Loading ...
Loading ...
Loading ...
TOOLS YOU
mnstallation mnstructions
iiiiiiif!lll!,,!,ll!f!!llll '_7""'iiiiii ,,iiiii1!!1! i I!I,LI,I ,111 ,!!lllP, l,i, I ,
WiLL NEED
# 1and#2Phillipsscrewdriver
Pencil
Ruleror tapemeasureand
t edge
Carpentersquare
(optional)
Tinsnips(forcutting
damper,,if required)
G!oves
Scissors
(tocuttemplate,ifnecessary)
Saw(saber,holeorkeyhole)
Eiec[ricdrill with ¥_6".W' and%"
drill bits
Studfinder or Hammer(optional}
Fillerblocksor scrap
weedpieces,if needed
fortop cabinetspacing
(usedonrecessedbottom
cabinetinstallationsonly)
Safetygoggles
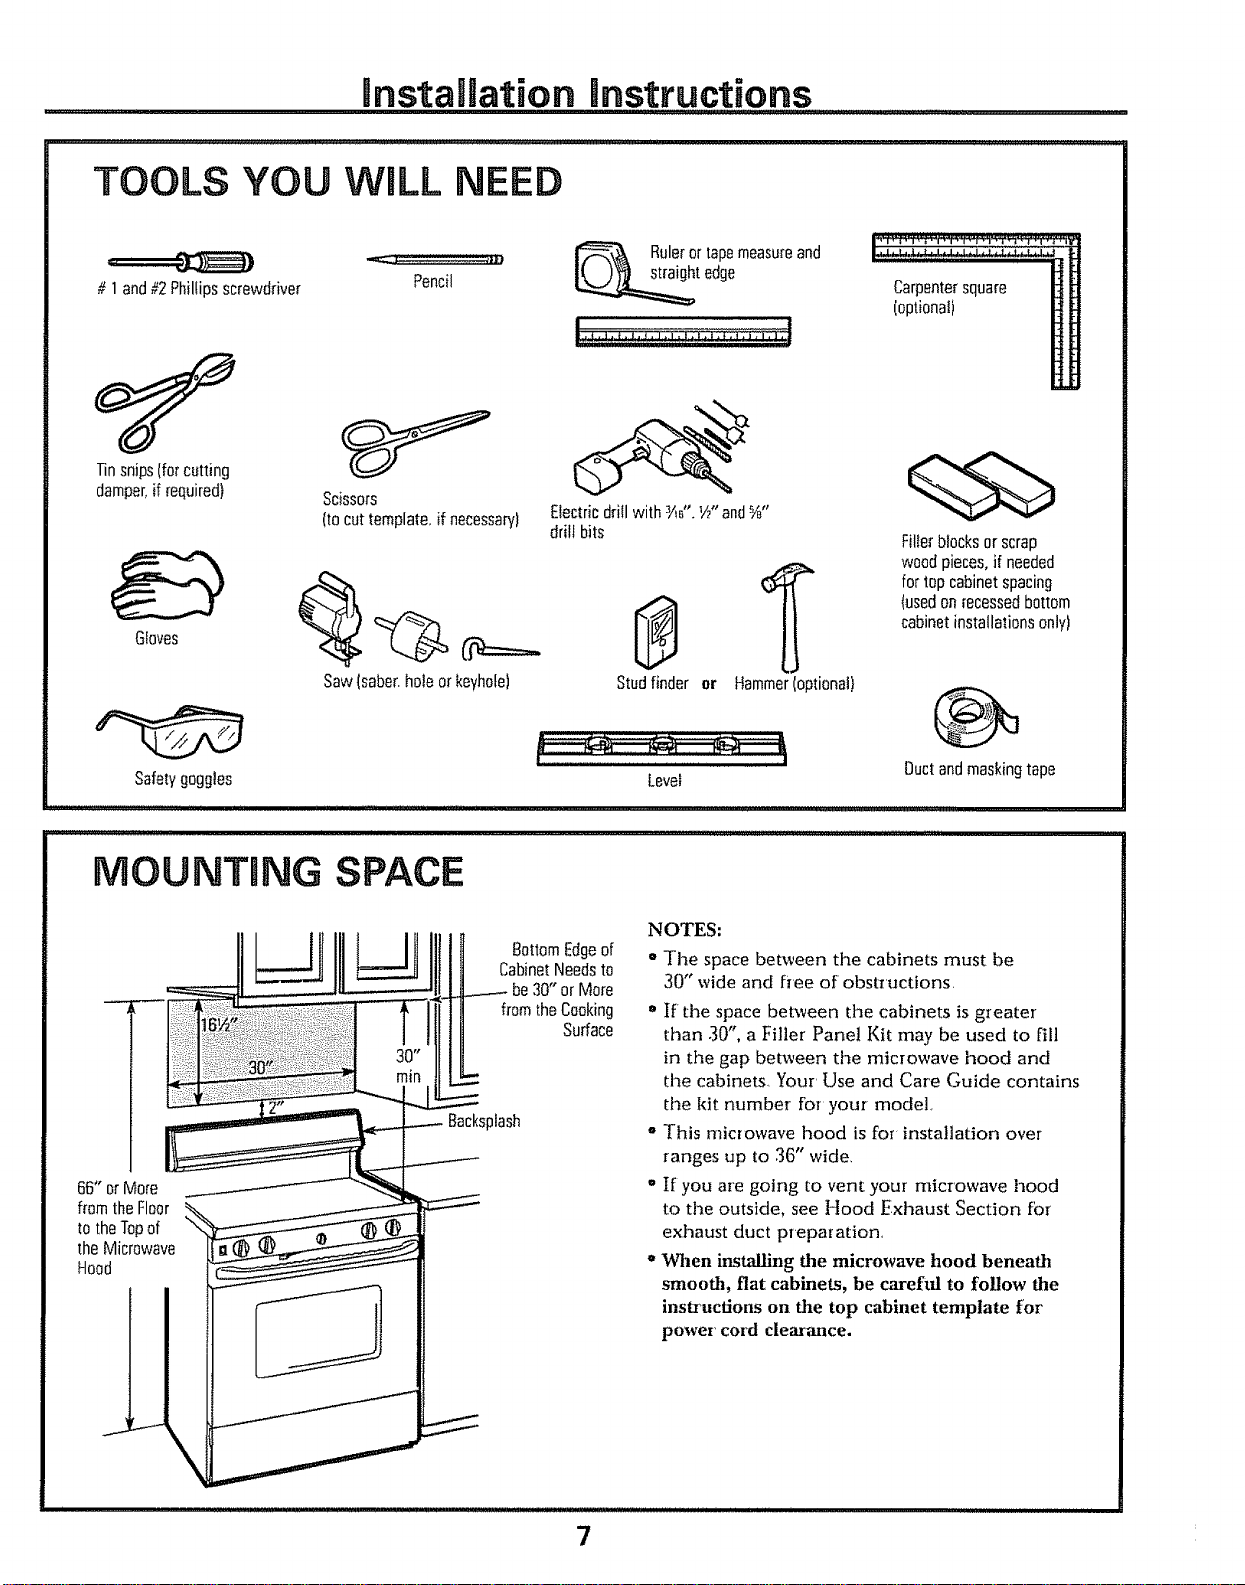
MOUNTING SPACE
Ductandmaskingtape
Level
IU I,LII,,I,I ,i,1,1UI ,i !![,j! ,i,1,111,,, ,i ,i ,,i,i, I ,i,, ,i,,,!j, 1,11,11!, ,[,i i
66" orMole
from theFloor
to the Topof
theMicrowave
Hood
31ash
BottomEdgeof
CabinetNeedsto
be30" or More
fromthe Cooking
Surface
NOTES:
" The space between the cabinets must be
30" wide and free of obstructions,
• If the space between the cabinets is greater
than 30", a }tiller Panel Kit may be used to fill
in the gap between the microwave hood and
the cabinets. You[ Use and Care Guide contains
the kit number for your model
o This microwave hood is for installation over
ranges up to 36" wide,
o If you are going to vent your microwave l_ood
to the outside, see Hood Exhaust Section fbr
exhaust duct preparation,
• When installing the microwave hood beneath
smooth, flat cabinets, be careftfl to follow the
instructions on the top cabinet template for
power cord clearance.
7
Loading ...
Loading ...
Loading ...