Loading ...
Loading ...
Loading ...
instal!ation instructions
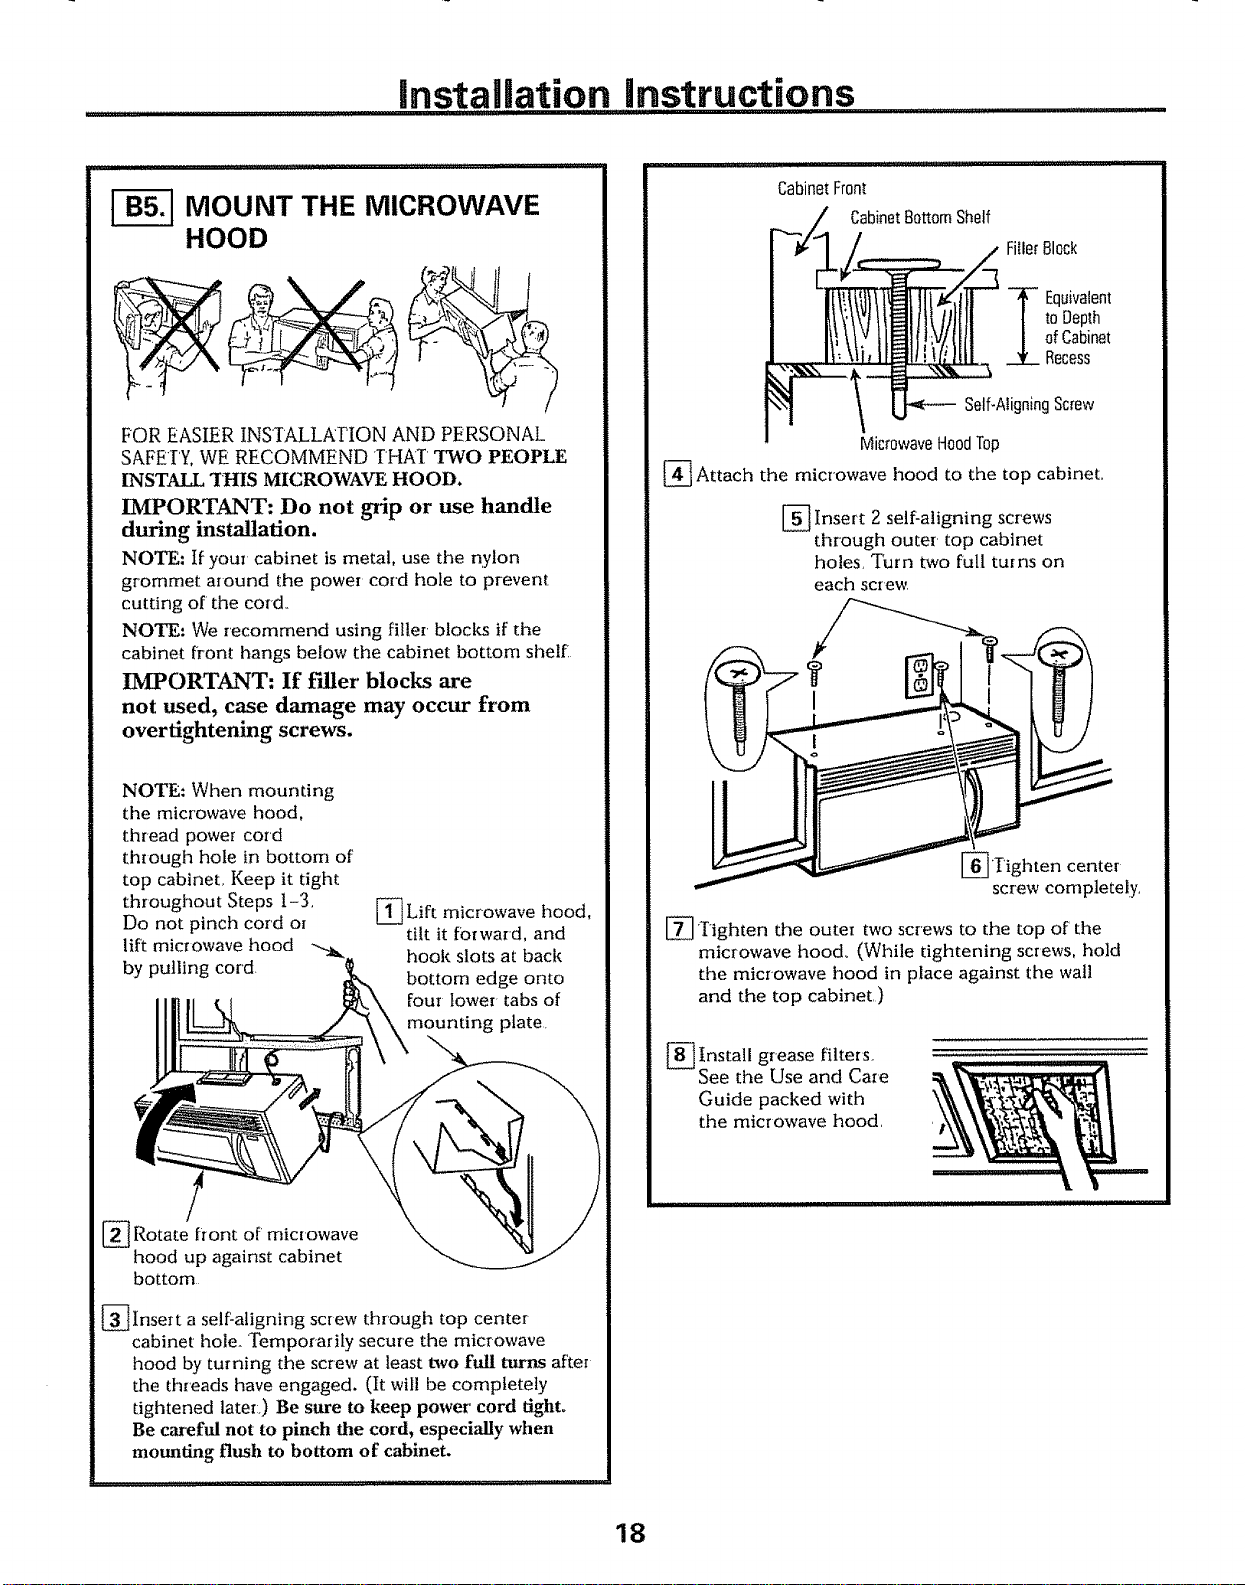
I_ MOUNT THE MICROWAVE
HOOD
FOR EASIER INSTALLATION AND PERSONAL
SAFETY, WE RECOMMEND THAI TWO PEOPLE
INSTALL "II-IIS MICROWAVE HOOD.
IMPORTANT; Do not _'ip or use handle
during installation.
NOTE: If your cabinet is metal, use the nylon
grommet around the power cord hole to prevent
cutting of' the cord.
NOTE: We recommend using filler blocks if the
cabinet front hangs below the cabinet bottom shel£
IMPORTANT; If filler blocks are
not used, case damage may occur from
overfightening screws.
NOTE: When mounting
the microwave hood,
thread power cord
thiough hole in bottom of
top cabinet, Keep it tight
throughout Steps 1-3,
Do not pinch cord or
lift microwave hood
by pulling cord
[_Lift microwave hood,
tilt it forward, and
hook slots at back
bottom edge onto
four lower tabs of
mounting plate.
/
[_ Rotate front of
microwave
hood up against cabinet
bottom
[]Insert a self:aligning screw through top center
cabinet hole_ Temporarily secure the microwave
hood by turning the screw at least two full turns after
the threads have engaged. (It wil! be completely
tightened later:,) Be sure to keep power cord tight°
Be careful not to pinch the cord, especially when
mounting flush to bottom o£ cabinet.
CabinetFron_
_Z CabinetBottomShelf
FillerBlock
/ II/!t_11!1_1IIITK',_ T Equivalent
toDeplh
/ !II IINII}!JIIIIII
1_ ,\_oo,,. ._.t_Rec_SSscrew
...." :L,0°,00
MicrowaveHoodTop
{_ Attach the microwave hood to the top
cabinet,
_Insert 2 self:aligning screws
through outer top cabinet
holes, Turn two full turns on
each screw.
[_'l-'ighten center
screw completely.
[_ Tighten the outer two screws to the top of' the
microwave hood. (While tightening screws, hold
the microwave hood in place against the wall
and the top cabinet.)
[_ Install grease filters.
See the Use and Ca,e
Guide packed with
the microwave hood.
18
Loading ...
Loading ...
Loading ...