Loading ...
Loading ...
Loading ...
103
►Do not touch the interior of the projector, while the lamp is
removed.
CAUTION
5.
Insert the new lamp, and retighten the three screws of the lamp loosened in
the previous step to lock it in place.
6.
While putting the interlocking parts of the lamp cover and the projector
together, slide the lamp cover back in place. Then rmly fasten the screw of
the lamp cover.
7.
Turn the projector on and reset the lamp time using the LAMP TIME item in
the OPTION menu.
(1) Press the
MENU
button to display a menu.
(2) Select as the following using the cursor button.
EASY MENU > ADVANCED MENU > SETUP > LAMP & FILTER
(3) Select LAMP-1 TIME or LAMP-2 TIME.
(4)
Press the
►
button to select “OK” on the dialog. It performs resetting the lamp time
.
4.
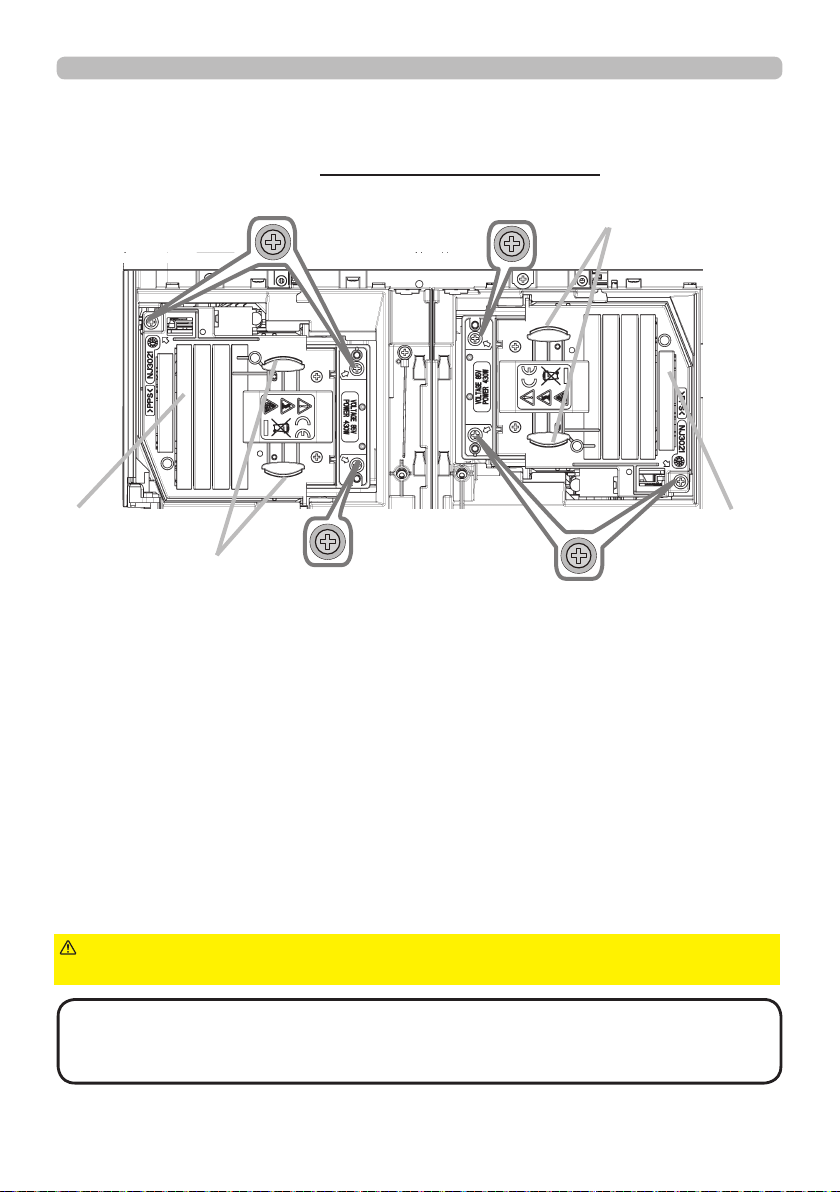
Loosen the three screws (marked by arrow) of the lamp, and slowly pull the
lamp out by the handles. Never loosen any other screws.
NOTE • Reset the lamp time only when you have replaced the lamp, for a
suitable indication about the lamp.
Lamp cover is assembled with cooling fan, handle with care.
Maintenance
4, 5
Handles
Handles
LAMP1 UNIT
(in the middle)
LAMP2 UNIT
(on the left side)
(continued on next page)
Loading ...
Loading ...
Loading ...