Learn how best to navigate, check the battery level, and care for your tracker.
Navigate Charge 3
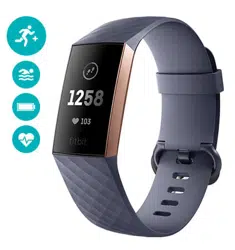
Charge 3 has an OLED touchscreen display and 1 button.
Navigate Charge 3 by tapping the screen, swiping side to side and up and down, or pressing the button. To preserve battery, the tracker’s screen turns off when not in use.
Basic navigation
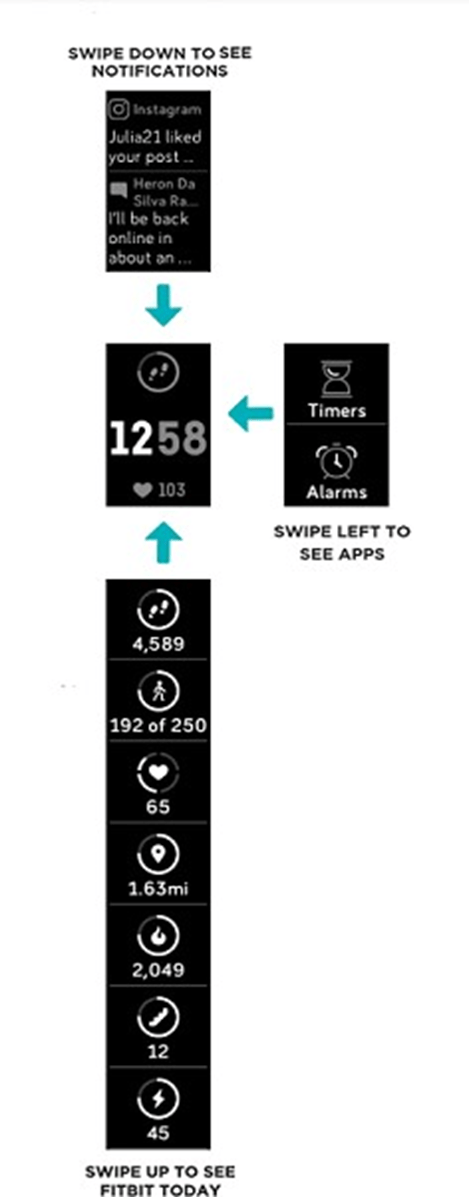
The home screen is the clock. On the clock:
Swipe down to see notifications.
Swipe up to see your daily stats.
Swipe left to see the apps on your tracker.
Quick settings
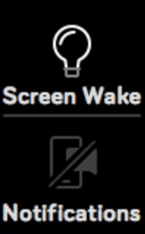
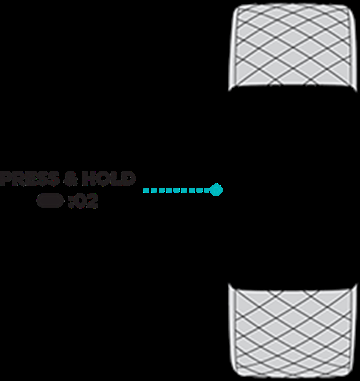
Press and hold the button on Charge 3 for a faster way to access certain settings. Tap a setting to turn it on or off. When you turn off the setting, the icon appears dim with a line through it.
On the quick settings screen:
Adjust your Screen Wake setting. When the Screen Wake setting is on, turn your wrist toward you to turn on the screen.
Turn notifications on or off. When the Notifications setting is on, Charge 3 displays notifications from your phone when your phone is nearby. For more information, see "Notifications" on page 20.
Adjust settings
Manage basic settings including brightness, heart-rate tracking, and button sensitivity directly on your tracker. Open the Settings app and tap a setting to adjust it. Swipe up to see the full list of settings.
Check battery level
Check your battery level at any time: from the clock face, swipe up. The battery level icon is in the top left of the screen.
Care for Charge 3
It's important to clean and dry Charge 3 regularly.
Change the clock face
A variety of clock faces are available in the Fitbit Clock Gallery.
To change your clock face:
1.With your tracker nearby, from the Fitbit app dashboard, tap the account icon > Charge 3 tile.
2.Tap Clock Faces > All Clocks.
3.Browse the available clock faces. Tap a clock face to see a detailed view.
4.Tap Select to add the clock face to Charge 3.
Notifications
Charge 3 can display call, text, calendar, and app notifications from your phone to keep you informed. The phone and tracker must be within 30 feet of each other to receive notifications.
Set up notifications
Check that Bluetooth on your phone is on and that your phone can receive notifications (often under Settings > Notifications). Then set up notifications:
1.With your tracker nearby, from the Fitbit app dashboard, tap the account icon > Charge 3 tile.
2.Tap Notifications.
3.Follow the on-screen instructions to pair your tracker. Charge 3 appears in the list of Bluetooth devices connected to your phone. Call, text, and calendar notifications are turned on automatically.
4.To turn on notifications from apps installed on your phone, including Fitbit and
WhatsApp, tap App Notifications and turn on the notifications you want to see.
Note that if you have an iPhone, iPad, or Windows 10 device, Charge 3 shows notifications from all calendars synced to the Calendar app. If you have an Android phone, Charge 3 shows calendar notifications from the calendar app you choose during setup.
See incoming notifications
When your phone and Charge 3 are within range, a notification causes the tracker to vibrate. If you don't read the notification when it arrives, you can check it later by swiping down on the clock screen.
Manage notifications
Charge 3 stores up to 10 notifications, after which the oldest are replaced as you receive new ones.
To manage notifications:
From the clock, swipe down to see your notifications and tap any notification to expand it.
To delete a notification tap to expand it. Then swipe to the bottom and tap Clear.
To delete all notifications at once, swipe to the top of your notifications and
tap Clear All.
Turn off notifications
Turn off all notifications in the quick settings on Charge 3, or turn off certain notifications in the Fitbit app.
To turn off all notifications:
1.Press and hold the button on your tracker to reach the quick settings screen.
2.Tap Notifications to turn them off.
To turn off certain notifications:
1.With your tracker nearby, from the Fitbit app dashboard, tap the account icon > Charge 3 tile > Notifications.
2.Turn off the notifications you no longer want to receive on your tracker.
3.Tap Notifications > Charge 3 in the top left to return to device settings. Sync your tracker to save your changes.
Note that if you use the Do Not Disturb setting on your phone, you don't receive notifications until you turn off this setting.
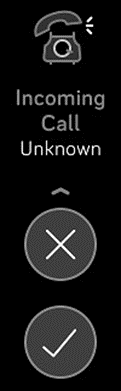
Answer or reject phone calls
If paired to an iPhone or Android (8.0+) phone, Charge 3 lets you accept or reject incoming phone calls. If your phone is running an older version of the Android OS, you can reject, but not accept, calls from your tracker.
To accept a call, tap the check mark on your tracker's screen. Note that you can't speak into the tracker—accepting a phone call answers the call on your nearby phone. To reject a call, tap the X icon on your tracker's screen.
Respond to messages
If paired to an Android (7.0+) phone, Charge 3 lets you respond directly to text messages and notifications from certain apps on your tracker with preset quick replies.
To use quick replies:
1.Tap the notification on your tracker. To see recent messages, swipe down from the clock face.
2.Tap Reply. If you don’t see an option to reply to the message, quick replies aren’t available for the app that sent the notification.
3.Choose a text reply from the list of quick replies or tap the emoji icon to choose an emoji.
You can also customize quick replies.
Get started
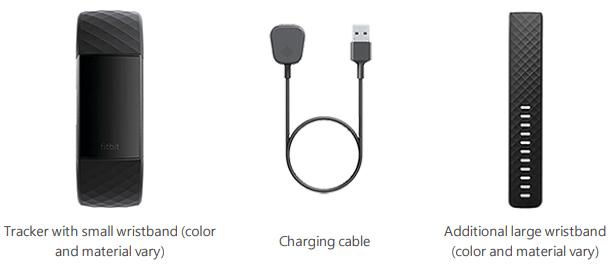
What's in the box
Your Charge 3 box includes:
The detachable wristbands on Charge 3 come in a variety of colors and materials, sold separately.
Set up Charge 3
For the best experience, use the Fitbit app for iPhones and iPads or Android phones. You can also set up Charge 3 on Windows 10 devices. If you don’t have a compatible phone or tablet, use a Bluetooth-enabled Windows 10 PC. Keep in mind that a phone is required for call, text, calendar, and smartphone app notifications.
To create a Fitbit account, you're prompted to enter your height, weight, and sex to calculate your stride length and to estimate distance, basal metabolic rate, and calorie burn. After you set up your account, your first name, last initial, and photos are visible to all other Fitbit users. You have the option to share other information, but most of the information you provide to create an account is private by default.
Charge your tracker
A fully-charged Charge 3 has a battery life of 7 days. Battery life and charge cycles vary with use and other factors; actual results will vary.
To charge Charge 3:
Plug the charging cable into the USB port on your computer or a UL-certified USB wall charger.
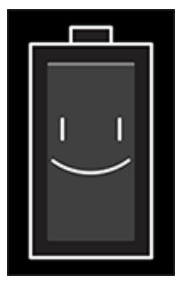
Clip the other end of the charging cable to the port on the back of the tracker. The pins on the charging cable must lock securely with the port. A battery icon appears on the screen.
Charging fully takes about 1-2 hours. While the tracker charges, you can press the button to check the battery level. A fully-charged tracker shows a solid battery icon with a smile.
Set up with your phone or tablet
The free Fitbit app is compatible with most iPhones and iPads, Android phones, and Windows 10 devices. If you're unsure if the Fitbit app is compatible with your device
To get started:
Find the Fitbit app in one of the locations below, depending on your device.
Apple App Store for iPhones and iPads
Google Play Store for Android phones
Microsoft Store for Windows 10 devices.
Install the app, and open it.
If you already have a Fitbit account, log in to your account, and tap the account icon > Set Up a Device.
If you don't have a Fitbit account, tap Join Fitbit to be guided through a series of questions to create a Fitbit account.
Continue to follow the on-screen instructions to connect Charge 3 to your account.
When you're done with setup, read through the guide to learn more about your new tracker and then explore the Fitbit app.
Set up with your Windows 10 PC
If you don't have a compatible phone, you can set up and sync Charge 3 with a Bluetooth-enabled Windows 10 PC and the Fitbit app.
To get the Fitbit app for your computer:
Click the Start button on your PC and open the Microsoft Store.
Search for "Fitbit app". After you find it, click Free to download the app to your computer.
Click Microsoft account to sign in with your existing Microsoft account. If you don't already have an account with Microsoft, follow the on-screen instructions to create a new account.
Open the app.
If you already have a Fitbit account, log in to your account, and tap the account icon > Set Up a Device.
If you don't have a Fitbit account, tap Join Fitbit to be guided through a series of questions to create a Fitbit account.
Continue to follow the on-screen instructions to connect Charge 3 to your account.
When you're done with setup, read through the guide to learn more about your new tracker and then explore the Fitbit app.
See your data in the Fitbit app
Sync Charge 3 to transfer your data to the Fitbit app, where you can view your activity and sleep data, log food and water, participate in challenges, and more. For best results, keep all-day sync turned on, so that Charge 3 syncs periodically with the app.
If you turn off all-day sync, we recommend syncing at least once a day. Each time you open the Fitbit app, Charge 3 syncs automatically when it's nearby. You can also use the Sync Now option in the app at any time.
Fitness and Exercise
Choose to automatically track exercise, or to track activity with the Exercise app and set goals based on distance, time, or calories.
Sync Charge 3 with the Fitbit app and share your activity with friends and family, see how your overall fitness level compares to your peers, and more.
Track your exercise automatically
Charge 3 automatically recognizes and records high-movement activities at least 15 minutes long—including run, elliptical, and swim. Sync your device to see basic stats about your activity in your exercise history.
Track and analyze exercise with the Exercise app
Track specific exercises—such as run, bike, or weights—with the Exercise app on Charge 3 to see real-time stats, including heart-rate data, calories burned, elapsed time, and a post-workout summary on your wrist. For complete workout stats, and route and pace information if you used GPS, review your exercise history in the Fitbit app.
Note: The connected GPS feature on Charge 3 uses the GPS sensors on your nearby phone.
GPS requirements
To use connected GPS:
1.Turn on Bluetooth and GPS on your phone.
2.Make sure the Fitbit app has permission to use GPS or location services.
3.Check that connected GPS is turned on for the exercise.
a.Open the Exercise app and swipe to find the exercise you want to track.
b.Swipe up and make sure Use Phone GPS is set to On.
4.Keep your phone with you while you exercise.
Track an exercise
To track an exercise:
1.On your tracker, open the Exercise app .
2.Swipe to find an exercise, and tap to choose it.
3.Tap Start to begin the exercise, or tap Set Goal to choose a time, distance, or calorie goal depending on the activity.
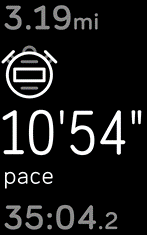
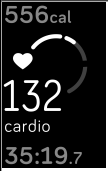
4.Tap the play icon to begin tracking your exercise. Charge 3 shows several real-time stats including heart rate, calories burned, and elapsed time. Tap the middle stat to see additional stats.
5.When you're done with your workout or want to pause, press the button. (Press the button again and tap Finish to end the workout.)
6.Swipe up to see your workout summary.
7.Press the button to close the summary screen.
Note:
Charge 3 shows 3 real-time stats of your choice. Swipe the middle stat to see all of your real-time stats. You can adjust the stats you see in the settings for each exercise.
If you set an exercise goal, your tracker vibrates when you’re halfway to your goal and when you reach the goal.
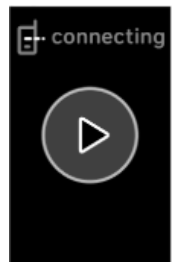
If the exercise uses GPS, an icon appears in the top left as your tracker connects to your phone's GPS sensors. When the screen says "connected" and Charge 3 vibrates, GPS is connected.
Customize your exercise settings and shortcuts
Customize settings for various exercise types and change or reorder exercise shortcuts in the Fitbit app. For example, turn connected GPS and cues on or off or add a yoga shortcut to Charge 3.
To customize an exercise setting:
1. From the Fitbit app dashboard, tap the account icon > Charge 3 tile > Exercise Shortcuts.
2. Tap the exercise you want to customize.
3. Choose the settings you want to customize, and then sync your device
Check your workout summary
After you complete a workout, Charge 3 shows a summary of your stats.
Sync your tracker to save the workout in your exercise history, where you can find additional stats and see your route and pace if you used connected GPS.
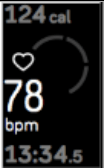
Check your heart rate
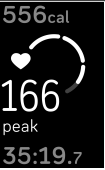
Heart-rate zones help you target the training intensity of your choice. Charge 3 shows your current zone and progress toward your maximum heart rate next to your heart-rate reading. In the Fitbit app, you can see your time spent in zones during a particular day or exercise. Three zones based on American Heart Association recommendations are available, or you can create a custom zone if you have a specific heart rate you're targeting.
Default heart-rate zones
Default heart-rate zones are calculated using your estimated maximum heart rate. Fitbit calculates your maximum heart rate with the common formula of 220 minus your age.
Icon
Zone
Calculation
Description
Out of Zone
Below 50% of your maximum heart rate
Your heart rate may be elevated, but not enough to be considered exercise.
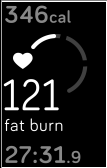
Fat Burn
Between 50% and
69% of your maximum heart rate
This is a low-to-medium intensity exercise zone. This zone may be a good place to start for those new to exercise. It's called the Fat Burn zone because a higher percentage of calories are burned from fat, but the total calorie burn rate is lower.
Cardio
Between 70% and
84% of your maximum heart rate
This is a medium-to-high intensity exercise zone. In this zone you're pushing yourself but not straining. For most people this is the exercise zone to target.
Peak
Greater than 85% of your maximum heart rate
This is a high-intensity exercise zone. This zone is for short intense sessions that improve performance and speed.
Custom heart-rate zones
Configure a custom heart-rate zone or a custom max heart rate in the Fitbit app if you have a specific target in mind. For example, elite athletes might have a target that differs from the American Heart Association’s recommendations for most people.
Share your activity
After you complete a workout, sync your tracker with the Fitbit app to share your stats with friends and family.
Update, Restart, and Erase
Learn how to update, restart, and erase Charge 3.
Restart Charge 3
If you can’t sync Charge 3, or if you have trouble with connected GPS or tracking your stats, you can restart your tracker from your wrist. From the clock face, swipe to Settings and tap About > Reboot Device.
If your tracker is unresponsive:
Plug the charging cable into the USB port on a computer or a UL-certified USB wall charger.
Clip the other end of the charging cable to the port on the back of the tracker. The pins on the charging cable must lock securely with the port.
Press and hold the button on your tracker for 8 seconds. Release the button. When you see a smiley face and the tracker vibrates, the tracker restarted.
Restarting your tracker reboots the device but doesn't delete any data
Charge 3 has a small hole (altimeter sensor) on the back of the device. Don’t attempt to restart your device by inserting any items, such as paper clips, into this hole as you can damage your Charge 3.
Erase Charge 3
If you want to give Charge 3 to another person or wish to return it, first clear your personal data:
On Charge 3, open the Settings app > About > Clear User Data.
Update Charge 3
Update your tracker to get the latest feature enhancements and product updates.
When an update is available, a notification appears in the Fitbit app. After you start the update, a progress bar appears on Charge 3 and in the Fitbit app until the update is complete. Keep your tracker and phone close to each other during the update.
Note: Updating Charge 3 takes several minutes and may be demanding on the battery. We recommend plugging your tracker into the charger before starting the update.
Troubleshooting
Heart-rate signal missing
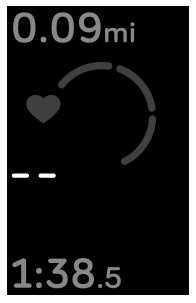
Charge 3 continuously tracks your heart rate while you're exercising and throughout the day. If the heart-rate sensor on your tracker has difficulty detecting a signal, dashed lines appear.
If your device doesn't detect a heart-rate signal, first make sure heart-rate tracking is turned on in the Settings app on your device. Next, make sure you're wearing your tracker correctly, either by moving it higher or lower on your wrist or by tightening or loosening the wristband. Charge 3 should be in contact with your skin. After holding your arm still and straight for a short time, you should see your heart rate again.
GPS signal missing
Environmental factors, including tall buildings, dense forest, steep hills, and even thick cloud cover, can interfere with your phone's ability to connect to GPS satellites. If your phone is searching for a GPS signal during an exercise, "connecting" appears at the top of the screen.
For best results, wait for your phone to find the signal before you start your workout.
Other issues
If you experience any of the following issues, restart your device:
Won't sync
Won't respond to taps, swipes, or button press
Won't track steps or other data
See "Restart Charge 3" on page 47 for instructions on how to restart your tracker.
For more information or to contact Customer Support
General Info and Specifications
Sensors
Fitbit Charge 3 contains the following sensors and motors:
A MEMS 3-axis accelerometer, which tracks motion patterns
An altimeter, which tracks altitude changes
An optical heart-rate tracker
Materials
The housing and buckle on Charge 3 are made of anodized aluminum. While anodized aluminum can contain traces of nickel, which can cause an allergic reaction in someone with nickel sensitivity, the amount of nickel in all Fitbit products meets the European Union's stringent Nickel Directive.
The Charge 3 classic wristband is made of a flexible, durable elastomer material similar to that used in many sports watches.
Wireless technology
Charge 3 contains a Bluetooth 4.0 radio transceiver and Fitbit-Pay enabled devices contain an NFC chip.
Haptic feedback
Charge 3 contains a vibration motor for alarms, goals, notifications, and reminders.
Battery
Charge 3 contains a rechargeable lithium-polymer battery
Memory
Charge 3 stores your data, including daily stats, sleep information, and exercise history, for 7 days. Sync your tracker with the Fitbit app to access your historical data. For best results, make sure the all-day sync option is turned on.
Display
Charge 3 has an OLED display.
Wristband size
Wristband sizes are shown below. Note that accessory wristbands sold separately may vary slightly.
Small wristband
Fits a wrist between 5.5 - 7.1 inches (140 mm - 180 mm) in circumference
Large wristband
Fits a wrist between 7.1 - 8.7 inches (180 mm - 220 mm) in circumference
 > Charge 3 tile.