Loading ...
Loading ...
Loading ...
7
NOTE: To avoid damaging door surfaces when moving
the refrigerator through narrow openings, it is
ALWAYS recommended to remove the doors as
instructed in the next two pages.
• Loosen the set screws with a 3/32” (2,38 mm) Allen
wrench and remove the handle.
NOTE: If the handle mounting fasteners need to be
tightened or moved, use a 1/4” (6,35 mm) Allen
wrench.
HANDLE INSTALLATION
Place the handle on the door by adjusting handle
footprints to fit mounting fasteners and tighten the set
screws with a 3/32” (2,38 mm) Allen wrench .
NOTE: If the handle mounting fasteners need to be
tightened or removed use a 1/4” (6,35 mm) Allen
wrench.
WARNING
ELECTRIC SHOCK HAZARD
• Disconnect electrical supply to the refrigerator before
installing. Failure to do so could result in death or
serious injury.
• Do not put hands, feet or other objects into the air
vents, base grille, or bottom of the refrigerator. You
may be injured or receive an electrical shock.
• Be careful when you work with the hinge, base grille
and stopper. You may be injured. Before removing
the doors, remove the base grille.
REMOVING AND REPLACING REFRIGERATOR
DOORS
Before removing the doors, remove the base grille. See
“Base Grille Installation” for reference.
To remove the right (refrigerator) door:
1. Open the door. Remove the top hinge cover screw (1).
2. Use a flat blade screwdriver to pry back the hooks
(not shown) of the hinge cover (2) from the top of the
refrigerator cabinet. Lift up the cover.
3. Rotate the hinge lever (3) clockwise. Lift the top hinge
(4) free of the hinge lever latch (5).
NOTE: Regardless of hinge lever type, removal process
is the same.
4. Lift the door from the lower hinge pin.
5. Place the door, inside facing up, on a non scratching
surface.
CAUTION: When lifting the hinge free of the latch,
be careful that the door does not fall
forward.
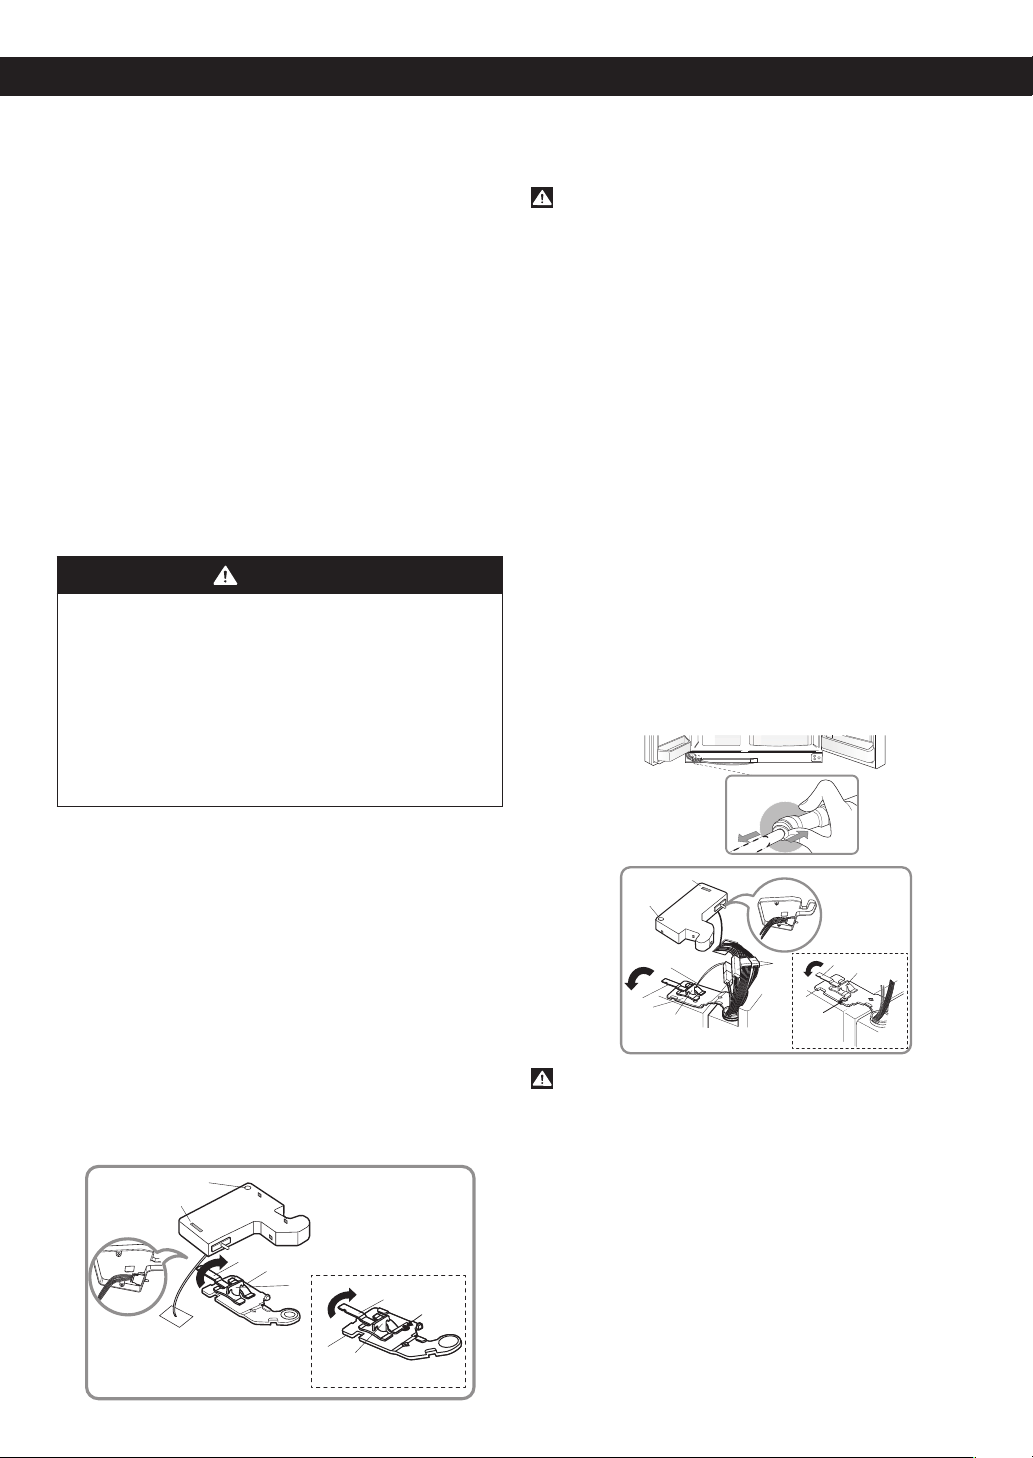
Removing the left (freezer) door with water line
connection:
Pull up the water feed tube while pressing the area (Figure
1) as shown in the figure below.
NOTE: If a tube end is deformed or abraded, trim the
part away. Disconnecting the tube under the door
causes about 0,13 gallons (0,5 liters) water to
flow out. Put a large container at end of tube to
prevent water from draining onto the floor.
1. Open the door. Remove the top hinge cover screw (1).
2. Use a flat blade screwdriver to pry back the hooks
(not shown) of the hinge cover (2) from the top of the
refrigerator cabinet (2). Lift up the cover.
3. Disconnect all the wire harnesses (3).
4. Remove the grounding screw (4).
5. Rotate hinge lever (5) counterclockwise. Lift the top
hinge (6) free of the hinge lever latch (7).
NOTE: Regardless of hinge lever type, removal process
is the same.
CAUTION: When lifting the hinge free of the latch, be
careful that the door does not fall forward.
6. Lift the door from the lower hinge pin being careful to
pull the water lines through the lower hinge pin.
7. Place the door, inside facing up, on a non scratching
surface.
Reinstalling the right (refrigerator) door:
1. Place the door onto the lower hinge pin.
2. Fit top hinge (4) over hinge lever latch (5) into place.
Rotate lever (3) counterclockwise to secure hinge.
NOTE: Regardless of hinge lever type, reinstallation
process is the same.
REFRIGERATOR INSTALLATION
(1 )
(2 )
(3
)
(4 )
(5 )
Type 2
Type 1
(3
)
(4 )
(5 )
Rivet
Figure 1
(1 )
(2 )
(3)
(5)
(6)
(7)
(4)
Type 2
Type 1
(6)
(5)
Rivet
(7)
Loading ...
Loading ...
Loading ...