Loading ...
Loading ...
Loading ...
11
REFRIGERATOR INSTALLATION
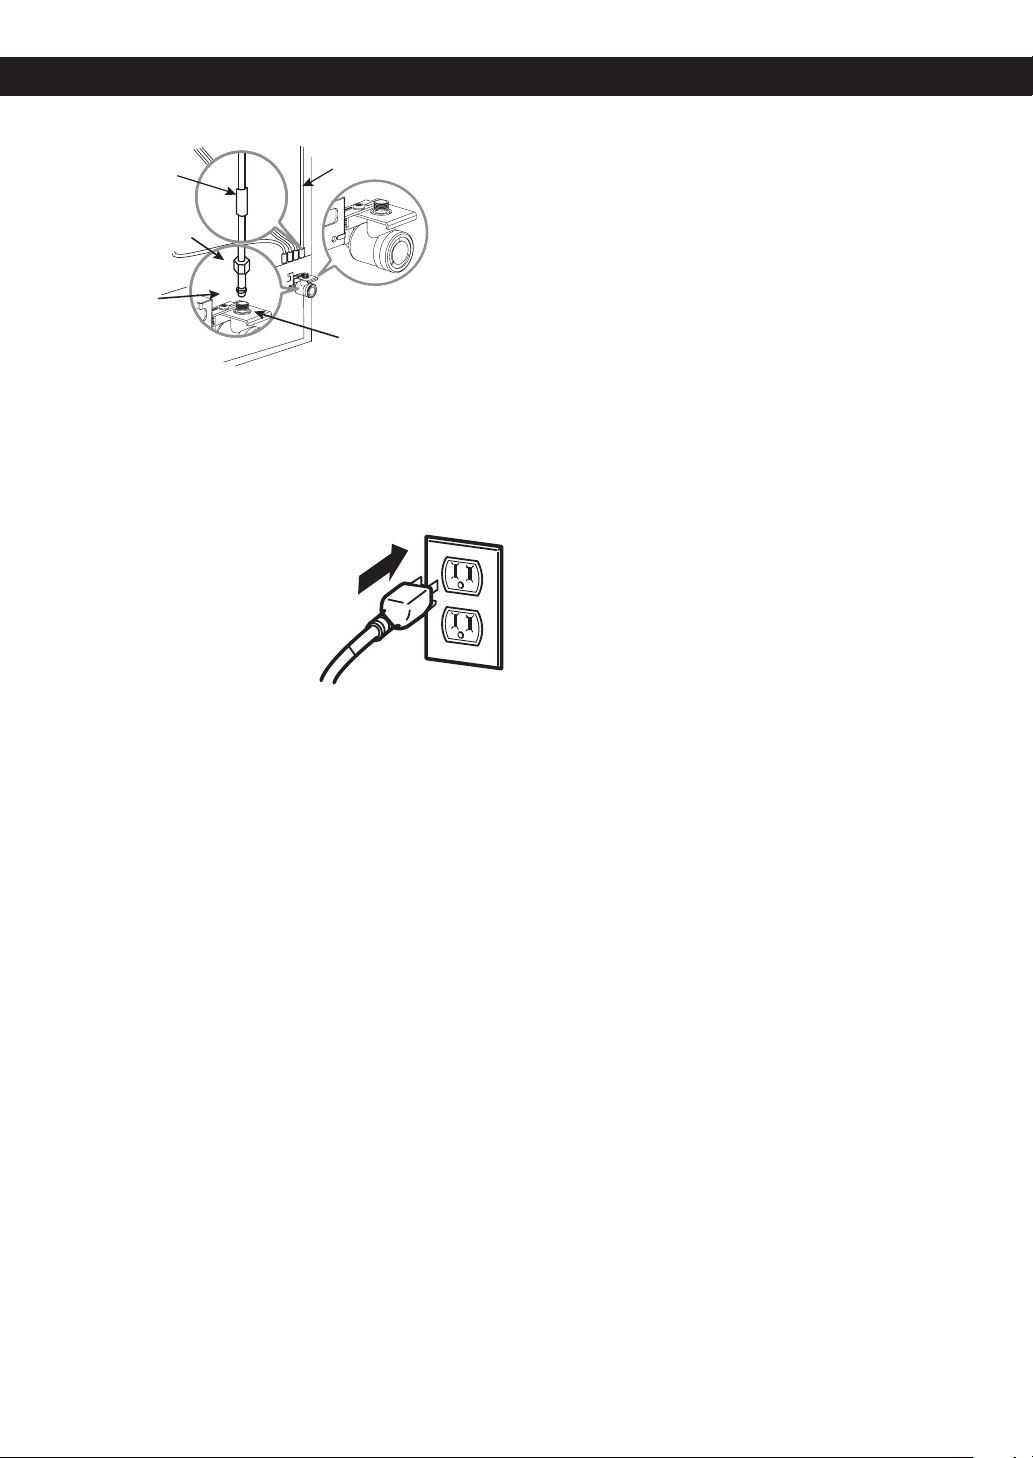
Fasten the tubing into the tubing clamp attached to the
back of the refrigerator. First, loosen the screw fastening
the clamp. Next, insert the tubing in the groove. Finally,
re-fasten the screw.
10. PLUG IN THE REFRIGERATOR
Arrange the coil of tubing so that
it does not vibrate against the
back of the refrigerator or against
the wall. Push the refrigerator
back to the wall.
11. START THE ICE MAKER
Set the ice maker power switch to the ON (I) position.
The ice maker will not begin to operate until it reaches
its operating temperature of 15 °F (-9 °C) or below. It will
then begin operation automatically if the ice maker power
switch is in the ON (I) position.
1/4” (6,35 mm) Tubing
Refrigerator
Connection
1/4” (6,35 mm)
Compression
Nut
Ferrule
(sleeve)
Back of refrigerator
Figure 1
Tubing Clamp
Loading ...
Loading ...
Loading ...