Loading ...
Loading ...
Loading ...
t"21
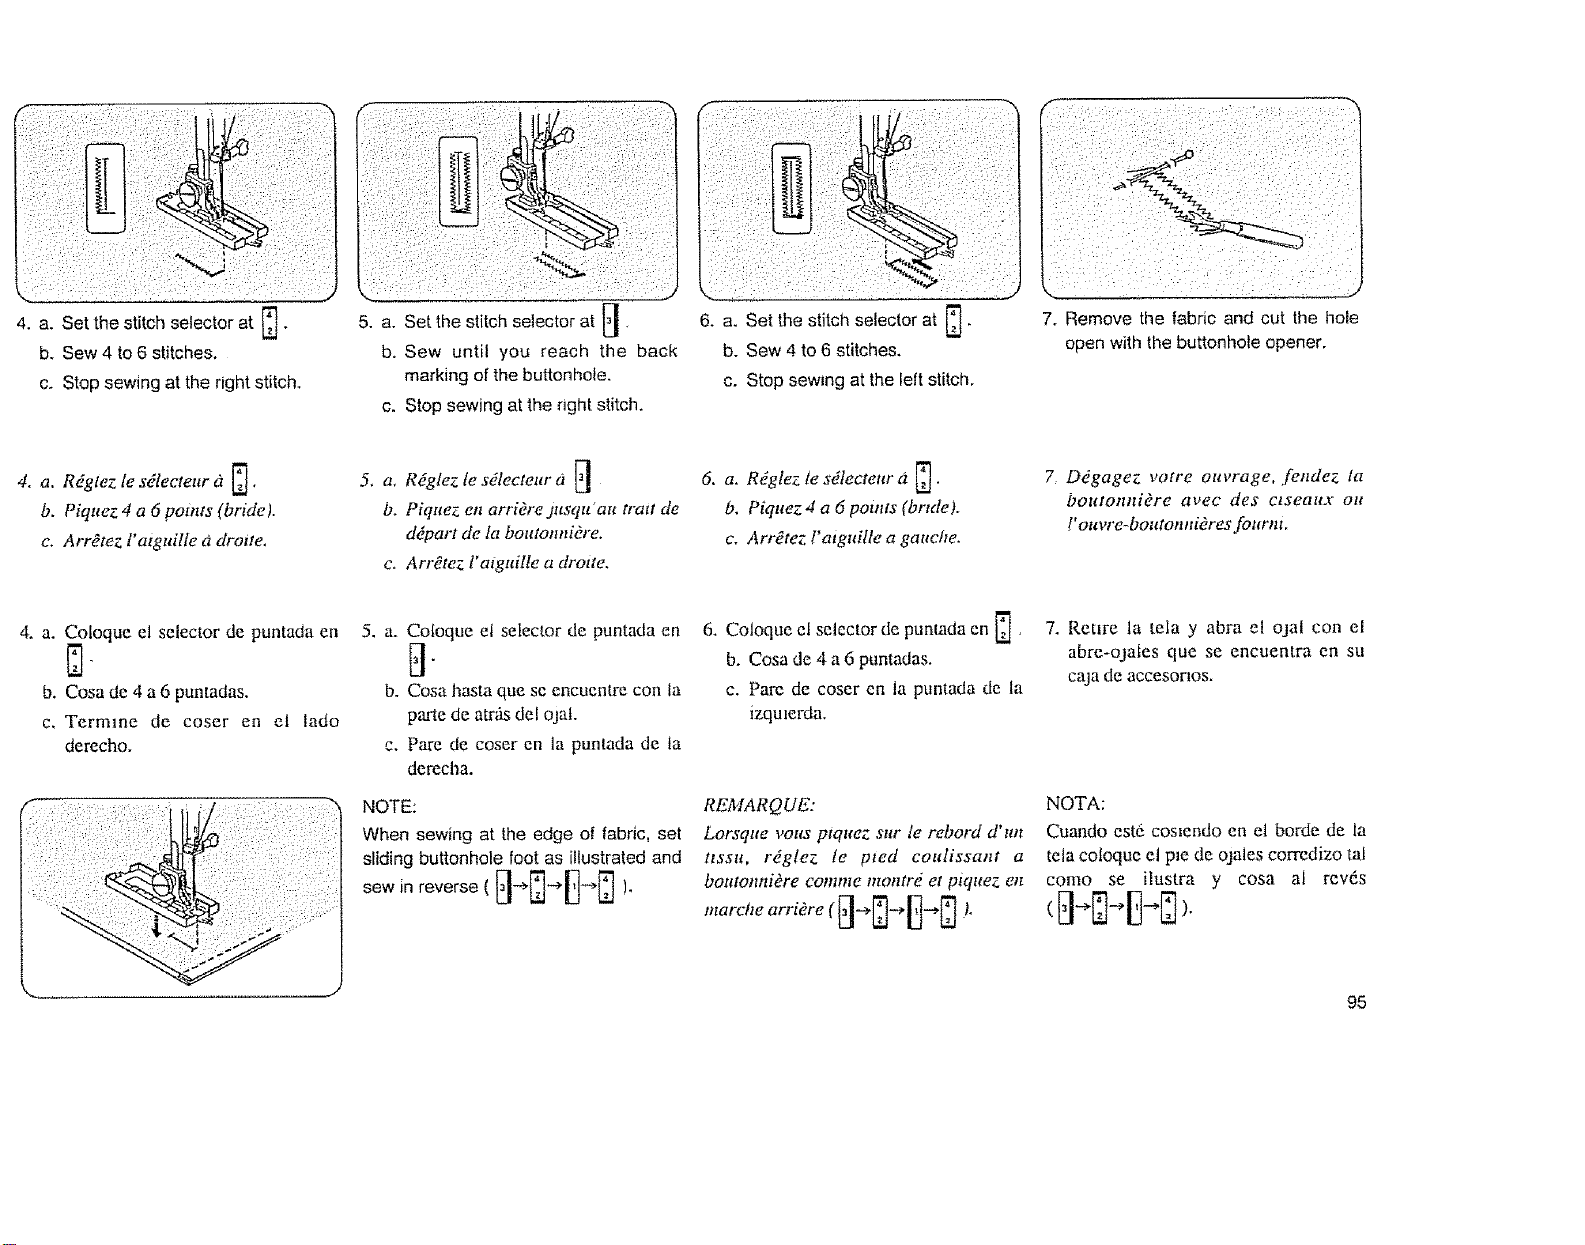
4.
Set the stitch selector at
a.
b. Sew 4 to 6 stitches,
c. Stop sewing at the right stitch,
5. a. Set the stitch selector at !=l.
b. Sew until you reach the back
marking of the buttonhole.
c. Stop sewing at the right stitch.
6. a. Set the stitch selector at
b. Sew 4 to 6 stitches.
c. Stop sewEng at the left stitch,
: :: +! ¸ i: ¸
7. Remove the fabric and cut the hole
open with the buttonhole opener.
4. a. Rdgtez te sdlecteur d U"
b, Piquez 4 a 6 points (bride).
c. ArrYtez I'atguilte d drotte.
F1
5, a, Rdglez te sdlecteur _l _1
b. Piquez en arriOre jusqu'au trait de
ddpart de ta boutotmi_re.
c, Arr_te7, t'atguille a drotte,
6, a. Rdglez le sdtecteur _2_, .
b. Piquez 4 a 6 points (bride).
c. Arr_tez !'atguille a gauche.
7, Ddgagez votre ouvrage, fendez la
bot_totlni_re av¢c des ctseaux oft
!'ouvre-boutonni_res fournt.
4. a. Cotoque el selector de puntada en
b. Cosa de 4 a 6 punladas.
c, Termme de coser en et lado
derecho.
5. a. Co[oque et selector de puntada en
EI
b. Cosa basra que se encuenkre con la
parte de atr_ del ojat.
c, Pare de coser en la puntada de ta
derecha,
NOTE:
When sewing at the edge of fabdc, set
sliding buttonhole foot as illustrated and
sew in reverse ( [_-_]_ _] L
t_
6. Coloque ef selector de puntada en _,
b. Cosa de 4 a 6 puntadas.
c. Pare de coser en ta puntada de la
izqmerda.
REMARQ UE:
Lorsqtte vous ptquez sur /e rebord d'mt
ttssu, r6gtez te pted coufissant a
boutonnidre comme tnotttre et piquez en
marche arri_re (_-_ ).
7. Rettre la teta y abra el ojal con el
abre-ojaLes que se encuentra en St.l
caja de accesorlos.
NOTA:
Cuando esta cos_endo en el borde de la
tela cotoque et p_e de ojales corredizo taf
como se ilustra y cosa at rev6s
95
Loading ...
Loading ...
Loading ...