Loading ...
Loading ...
Loading ...
INSTALLATION
Check the appliance is electrically safe and gas sound when you have finished.
28
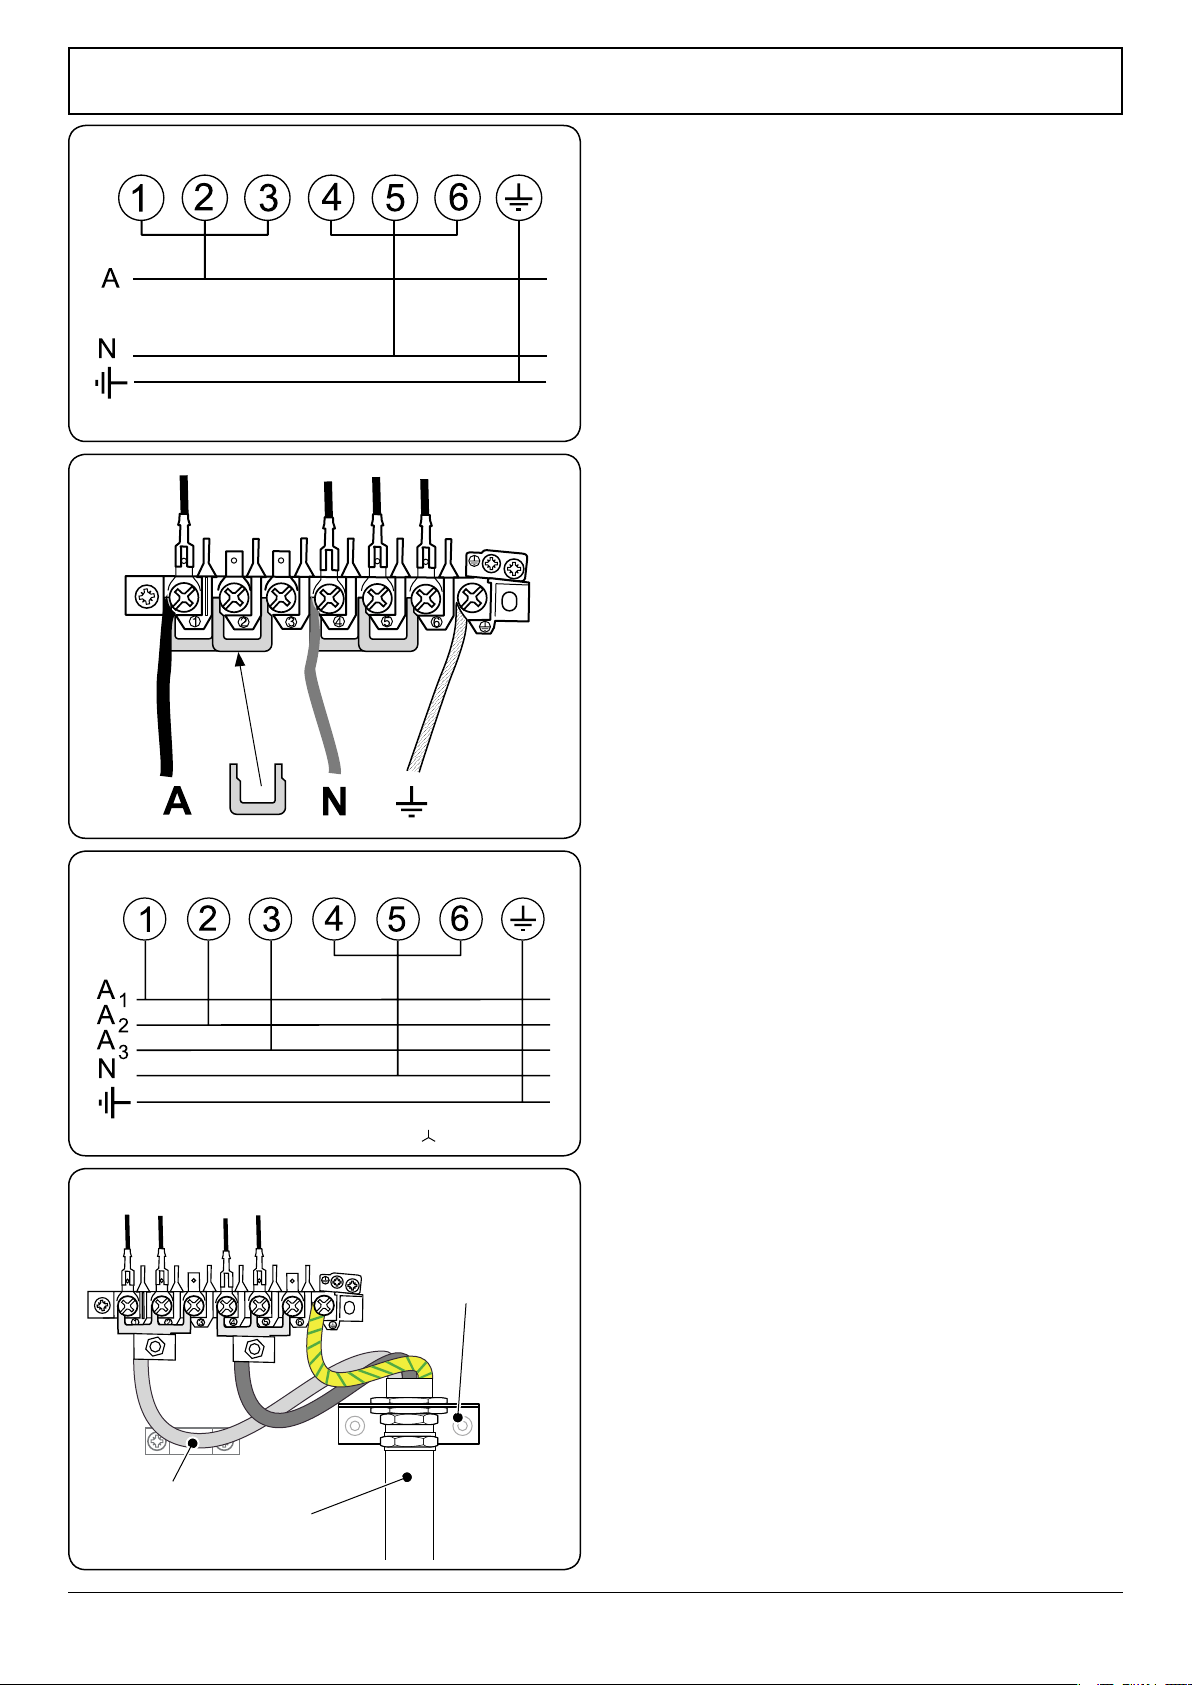
ArtNo.132-0002 - 3 phase 240/415Vac 50Hz
Fig.7-17
ArtNo.132-0005 - Fixed wiring connection 2 (AUS)
Fig.7-18
The total electrical load of the appliance is approximately
8kW. The cable size used should be suitable for this load and
comply with all local requirements (i.e. PVC Insulated cable
IEC 60227 – code 53 for ordinary cables). Please note the
maximum cable sizes are 6mm²
for the screw terminals and
10mm² for the 3-pronged links.
Access to the mains terminal is gained by removing the
electrical terminal cover box on the back panel. Connect
the mains cable to the correct terminals for your electrical
supply type (Fig.7-15 and Fig.7-16). Check that the links are
correctly fitted and that the terminal screws are tight. Secure
the mains cable using the cable clamp.
Fixed Wiring
For connection to fixed wiring, i.e. flexible conduit, remove
the electrical terminal cover box on the back panel. Using the
two screws, fix the strain relief bracket in position.
Fix the conduit-to-conduit mounting bracket onto the
strain relief bracket. Connect the mains cable to the correct
terminals for your electrical supply type (Fig.7-17 and
Fig.7.18). Check that the links are correctly fitted and that the
terminal screws are tight.
Replace the electric terminal cover box; make sure that the
conduit is clear of the bottom flange.
Checks
Note: The clock must be set before the ovens will work. See
‘The Clock’ section for instructions on setting the time of day.
Hotplate Check
Check each burner in turn. There is a flame safety device (FSD)
that stops the flow of gas to the burner if the flame goes out.
For each burner, turn the control knob to the solid flame
symbol. Press in the control knob. This lets gas through to
the burner. Keep holding the knob pressed in and press the
igniter button or light with a match. Keep holding the control
knob pressed in for about 10 seconds.
If, when you let go of the control knob the burner goes out,
the safety device has not held in. Wait one minute then try
again this time holding the control pressed in for slightly
longer.
Grill Check
Open the grill compartment door. Turn on the grill control
and check that the grill heats up.
Oven Check
Turn on the oven and check that it starts to heat up. Check
that the oven lights are working.
Note: The oven light bulb is not included in the guarantee.
Turn off the oven.
ArtNo.132-0001 - 1 phase 240Vac 50Hz
Fig.7-15
ArtNo.132-0003 - Single-phase connections (AUS)
Fig.7-16
Loading ...
Loading ...
Loading ...