Loading ...
Loading ...
Loading ...
CONNECTING ROTATED PATTERNS
Advanced Embroidery
331
7
d
Press to display the sewing screen.
e
Press and then, press .
f
Refer to steps g through i of
“Connecting Three Patterns” to embroider
the first pattern.
g
Select the next pattern, and then press
.
h
Press and then, press in the
pattern editing screen.
i
Rotate the pattern to the same angle as the
first pattern, and then press .
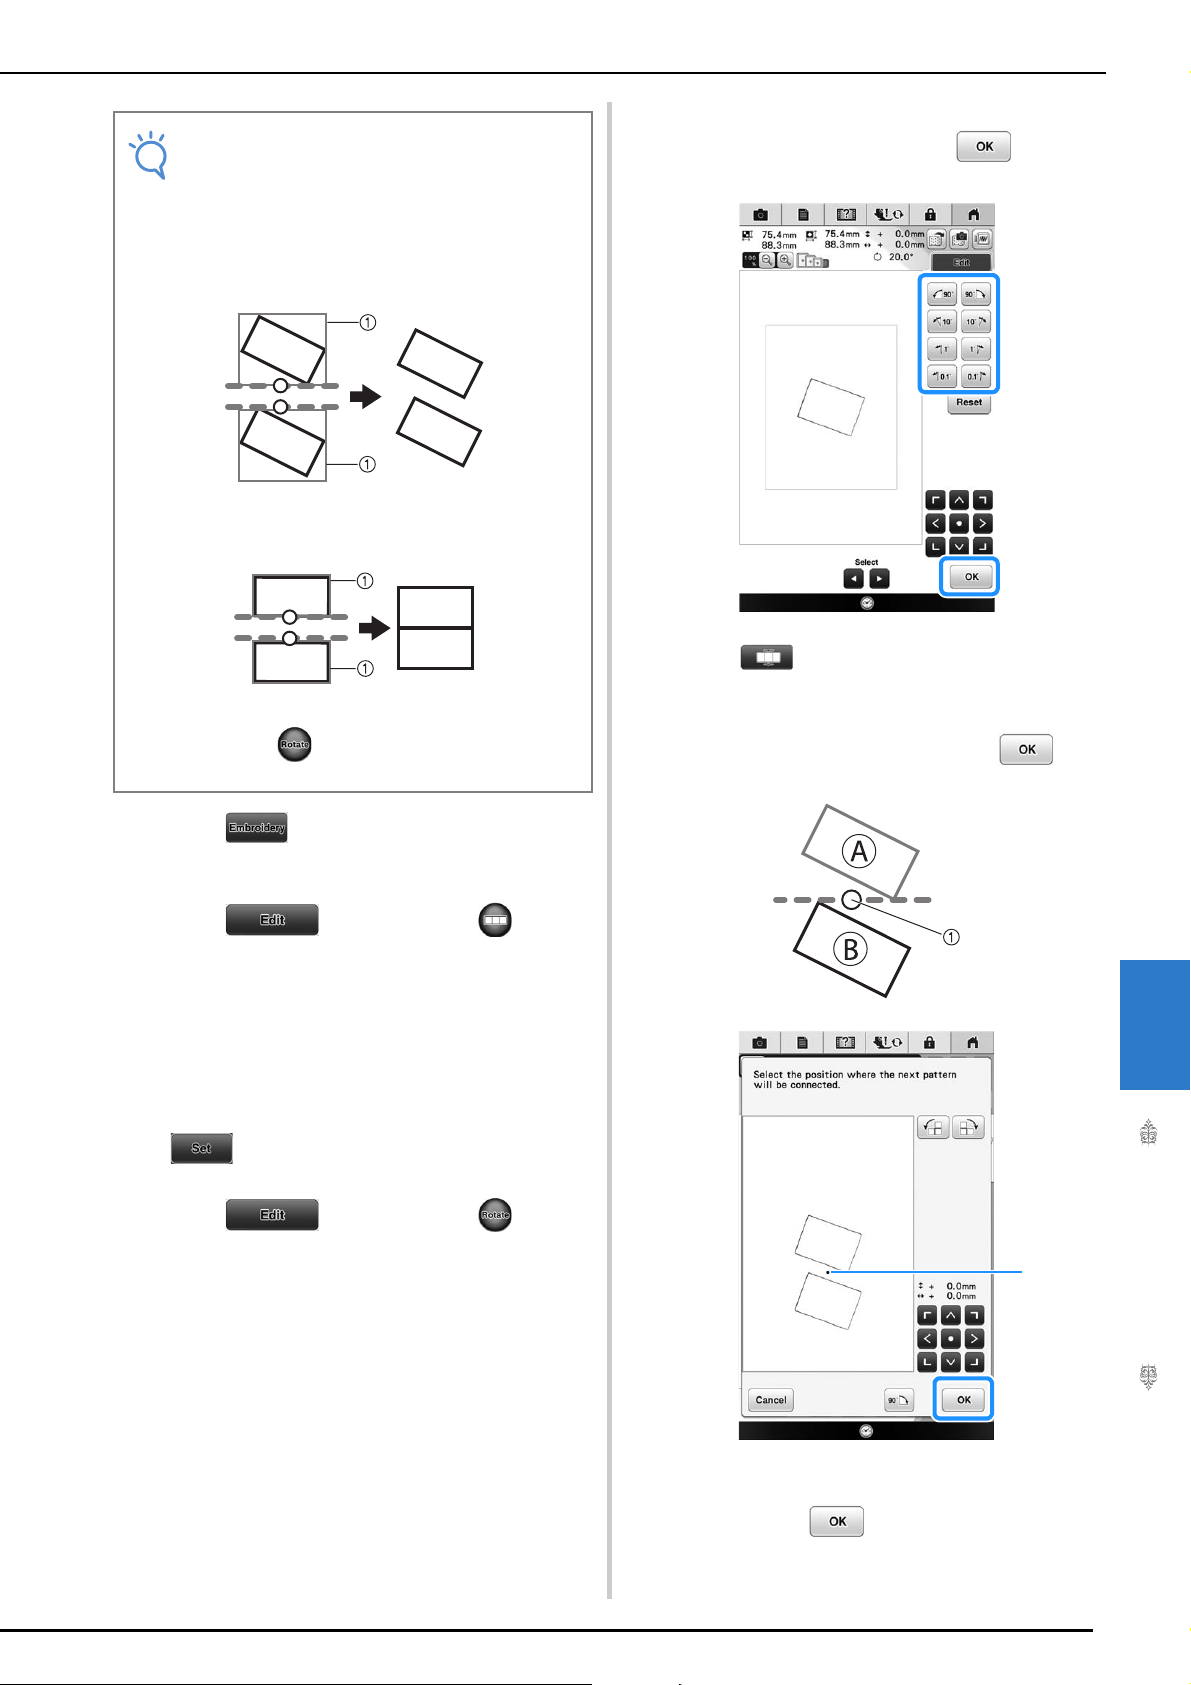
j
Press .
k
The pattern position does not need to be
specified for this example. Press .
a Connecting point
→ Message appears on screen and carriage will move
after pressing .
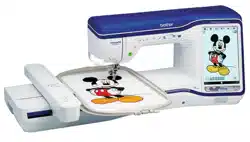
Note
• Be sure to rotate the pattern from the
pattern editing screen. The reference edge
and reference point are specified along the
smallest rectangle (not angled) that contains
all patterns selected.
Rectangles and angled patterns
a Rectangle
Rectangles and patterns (not angled)
a Rectangle
• Pressing in the sewing screen changes
the angle at which patterns are connected.
A
B
B
A
A
A
B
B
a
Loading ...
Loading ...
Loading ...