Loading ...
Loading ...
Loading ...
CONFIRMING THE PATTERN POSITION
Basic Embroidery
267
6
b
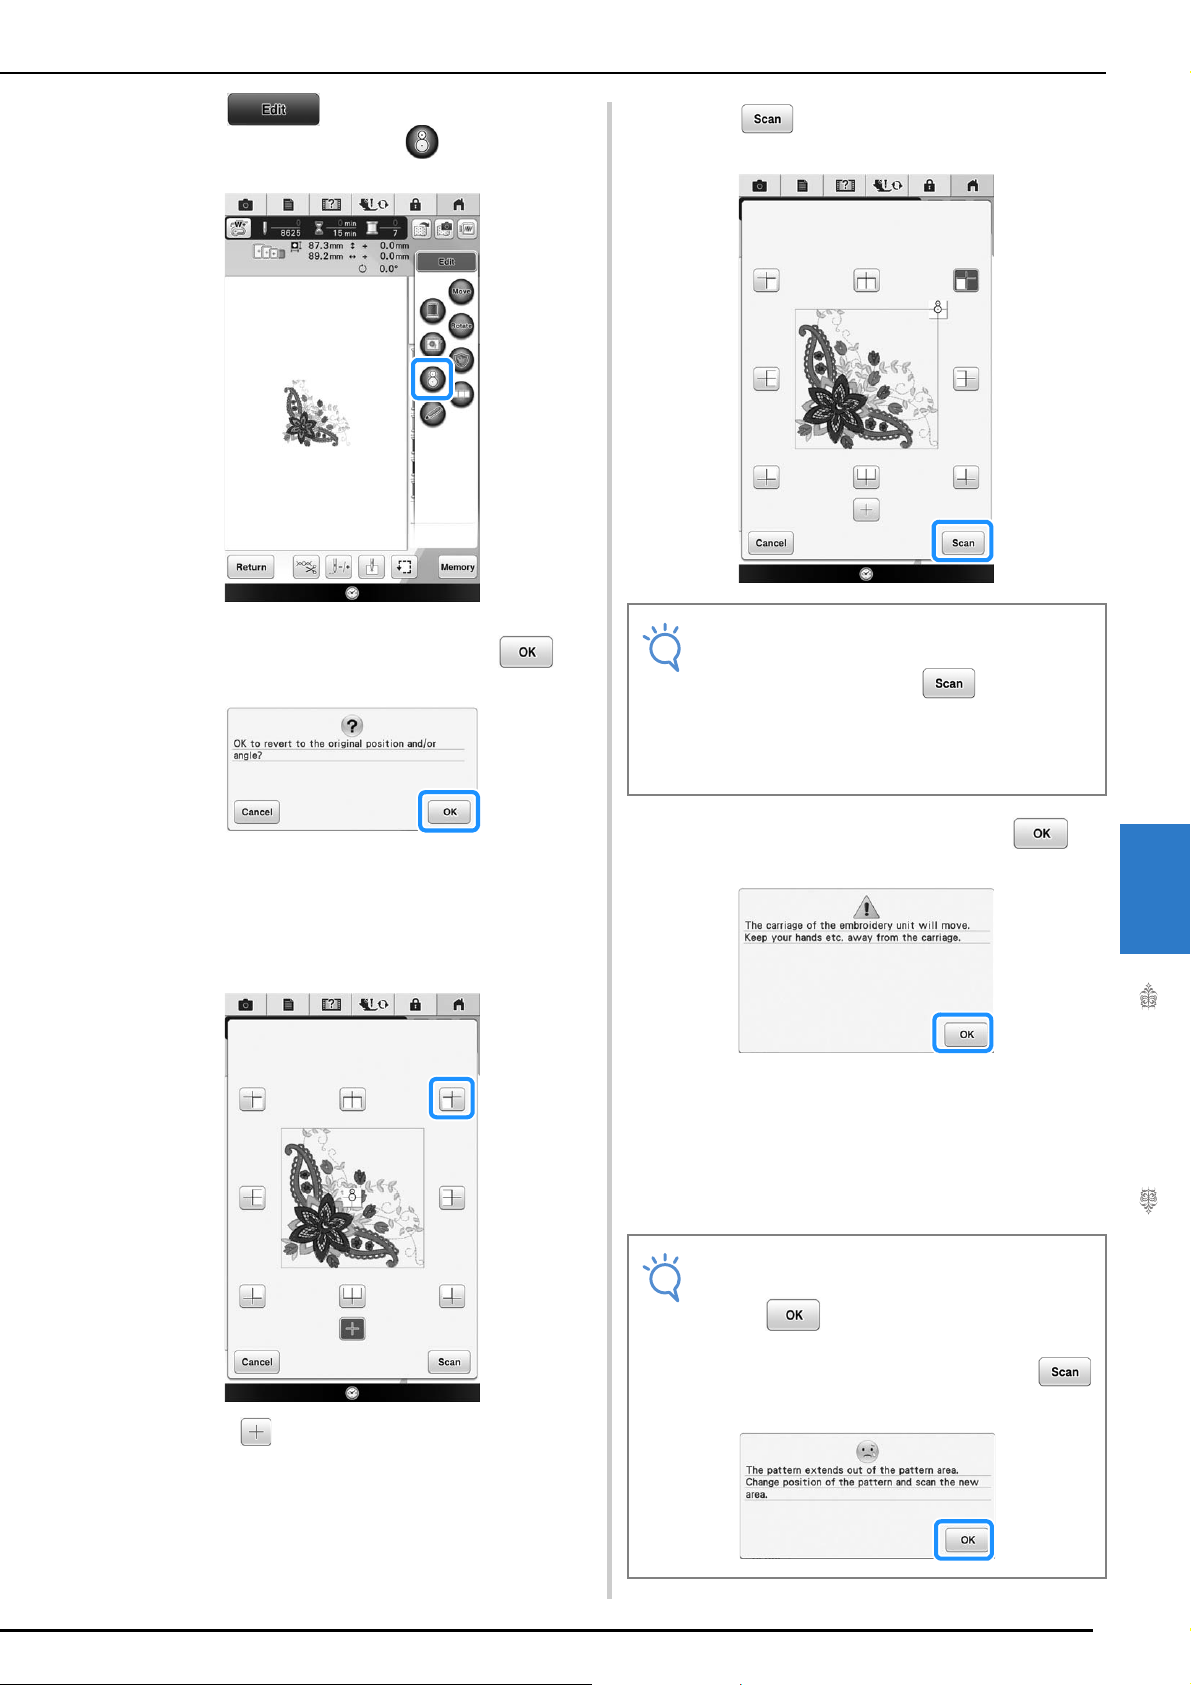
Press to display the editing
window, and then press .
c
Following message appears. Press .
→ The embroidering position will return to the original
position, even if you changed before.
d
Select the position you want to set as the
reference point.
* Select if you want to embroider referring the
embroidery positioning sticker as the center of the
pattern.
e
Press .
f
Following message appears. Press .
→ The built-in camera automatically searches for the
embroidery positioning sticker, and then the
carriage is moved so that the selected reference
point of the embroidery pattern is aligned with the
embroidery positioning sticker. The brightness of the
machine light is dimmed while the built-in camera
searches for the embroidery positioning sticker.
Note
• Attach embroidery foot “W+” with LED
pointer before pressing . The
embroidery foot “W+” lowers and check the
fabric thickness, to help the built-in camera
recognize the embroidery positioning
sticker.
Note
• If the following warning message appears,
touch and reposition the embroidery
positioning sticker so the pattern is within
the embroidery field, and then press
again.
Loading ...
Loading ...
Loading ...