Loading ...
Loading ...
Loading ...
124
Image Playback
You can magnify the image by 1.5x to 10x on the LCD monitor.
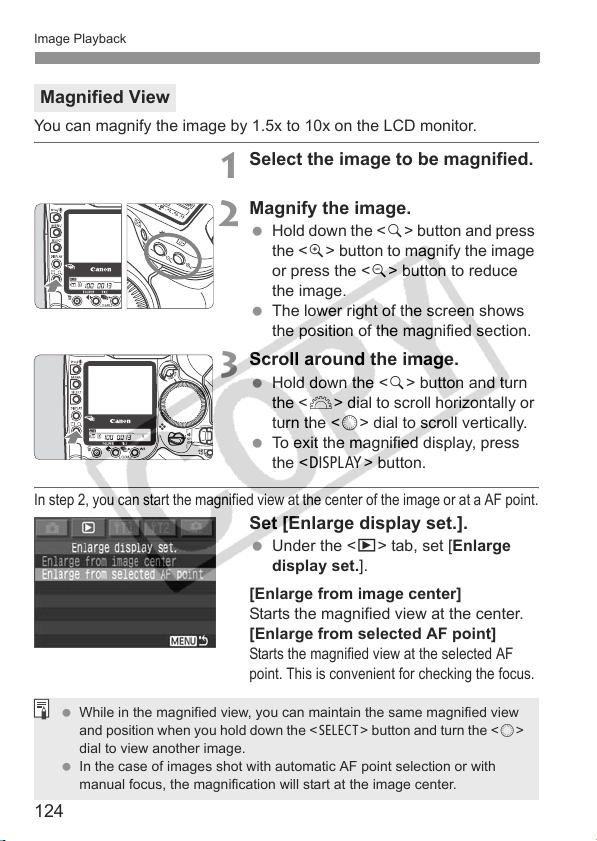
1
Select the image to be magnified.
2
Magnify the image.
Hold down the <r> button and press
the <
u> button to magnify the image
or press the <
y> button to reduce
the image.
The lower right of the screen shows
the position of the magnified section.
3
Scroll around the image.
Hold down the <r> button and turn
the <
6> dial to scroll horizontally or
turn the <
5> dial to scroll vertically.
To exit the magnified display, press
the <
V> button.
In step 2, you can start the magnified view at the center of the image or at a AF point.
Set [Enlarge display set.].
Under the <x> tab, set [Enlarge
display set.].
[Enlarge from image center]
Starts the magnified view at the center.
[Enlarge from selected AF point]
Starts the magnified view at the selected AF
point. This is convenient for checking the focus.
Magnified View
While in the magnified view, you can maintain the same magnified view
and position when you hold down the <
X> button and turn the <5>
dial to view another image.
In the case of images shot with automatic AF point selection or with
manual focus, the magnification will start at the image center.
Loading ...
Loading ...
Loading ...