Loading ...
Loading ...
Loading ...
59
32L221U / 55L421U 32" 720p / 55" 1080p 60Hz LED Chromecast™ built-in TV
www.tv.toshiba.com
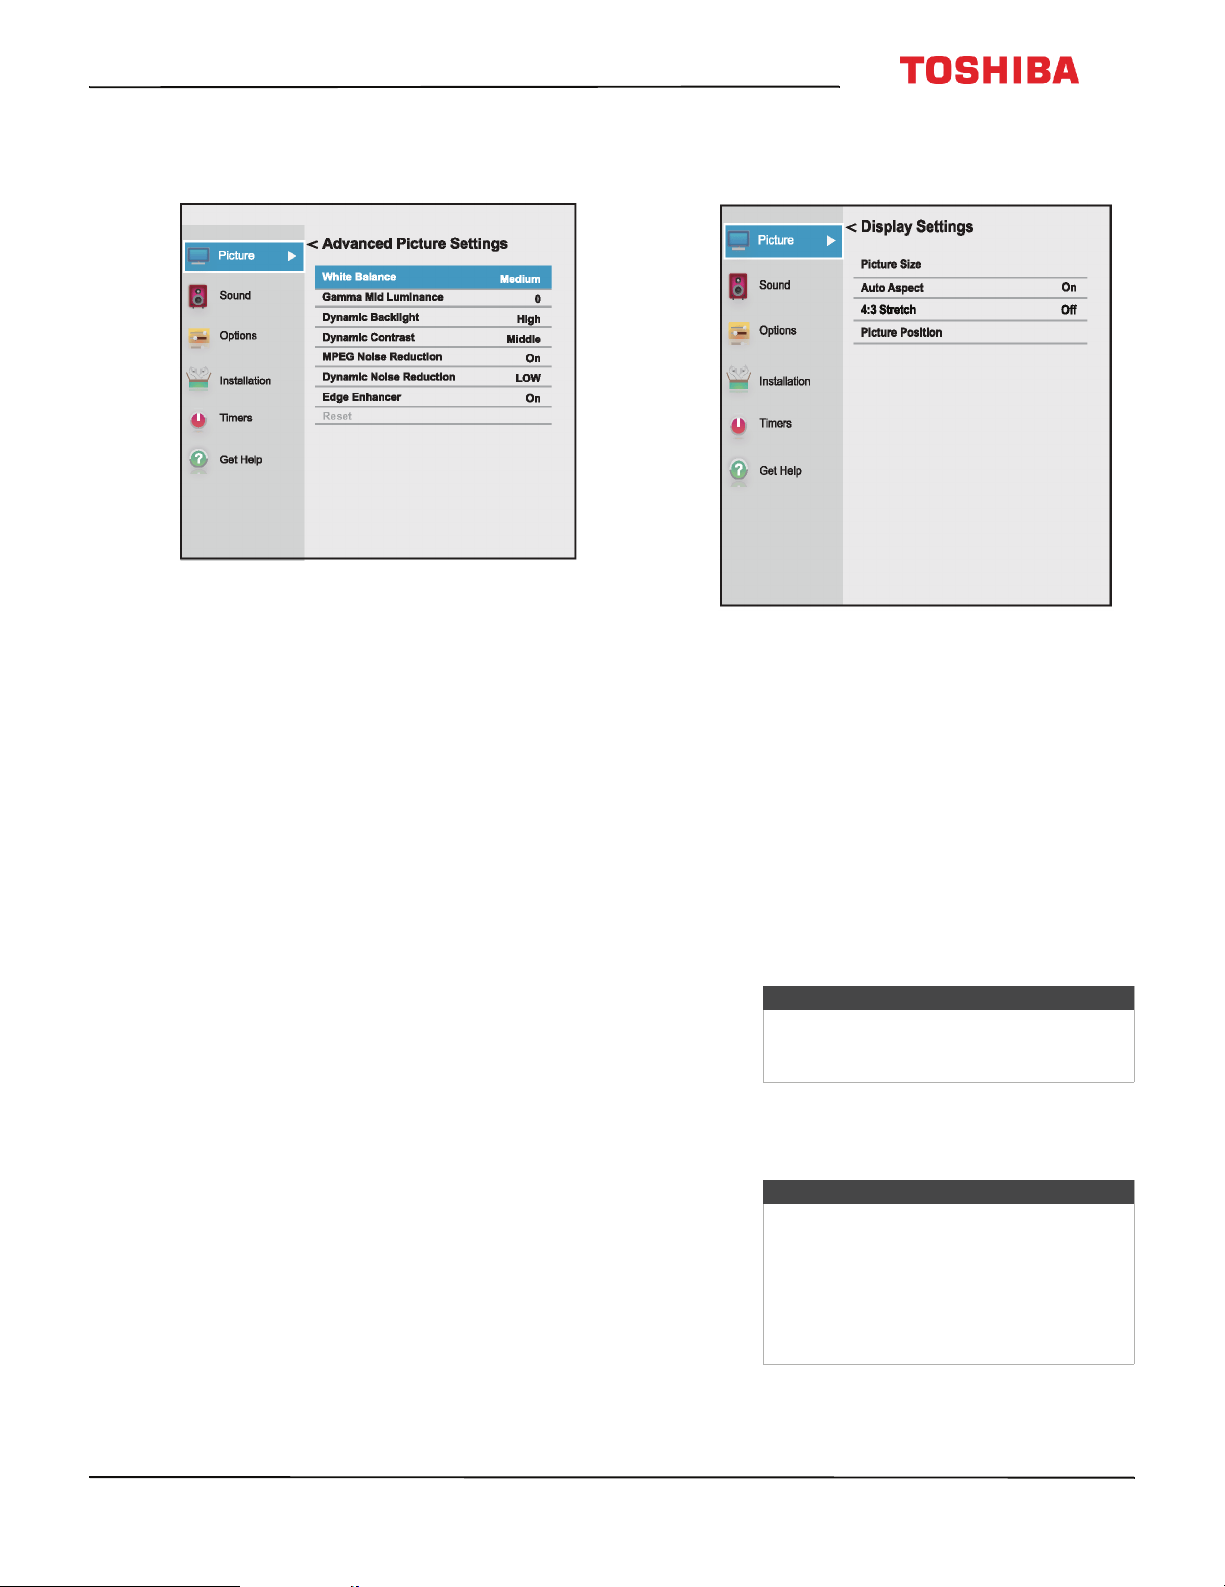
• Advanced Picture Settings—Opens the
Advanced Picture Settings menu where you can
adjust additional video options.
• White Balance—Adjusts the color
temperature.
A Highlight this option, then press OK.
B Press
W
or
X
to select Cool (to enhance
the blues), Medium (to select a neutral
color temperature), or Warm (to enhance
the reds).
C Highlight Red Intensity, Green
Intensity, or Blue Intensity, then press
OK. Press
W
or
X
to adjust the setting,
then press OK.
D Highlight Done, then press OK.
• Gamma Mid Luminance—lets you adjust
the levels of black in the picture.
A Highlight this option, then press OK.
B Press
W
or
X
to decrease or increase the
black level detail.
• Dynamic Backlight—Automatically
strengthens the black coloring of dark areas
in the video according to the level of
darkness. You can select High, Low, or Off.
• Dynamic Contrast—Automatically detects
changes in picture quality that affect the
appearance of your contrast settings and
automatically adjusts the video. You can
select High, Middle, Low, or Off.
• MPEG Noise Reduction—Reduces blocking
artifacts noise and mosquito noise by MPEG
encoding. You can select On or Off.
• Dynamic Noise Reduction—Reduces
picture noise (snow). You can select High,
Low, or Off.
• Edge Enhancer—Adjusts the picture to
achieve a sharper image. You can select On
or Off.
• Reset—Resets all advanced picture settings
to factory defaults.
• Display Settings—Opens the Display Settings
menu where you can adjust how the picture is
displayed on the screen.
A Highlight Picture Size, then press OK.
Press
S
or
T
to select an available picture
size. See Adjusting the picture size on
page 60.
B Highlight Auto Aspect, then press OK.
Press
S
or
T
to select On or Off. See
Automatically adjusting the aspect ratio
on page 61.
C Highlight 4:3 Stretch, then press OK.
Press
S
or
T
to select On or Off. See
Using the 4:3 Stretch on page 62.
D Highlight Picture Position, then press
W
or
X
to adjust the vertical picture
position. See Scrolling the TheaterWide™
picture on page 61.
3 Press
W
X
S
or
T
to adjust the option or select a
setting, then press OK.
4 Press EXIT to close the menu.
Note
The Picture Position option may be
grayed and unavailable for some Picture
Size settings.
Notes
• Picture setting adjustments affects the
current video input only. You can
adjust the picture quality separately
for each input.
• Depending on the Sharpness setting,
the Edge Enhancer effect may be
reduced.
Loading ...
Loading ...
Loading ...