Loading ...
Loading ...
Loading ...
Be sure all controls are off and all surfaces are cool before cleaning any part of the range.
Control Knobs
+;86BAGEB?>AB5F@4L58E8@BI879BE
84F<8E6?84A<A:
%4>8FHE8G;8>AB5F4E8<AG;8OFF
CBF<G<BAF4A7CH??G;8@FGE4<:;GB99G;8
FG8@F9BE6?84A<A:
+;8>AB5F64A586?84A87<A47<F;J4F;8E
BEG;8L@4L4?FB58J4F;87J<G;FB4C4A7
J4G8E%4>8FHE8G;8<AF<78F B9G;8>AB5F
4E87EL589BE8E8C?46<A:
)8C?468G;8>AB5F<AG;8OFF CBF<G<BAGB
8AFHE8CEBC8EC?468@8AG
WARNING: If your range is removed for cleaning, servicing or any
reason, be sure the anti-tip device is reengaged properly when the range is
replaced. Failure to take this precaution could result in tipping of the range and
cause injury.
Burner Assembly
+;85HEA8E4FF8@5?<8FF;BH?758J4F;87
E8:H?4E?L4A7B96BHEF849G8EFC<??BI8EF
Turn all controls off before removing
burner parts.
+;85HEA8E:E4G8F5HEA8E;847F4A7
5HEA8E64CF64A58E8@BI879BE84FL
6?84A<A:
+;88?86GEB78B9G;8FC4E><:A<G8E<F
8KCBF8758LBA7G;8FHE9468B9G;85HEA8E
54F8.;8A6?84A<A:G;86BB>GBC58
64E89H?ABGGBFA4:G;88?86GEB78B9G;8
FC4E><:A<G8EJ<G;LBHE6?84A<A:6?BG;
4@4:8GBG;8<:A<G8E6BH?7B66HE
To avoid snagging a cloth on the spark
igniter, leave the burner heads in place
when cleaning the cooktop.
864E89H?ABGGBCHF;<A4AL6BB>GBC
6BAGEB?FJ;<?86?84A<A:G;86BB>GBC
F?<:;G8?86GE<64?F;B6>@<:;GE8FH?GJ;<6;
6BH?764HF8LBHGB>AB6>BI8E;BG
6BB>J4E8
.4F;5HEA8EC4EGFJ<G;4A4??CHECBF8
ABA45E4F<I86?84A8E4A7J4E@J4G8E
*B4>FGH55BEAFB<?ELG;8@J<G;46?BG;U
7BABGE84FF8@5?8J;<?8J8G
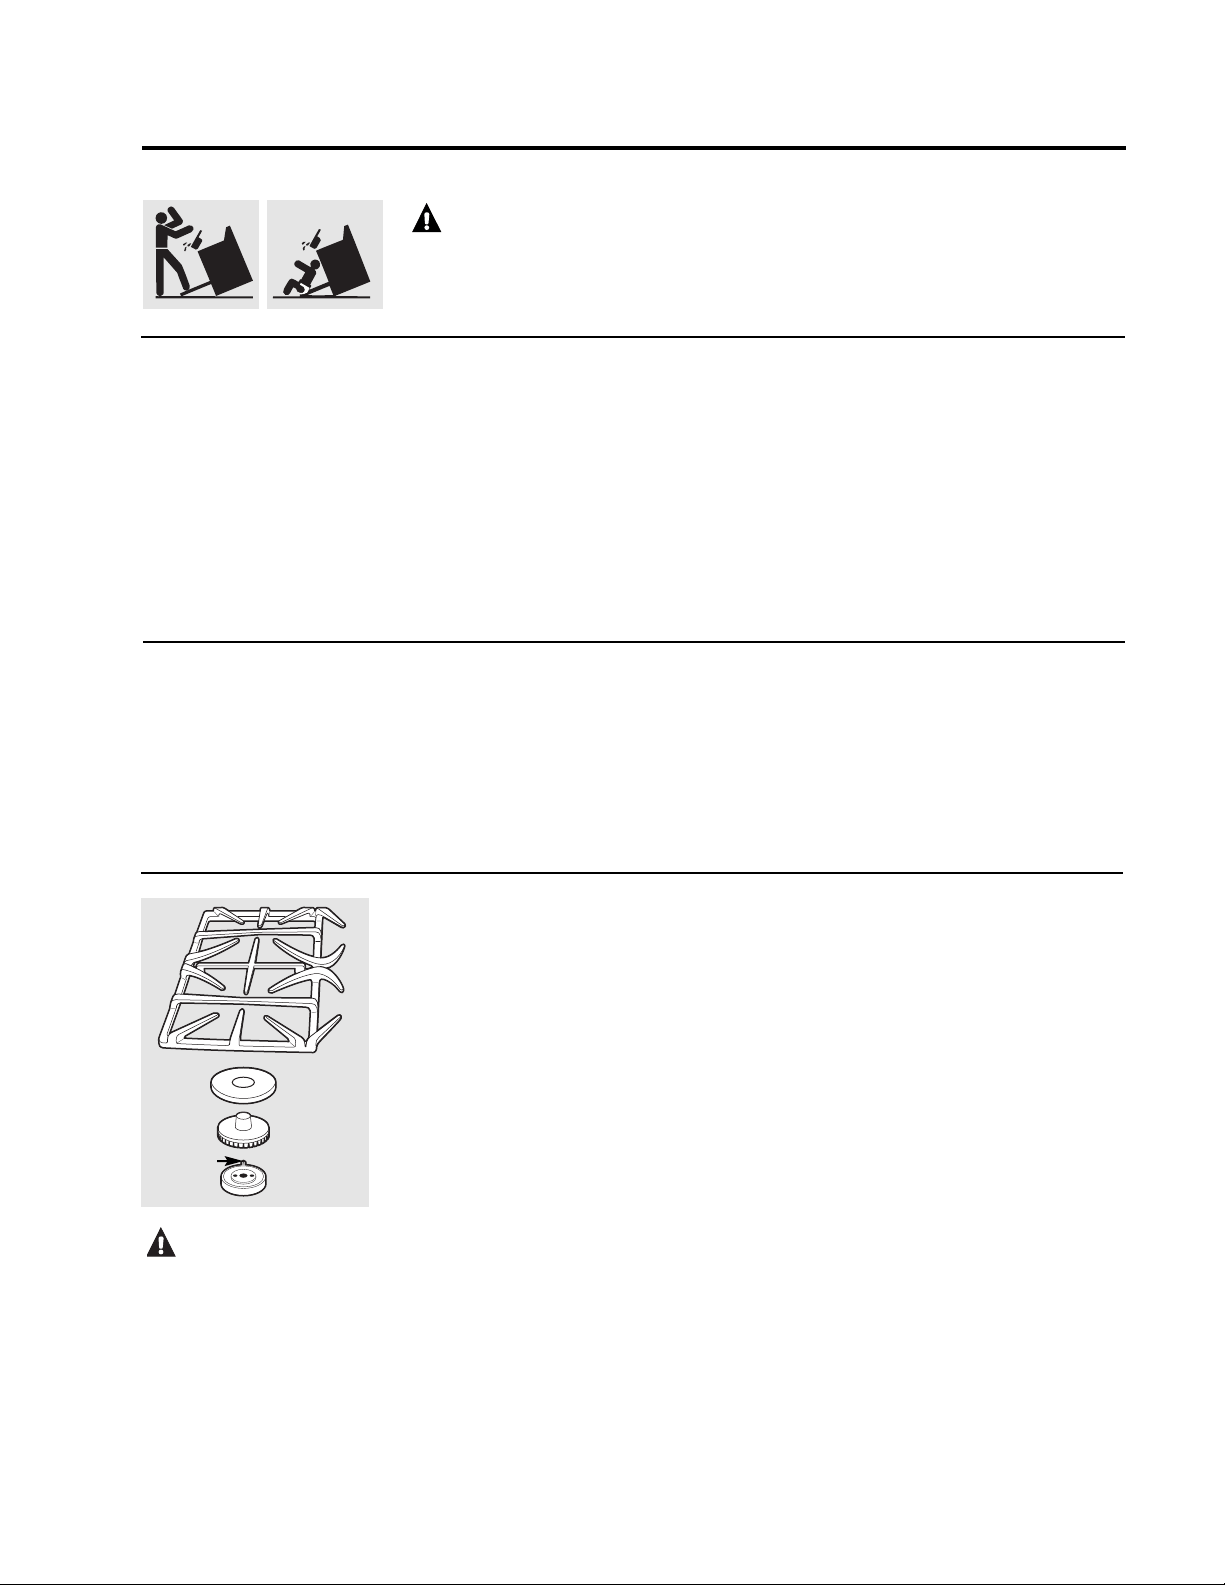
+BE84FF8@5?8E8C?468G;85HEA8E;847
9<EFGG;8AG;85HEA8E64C4A79<A4??LG;8
5HEA8E:E4G88FHE8G;8C<AF<AG;85HEA8E
;8474E8CEBC8E?L?B64G87<AG;85HEA8E
54F8;B?8F
CAUTION:
DO NOT OPERATE THE BURNER
WITHOUT ALL BURNER PARTS
IN PLACE.
?86GEB78
HEA8E64C
HEA8E;847
HEA8E54F8
E4G8
How to Remove Protective Shipping Film and Packaging Tape
4E89H??L:E4FC46BEA8EB9G;8CEBG86G<I8
F;<CC<A:9<?@J<G;LBHE9<A:8EF4A7F?BJ?L
C88?<G9EB@G;84CC?<4A68FHE9468BABG
HF84ALF;4EC<G8@FGBE8@BI8G;89<?@
)8@BI84??B9G;89<?@589BE8HF<A:G;8
4CC?<4A689BEG;89<EFGG<@8
+B4FFHE8AB74@4:8<F7BA8GBG;8
9<A<F;B9G;8CEB7H6GG;8F498FGJ4LGB
E8@BI8G;847;8F<I89EB@C46>4:<A:G4C8
BAA8J4CC?<4A68F<F4A4CC?<64G<BAB94
;BHF8;B?7?<DH<77<F;J4F;<A:78G8E:8AG
CC?LJ<G;4FB9G6?BG;4A74??BJGBFB4>
NOTE: +;847;8F<I8@HFG58E8@BI87
9EB@4??C4EGF"G64AABG58E8@BI87<9<G<F
54>87BA
Care and cleaning of the range. GEAppliances.com
Loading ...
Loading ...
Loading ...