Owner Manual Kitchen Machine
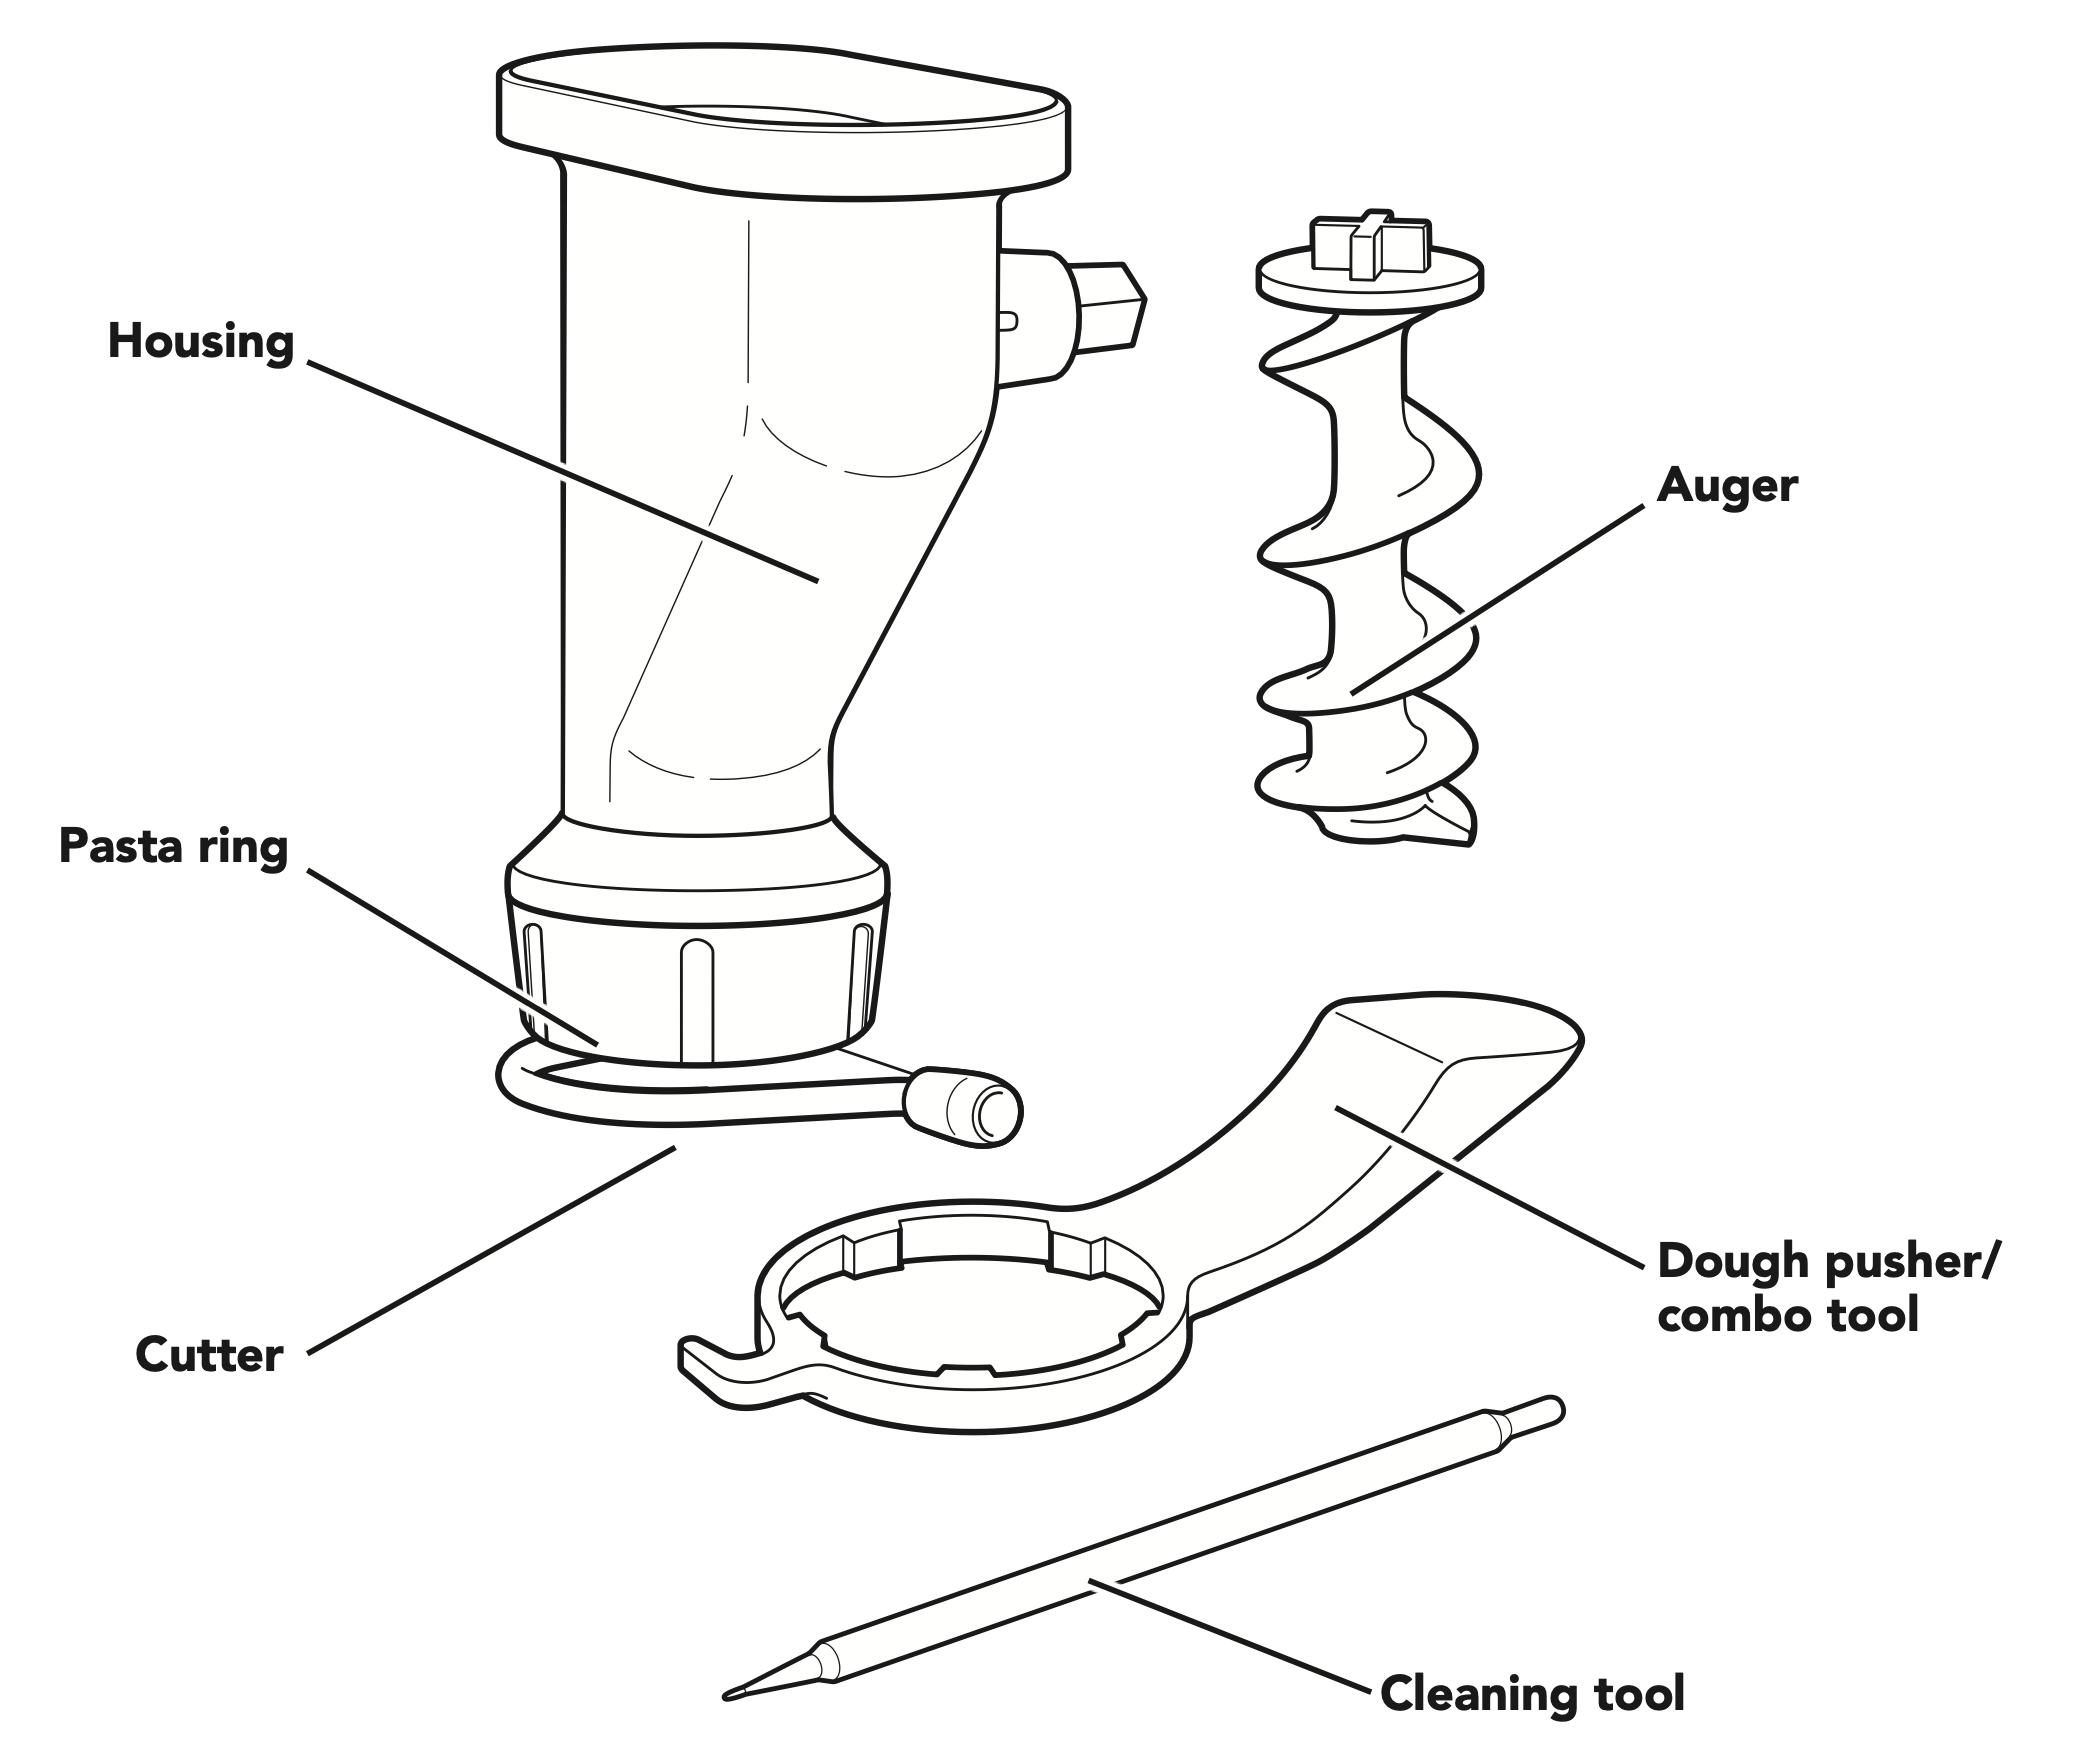
PARTS AND FEATURES
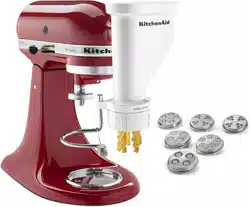
PARTS AND ACCESSORIES
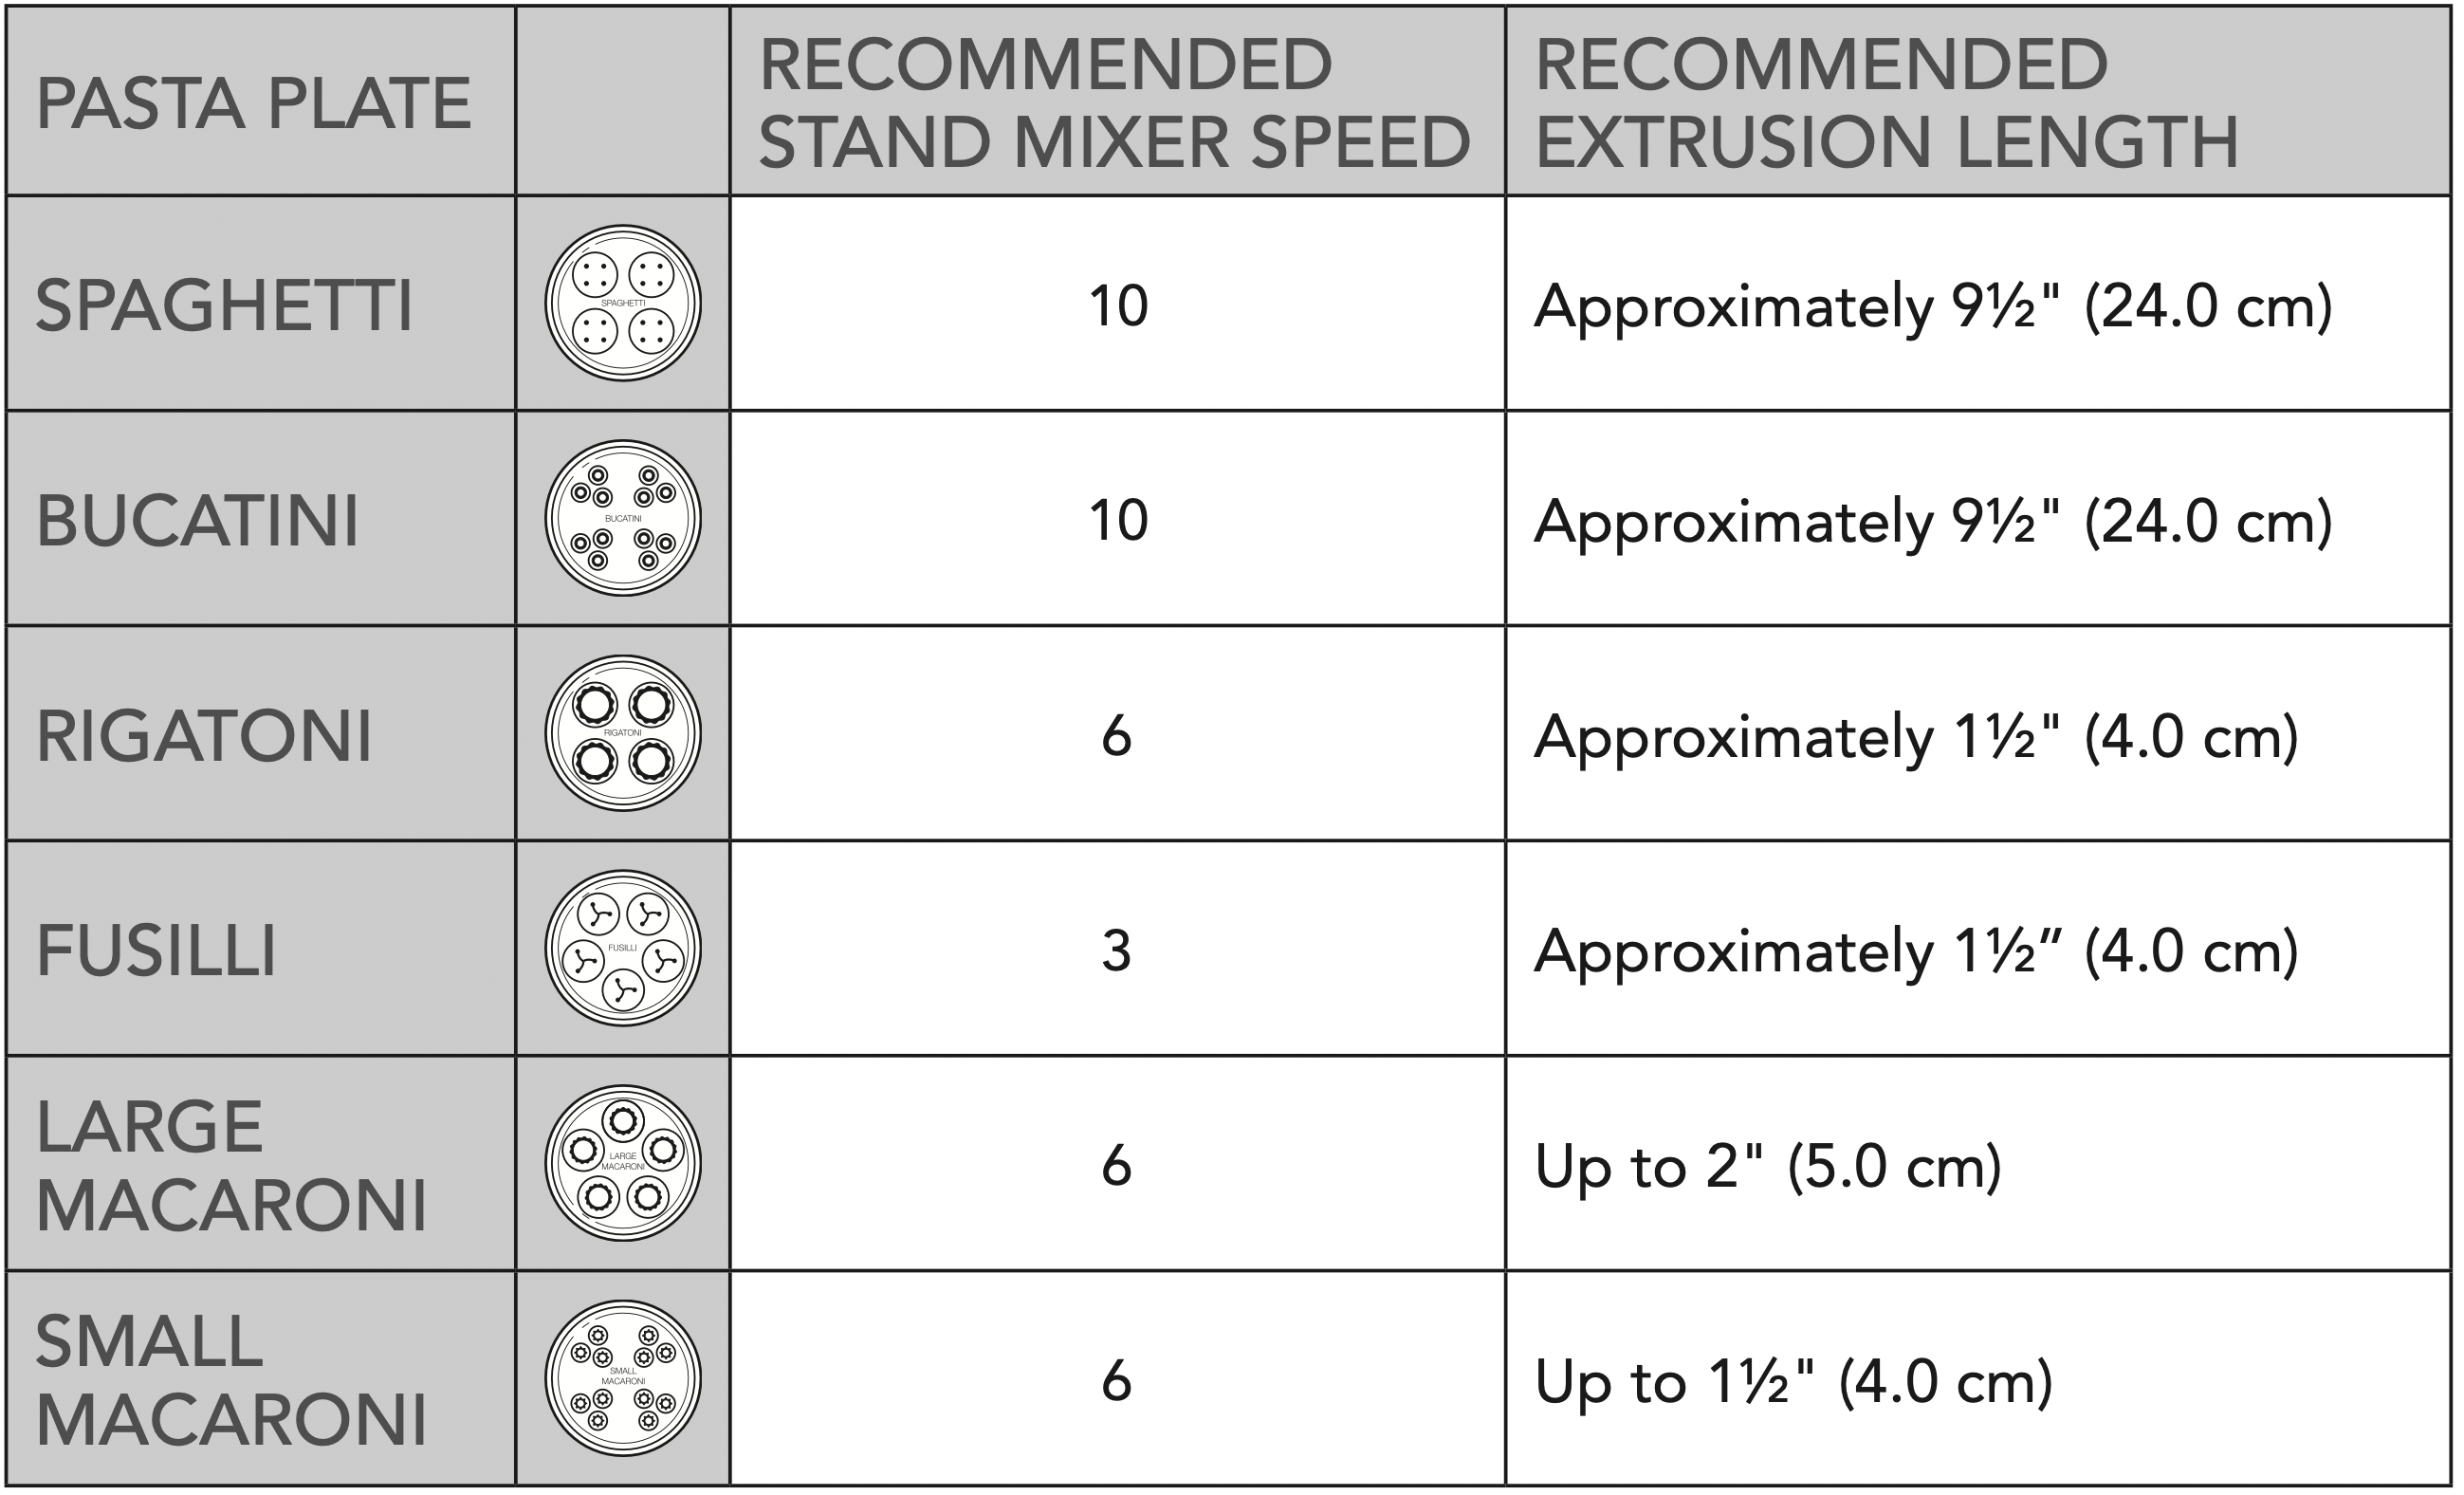
PASTA PLATES
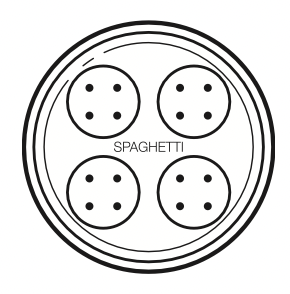 Spaghetti
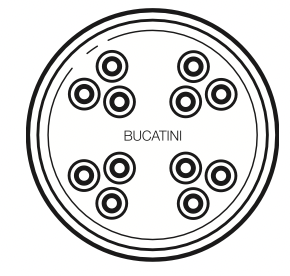 Bucatini
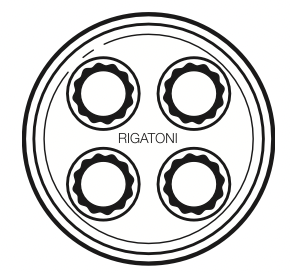 Rigatoni
 Fusilli
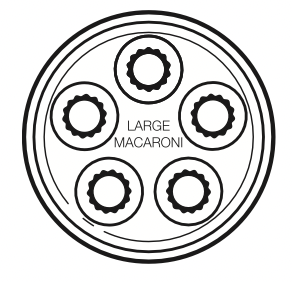 Large macaroni
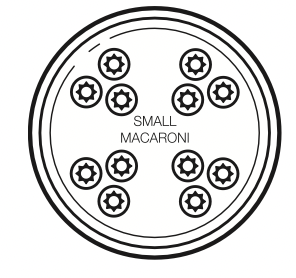 Small macaroni
USING THE PASTA PRESS
CHOOSING THE RIGHT PASTA PLATE
ASSEMBLING THE PASTA PRESS
- Rotate cutter away from the housing base so that the auger may be inserted. Insert auger into housing base, cross-tab first. Auger should settle completely inside of housing.
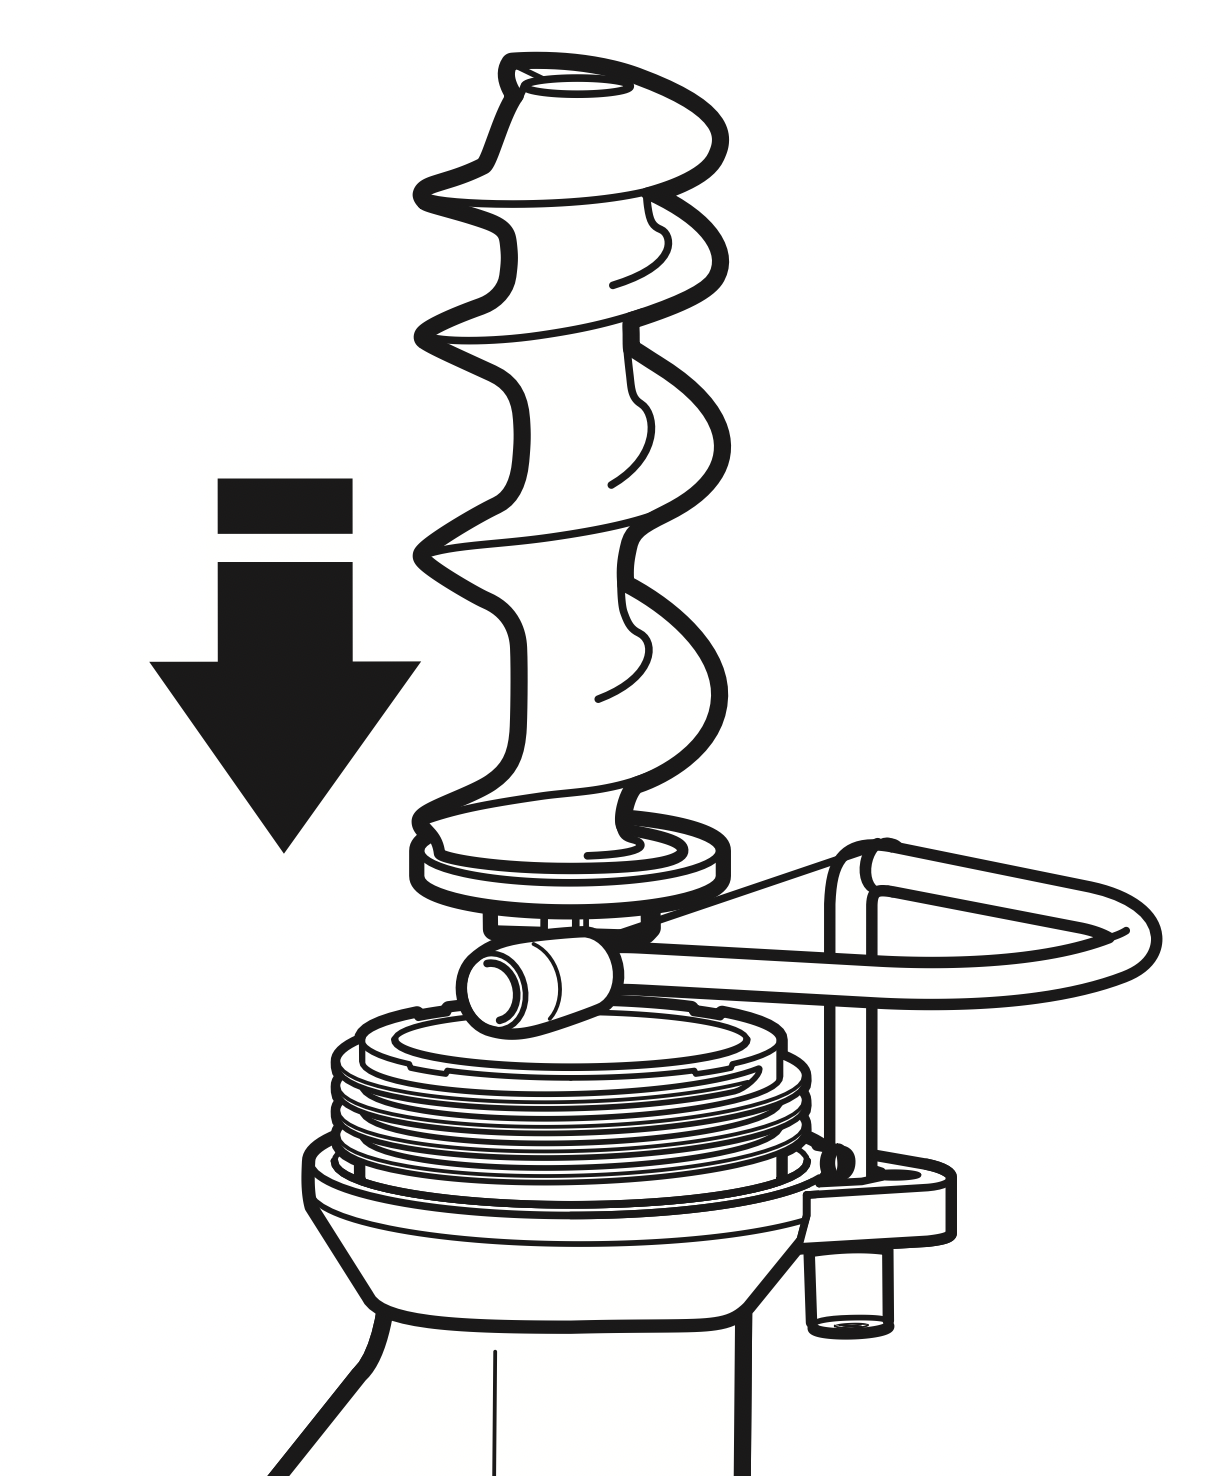
- Place selected pasta plate onto housing base so that the pasta plate’s tab inserts into auger base.

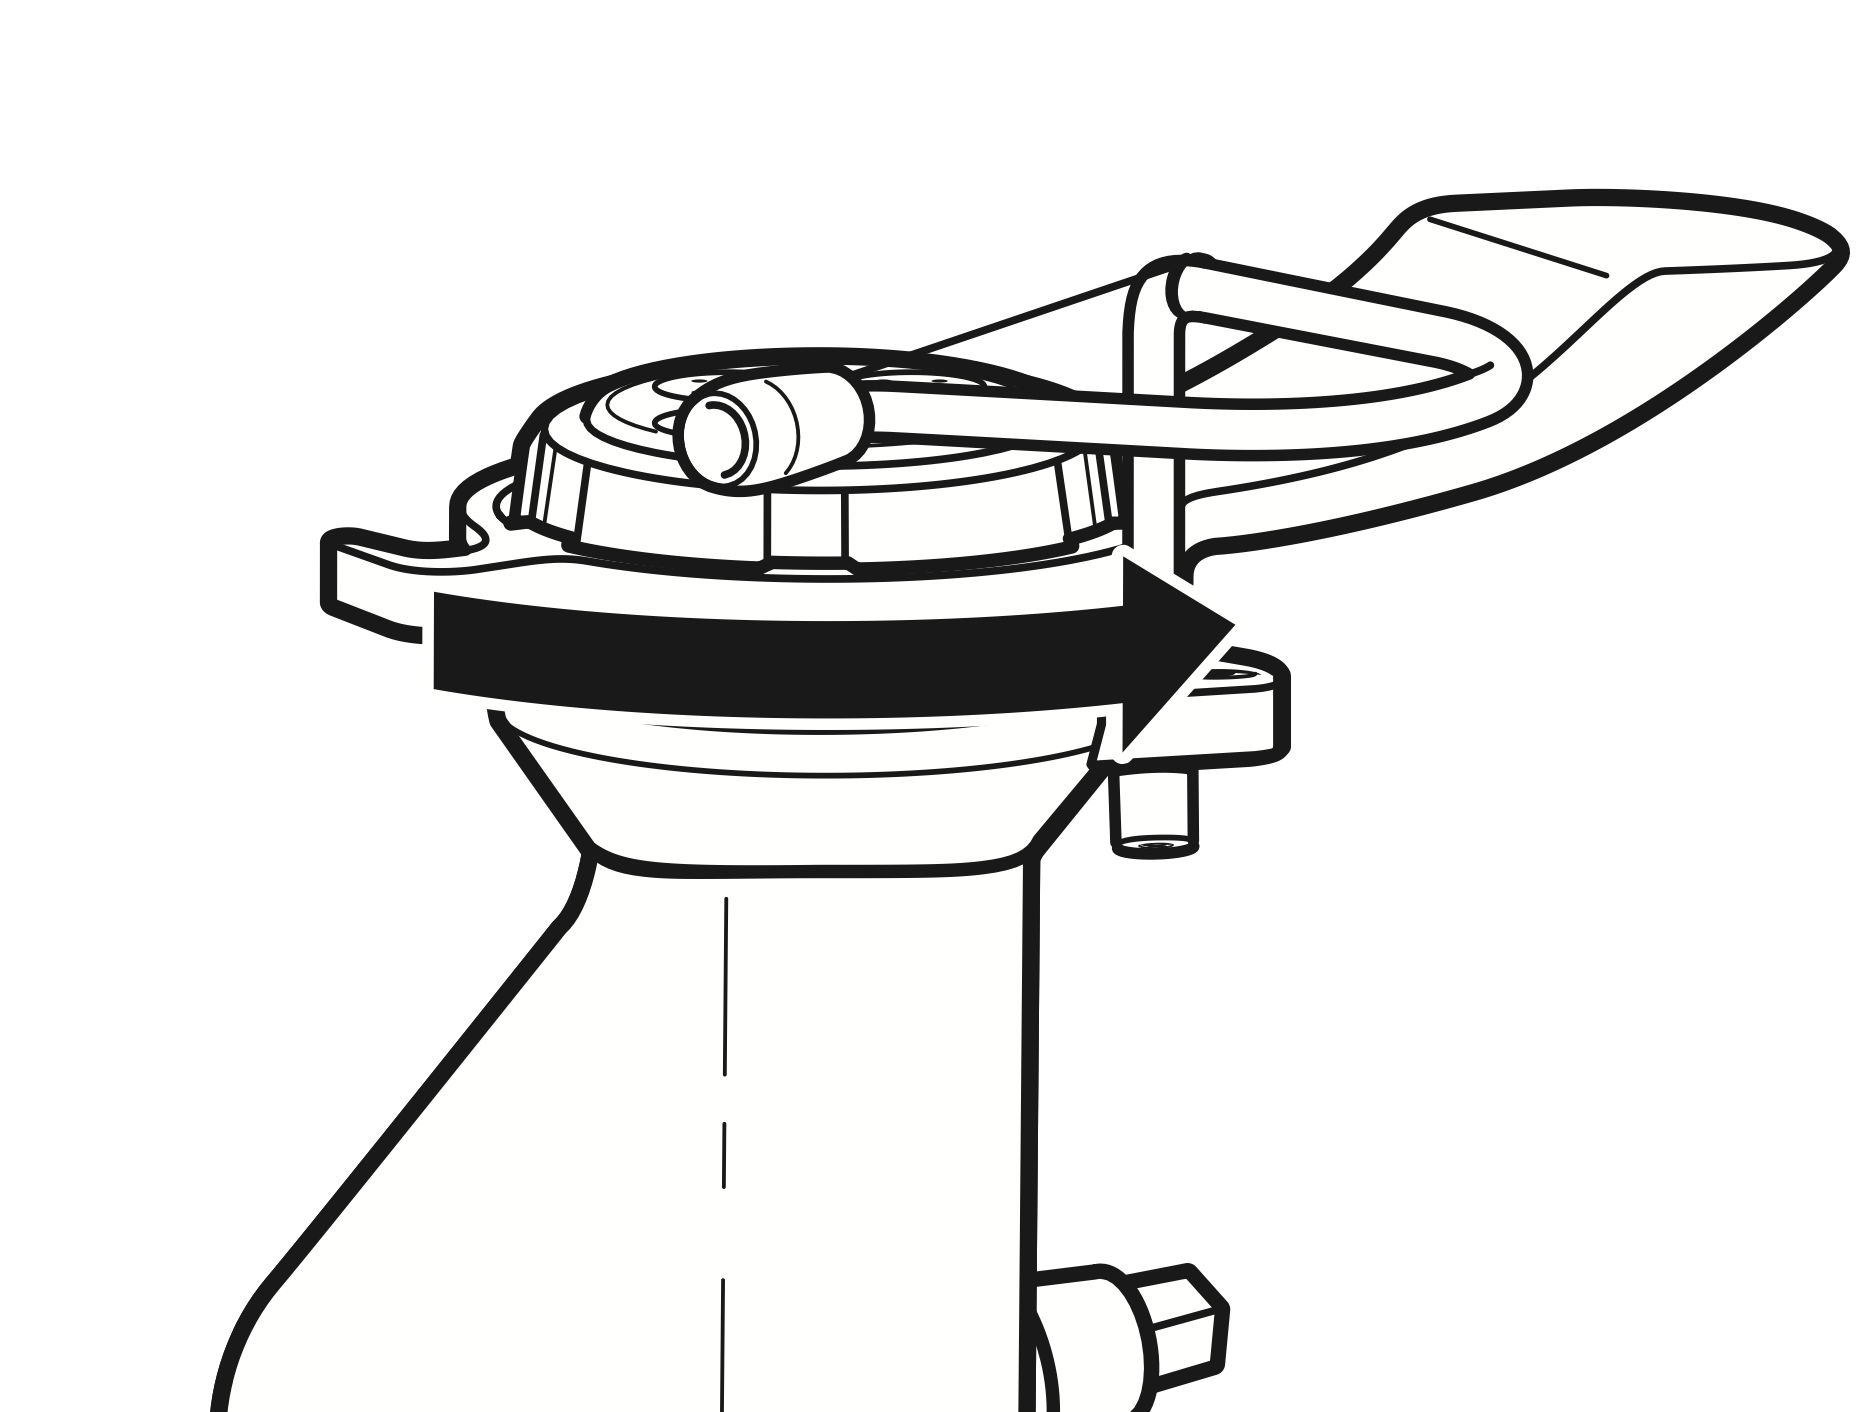
- Screw pasta ring onto housing base until it is seated firmly in place.
ATTACHING THE PASTA PRESS
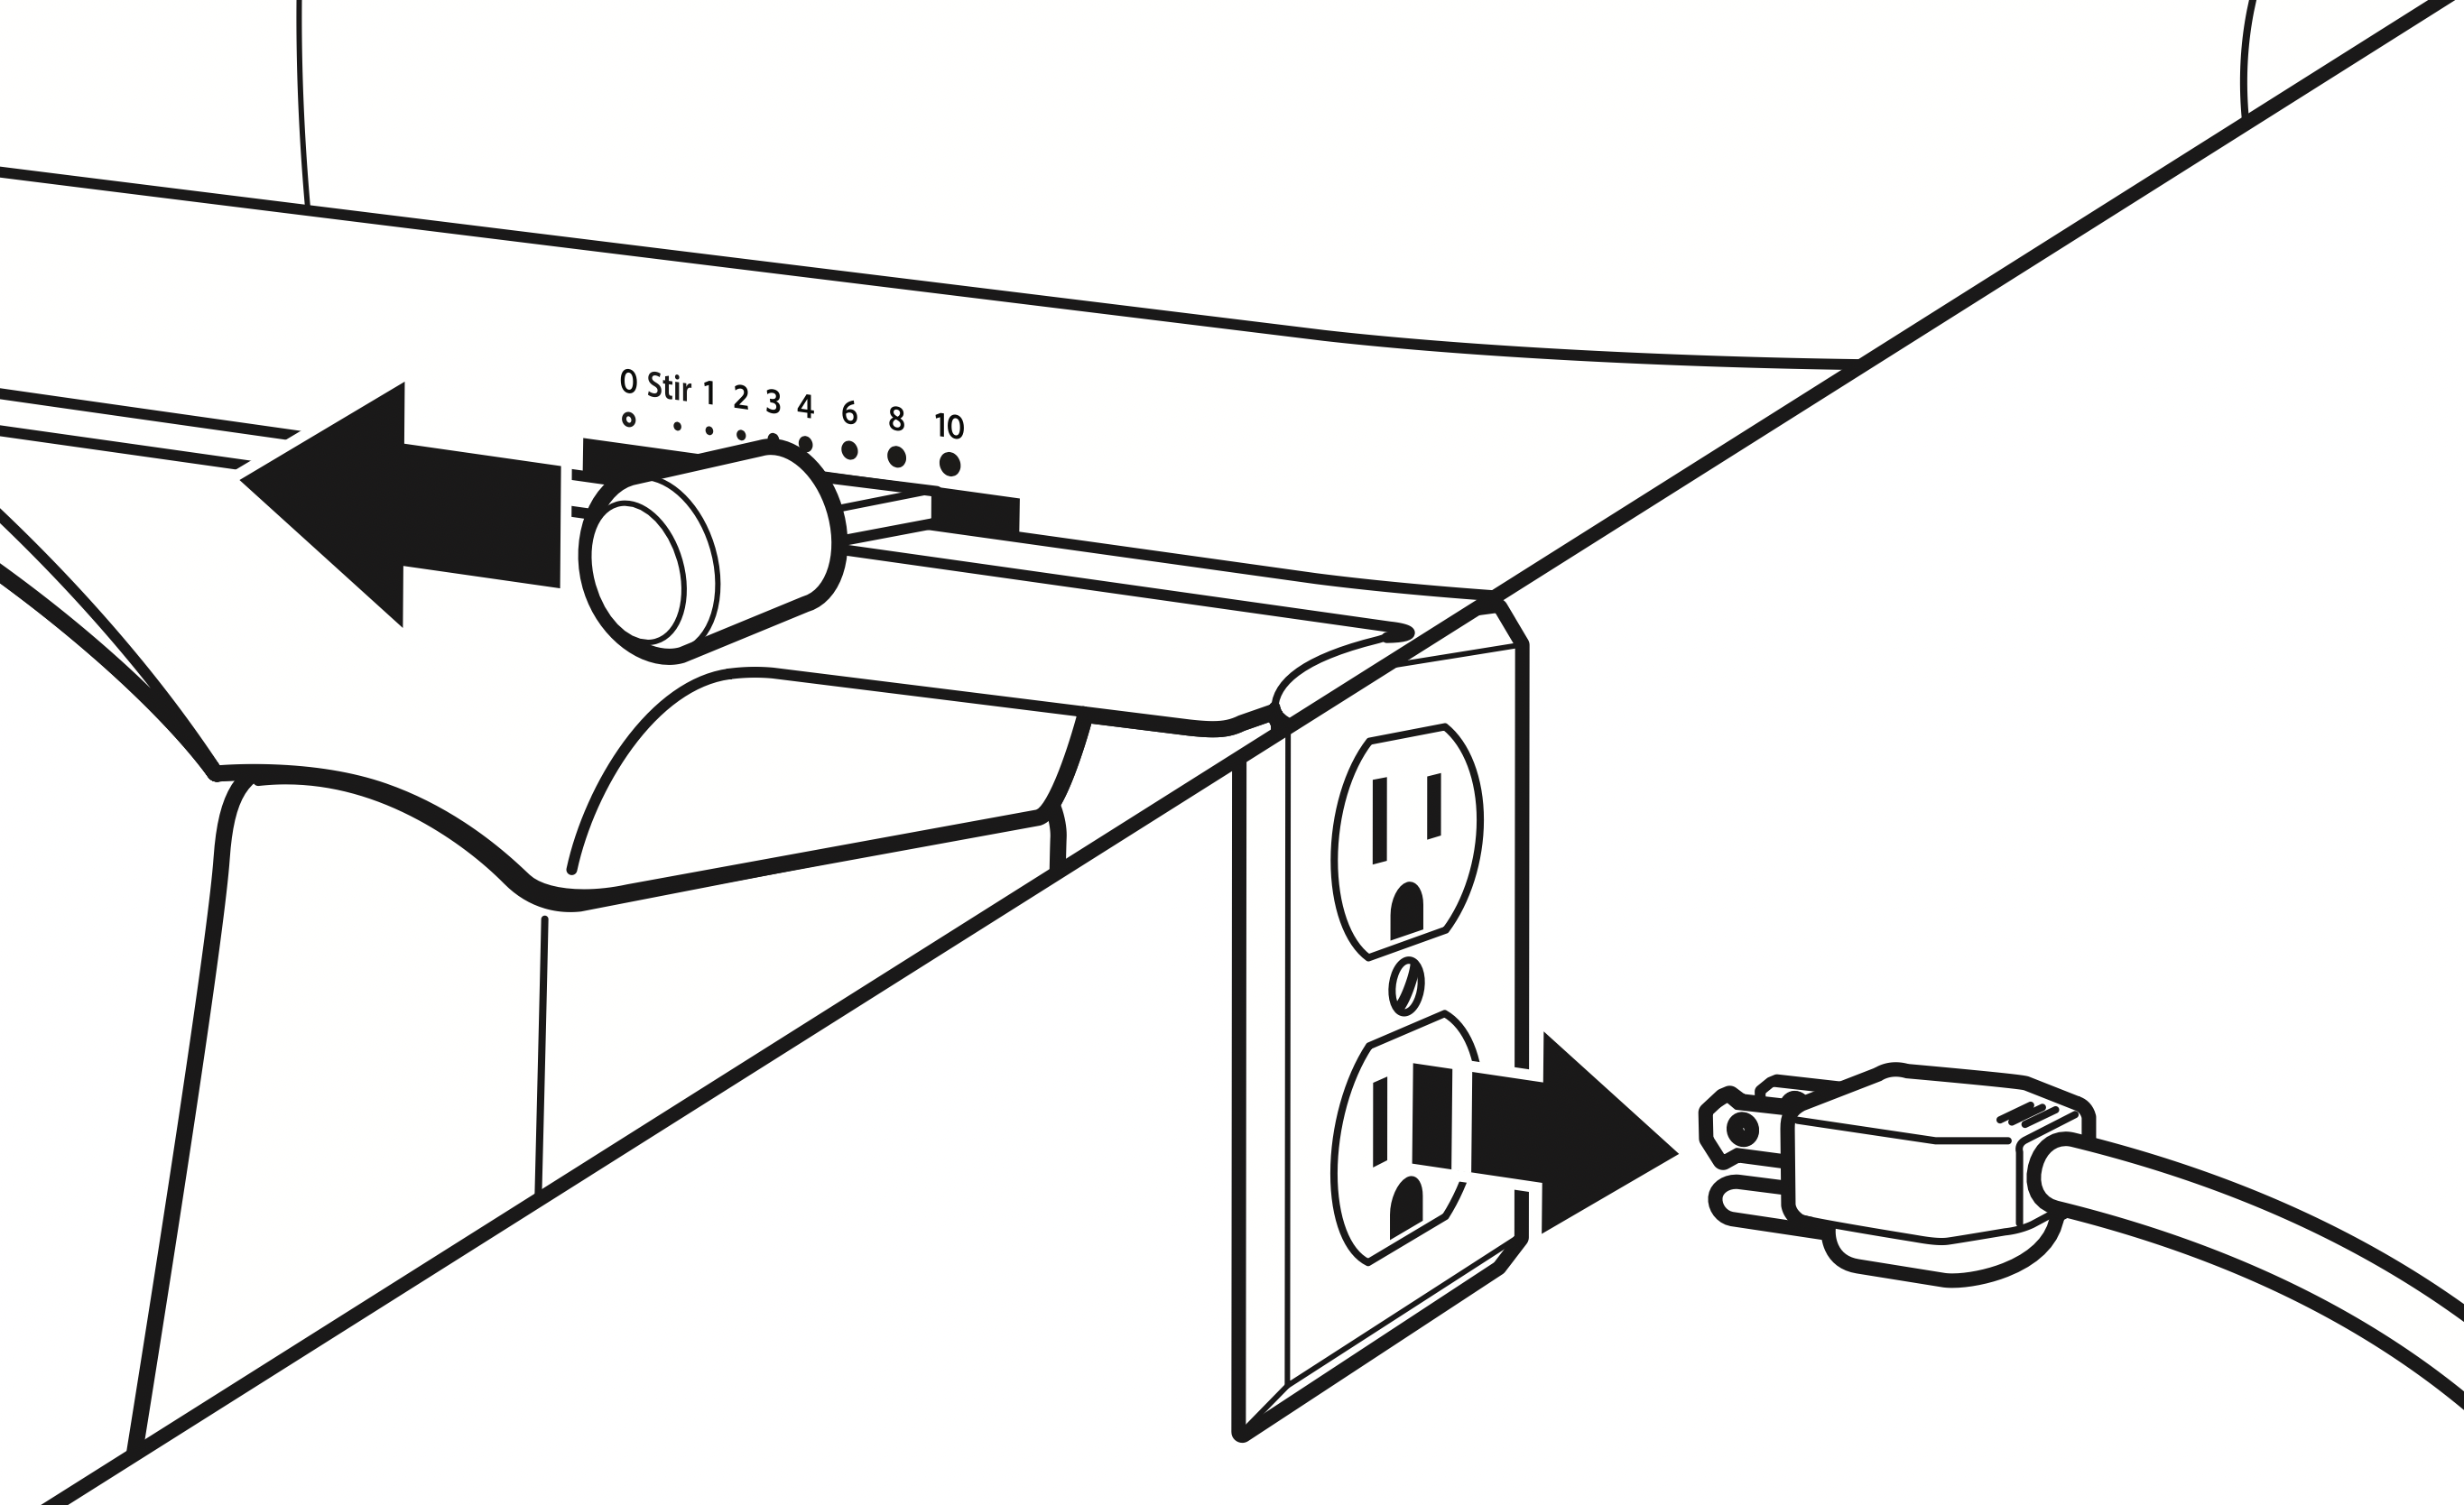
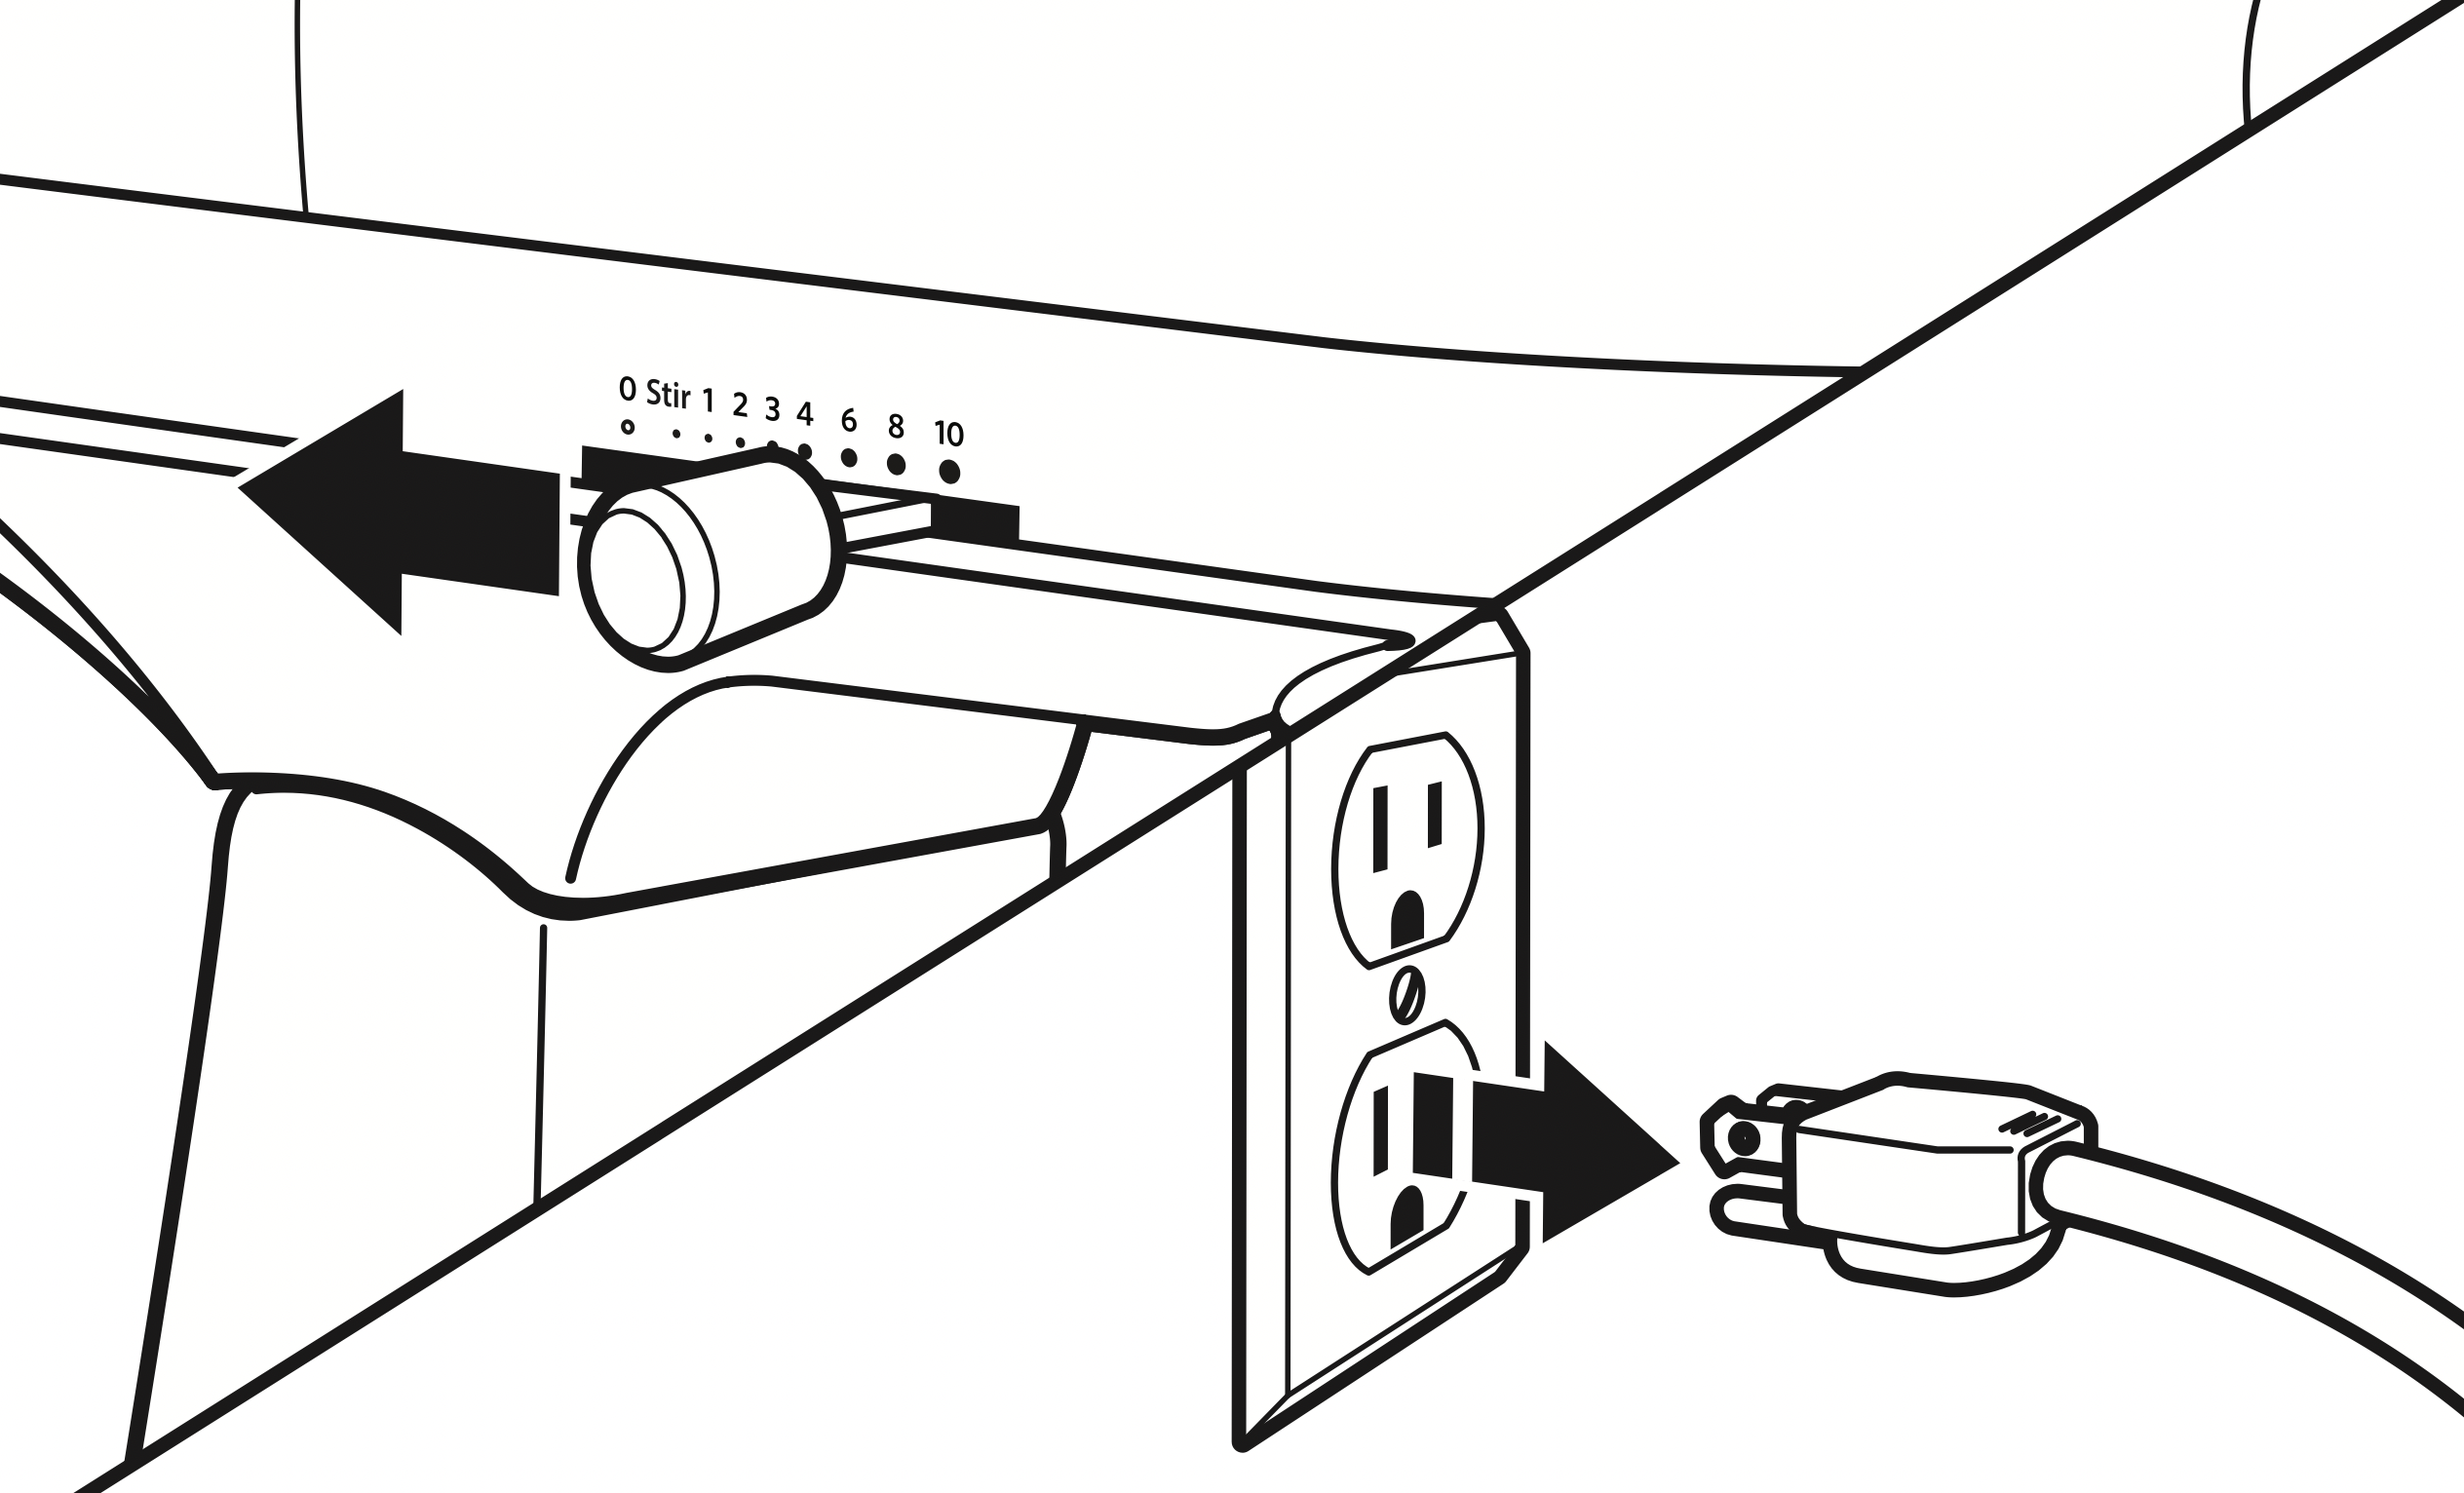
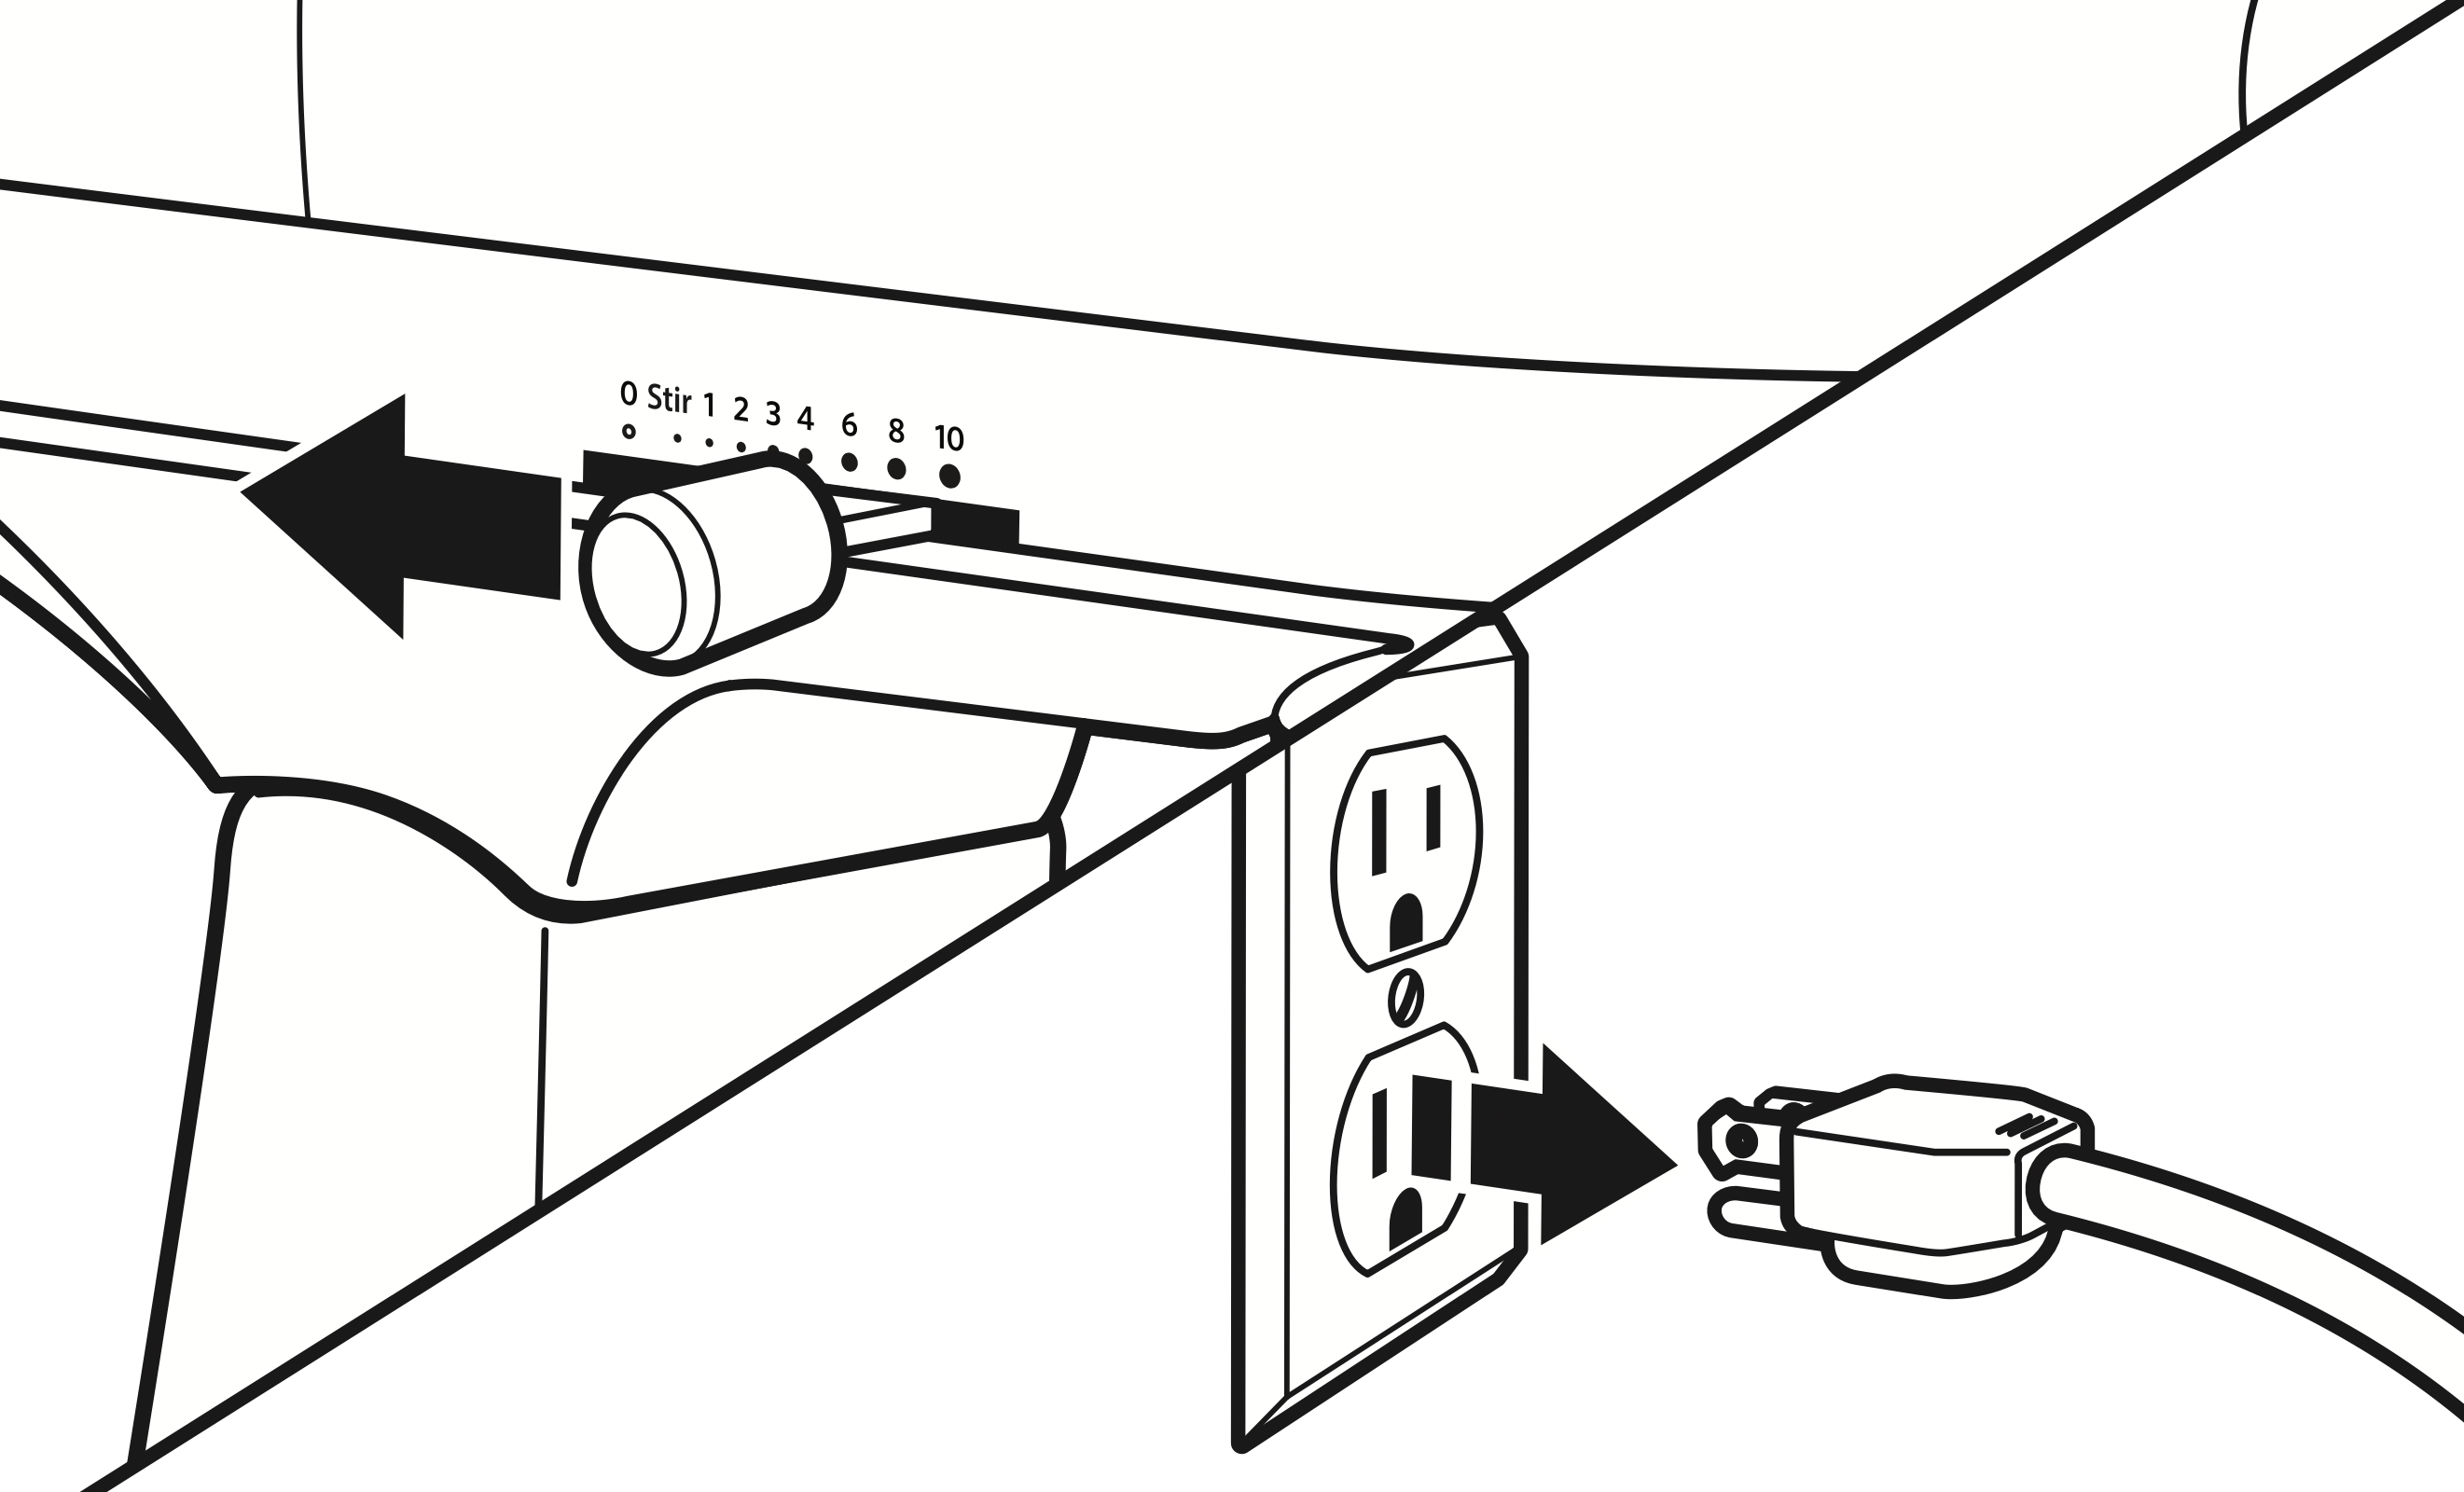
- Turn Stand Mixer OFF and unplug.
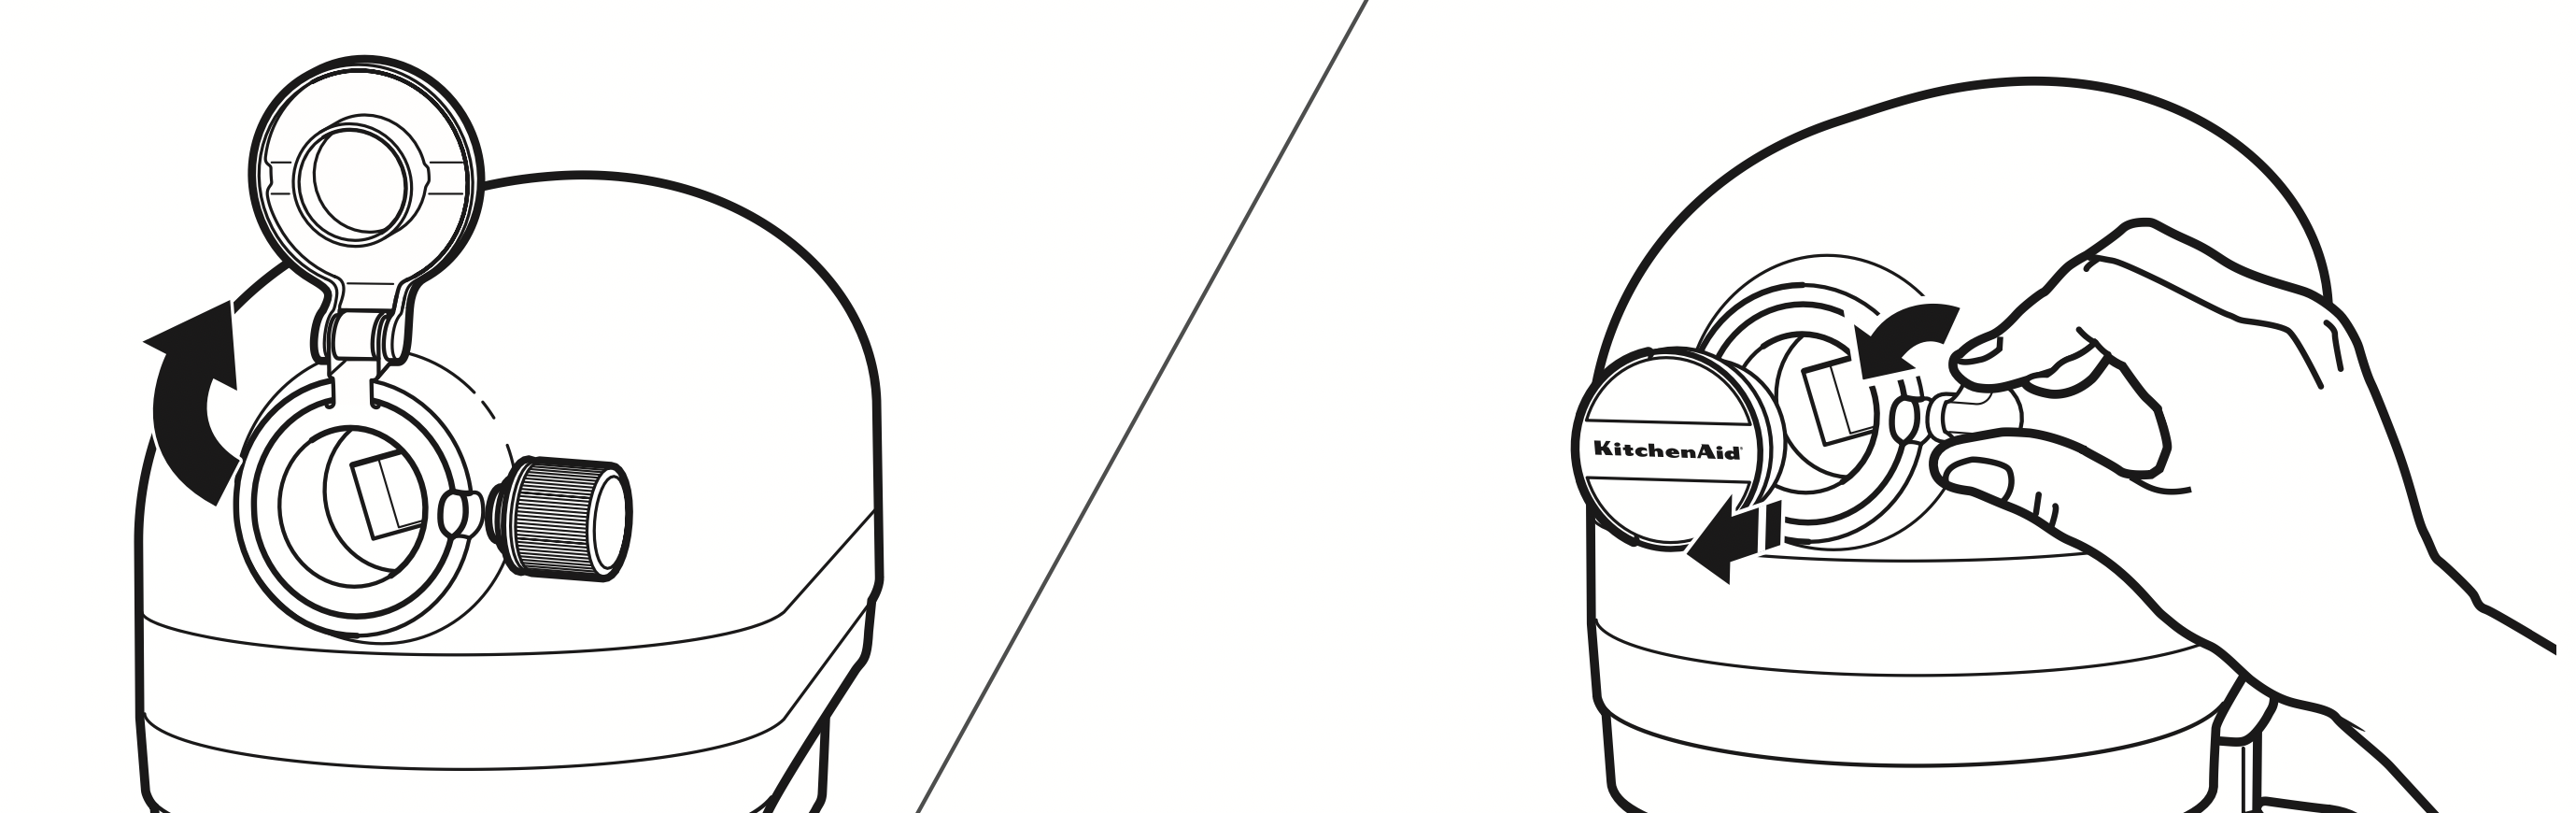
- For Stand Mixers with a hinged attachment hub cover: Flip up to open.
For Stand Mixers with a removable attachment hub cover: Turn the attachment knob counterclockwise to remove attachment hub cover.
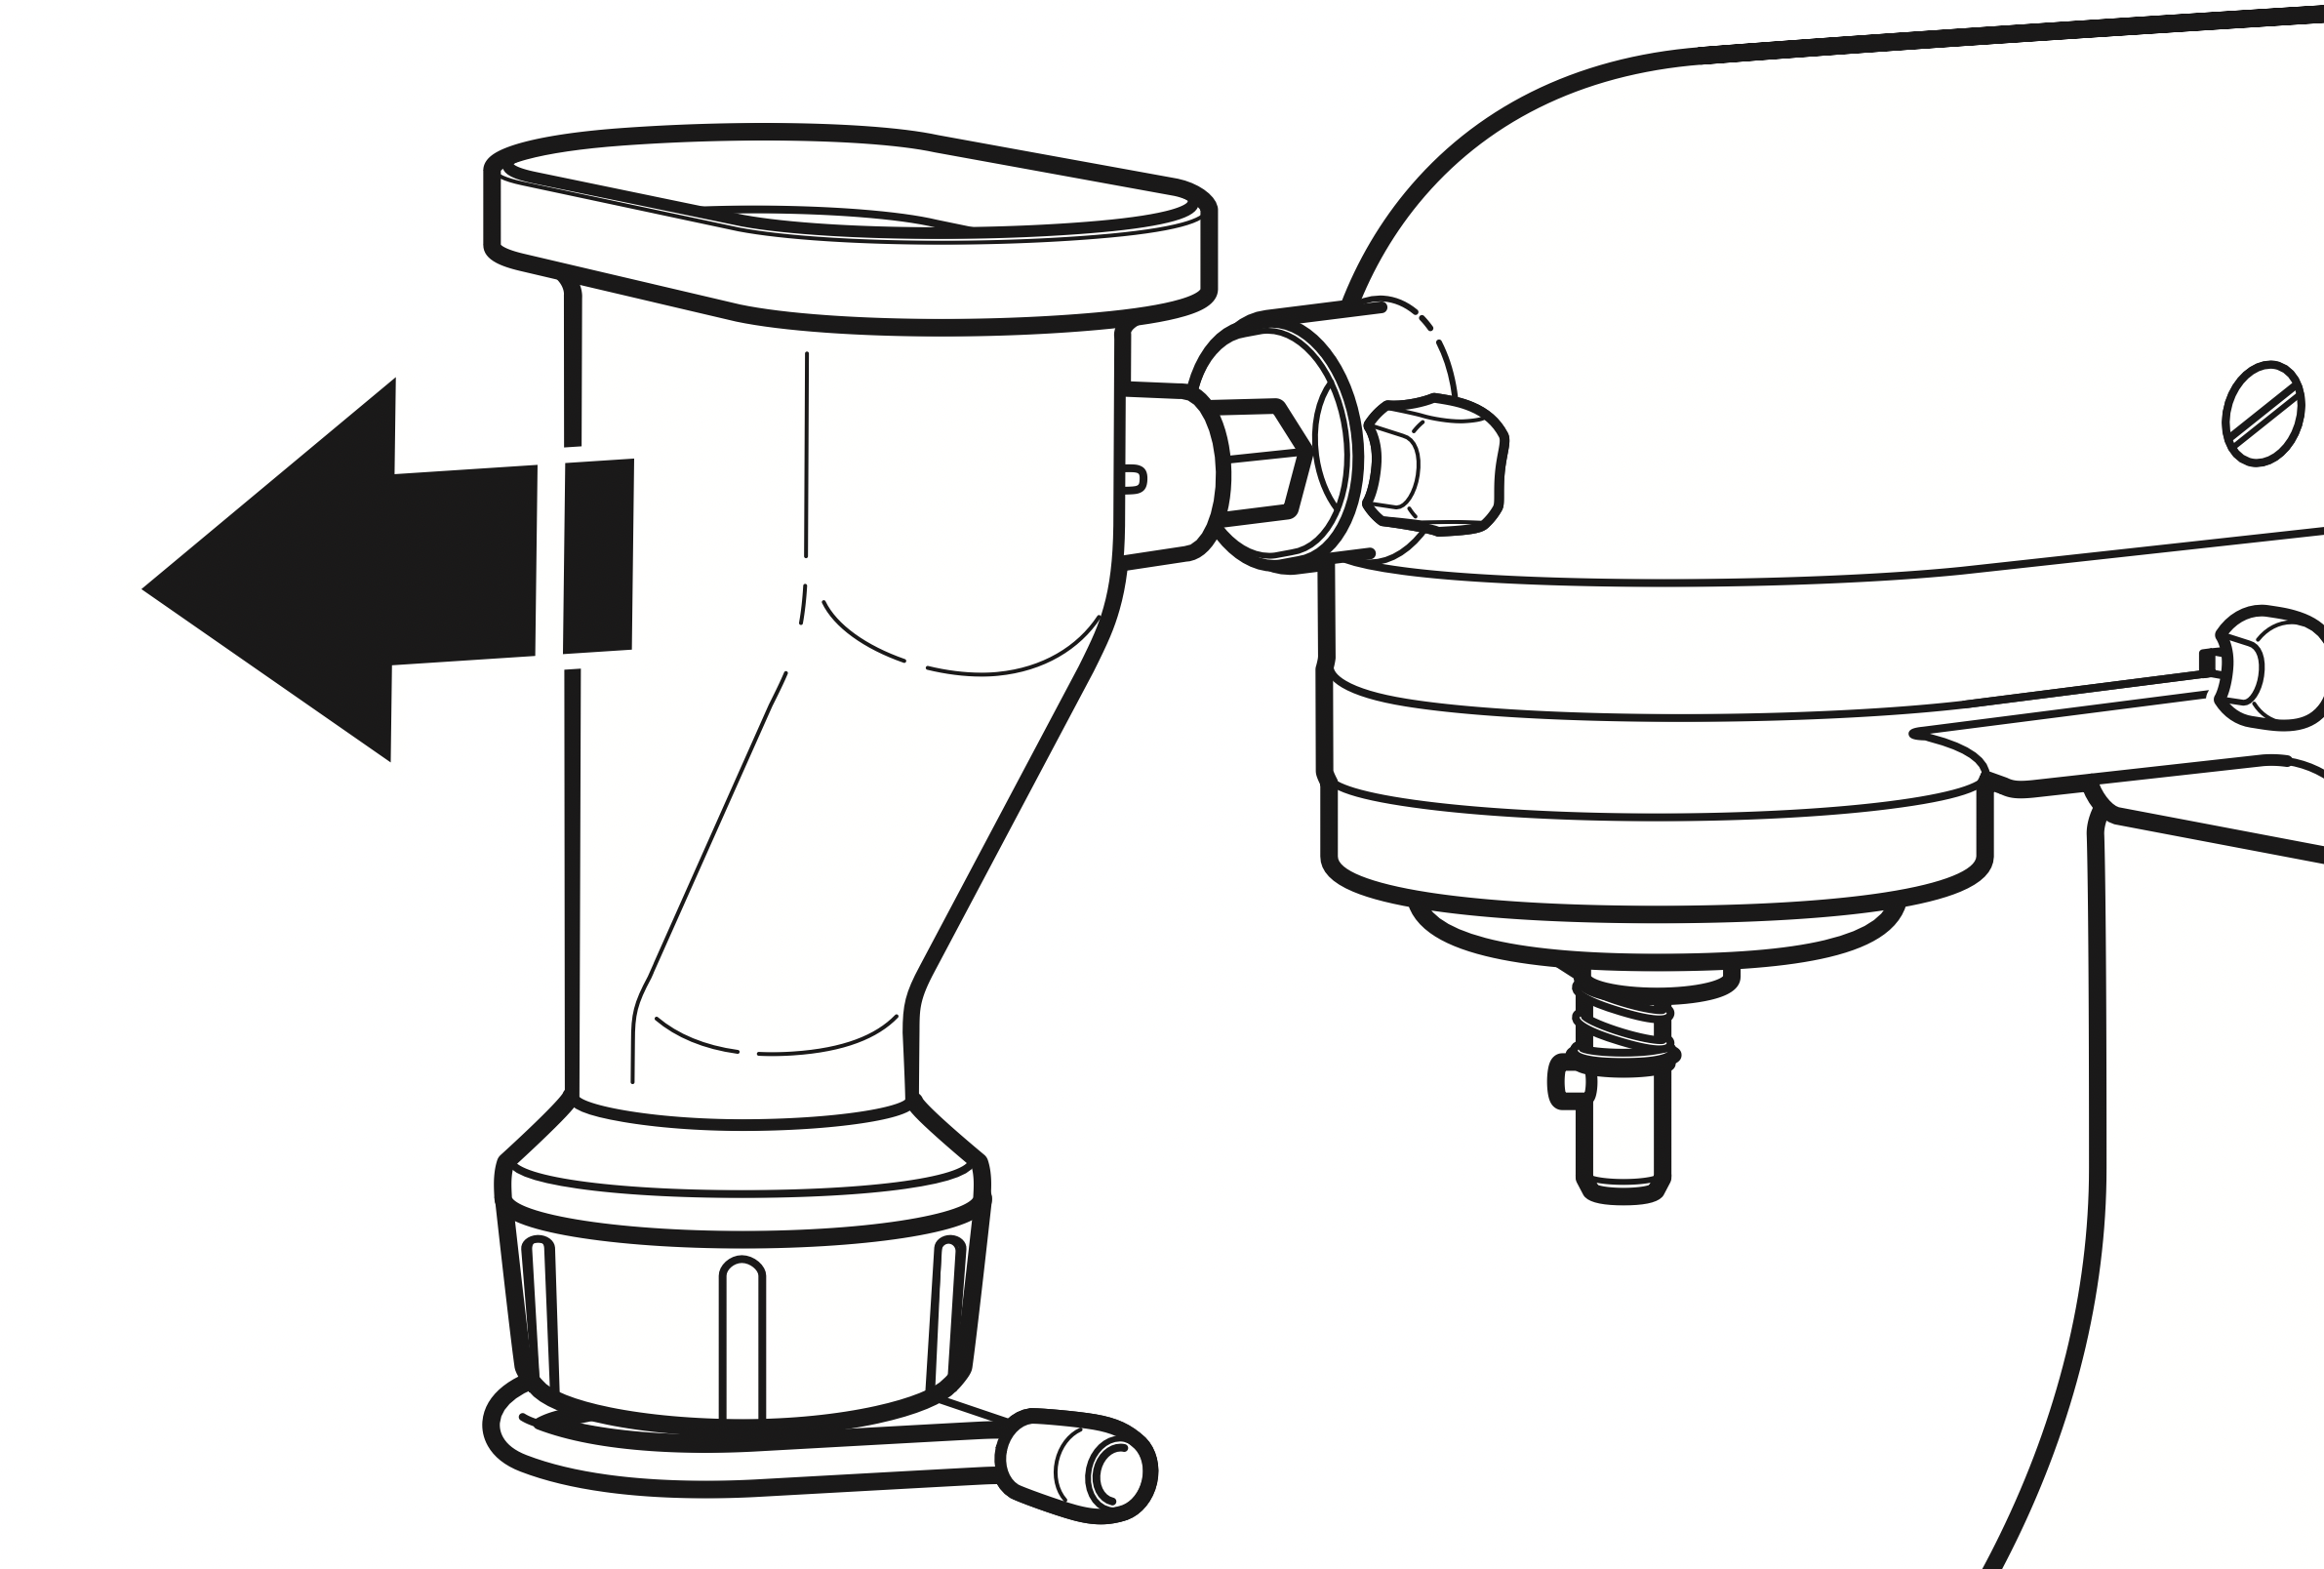
- Insert attachment shaft housing into the attachment hub, making certain the power shaft fits into the square hub socket. If necessary, rotate the Pasta Press back and forth. The pin on the attachment housing fits into the notch of the hub rim when in the proper position.
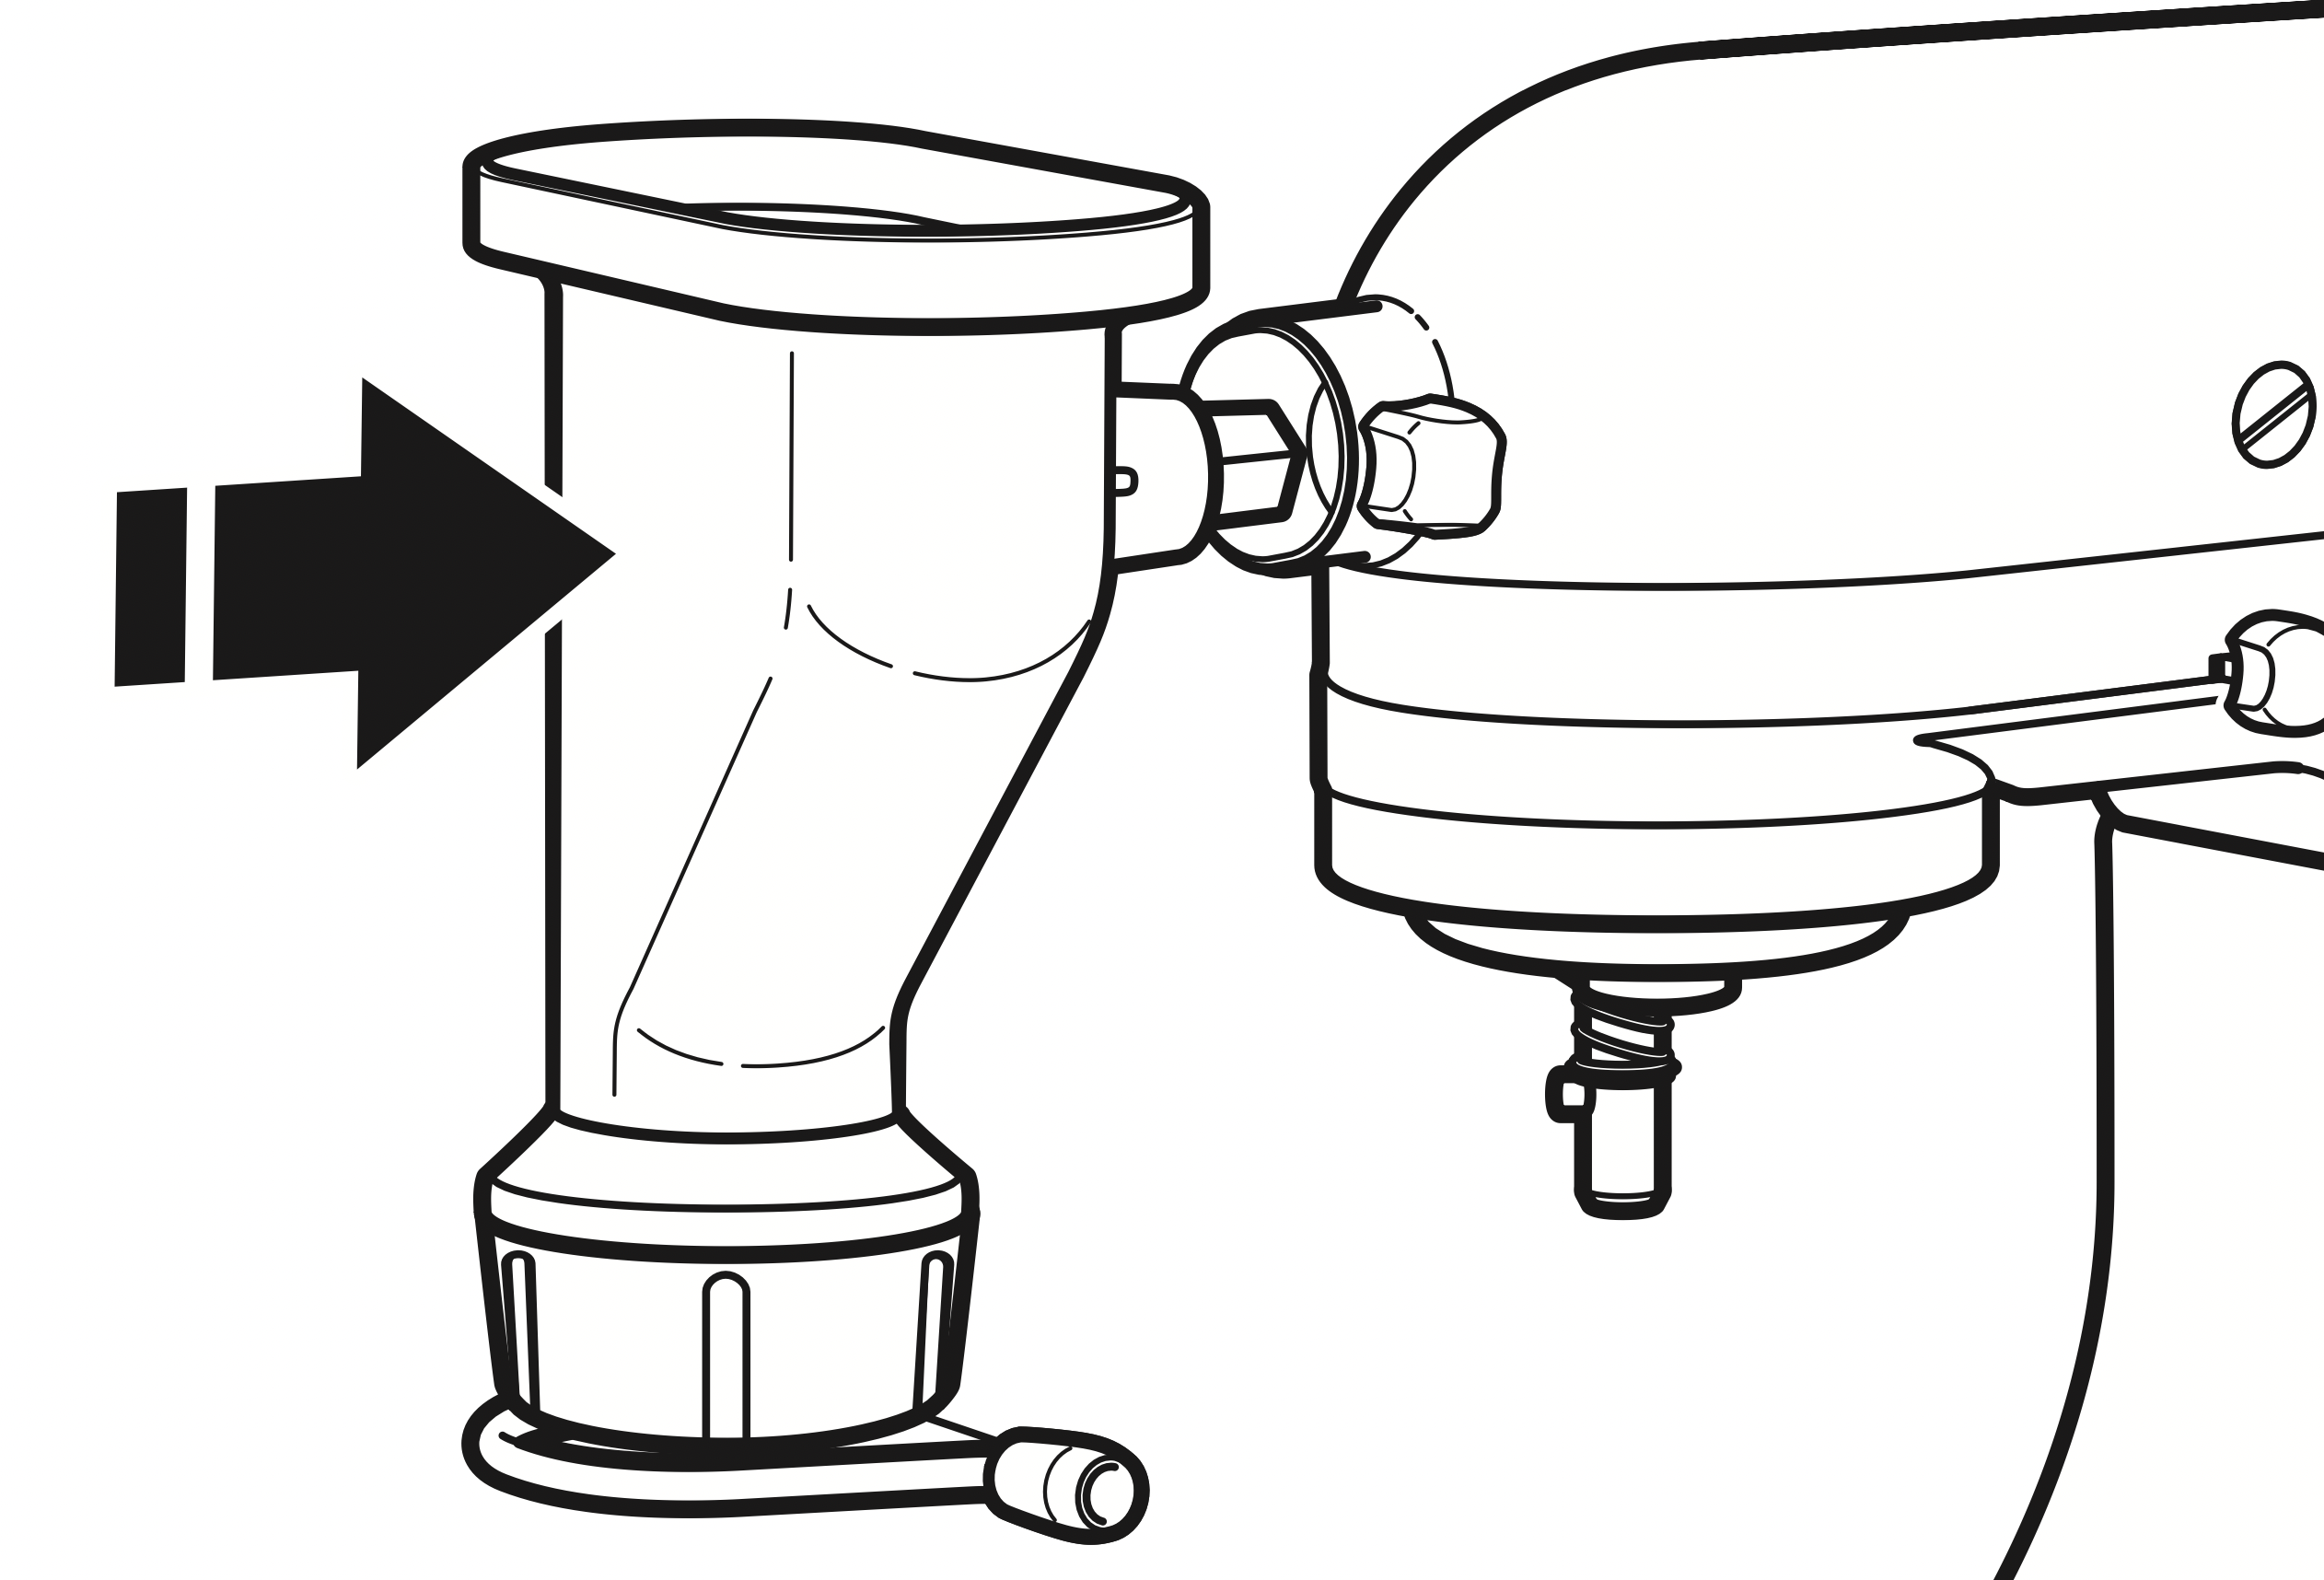
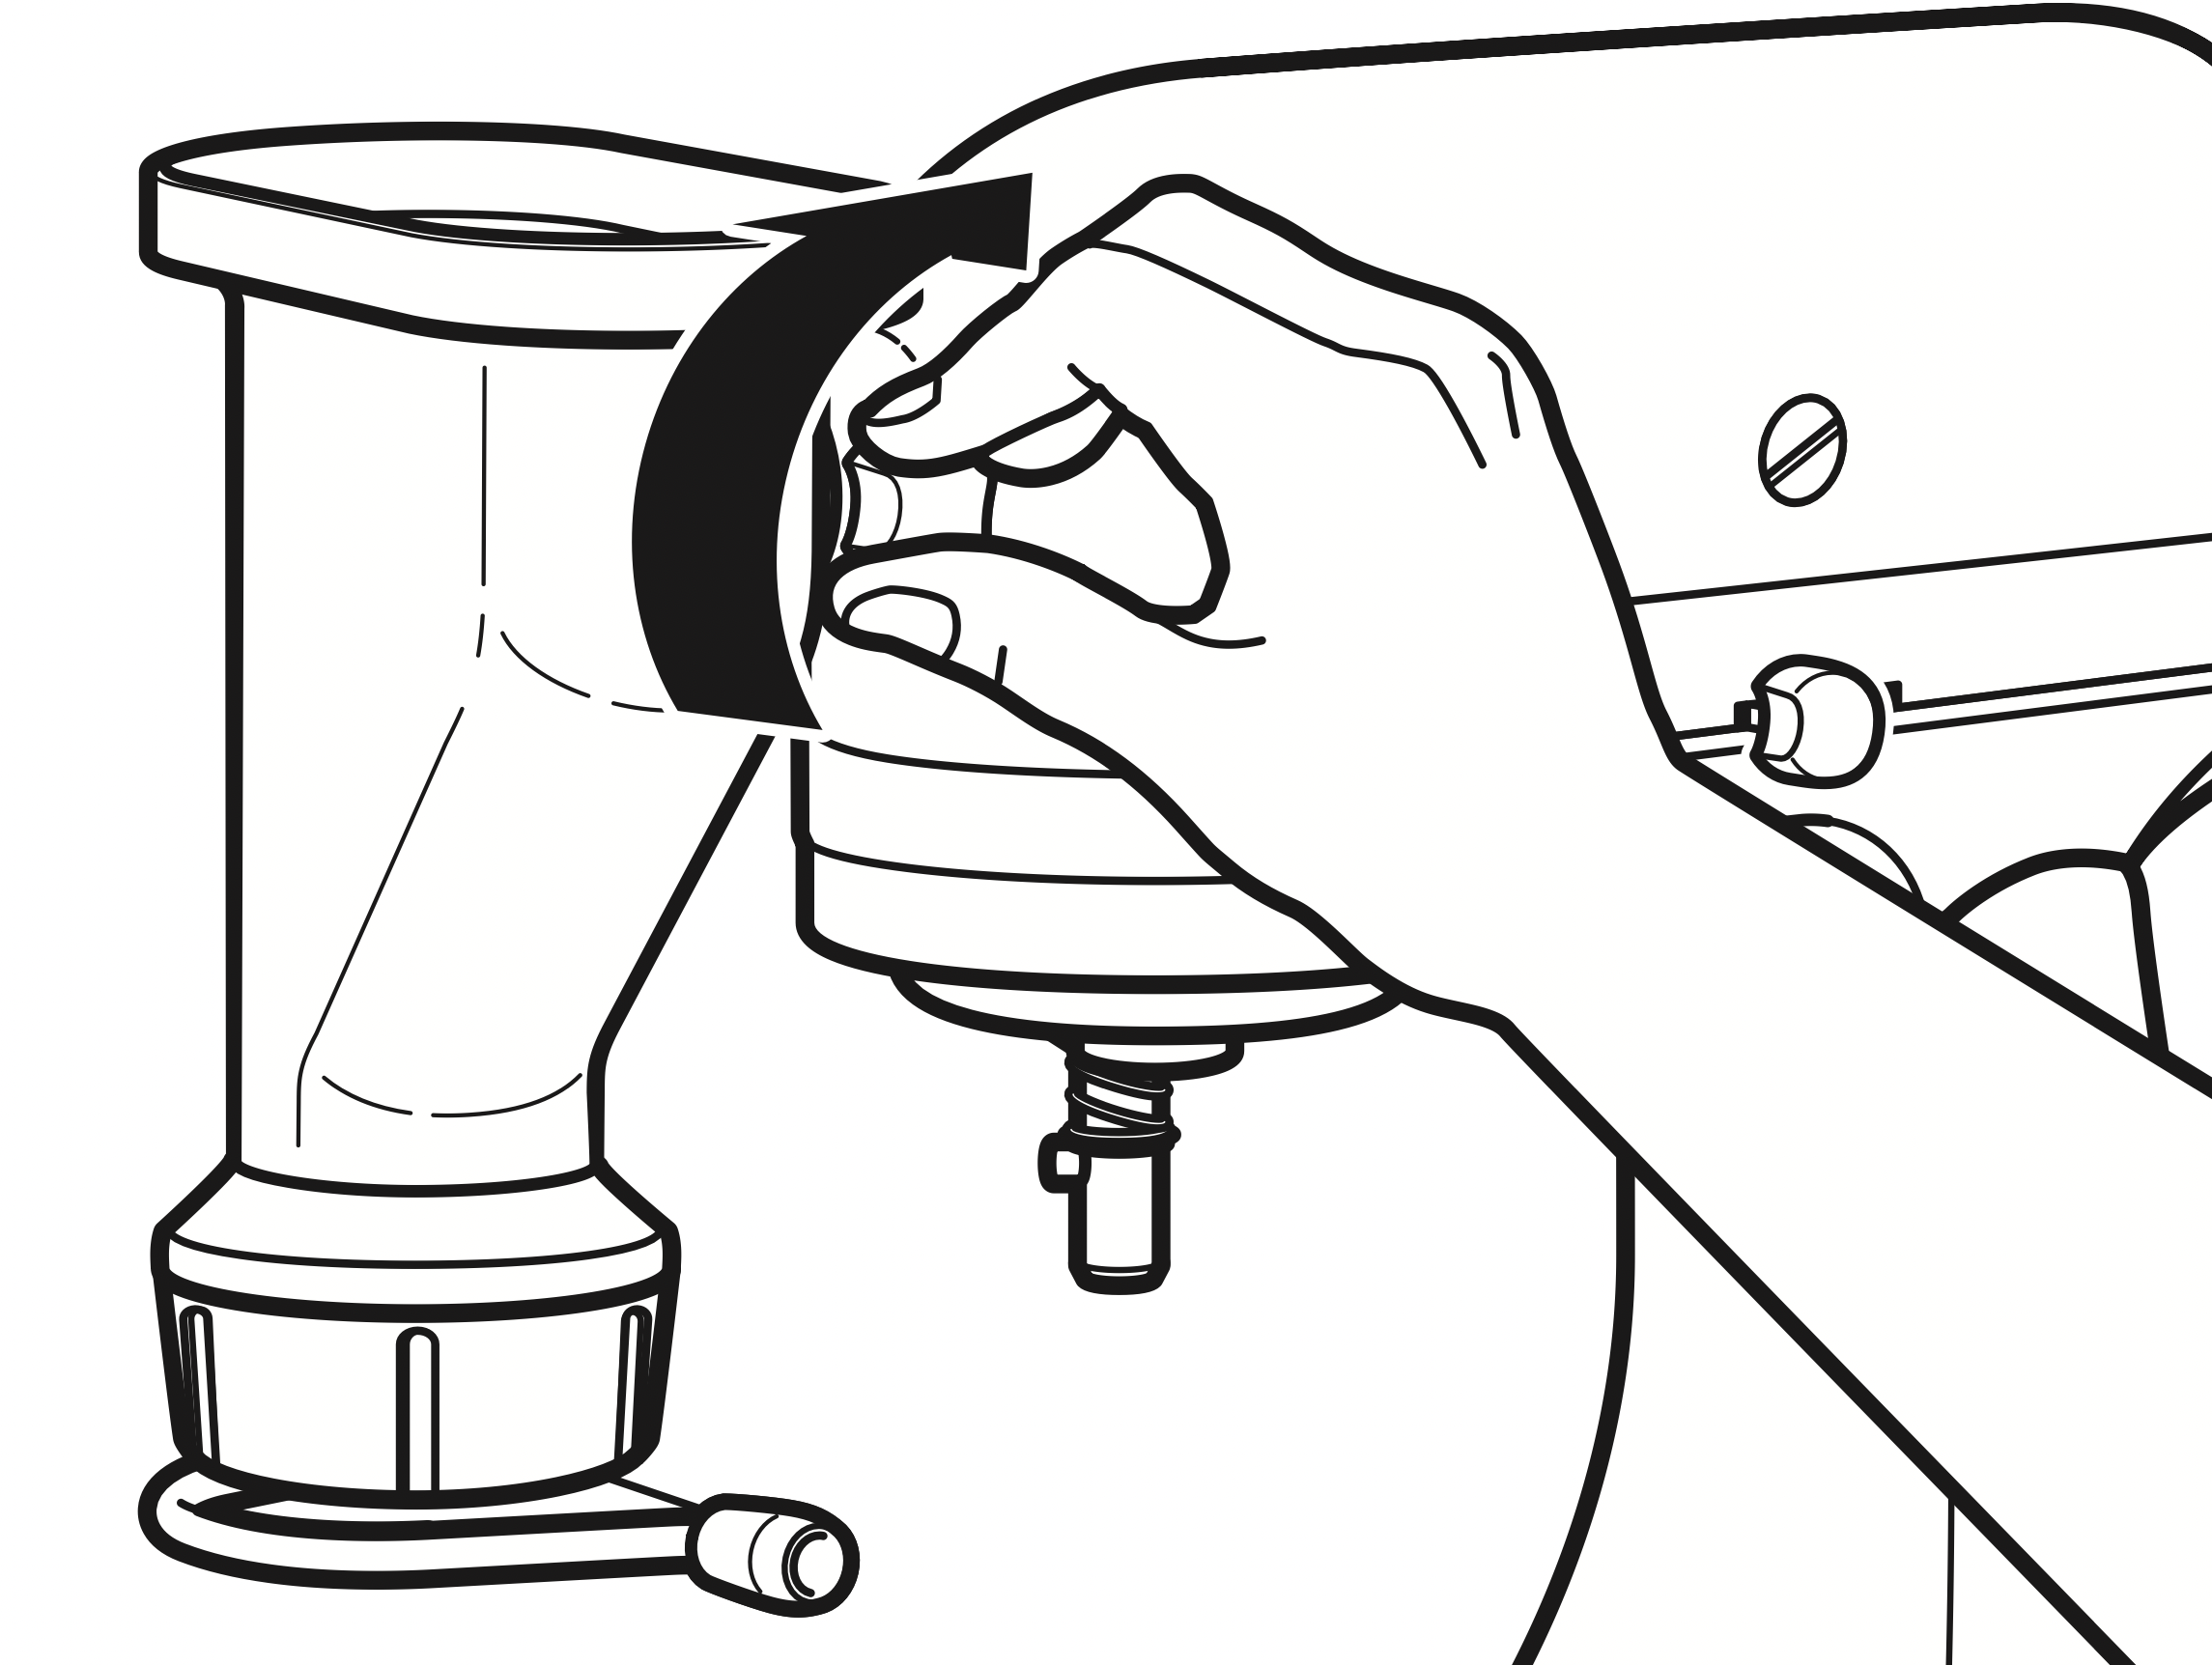
- Tighten the Stand Mixer attachment hub knob until the Pasta Press attachment is completely secured to the Stand Mixer.
MAKING PASTA
IMPORTANT: When using the Pasta Press, do not wear ties, scarves, loose clothing or long necklaces; gather long hair with a clasp.
Warning - Rotating Blade Hazard
- Always use food pusher.
- Keep fingers out of openings.
- Keep away from children.
- Failure to do so can result in amputation or cuts.
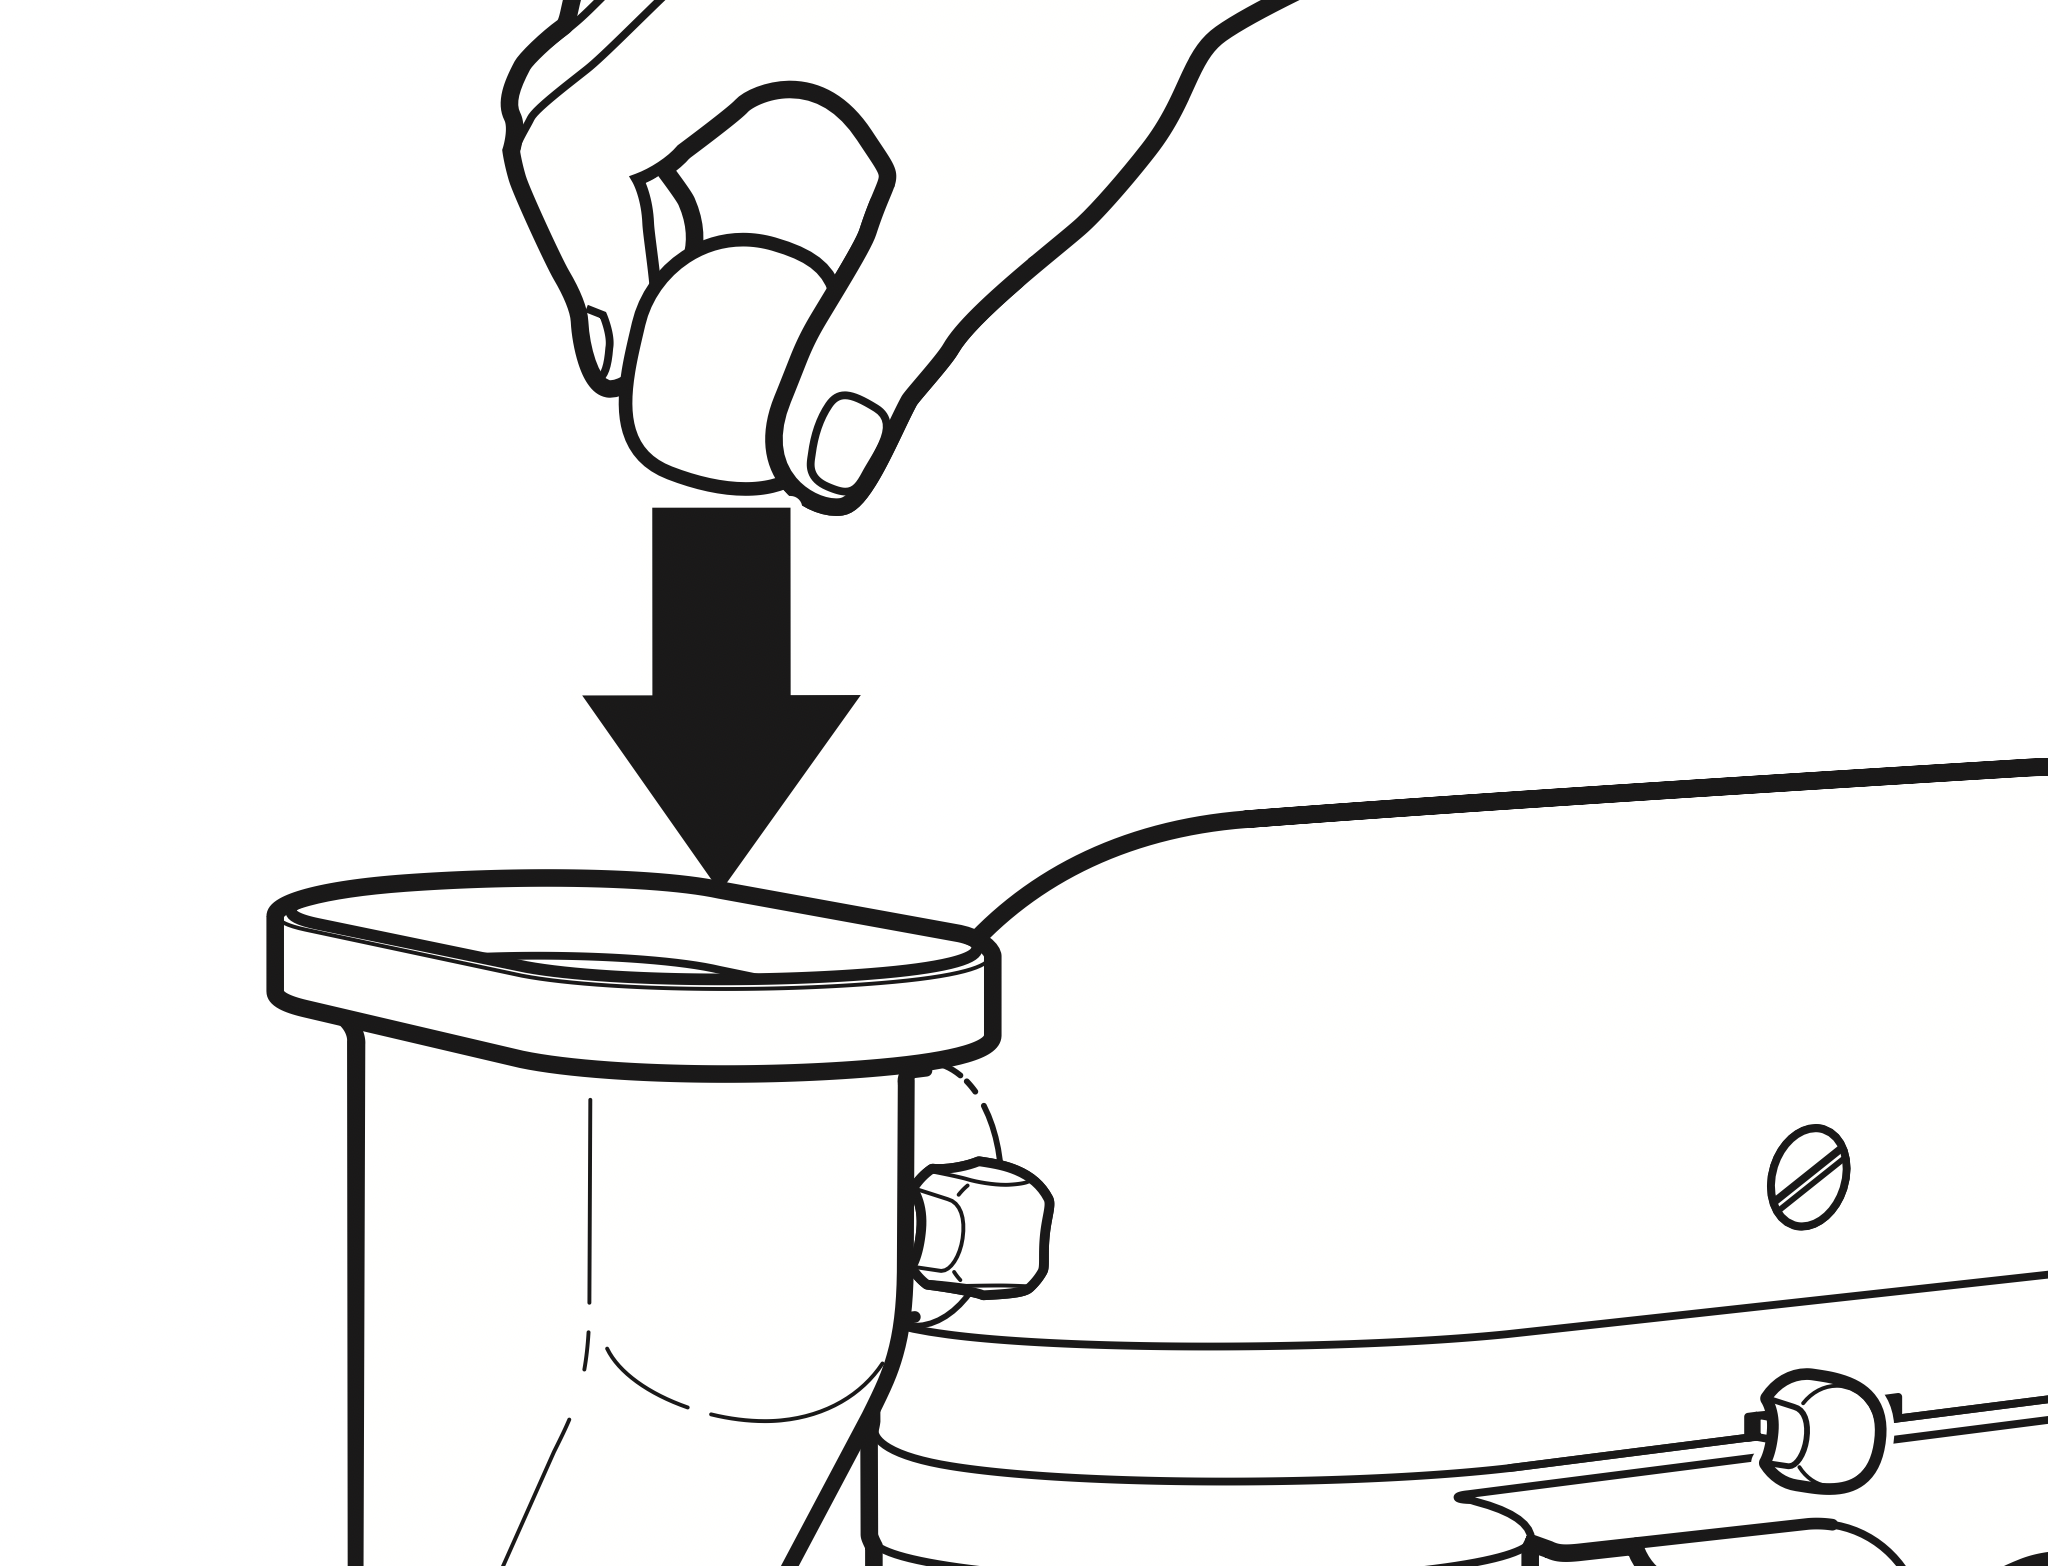
- Prepare pasta dough (see “Recipe” section). Form dough into walnutsized balls.
NOTE: The Pasta Press is designed to be used with pasta dough only. To avoid damaging your Pasta Press, do not insert anything other than pasta dough.
- Set the Stand Mixer speed, using “Choosing the right pasta plate” chart.

- Slowly feed walnut-sized balls of dough into the hopper; dough should self-feed through the auger. Wait until auger is visible before adding the next piece.
- Use the combo tool to push dough only if dough becomes caught in the hopper and no longer self feeds.

- Use the cutter to cut pasta at desired length as it exits the press. See “Choosing the right pasta plate” for recommended lengths.
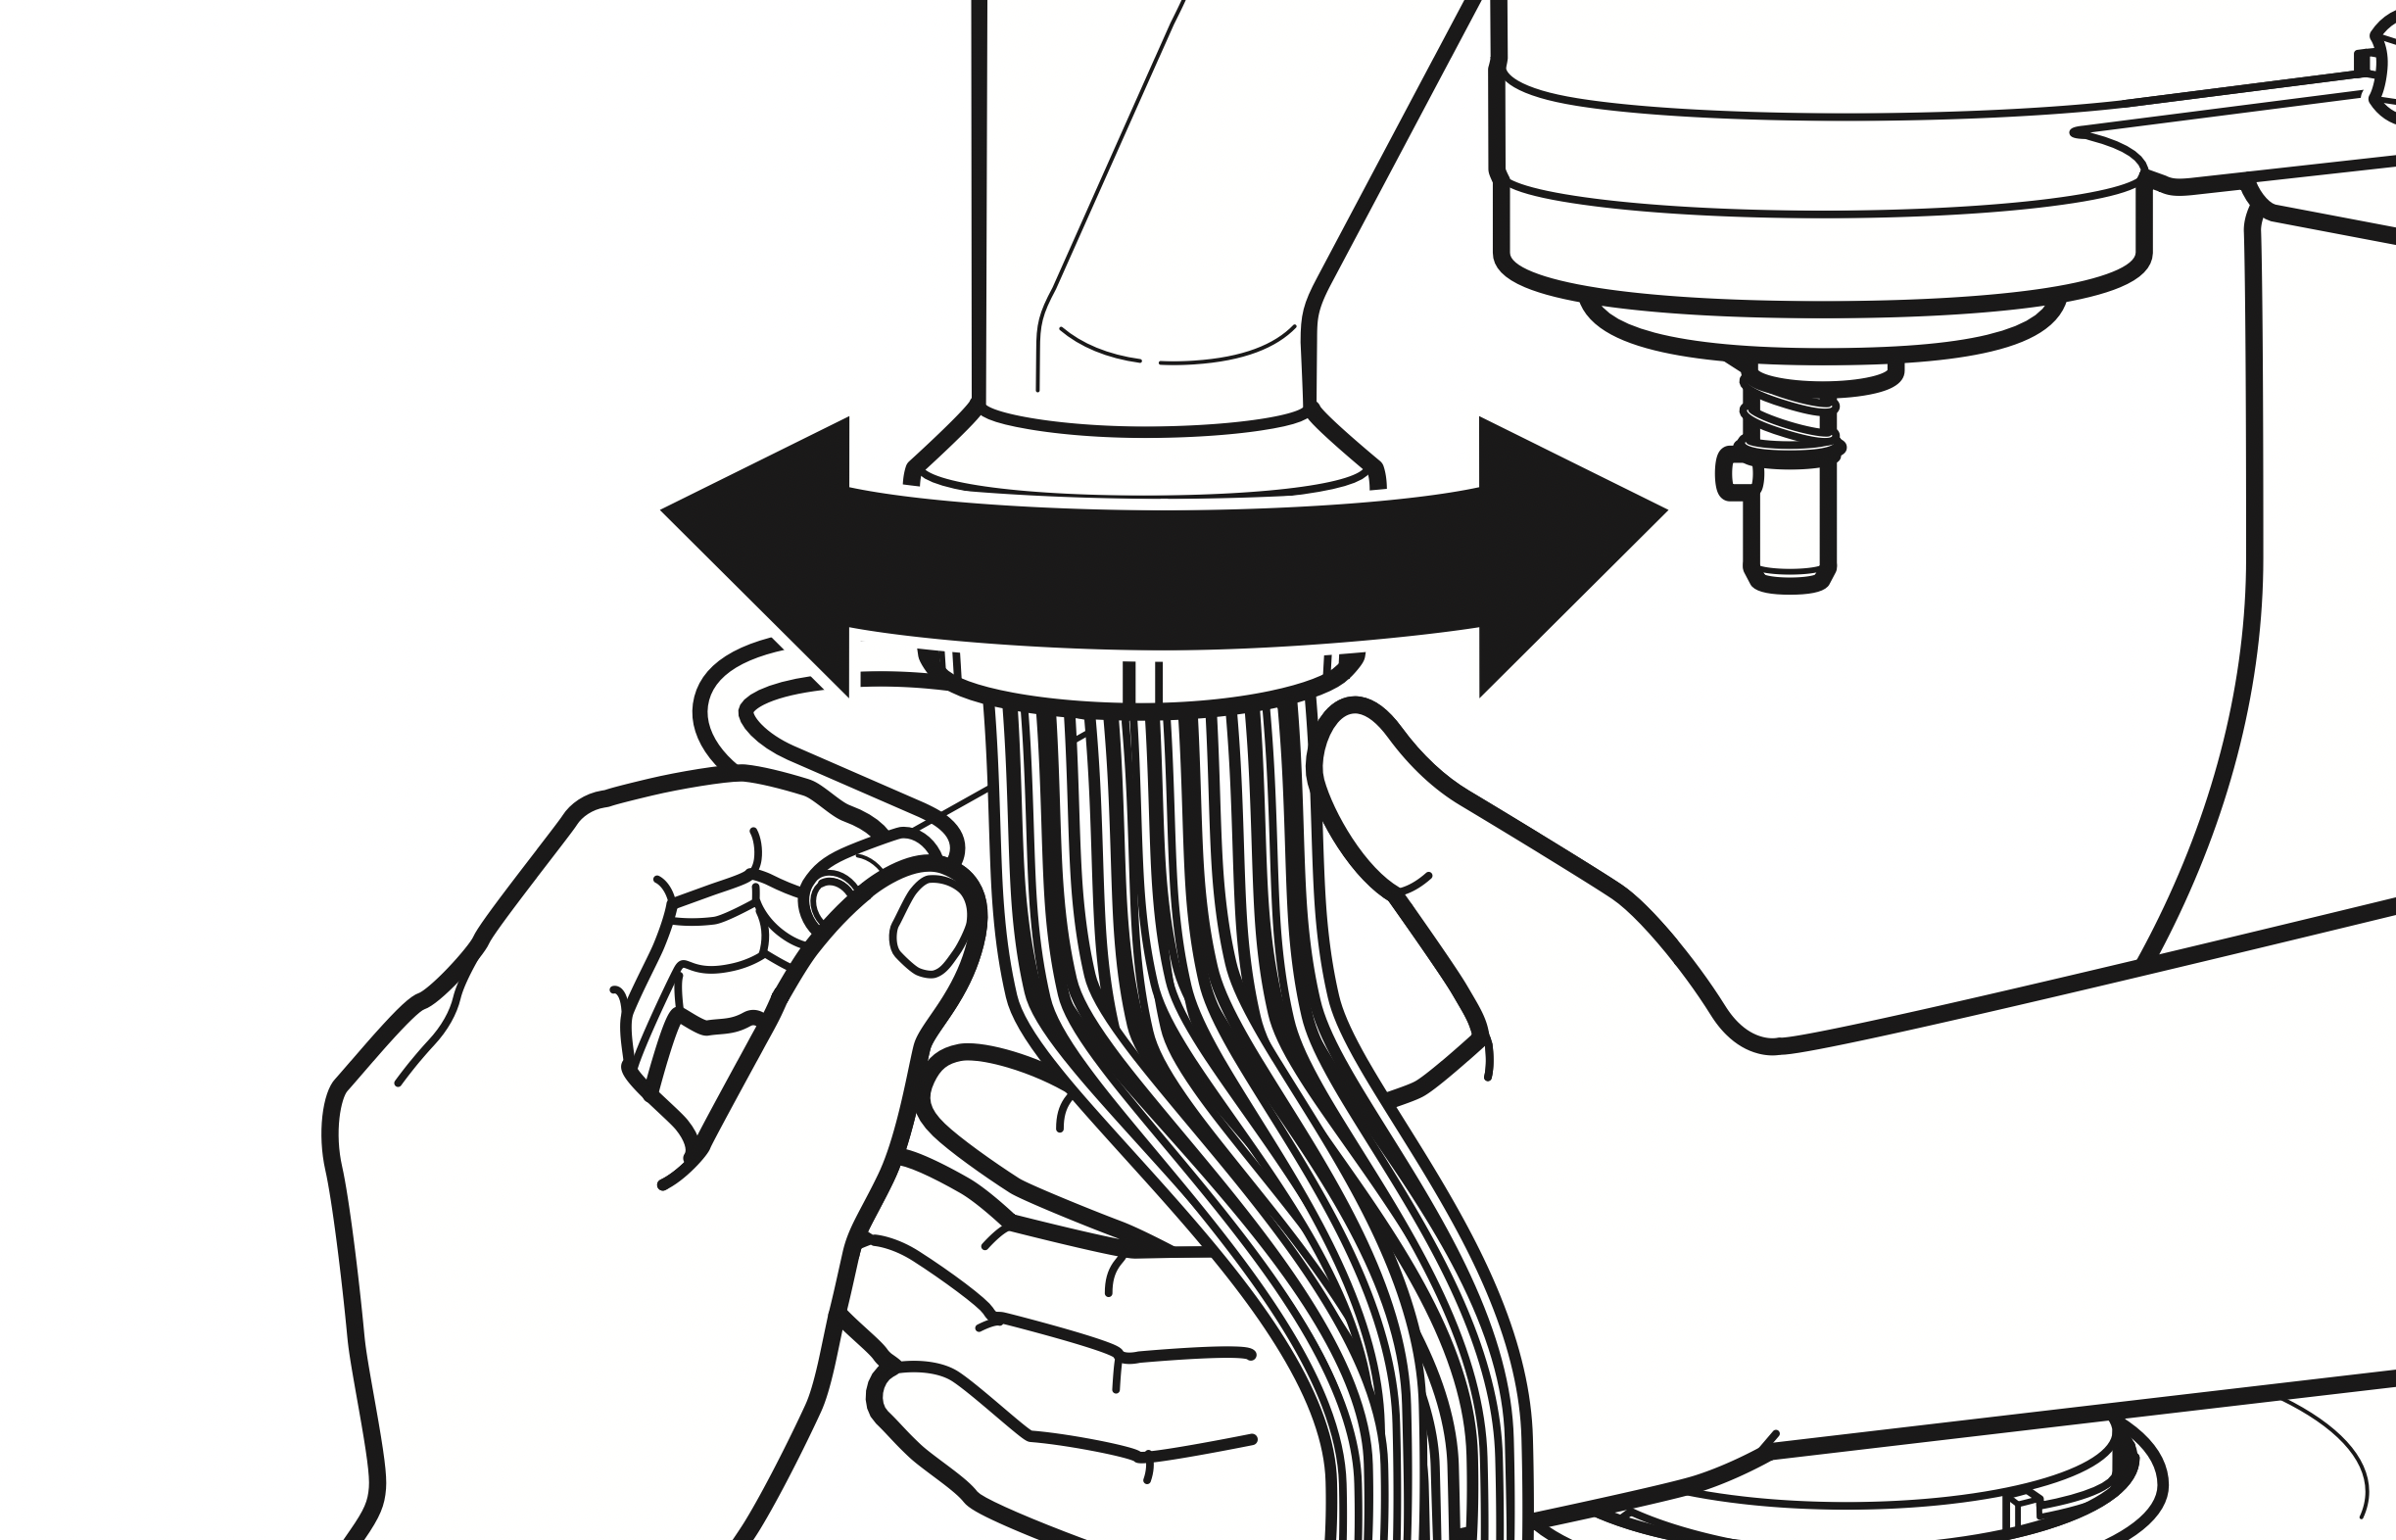
- Separate pasta after extrusion. Pasta may be cooked immediately. If drying, place long noodles on KitchenAid ® Drying Rack (KPDR), or dry in a single layer on a towel placed on a flat surface.

Warning - Food Poisoning Hazard
- Do not let foods that contain perishable ingredients such as eggs, dairy products, and meats remain unrefrigerated for more than one hour.
- Doing so can result in food poisoning or sickness.
DISASSEMBLING THE PASTA PRESS
- Turn Stand Mixer OFF and unplug.
- Remove the Pasta Press attachment from the Stand Mixer.
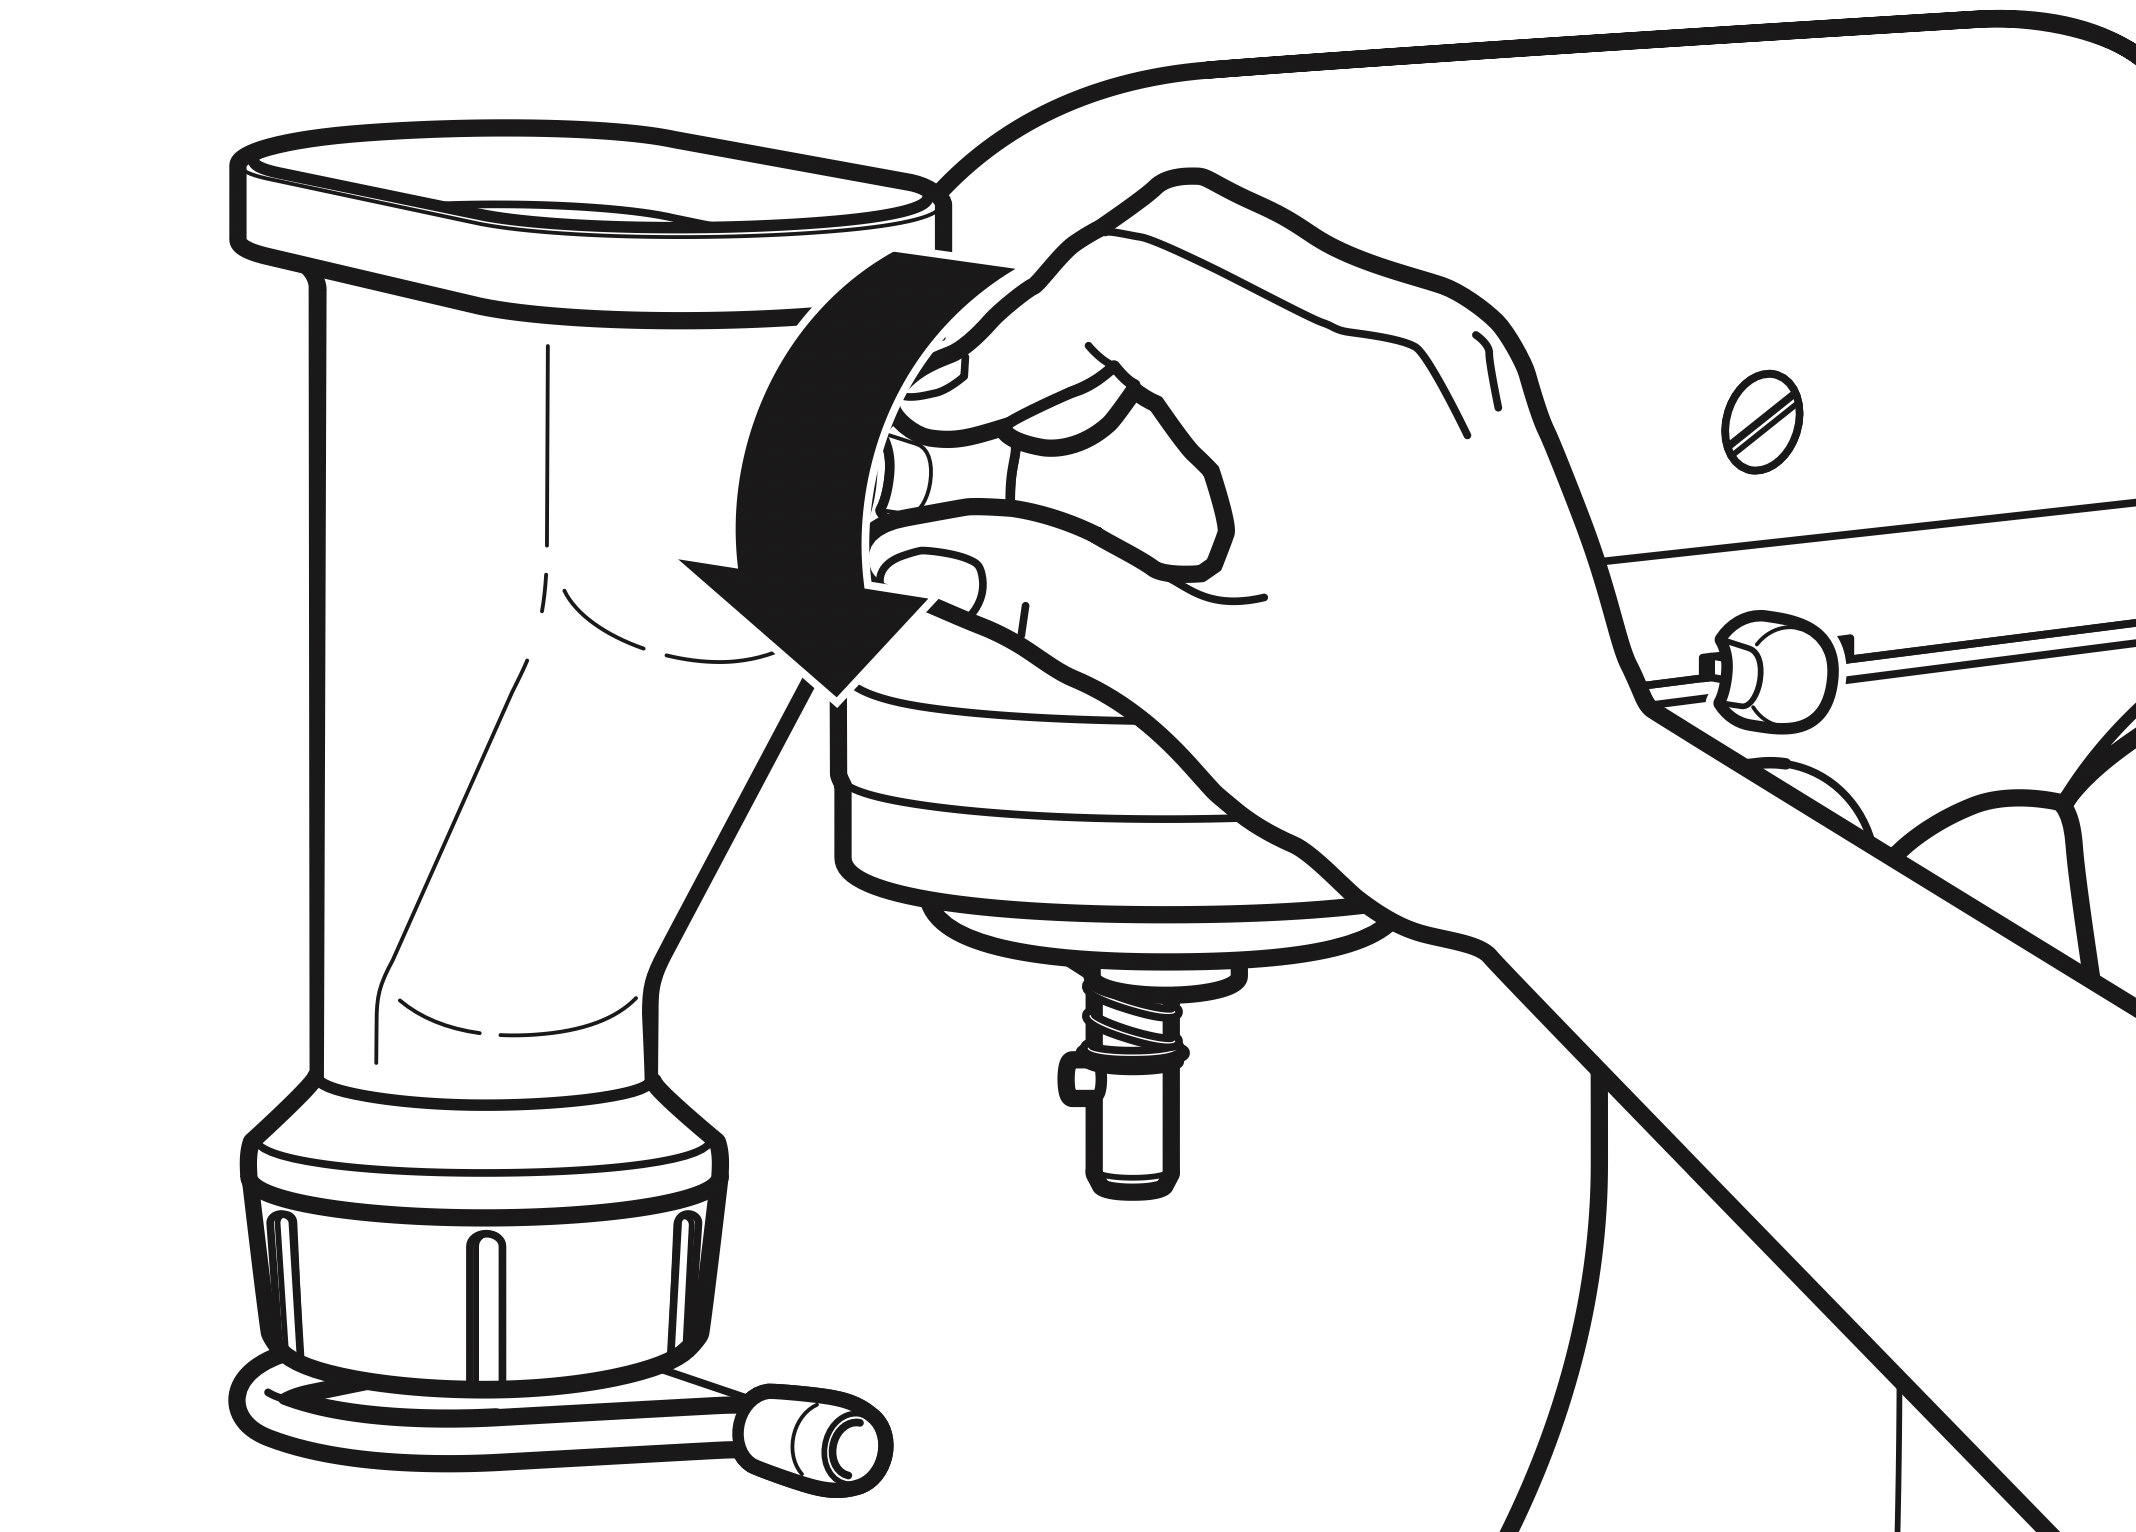
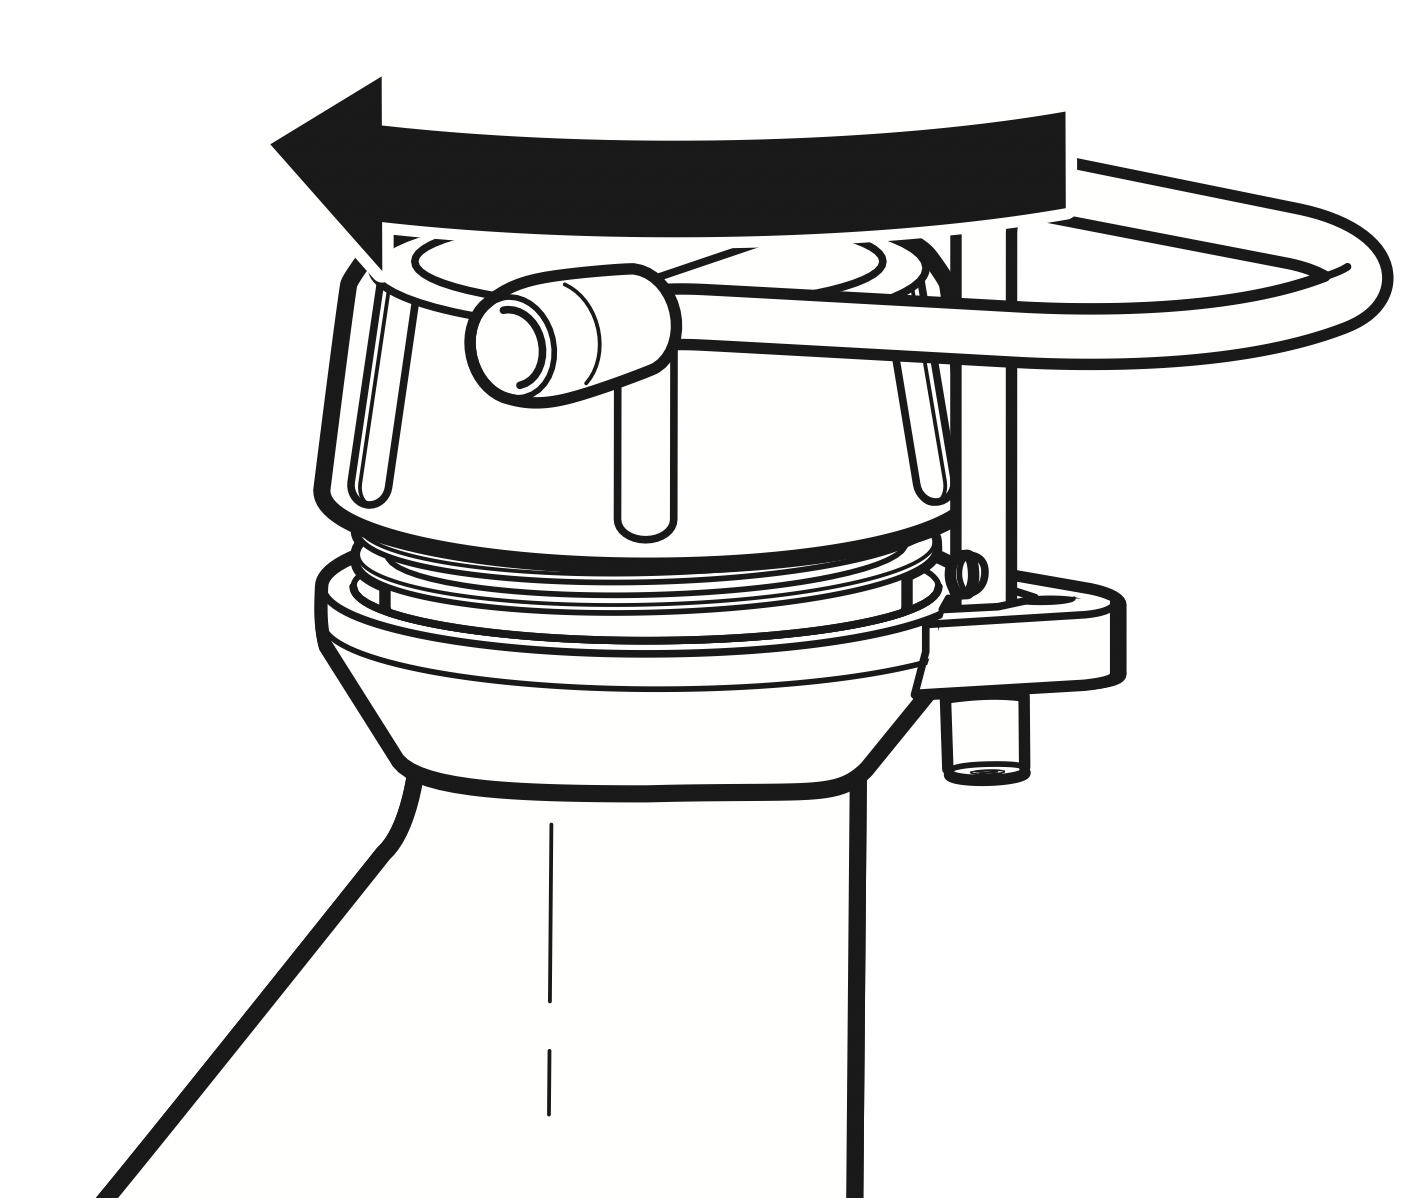
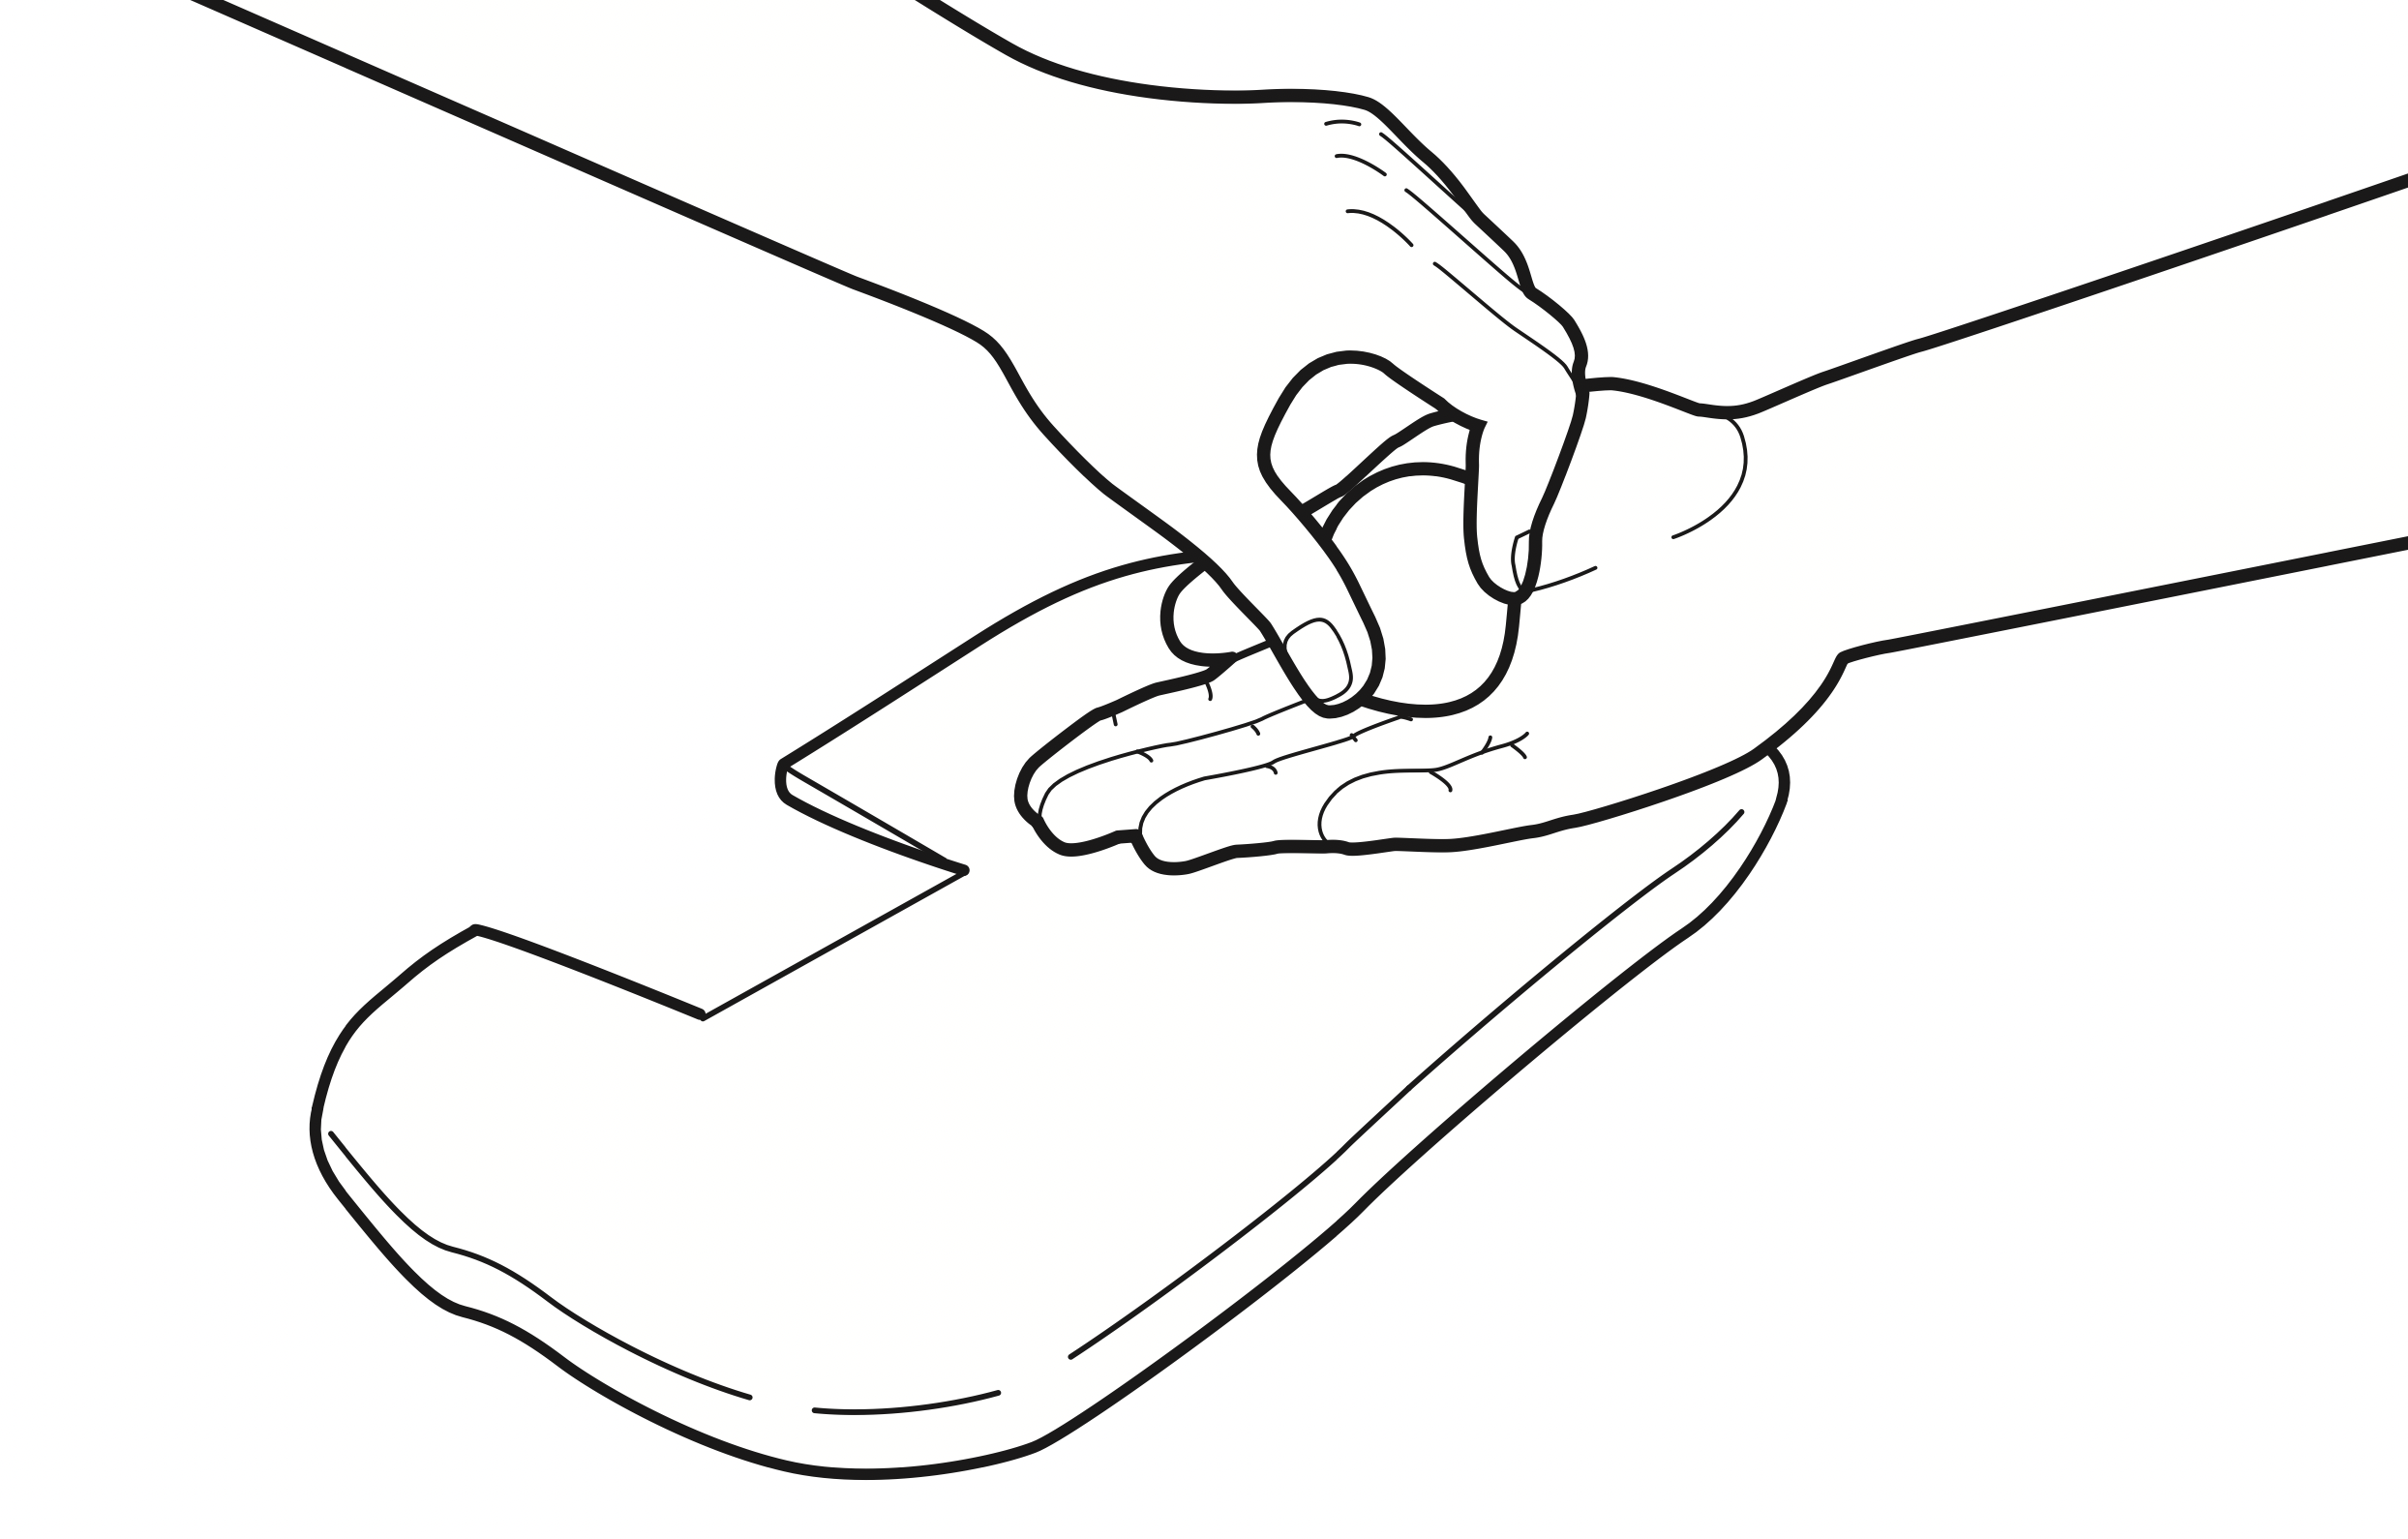
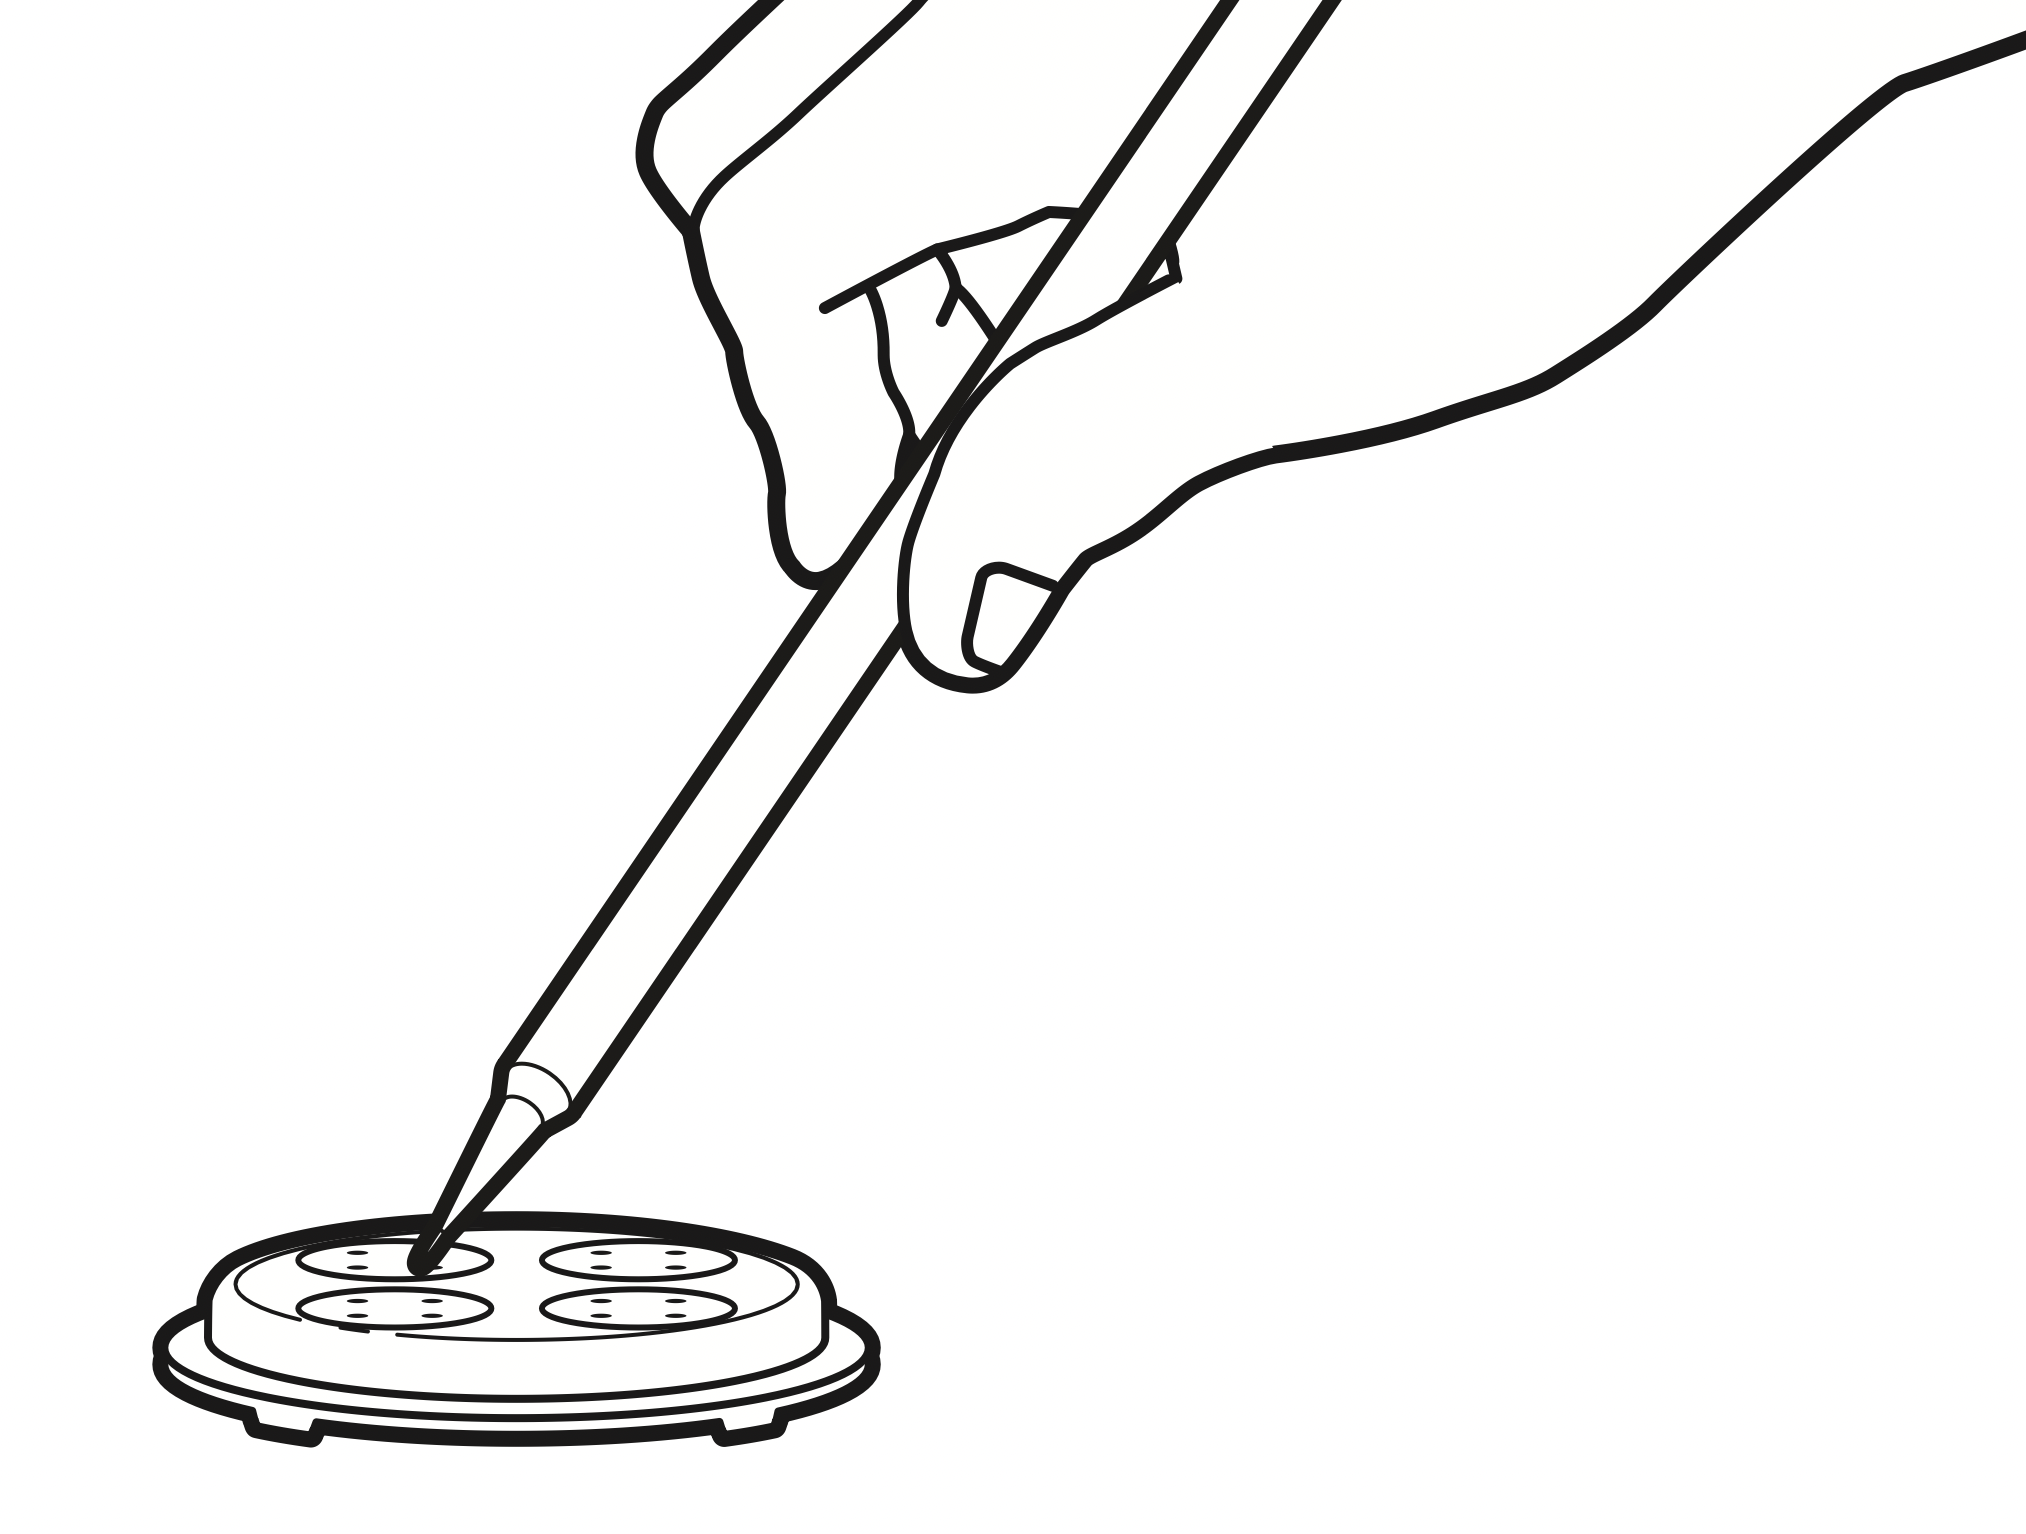
- Unscrew the pasta ring to remove. If pasta ring is too tight to remove by hand, slip the wrench side of the combo tool over the grooves, and turn as shown. Once the pasta ring is off, pop out the pasta plate.
- Use the combo tool hook to pull the auger from the Pasta Press housing.

OPTIONAL: If desired, attach the next pasta plate, using the directions in the “Attaching the Pasta Press” section.

NOTE: Allow Stand Mixer to rest for at least 1 hour after extruding 2 consecutive pasta dough recipes.
IMPORTANT: After removing the auger from the press housing, be sure to clean any dried dough from the auger. See “Care and Cleaning” for details.
CARE AND CLEANING
CLEANING THE PASTA ATTACHMENT AND ACCESSORIES
These accessories are designed to be used with pasta dough only. To avoid damaging your Pasta Press, do not insert anything other than pasta dough.
IMPORTANT: Do not use metal objects, other than the provided cleaning tool, to clean out the Pasta Press. Do not wash housing, cutter, and pasta plates in the dishwasher or immerse in water or other liquids. The housing, cutter, and pasta plates should be hand washed.
- Turn Stand Mixer OFF and unplug.
- Completely disassemble Pasta Press. Use the directions from the “Disassembling the Pasta Press” section.
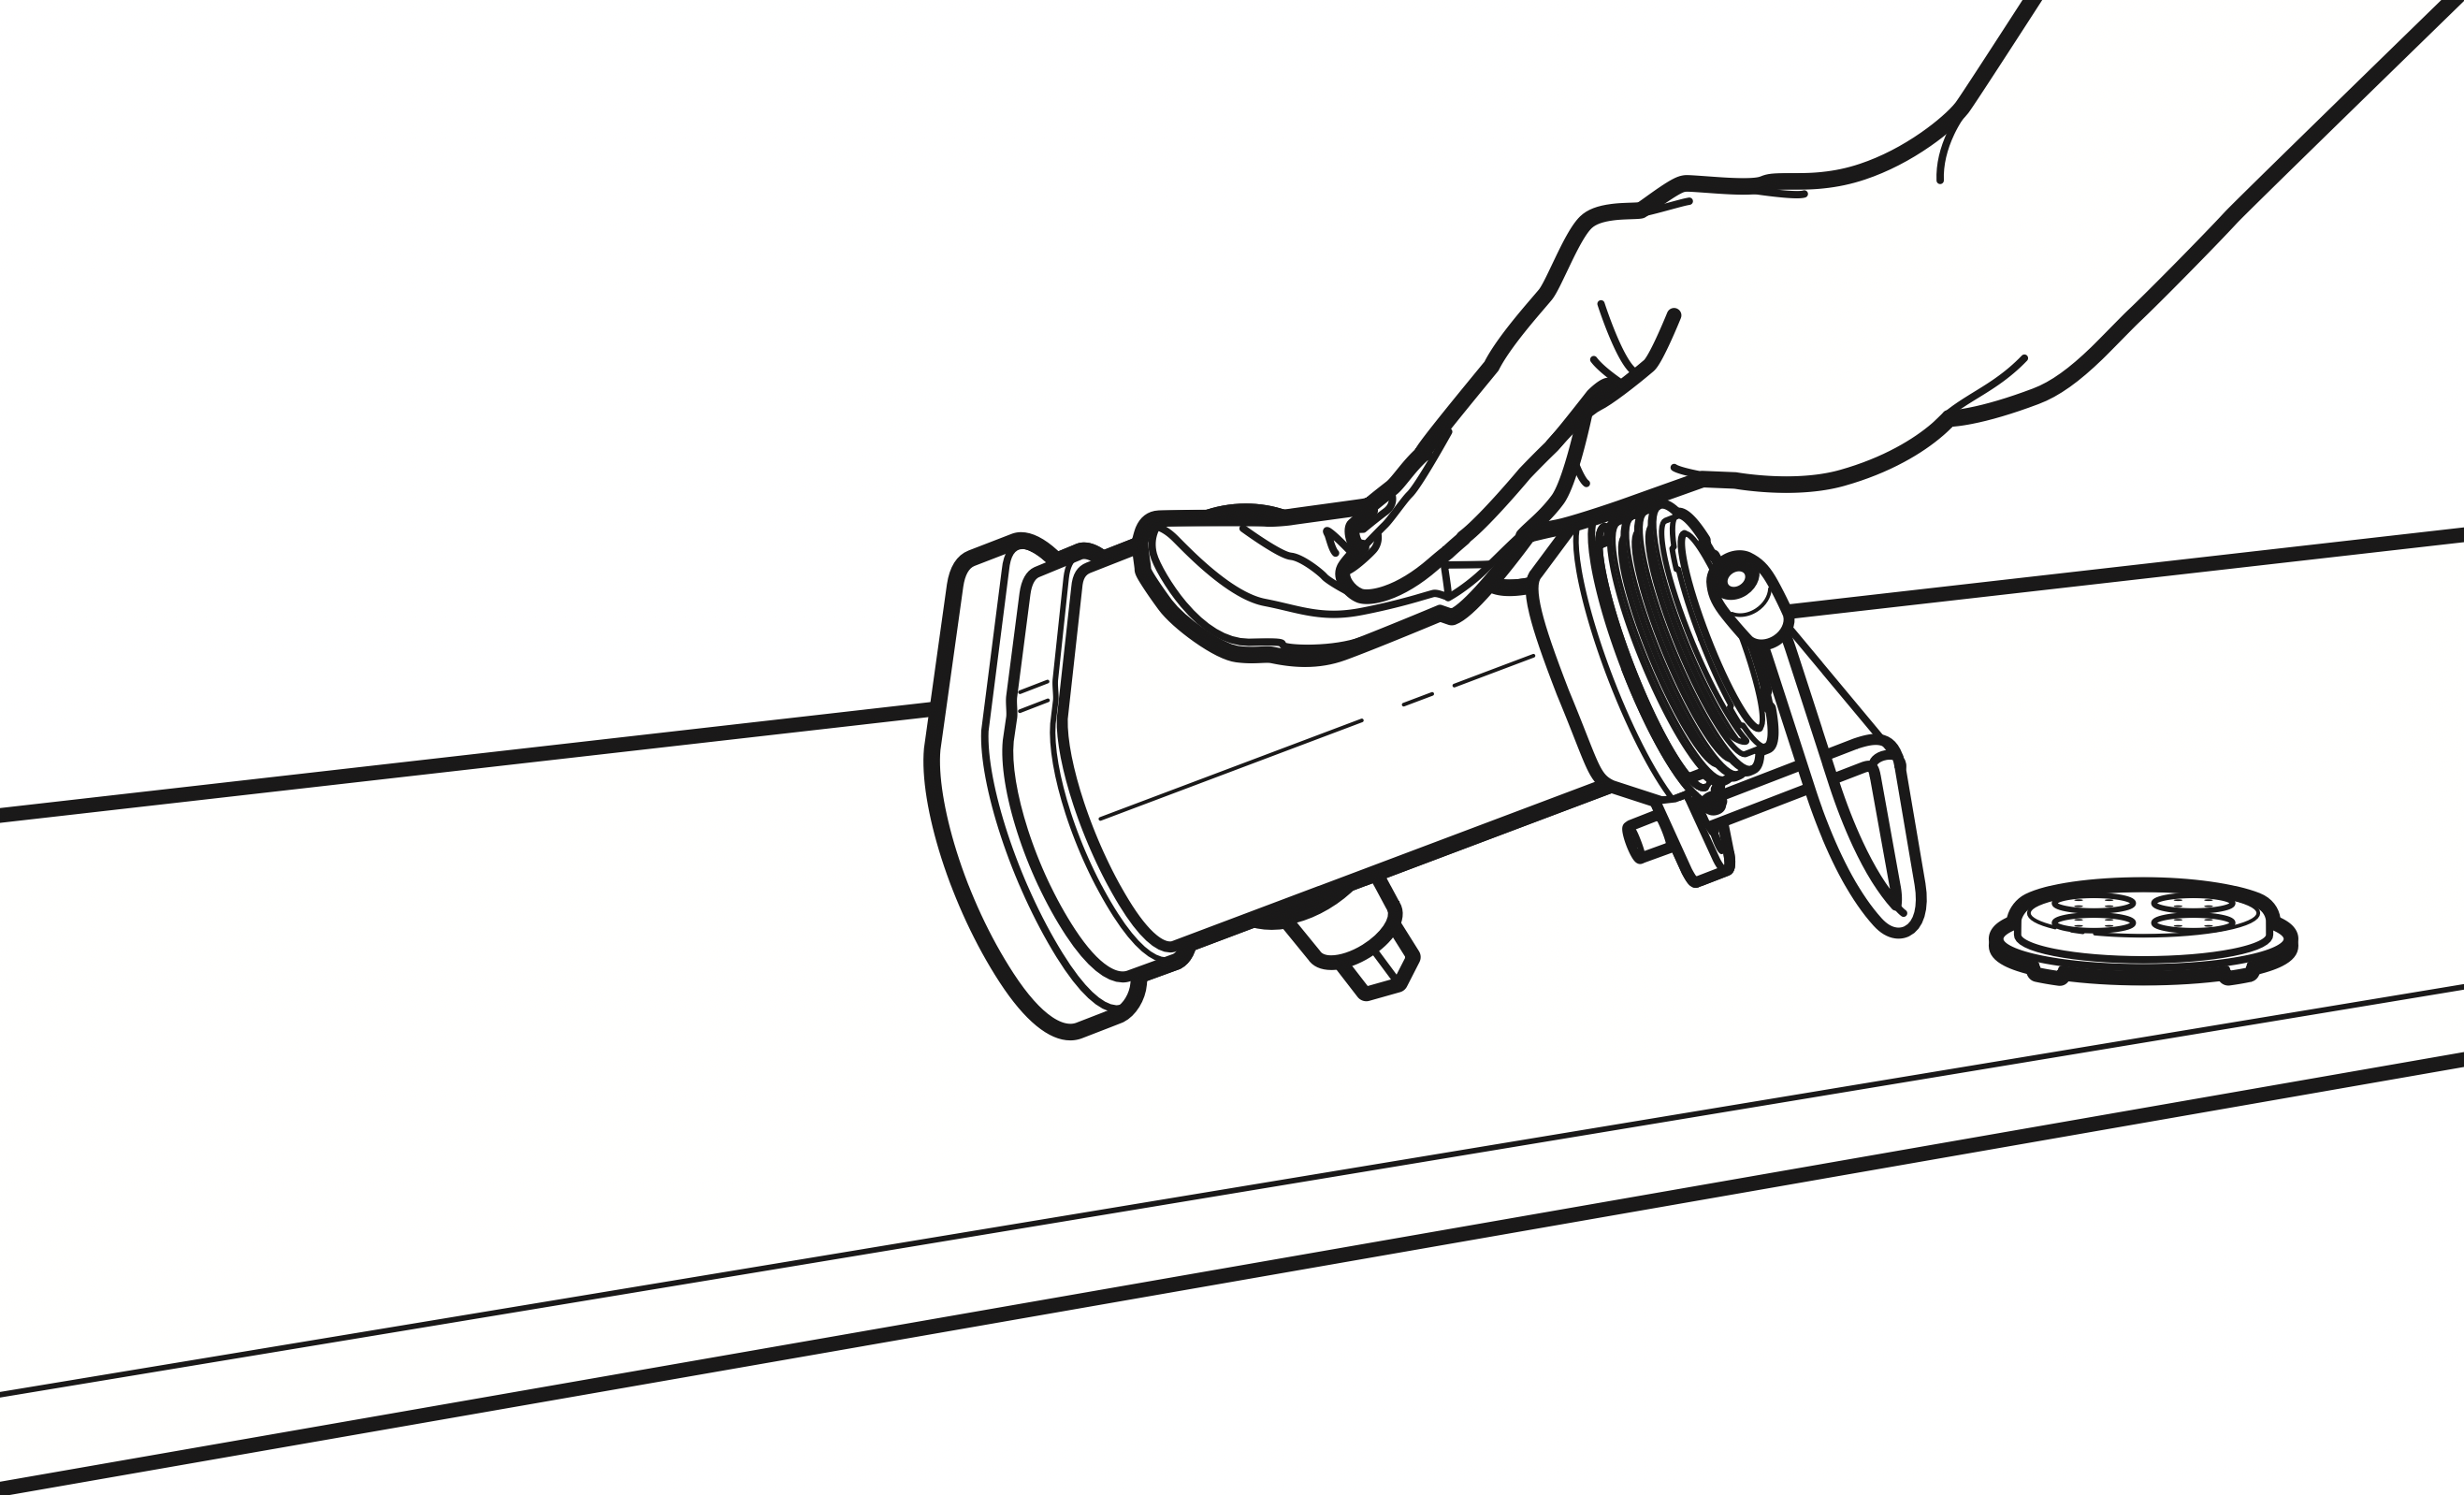
- Remove completely dried dough with the cleaning tool.
- Clean the Pasta Press housing, cutter, and pasta plates by hand only. Wash with a soft, damp cloth. Dry thoroughly with a soft dry cloth. Do not immerse in water or other liquids. Do not wash in the dishwasher.
- Wash the pasta ring, auger and combo tool by hand with a soft cloth, in warm sudsy water; or wash in the top rack of the dishwasher.

TROUBLESHOOTING
Warning - Electrical Shock Hazard
- Plug into a grounded 3 prong outlet.
- Do not remove ground prong.
- Do not use an adapter.
- Do not use an extension cord.
- Failure to follow these instructions can result in death, fire, or electrical shock.
If your Stand Mixer should malfunction or fail to operate while using the Pasta Press attachment, please check the following:
- Did you use the correct speed for the pasta plate as suggested in the “Choosing the right pasta plate” chart?
- Did you assemble and attach the Pasta Press attachment properly as shown in the “Using the Pasta Press” section?
- Did you follow the usage instructions as described in the “Using the Pasta Press” section?
- Is your dough prepared according to the recipe?
- Is the Stand Mixer plugged in?
- Is the fuse in the circuit to the Stand Mixer in working order? If you have a circuit breaker box, be sure the circuit is closed.
- Turn off the Stand Mixer for 10-15 seconds, then turn it back on. If the Stand Mixer still does not start, allow it to cool for 30 minutes before turning it back on.
If the problem is not due to one of the above items, see the “Arranging for Service” section in the “Warranty”.
Do not return the Pasta Press attachment or the Stand Mixer to the retailer, as they do not provide service.