When using electrical appliances, basic safety precautions should always be followed, including the following:
Read all instructions.
To protect against risk of electrical shock, do not put Stand Mixer in water or other liquid.
Always make sure interlock lid is securely closed before Stand Mixer motor is turned on. Do not remove the lid while Food Processor attachment is in operation.
Be sure to turn the Stand Mixer OFF (and detach Food Processor attachment from Stand Mixer) after each use of the Food Processor attachment and before cleaning. Make sure the motor stops completely before disassembling.
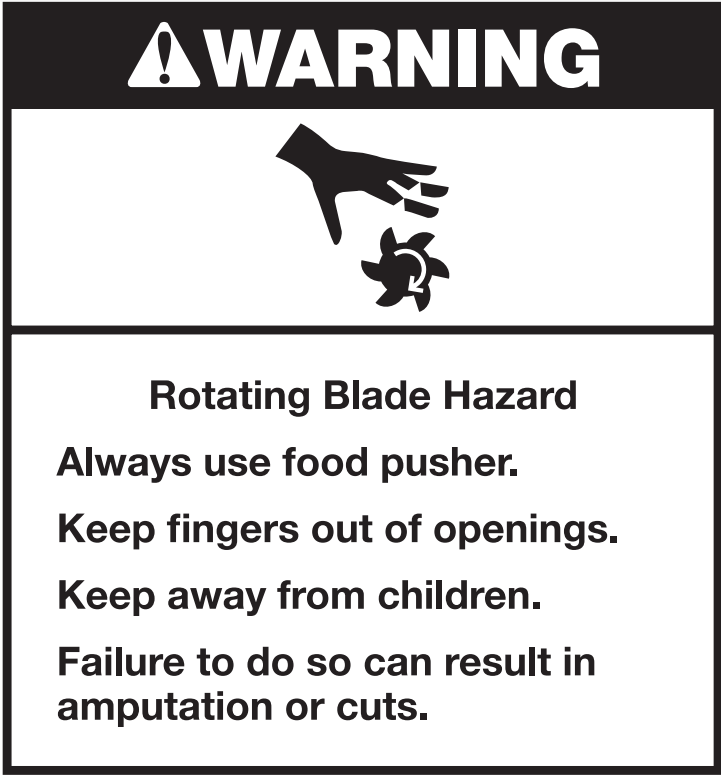
Do not put your fingers or other objects into the Food Processor attachment opening or discharge chute while it is in operation. Never feed by hand. Always use the pusher. If food becomes lodged in opening or discharge chute, use pusher or another piece of fruit or vegetable to push it down or remove. When this method is not possible, turn the motor off and disassemble Food Processor attachment to remove the remaining food.
Avoid contacting moving parts.
The use of attachments not recommended or sold by KitchenAid may cause fire, electric shock, or injury.
Do not use outdoors.
Close supervision is necessary when any appliance is used by or near children.
Do not use the appliance if the driver mechanism or rotating parts are damaged. Return appliance to the nearest Authorized Service Facility for examination, repair, or electrical or mechanical adjustment.
Do not let the Stand Mixer cord hang over the edge of table or counter.
Keep hands and utensils away from moving blades or discs while processing food to reduce the risk of severe injury to persons or damage to the Food Processor attachment.
Blades are sharp. Handle carefully.
Do not remove the lid until discs or blades stop.
Do not attempt to defeat the cover interlock mechanism.
To avoid damaging the gear assembly, do not immerse Food Processor attachment assembly in water or other liquids.
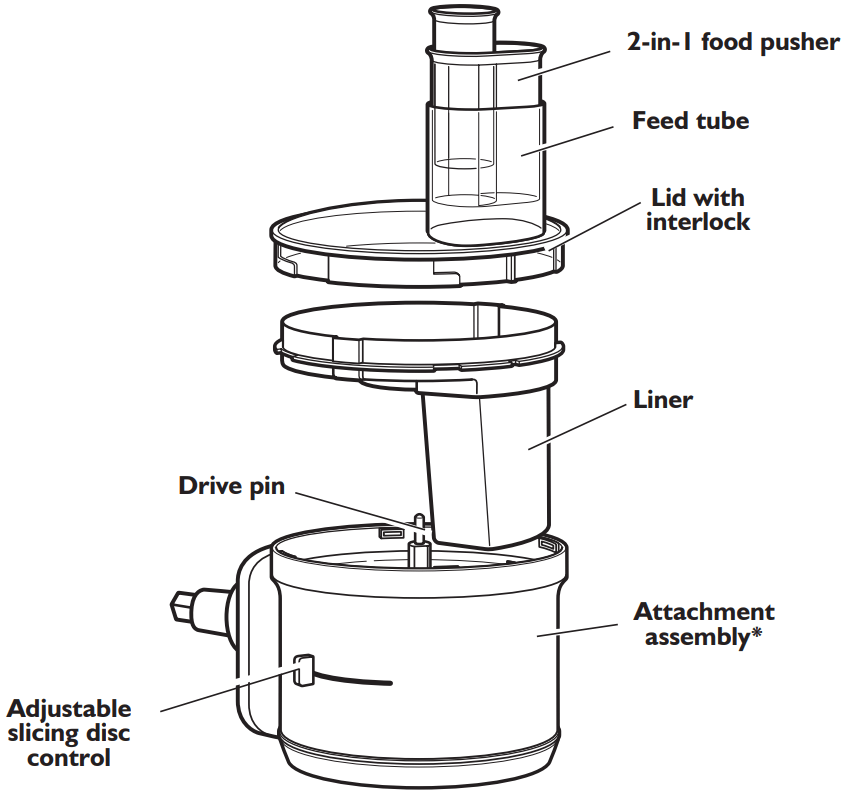
PARTS AND FEATURES
GETTING STARTED
Before First Use
Before using your Food Processor attachment for the first time, wash all parts and accessories either by hand or in the dishwasher (see “Care and cleaning” section).
IMPORTANT: To avoid damaging the Food
Processor attachment, do not immerse the attachment assembly in water or other liquids. All other parts are top rack dishwasher safe.
NOTE: This product is designed for household use only.
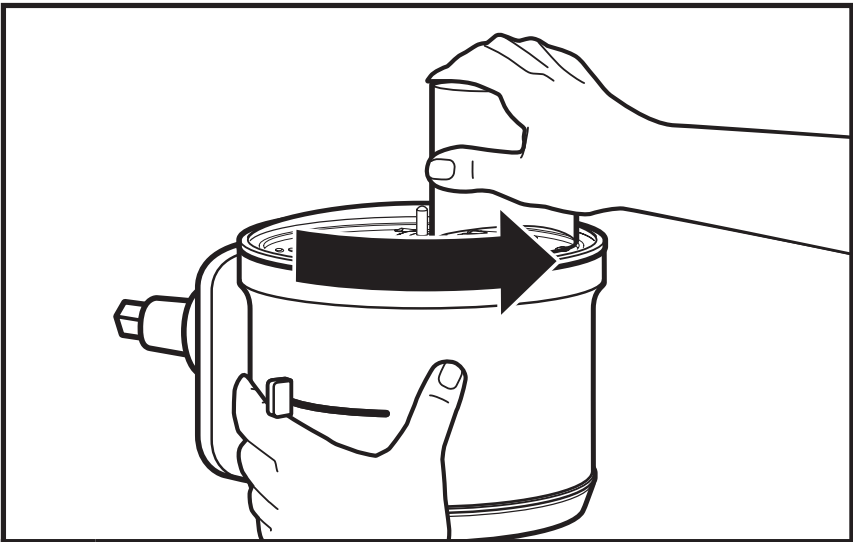
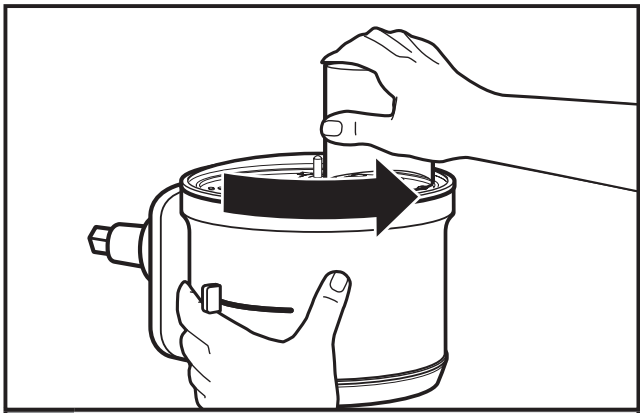
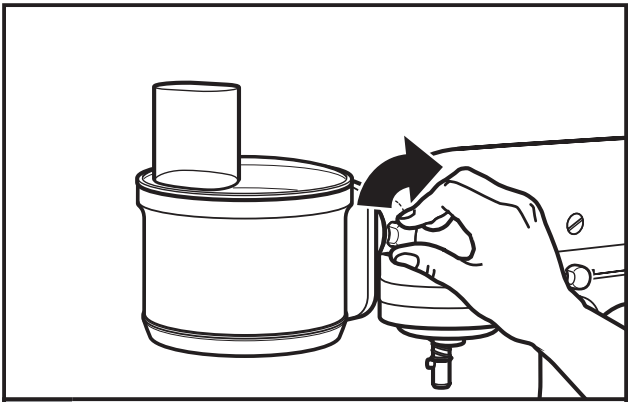
Grasp the feed tube on the interlock lid and turn it clockwise to remove it from the attachment assembly.
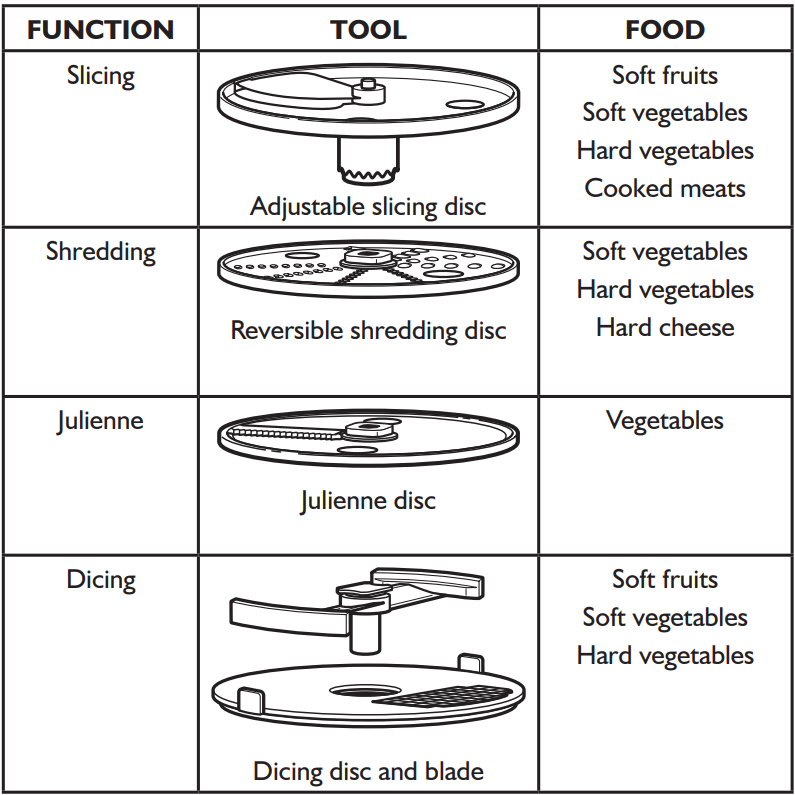
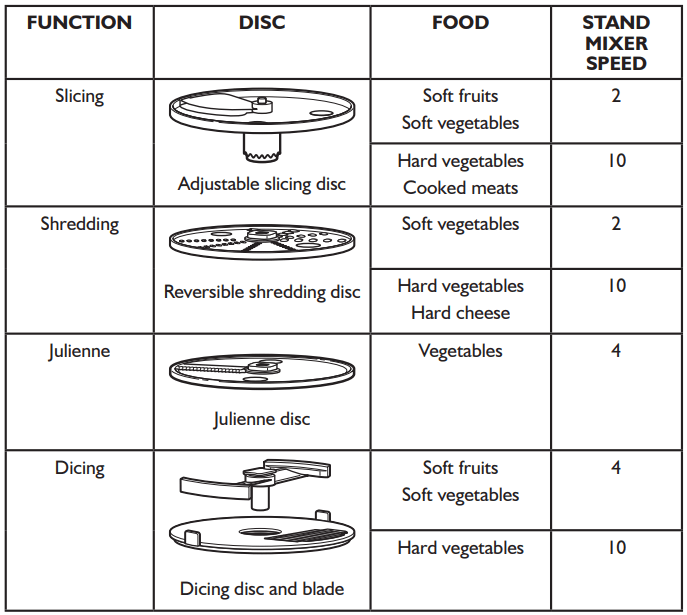
Selecting the right tool
The guide below will help you select the right tool for your recipe. See the section "Installing the discs" for more detailed information for each disc.
INSTALLING THE DISCS
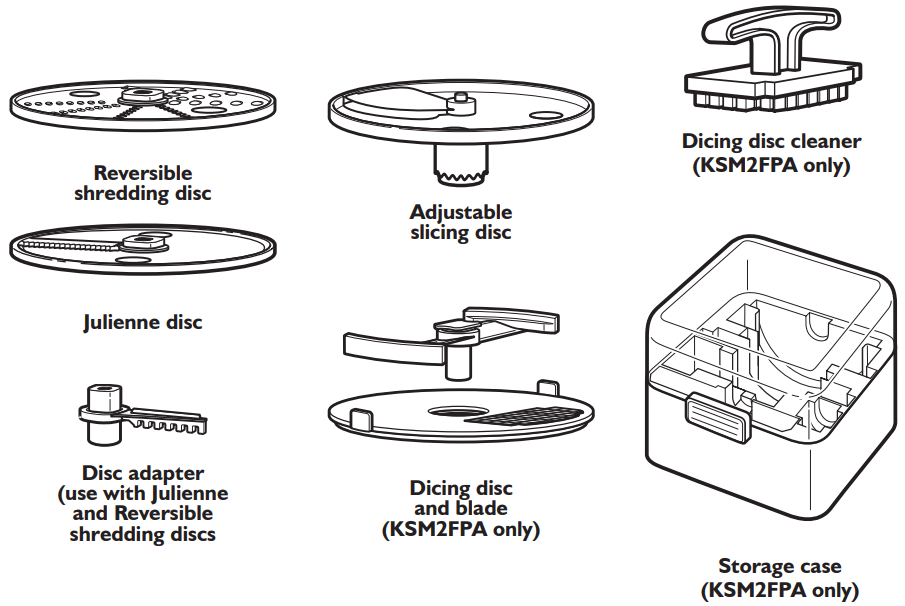
Installing the reversible shredding disc
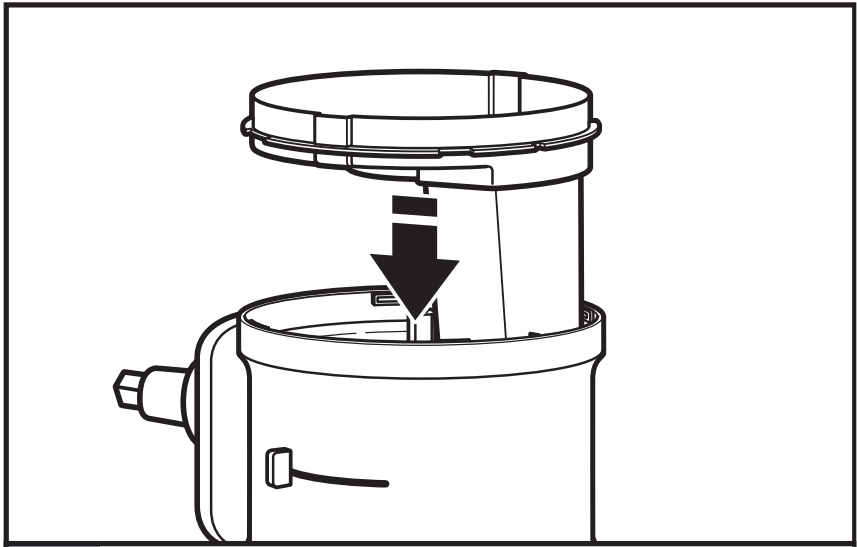
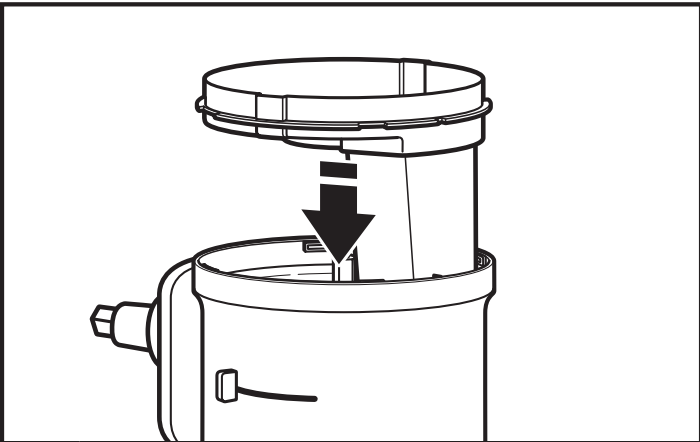
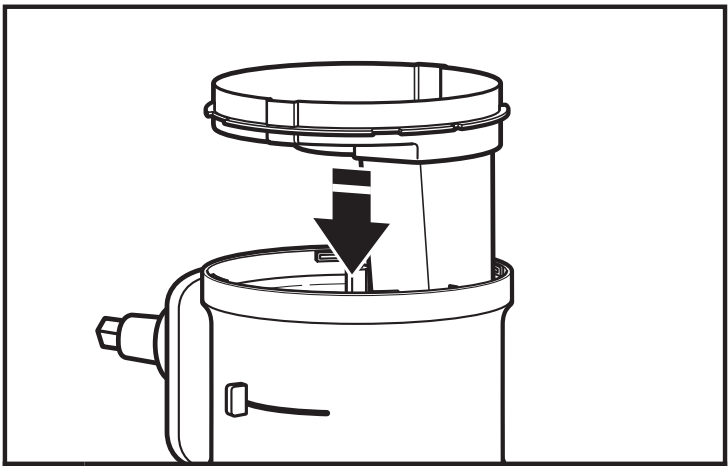
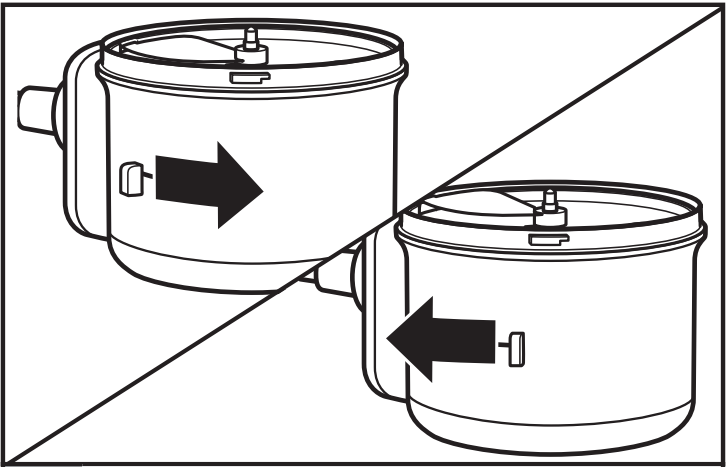
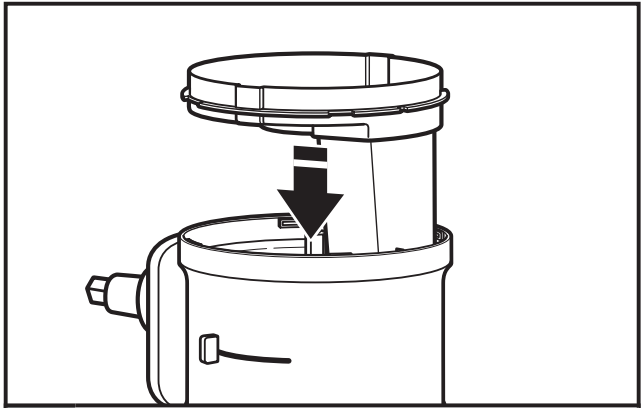
1. Insert the liner into the attachment assembly so that the feed tubes line up and the liner lies flat.
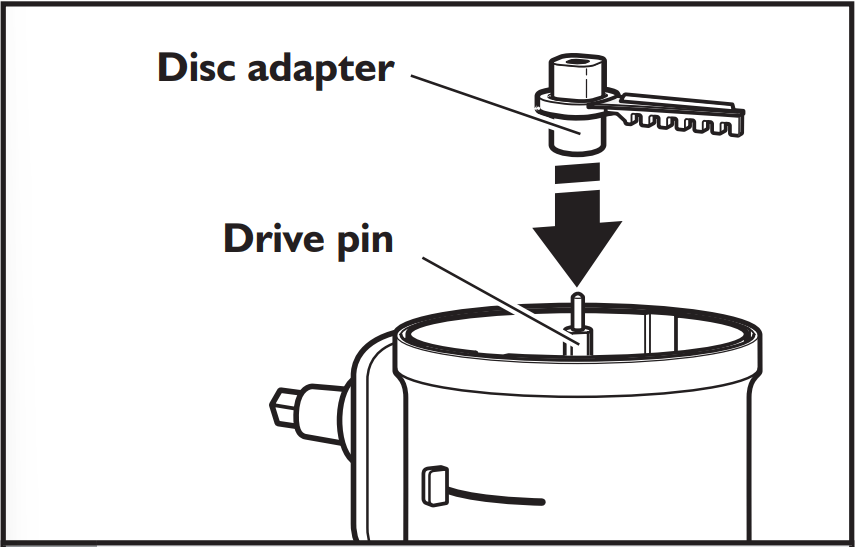
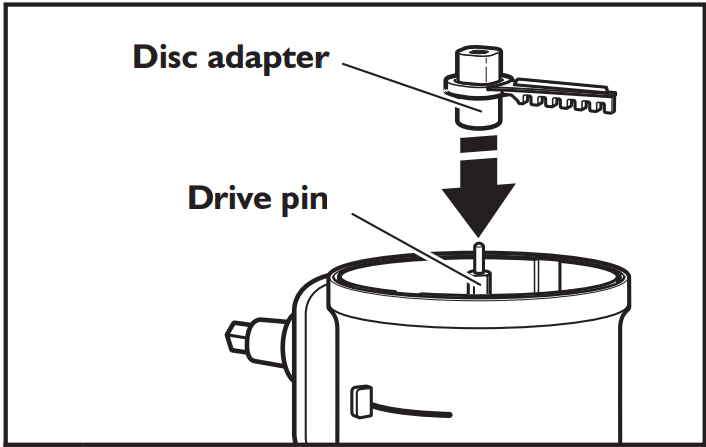
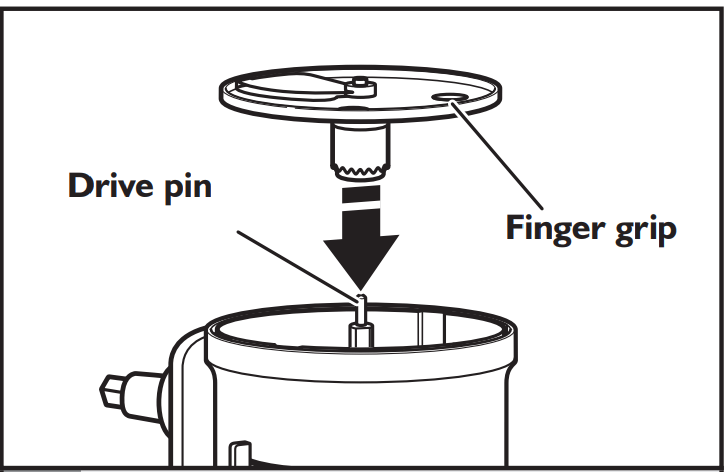
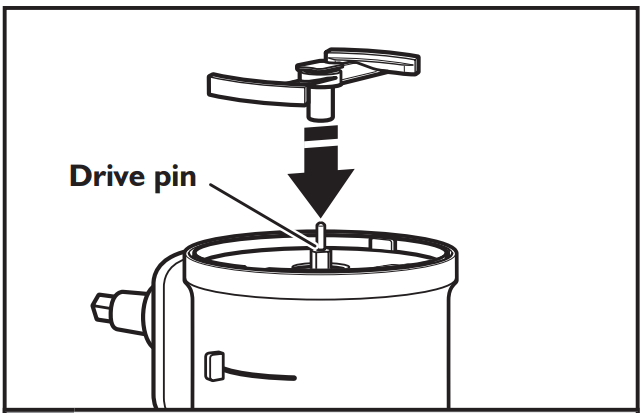
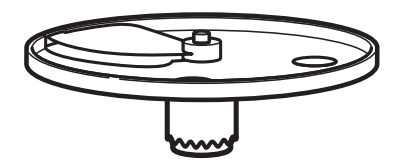
2. Slide the disc adapter onto the drive pin
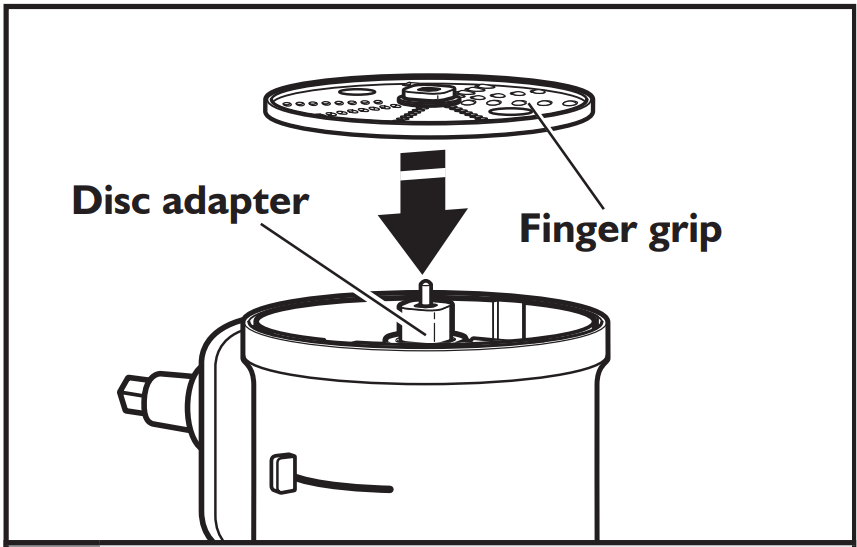
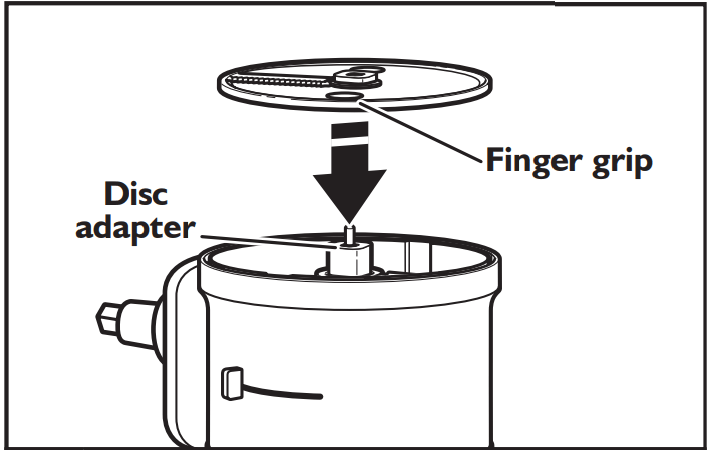
3. Hold the reversible shredding disc by the 2 finger grips with the desired shredding side facing UP. Install the disc on the disc adapter by fitting the adapter through the hole in the bottom of the disc until it is seated against the liner.
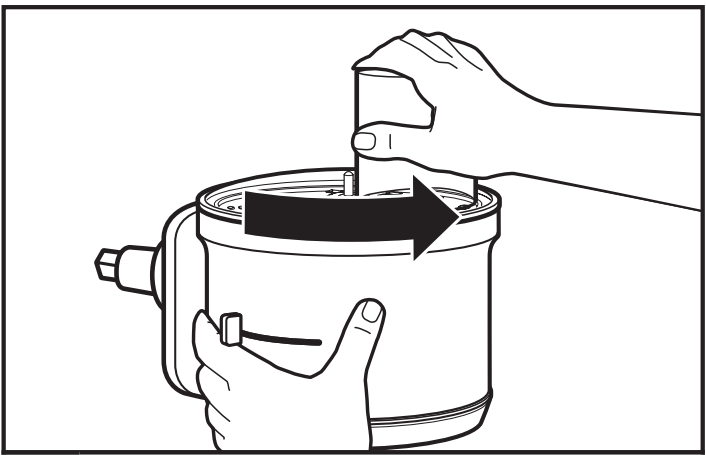
4. Install the lid by turning counter clockwise, being sure it locks into place.
Installing the julienne disc
1. Insert the liner into the attachment assembly so that the feed tubes line up and the liner lies flat.
2. Slide the disc adapter onto the drive pin.
3. Hold the julienne disc by the 2 finger grips, with the smaller side of the middle hole facing UP. Install the disc on the disc adapter by fitting the adapter through the hole in the bottom of the disc until it is seated against the liner.
4. Install the lid by turning counter 3 clockwise, being sure it locks into place.
Installing the adjustable slicing disc
1. Insert the liner into the attachment assembly so that the feed tubes line up and the liner lies flat.
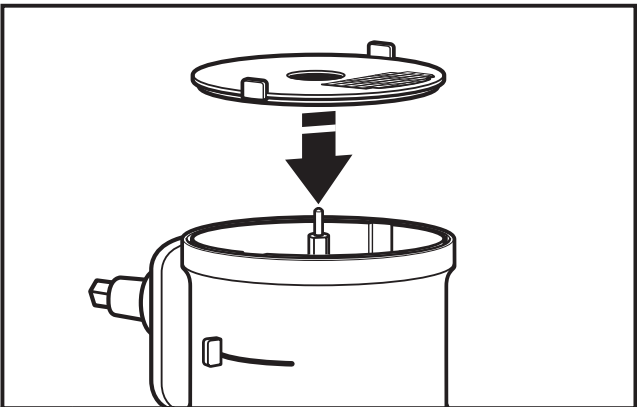
2. Hold the slicing disc by the finger grips and lower it onto the drive pin. You may need to turn the disc/drive adapter until it drops down into place.
3. Set the desired slicing thickness by moving the control lever to the left for thinner slices or to the right for thicker slices.
4. Install the lid by turning counter clockwise, being sure it locks into place.
NOTE: If the sliced food is not the desired thickness, the control lever can be adjusted during operation.
Installing the dicing disc and blade
1. Insert the liner into the attachment assembly so that the feed tubes line up and the liner lies flat.
2. Hold the dicing disc by the middle hole and disc edge, chute lip-side facing DOWN. Place the disc on top of the liner so that the dicing grate aligns with the liner’s feed tube.
3. Install the blade on top of the dicing disc by sliding it onto the drive pin.
4. Install the lid by turning counter clockwise, being sure it locks into place.
OPERATING THE FOOD PROCESSOR ATTACHMENT
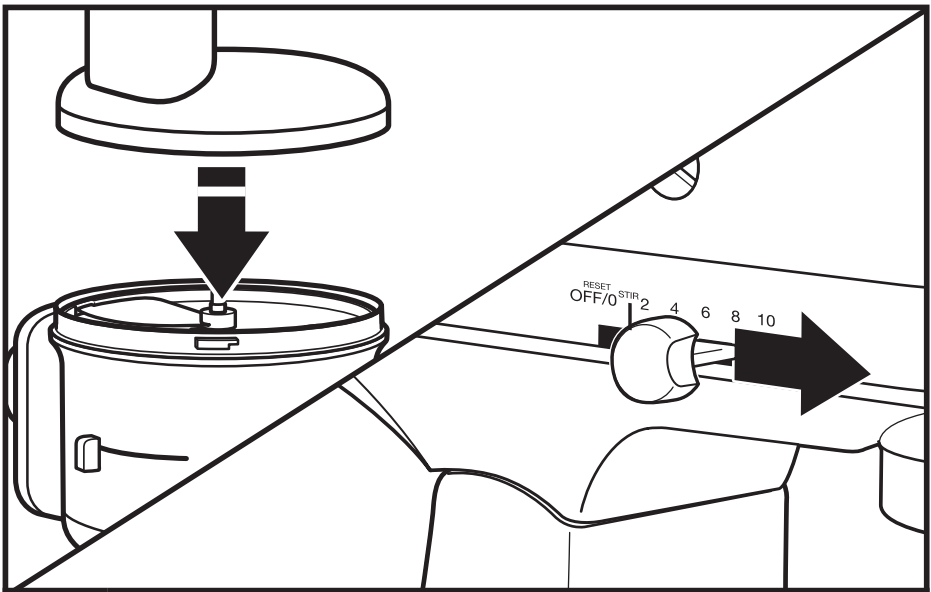
Attaching the Food Processor attachment to the Stand Mixer
1. Attaching the Food Processor attachment to the Stand Mixer
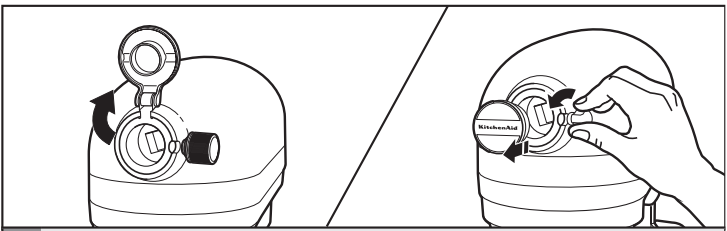
2. For Stand Mixers with a hinged attachment hub cover: Flip up to open.
For Stand Mixers with a removable attachment hub cover: Turn the attachment knob counterclockwise to remove attachment hub cover.
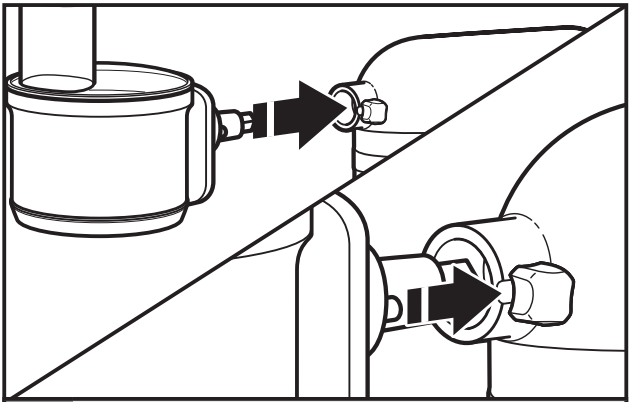
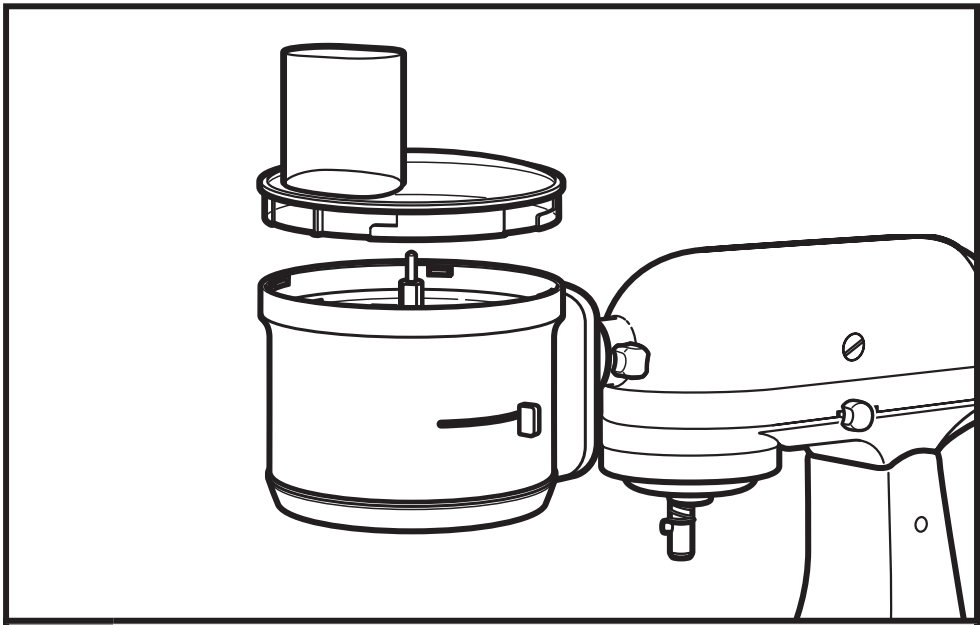
3. Insert the attachment into the attachment hub. Rotate attachment back and forth if necessary. The pin on the attachment housing will fit into the notch of the hub rim when in proper position.
4. Tighten attachment knob until the Food Processor attachment is completely secured to Stand Mixer.
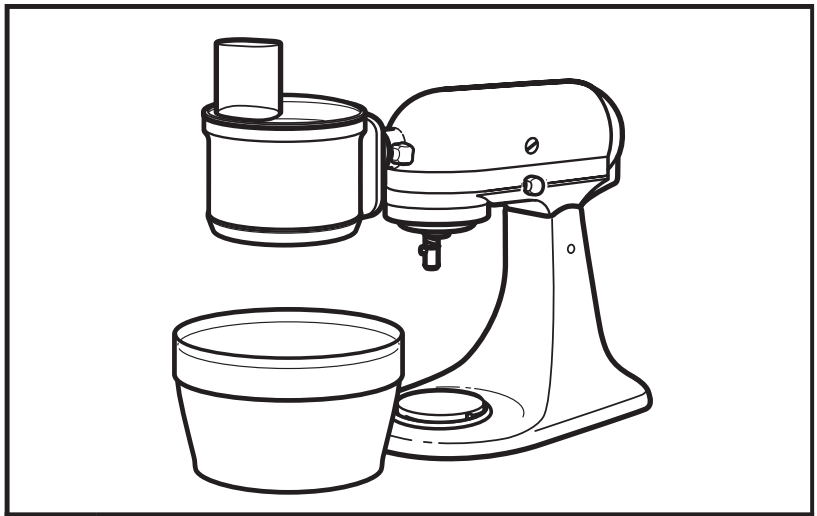
5. Place a bowl or container under the food exit chute.
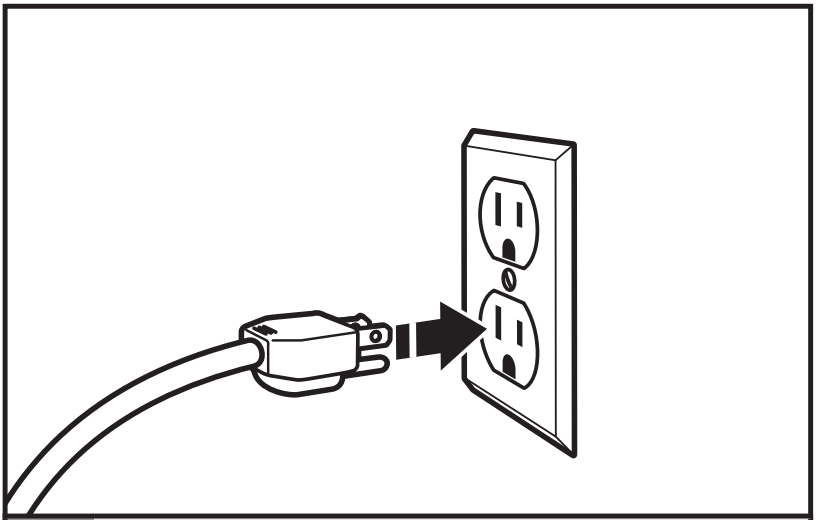
6. Plug into a grounded 3 prong outlet.
Speed selection guide
Different foods require varying degrees of pressure and speed for optimized results.
In general, use light pressure and low speeds for soft, delicate foods — soft fruits and vegetables like kiwi or ripened tomatoes, as well as soft cheeses like mozzarella.
Use firmer pressure with high speed for harder foods — hard vegetables like potatoes and carrots, meats like pepperoni, and hard cheeses like Pecorino Romano.
Use the table provided to determine the appropriate speed for your recipe.
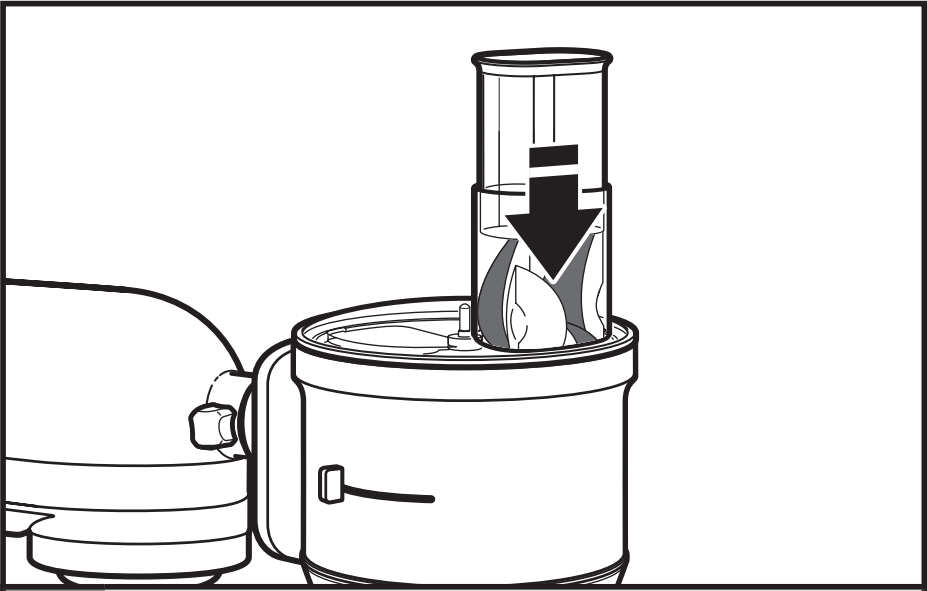
Using the Food Processor attachment
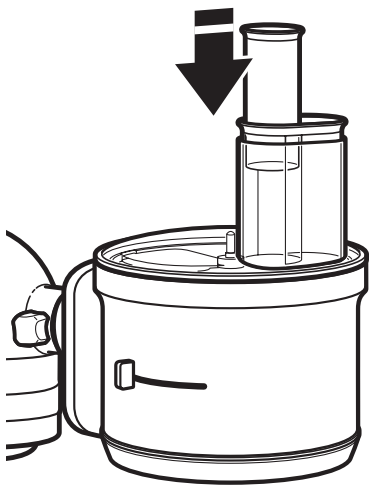
1. Place the interlock lid on the attachment assembly, making sure to click the lock into place. Turn on the Stand Mixer on to the appropriate speed. See the Speed selection guide for more information
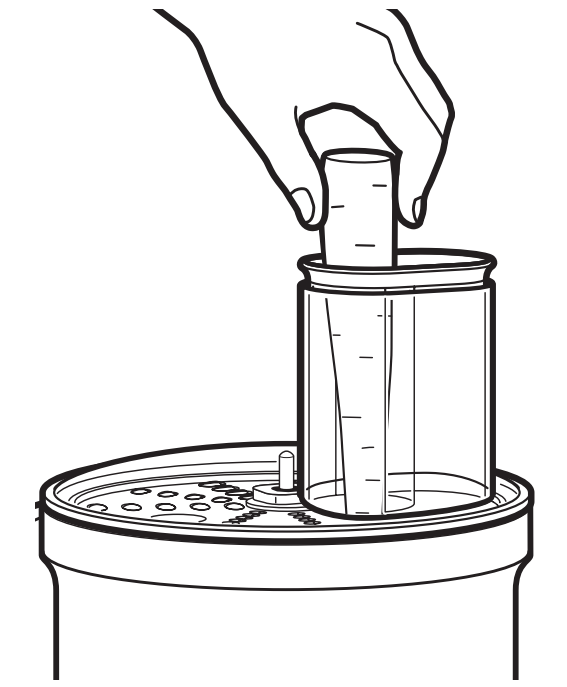
2. Use the food pusher to slowly feed 1 items into the attachment assembly.
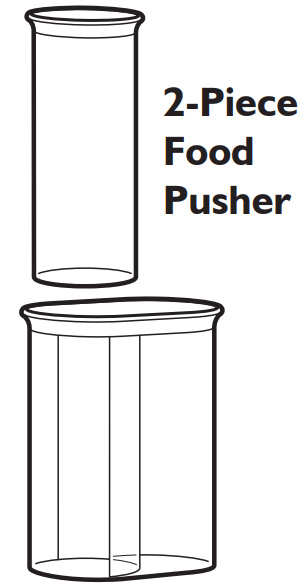
Using the 2-in-1 food pusher
The 2-in-1 food pusher features a smaller chute inside of a larger food pusher.
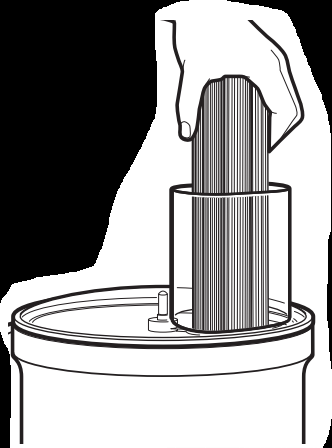
Use the small feed tube and pusher to process small or slender items, like single carrots or celery stalks.
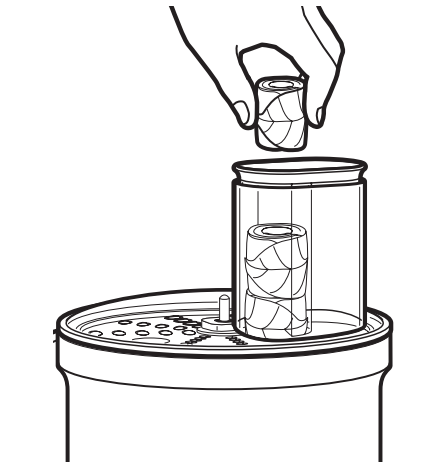
To slice or shred small items, insert the 2-piece food pusher into the feed tube so that the smaller chute is oriented as shown.
Place food items in the smaller chute and use the small food pusher to process.
TIPS FOR GREAT RESULTS
Using a slicing or shredding disc
To slice or shred fruits or vegetables that are long and relatively small in diameter, such as carrots and bananas:
Cut food to fit feed tube vertically and pack feed tube securely to keep food positioned properly. Process using even pressure with the food pusher. Or use the small feed tube in the two-piece food pusher. Position food vertically in the tube and use the small food pusher to process food.
To slice or shred fruits and vegetables that are round, such as onions, and apples:
Peel, core, and remove seeds. Cut in halves or quarters to fit feed tube. Position in feed tube. Process using even pressure with the food pusher.
To slice or shred fruits and vegetables that are small:
Position food vertically or horizontally in layers within the feed tube. Fill feed tube in order to keep food positioned properly.
Process using even pressure with the food pusher. Or use the small feed tube in the two-piece food pusher. Position food vertically in the tube and use the small food pusher to process food.
To slice cooked meat or poultry, such as pepperoni:
Food should be very cold. Cut in pieces to fit feed tube. Process food using firm, even pressure with the food pusher.
To shred spinach and other leaves:
Stack leaves. Roll up and stand up in feed tube. Process using even pressure with the food pusher.
To shred firm and soft cheeses:
Firm cheese should be very cold. For best results, thoroughly freeze soft cheeses, such as mozzarella, before processing. This may take several hours to achieve proper firmness for best processing.
Helpful hints
To avoid damage to the blade or motor, do not process food that is so hard or firmly frozen that it cannot be pierced with the tip of a sharp knife. If a piece of hard food, such as a carrot, becomes wedged or stuck on the blade, stop the mixer and remove the blade. Gently remove food from the blade.
Position slicing discs so the cutting surface is just to the right of the feed tube. This allows the blade a full rotation before contacting the food.
To capitalize on the speed of the processor, drop ingredients to be chopped through the feed tube while the mixer is running.
Soft and medium-hard cheese may spread out or roll up on the shredding disc. To avoid this, shred only well-chilled cheese.
A few larger pieces of food may remain on top of the disc after slicing or shredding. If desired, cut these by hand and add to mixture.
Sometime slender foods, such as carrots or celery, fall over in the feed tube, resulting in an uneven slice. To minimize this, cut food in several pieces and pack the feed tube with the food. For processing small or slender items, the small feed tube in the 2-piece food pusher will prove especially convenient. For best results, cut a small amount off the end to create a flat surface when processing a single carrot or celery stalk.
Different foods require varying degrees of pressure and speed for optimal results. In general, use light pressure and low speed for soft, delicate foods (soft fruits and vegetables like kiwi, ripened tomatoes, soft cheeses), and firmer pressure with high speed for harder foods (hard vegetables like potatoes and carrots, hard cheeses and meats like pepperoni).
After removing the lid, place it upside down on the counter. This will help keep the counter clean.
Your Food Processor attachment is not designed to perform the following functions:
Grind coffee beans, grains, or hard spices
Grind bones or other inedible parts of food
Liquefy raw fruits or vegetables
Slice hard-cooked eggs or unchilled meats.
If any plastic parts should discolor due to the types of food processed, clean them with lemon juice.
Quickly rinse the liner between foods to elminate cross contamination of foods.
CARE AND CLEANING
IMPORTANT: To avoid damaging the Food Processor attachment, do not immerse the attachment assembly in water or other liquids. All other parts are top rack dishwasher safe.
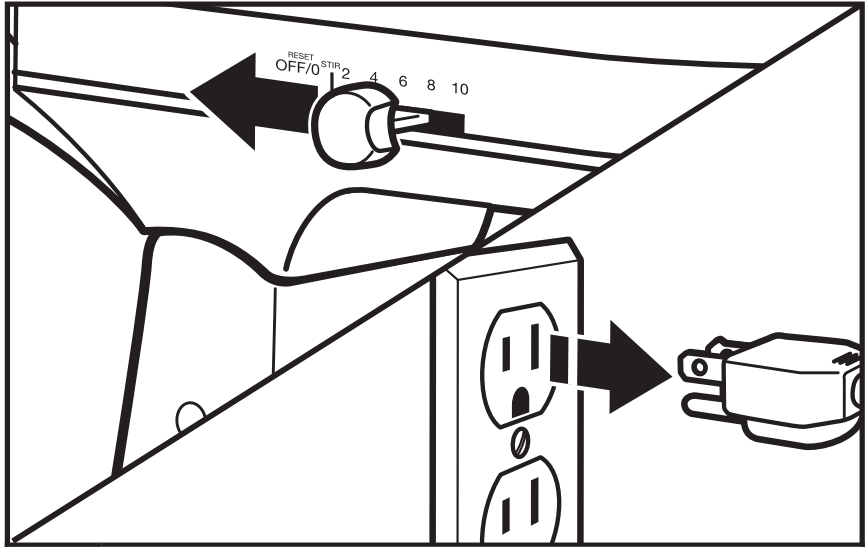
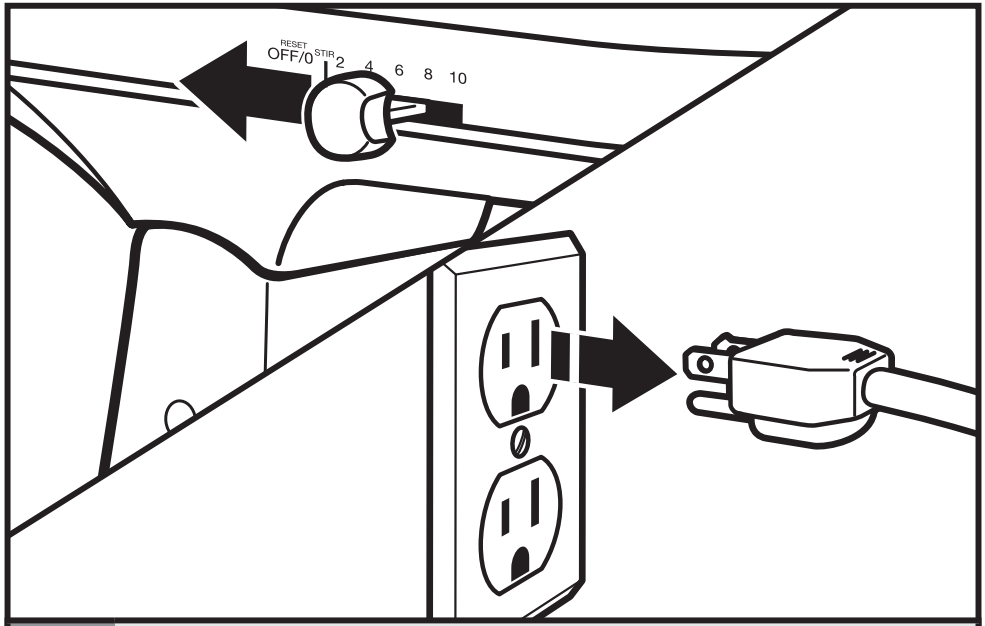
1. Turn Stand Mixer OFF and unplug from outlet.
2. Remove and disassemble Food Processor attachment.
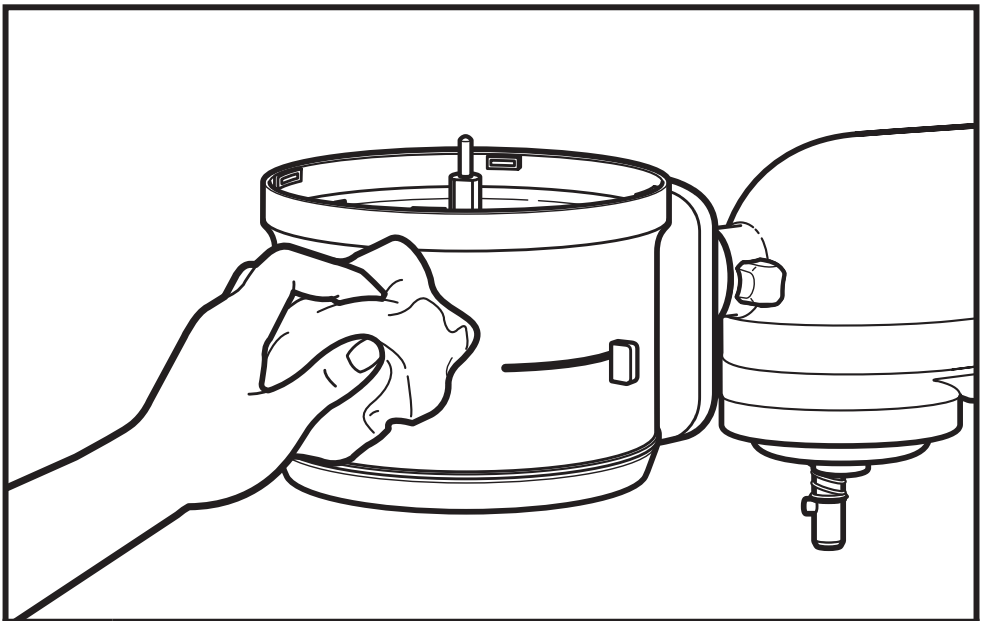
3. Wipe the attachment assembly with a warm, damp cloth. Avoid using abrasive cleaners or scouring pads as they may scratch the attachment assembly casing. Thoroughly dry with a soft cloth. To avoid damaging the Food Processor attachment, do not wash or immerse the attachment assembly in water or other liquids.
4. All other parts may be washed in warm, sudsy water or placed in the top rack of the dishwasher for cleaning.
TROUBLESHOOTING
Food Processor attachment doesn’t run
Check to see whether the Stand Mixer is plugged into a grounded 3 prong outlet.
If it is, check the fuse or circuit breaker on the electrical circuit the Stand Mixer is connected to and make sure the circuit is closed.
Is the fuse in the circuit to the Stand Mixer in working order? If you have a circuit breaker box, be sure the circuit is closed.
Unplug the Stand Mixer, then plug it back into the outlet.
Check to make sure the Food Processor attachment was assembled correctly, and the interlock lid is properly aligned and locked in place.
Food Processor attachment not shredding or slicing properly
Make sure the raised-blade side of the disc is positioned face up on the common adapter.
If using the adjustable slicing blade, make sure it is set to the correct thickness.
Make sure ingredients are suitable for slicing or shredding.
Lid won’t close when using a disc
Make sure the disc is installed correctly, and is positioned properly on the disc adapter.
Do not return the Food Processor attachment to the retailer. Retailers do not provide service.
Clutch engages
If the clutch activates, there will be a very loud clicking noise.
Check to make sure there are not too many items in the Food Processor attachment.
Make sure any hard seeds are removed.
Stand Mixer motor slows down
This is normal operation and is not damaging to the performance of the attachment.