Loading ...
Loading ...
Loading ...
540mm Upright Cooker with GAS oven User manual
17
I
I
n
n
s
s
t
t
a
a
l
l
l
l
a
a
t
t
i
i
o
o
n
n
o
o
f
f
t
t
h
h
e
e
a
a
n
n
t
t
i
i
-
-
t
t
i
i
l
l
t
t
p
p
l
l
a
a
t
t
e
e
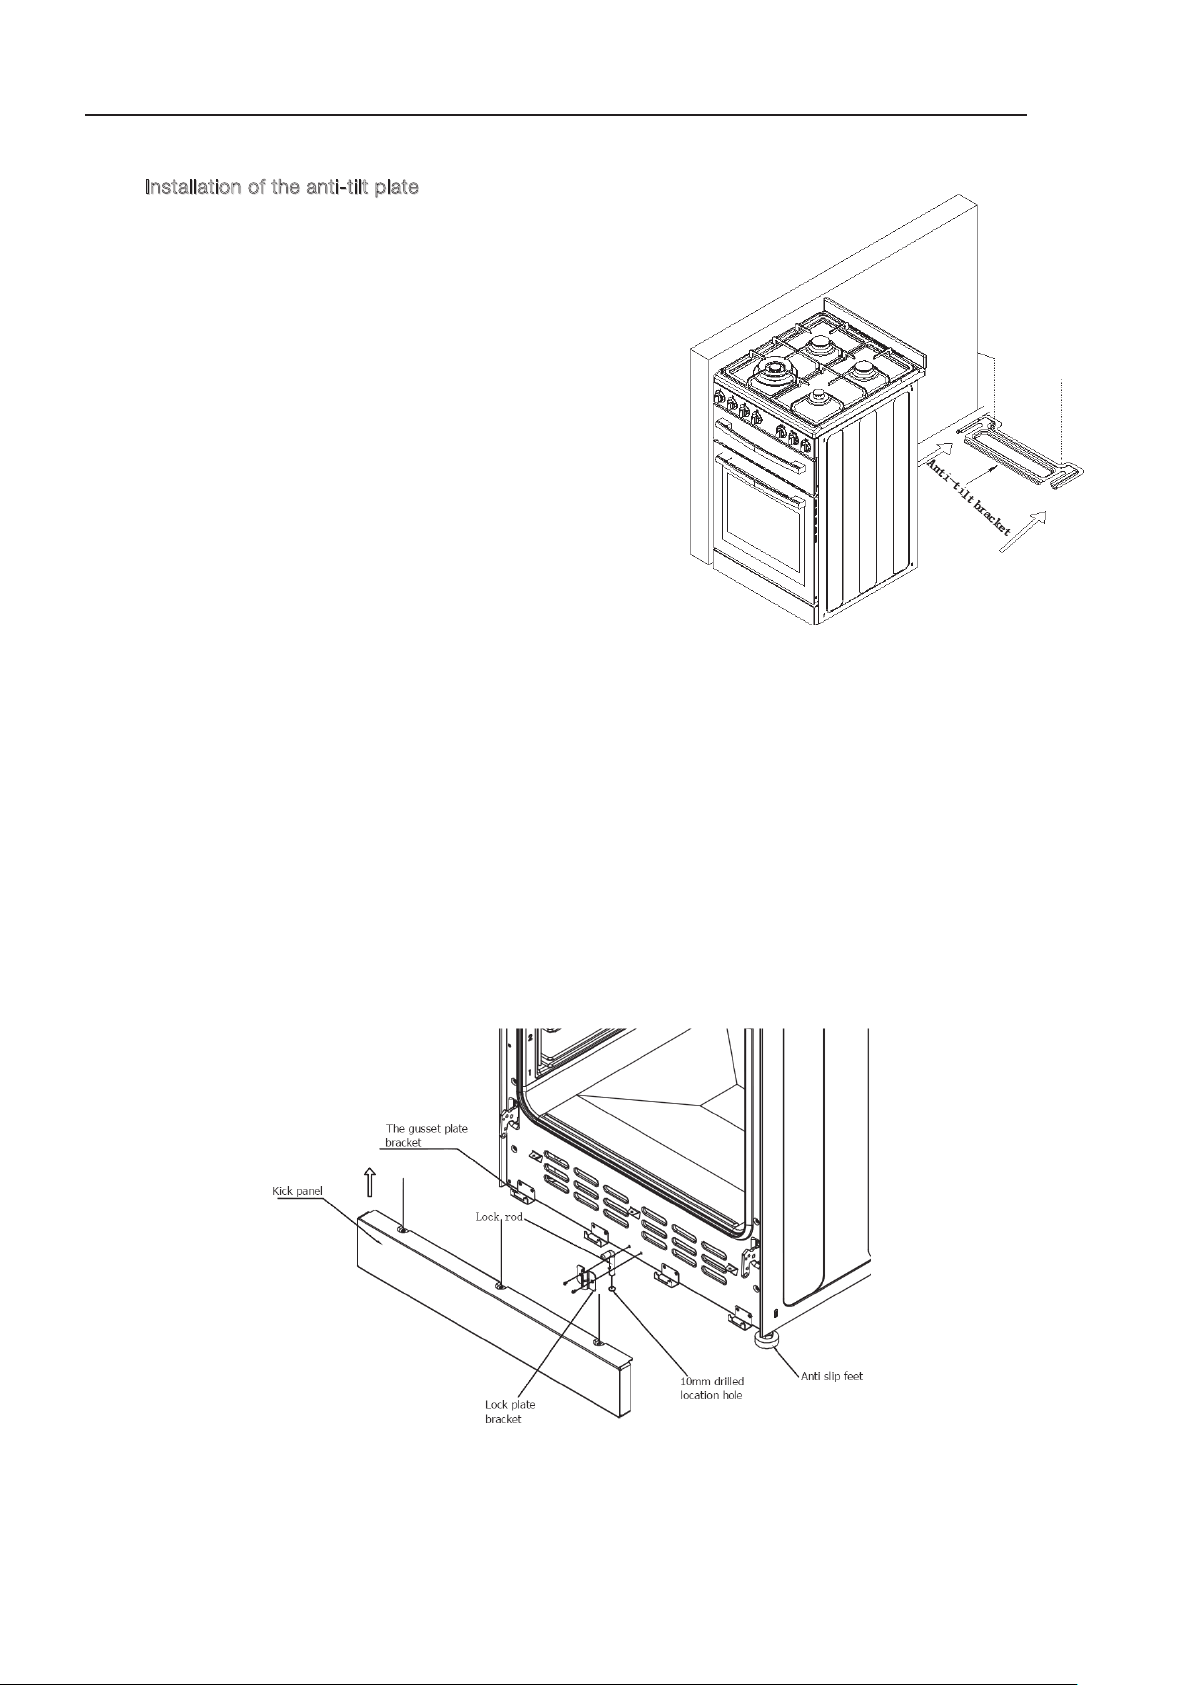
Determine position of cooker and ant-tilt plate.
Securely fix the anti-tilt plate to the floor with
appropriate fasteners.
Remove front kick plate to obtain access to stability
bolt, by removing screws from top of the kick plate.
Removing the oven door will make this procedure
easier.
Fasten the stability bolt bracket to the front frame with
the 2 screws supplied.
Reposition the cooker back into the anti-tilt plate and
then mark the position of the stability bolt hole.
Pull the cooker back out and drill the bolt location hole.
Use a 10mmmasonry or wood drill. When drilling into
concrete ensure a minimum hole depth of 30mm.
Reposition the cooker back into the anti-tilt plate, aligning the stability
bolt bracket with the 10mm drilled hole. Then slide the bolt through the
bracket and into the hole.
Connect Electricity supply/gas supply but do not turn on until installation
is completed.
Slide the cooker back into the anti-tilt plate so that rear cover rests against the rear wall. Then check the
height and level of the cooker. If required, pull the cooker back out and adjust the leveling feet as
required.
Re-fit kick plate as per the illustration below
Loading ...
Loading ...
Loading ...