Loading ...
Loading ...
Loading ...
18 INSTALLATION
2
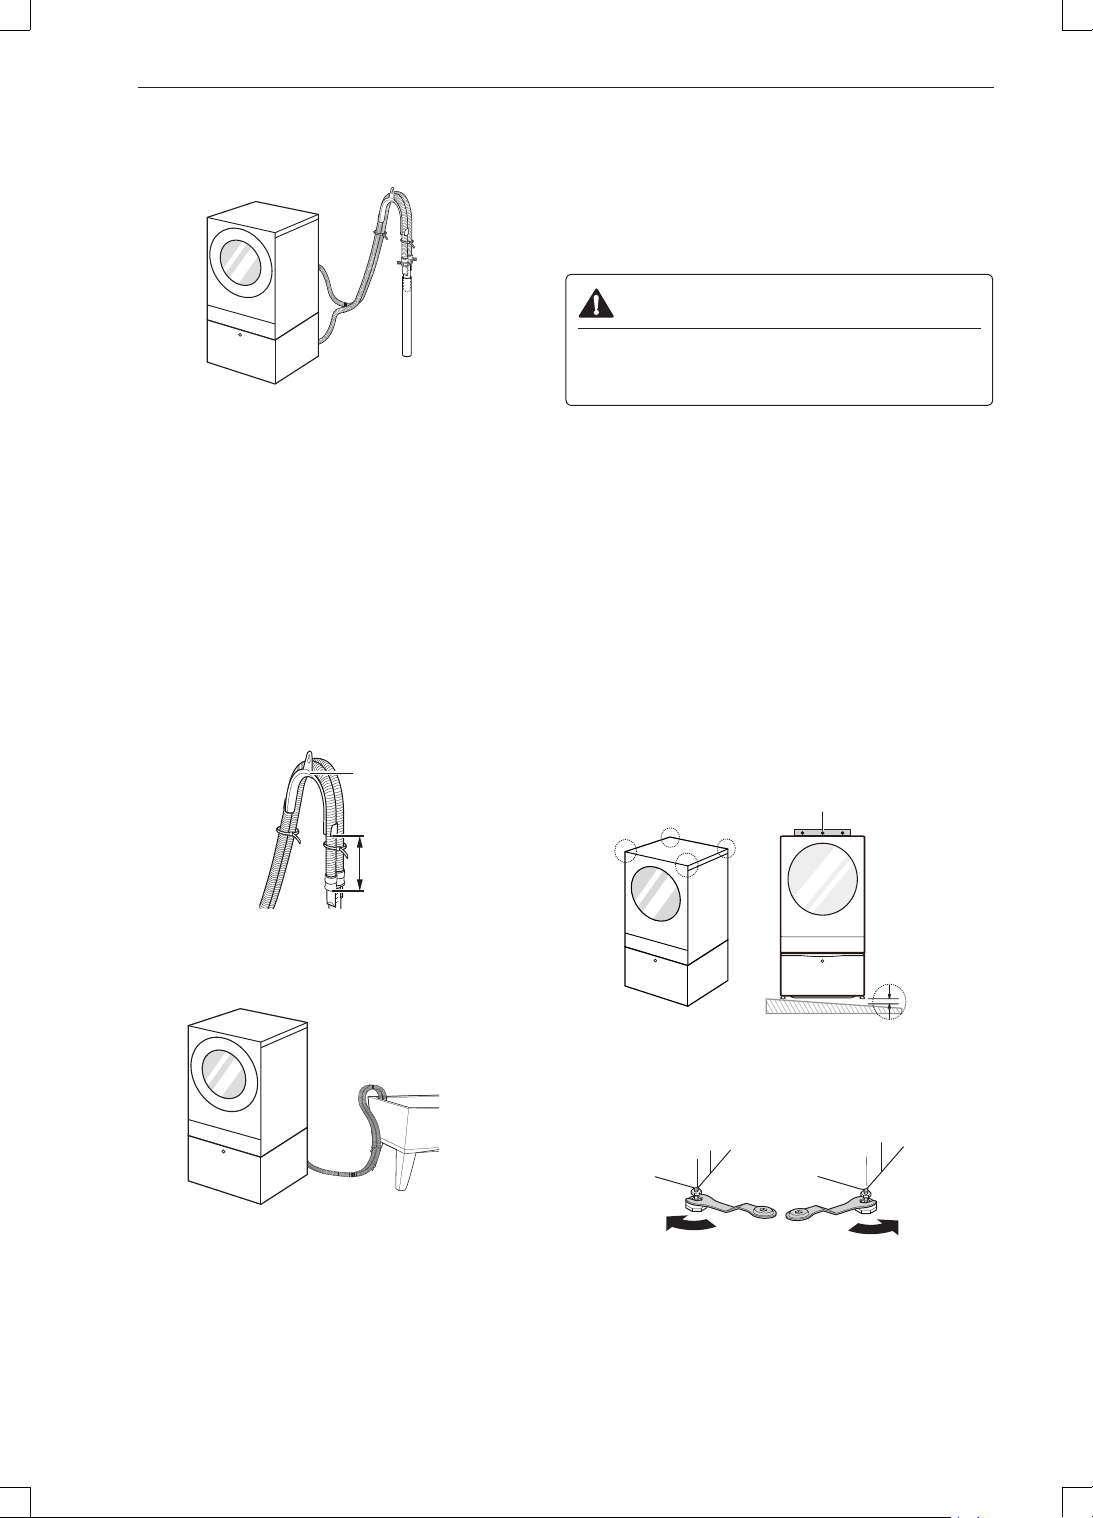
Insert the end of the drain hose connector into
the standpipe.
3
Use a tie strap to secure the drain hoses in
place.
Option 2: Laundry Tub
1
Clip the hoses above the drain hose connector
into the elbow bracket.
Connect the elbow bracket within 4 inches (10
cm) of the end of the drain hose. If the drain
hose is extended more than 4 inches (10 cm)
beyond the end of the elbow bracket, mold or
microorganisms could spread to the inside of the
washer.
Elbow bracket
No more than 4
inches (10 cm)
2
Hang the end of the drain hose over the side
of the laundry tub.
3
Use a tie strap to secure the drain hose in
place.
Leveling the Appliance
The tub of the washer spins at very high speeds. To
minimize vibration, noise, and unwanted movement,
the oor must be a level, solid surface. The slope
beneath the washer should not exceed 1 inch, and all
four leveling feet must rest rmly on the oor.
WARNING
• To prevent the washer from tipping over, always
move stacked machines from the bottom, not the
top.
NOTE
• Adjust the leveling feet only as far as necessary to
level the washer. Extending the leveling feet more
than necessary can cause the washer to vibrate
• Before installing the washer, make sure that the
oor is clean, dry and free of dust, dirt, water and
oil so the washer feet cannot slide easily. Feet
that move or slide on the oor can contribute to
excessive vibration and noise due to poor contact
with the oor.
1
Position the washer in its nal location.
Take special care not to pinch, strain, or crush the
water and drain lines. If you have a carpenter's
level, you can place it across the top of the
washer.
1"
Level
2
Adjust the lower leveling feet.
Turn in one direction to raise the washer or the
other direction to lower it.
Raise Lower
Loading ...
Loading ...
Loading ...