Loading ...
Loading ...
Loading ...
6
(Continued)
Remote control
1. Remote Control Transmitter LED
CD control section
2. Disc Number Select Buttons
3. Memory Button
4. Pause Button
5. Clear Button
6. Track Down/Review Button
7. Track Up/Cue Button
8. Disc Skip Button
9. Play/Repeat Button
10. Stop Button
11. Random Button
Tuner control section
12. Preset Up/Down Buttons
Tape control section
13. (TAPE 1) Play Button
14. (TAPE 2) Record Pause Button
15. (TAPE 1/2) Stop Button
16. (TAPE 2) Play Button
17. (TAPE 2) Rewind Button
18. (TAPE 2) Fast Forward Button
Common section
19. Equalizer Mode Selector Button
20. Function Selector Buttons
21. On/Stand-by Button
22. Extra Bass Button
23. Volume Up/Down Buttons
PREPARATION FOR USE
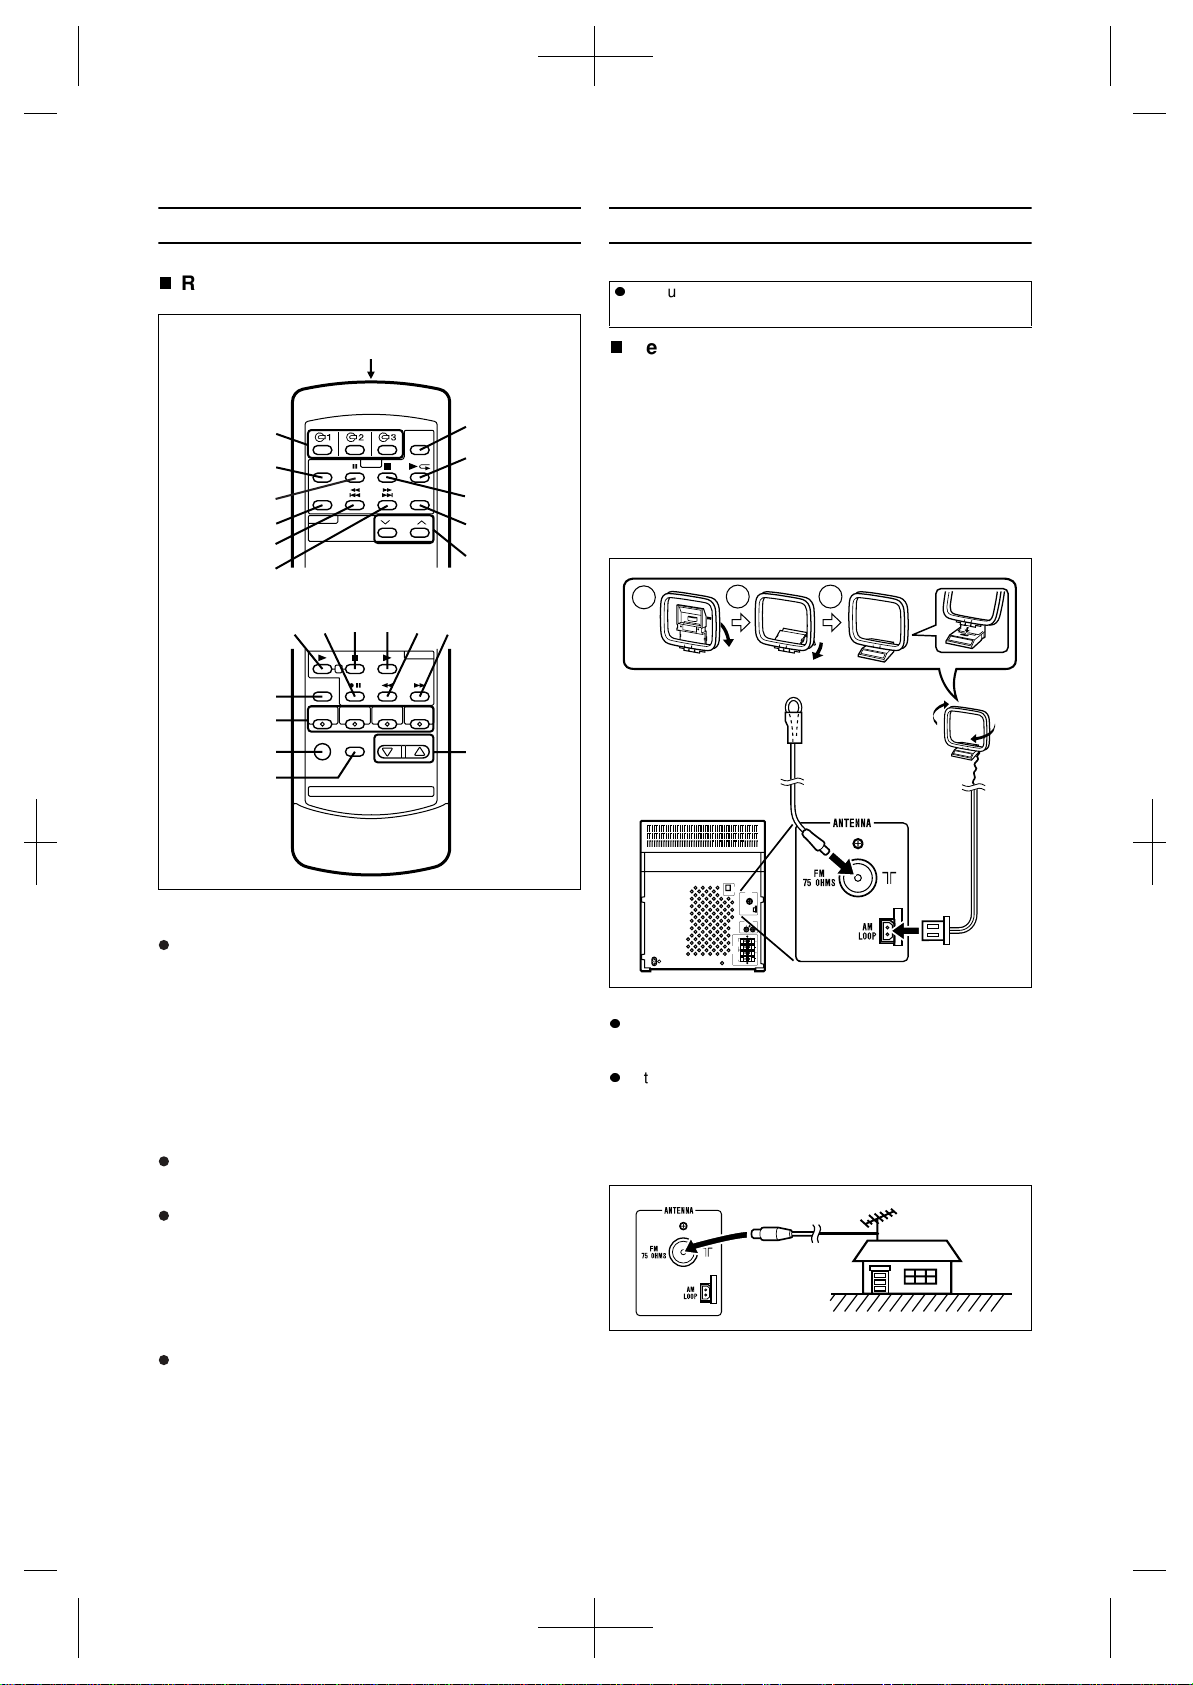
Aerial connection
Supplied FM aerial
Connect the FM aerial wire to the FM 75 OHMS socket and
position the FM aerial wire in the direction where the stron-
gest signal can be received.
Supplied AM loop aerial
Connect the AM loop aerial to the AM LOOP socket. Posi-
tion the AM loop aerial for optimum reception. Place the AM
loop aerial on a shelf, etc., or attach it to a stand or a wall
with screws (not supplied).
Notes:
Do not place the aerial on the main unit as it may result in
noise pickup from the internal digital electronics. Place
the aerial away from the unit for better reception.
If the AM loop aerial and the FM aerial wire are placed
near the AC power lead, interference may result.
External FM aerial
Use an external FM aerial if you require better reception.
Consult your dealer.
1
2
3
4
5
6
7
8
9
10
11
12
13 14 15 16 17 18
19
20
21
22
23
Unplug the AC power lead from the AC socket before
connecting or disconnecting any component.
1
2
3
AM loop
aerial
FM aerial
External
FM aerial
Downloaded from: http://www.usersmanualguide.com/
Loading ...
Loading ...
Loading ...