Loading ...
Loading ...
Loading ...
34
RESETTING THE MICROCOMPUTER
Reset the microcomputer under the following condi-
tions:
To erase all of the stored memory contents (clock and
timer settings, and tuner and CD presets).
If the display is not correct.
If the operation is not correct.
1
Press the ON/STAND-BY button to enter the stand-
by mode.
2
Whilst pressing down the / button and the X-
BASS/DEMO button, hold down the ON/STAND-BY
button for at least 1 second.
"CLEAR AL" will appear.
Caution:
The operation explained above will erase all data stored
in memory including clock and timer settings, and tuner
and CD presets.
TRANSPORTING THE UNIT
Before you move this product to a new location, pro-
ceed as follows:
1
Press the ON/STAND-BY button to turn the power
on.
2
Press the CD button.
3
Press the OPEN/CLOSE button to open the disc tray.
Remove all CDs inserted in the unit.
4
Press the OPEN/CLOSE button to close the disc
tray.
Make sure that "NO DISC" is displayed.
5
Press the ON/STAND-BY button to enter the stand-
by mode, and then unplug the AC power lead from
the AC socket.
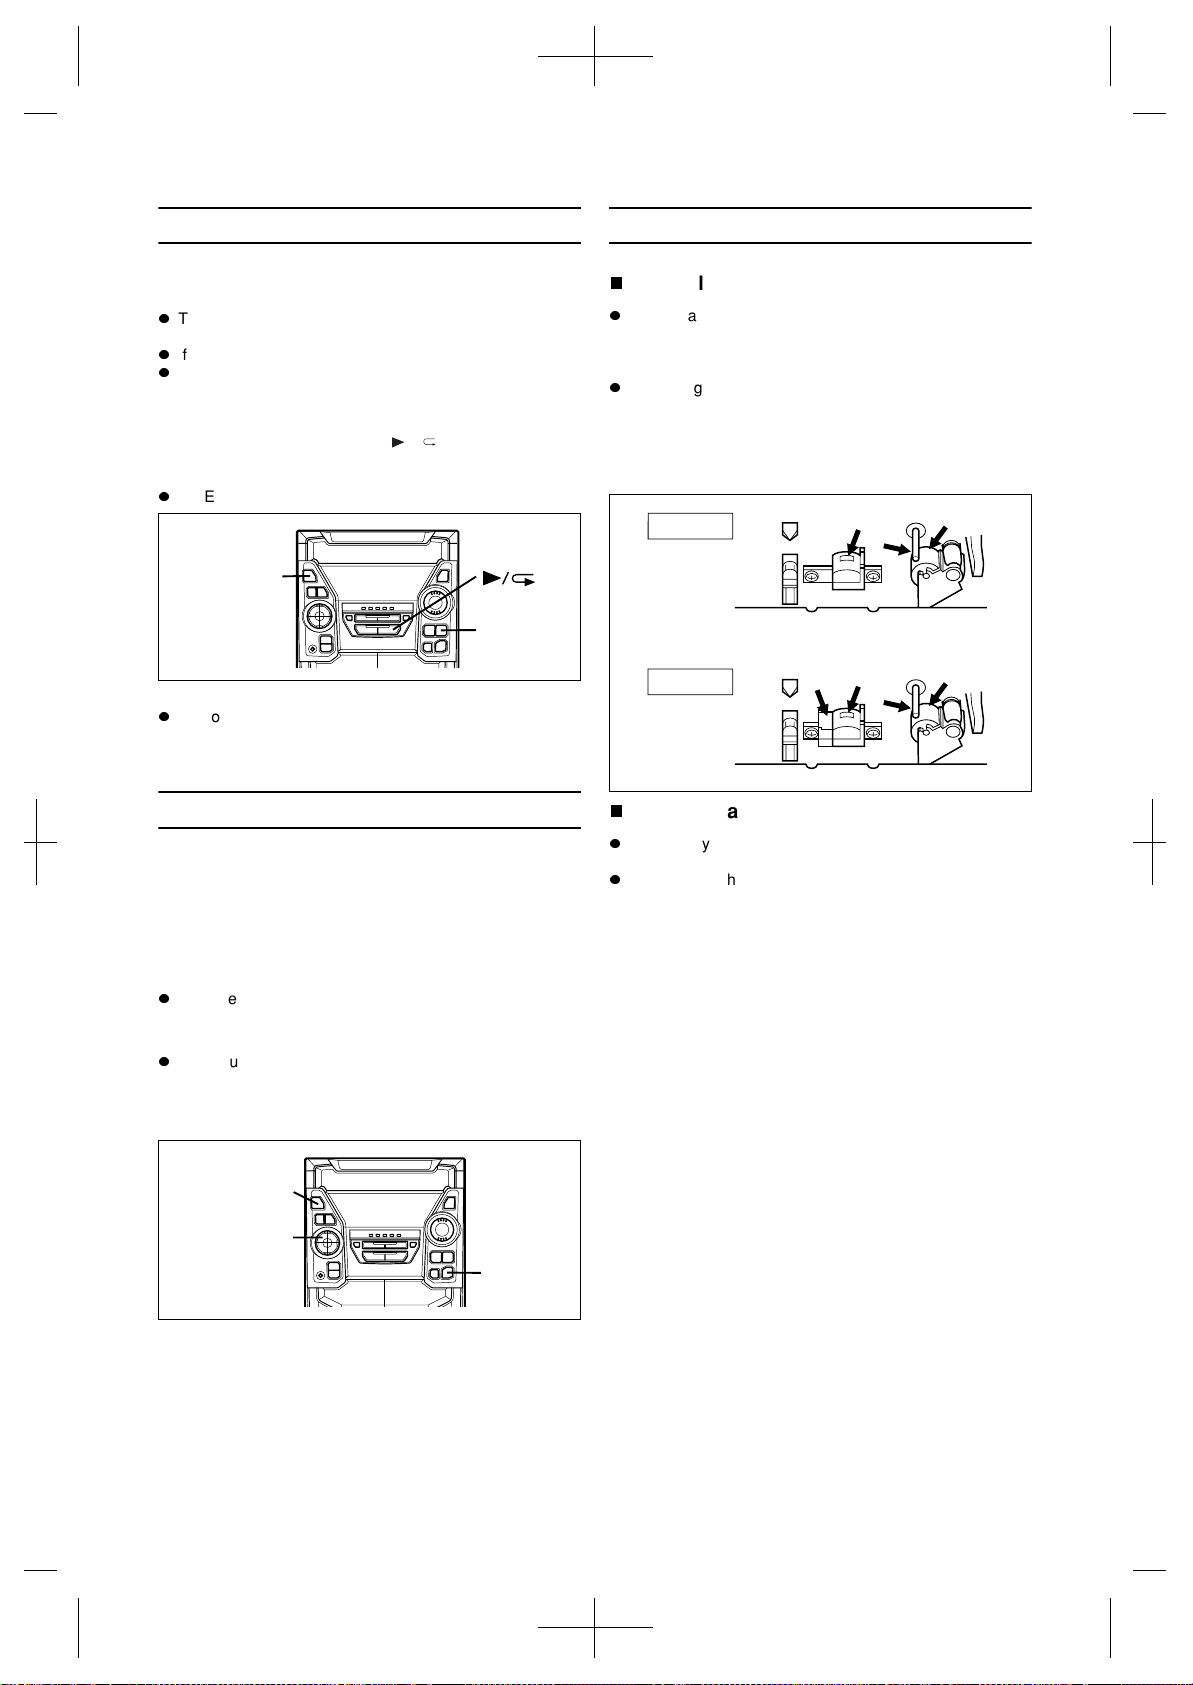
MAINTENANCE
Internal care
Dirty heads, capstans or pinch rollers can cause poor
sound and tape jams. Clean these parts with a cotton
swab moistened with commercial head/pinch roller
cleaner or isopropyl alcohol.
After long use, the deck's heads and capstans may
become magnetised, causing poor sound. Demagnetise
these parts once every 30 hours of playing/recording
time by using a commercial tape head demagnetiser.
Read the demagnetiser's instructions carefully before
use.
External care
Periodically wipe the cabinet with a soft cloth and a
diluted soap solution, then wipe with a dry cloth.
Do not use chemically treated cleaning cloths or other
chemicals.
X-BASS/
DEMO
ON/
STAND-BY
CD
OPEN/
CLOSE
ON/
STAND-BY
TAPE 1
TAPE 2
Downloaded from: http://www.usersmanualguide.com/
Loading ...
Loading ...
Loading ...