Loading ...
Loading ...
Loading ...
31
(Continued)
Timer recording
1
Press the ON/STAND-BY button to turn the power
on.
Load a cassette for recording into the TAPE 2 cassette
compartment.
2
Press the TUNER (BAND) or VIDEO/AUX button to
select the desired function, and then adjust the
sound volume using the VOLUME buttons.
3
Press the TIMER/SLEEP button repeatedly until a
red " " is displayed.
The timer set indicator will flash.
4
Press the TUNING/TIME ( or ) button to set the
hour start time, then press the MEMORY/SET but-
ton.
5
Press the TUNING/TIME ( or ) button to set the
minute start time, then press the MEMORY/SET but-
ton.
The unit will enter the stand-by mode automatically, and
the timer set indicator will light up.
6
When the preset time is reached, the timer recording
will start.
The volume will increase gradually.
7
When the recording tape reaches its end, the timer
recording will end, and the unit will enter the stand-
by mode.
To cancel timer operation:
Press the ON/STAND-BY button to turn the power on.
To change the programmed contents:
Start again from step 1.
Notes:
When performing timer recording using an external unit
connected to the VIDEO/AUX sockets, only the power of
the main unit will enter the stand-by mode automatically.
(The power of the external unit will not be turned off.)
Once the time is set, the setting will be retained until a
new time is entered.
The unit will turn on and start recording from the radio at the
preset time.
Before setting the timer, make sure that the clock setting
is correct (page 10).
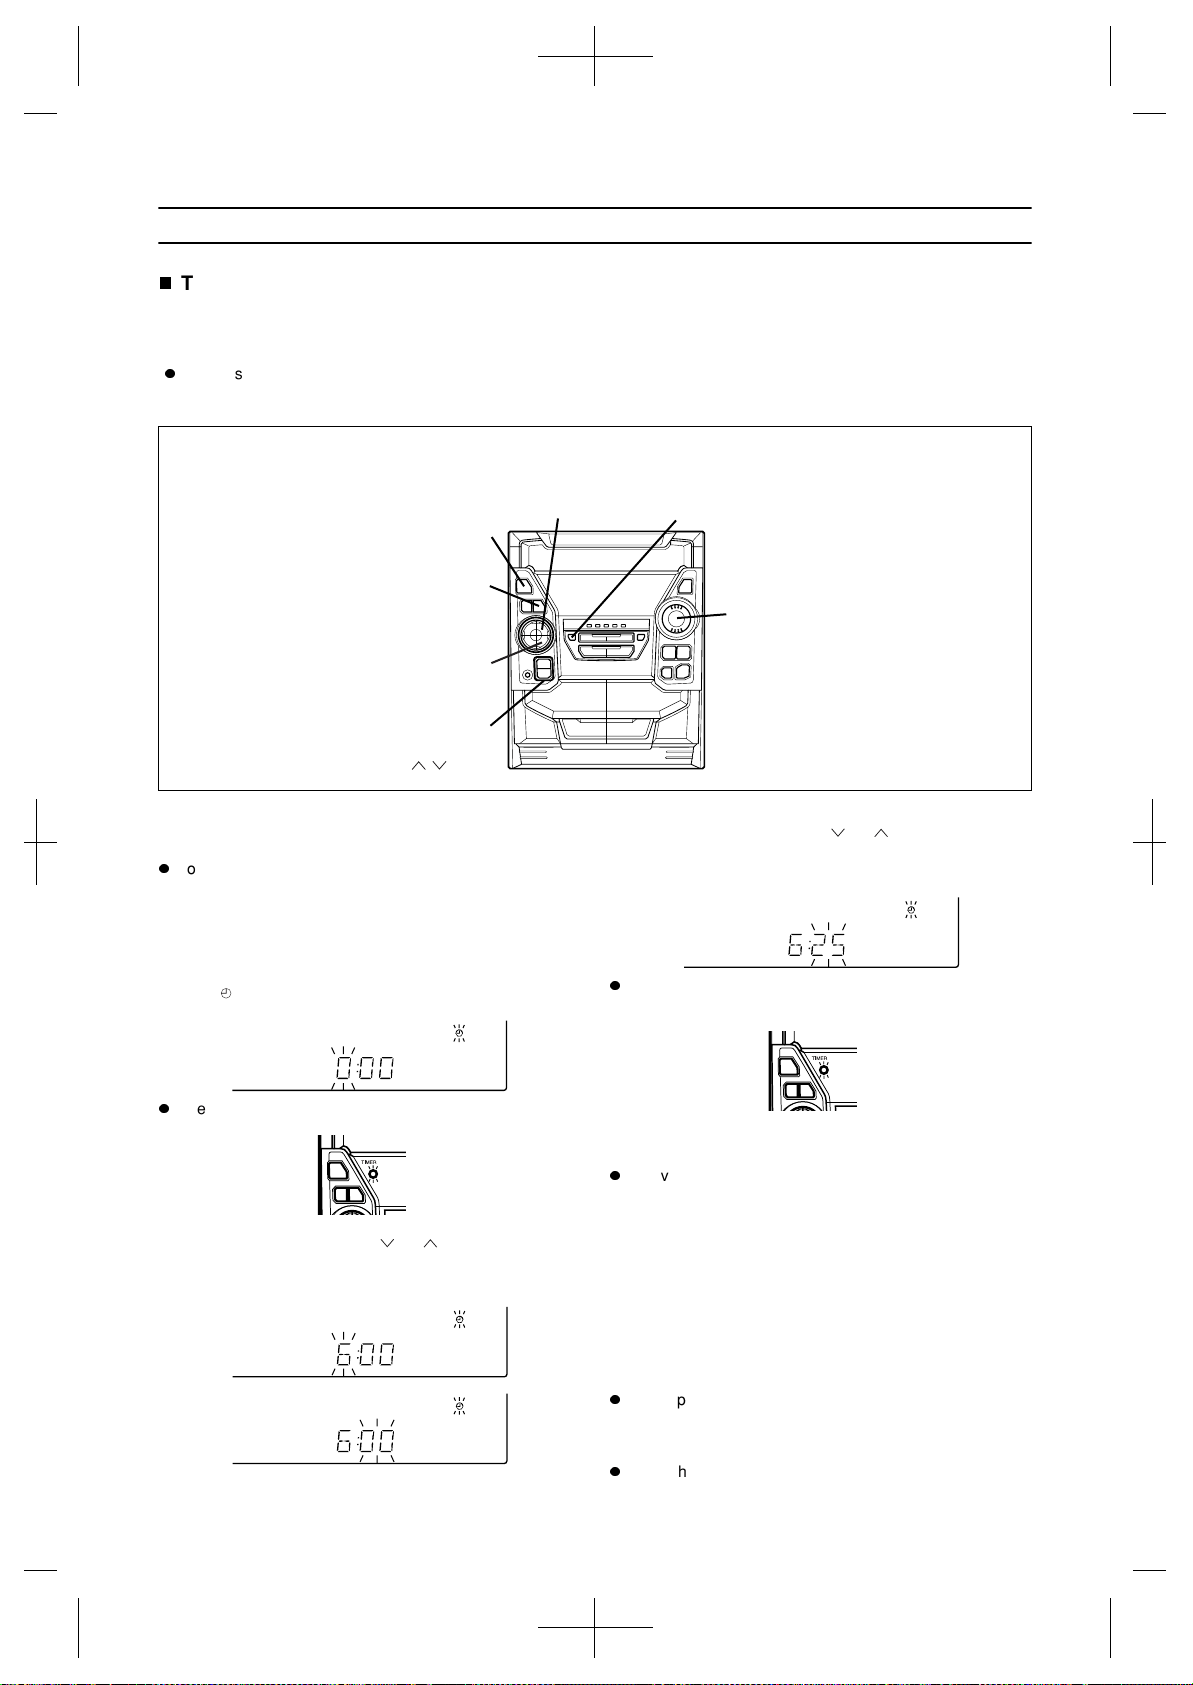
(Main unit operation)
ON/
STAND-BY
TIMER/
SLEEP
TUNER/(BAND)
VIDEO
/AUX
MEMORY/SET
VOLUME
TUNING/
TIME
(
)
Downloaded from: http://www.usersmanualguide.com/
Loading ...
Loading ...
Loading ...