Loading ...
Loading ...
Loading ...
16 17ASSEMBLY AND GAS CONNECTION INSTRUCTIONS FOR SIDE BURNERASSEMBLY AND GAS CONNECTION INSTRUCTIONS FOR SIDE BURNER
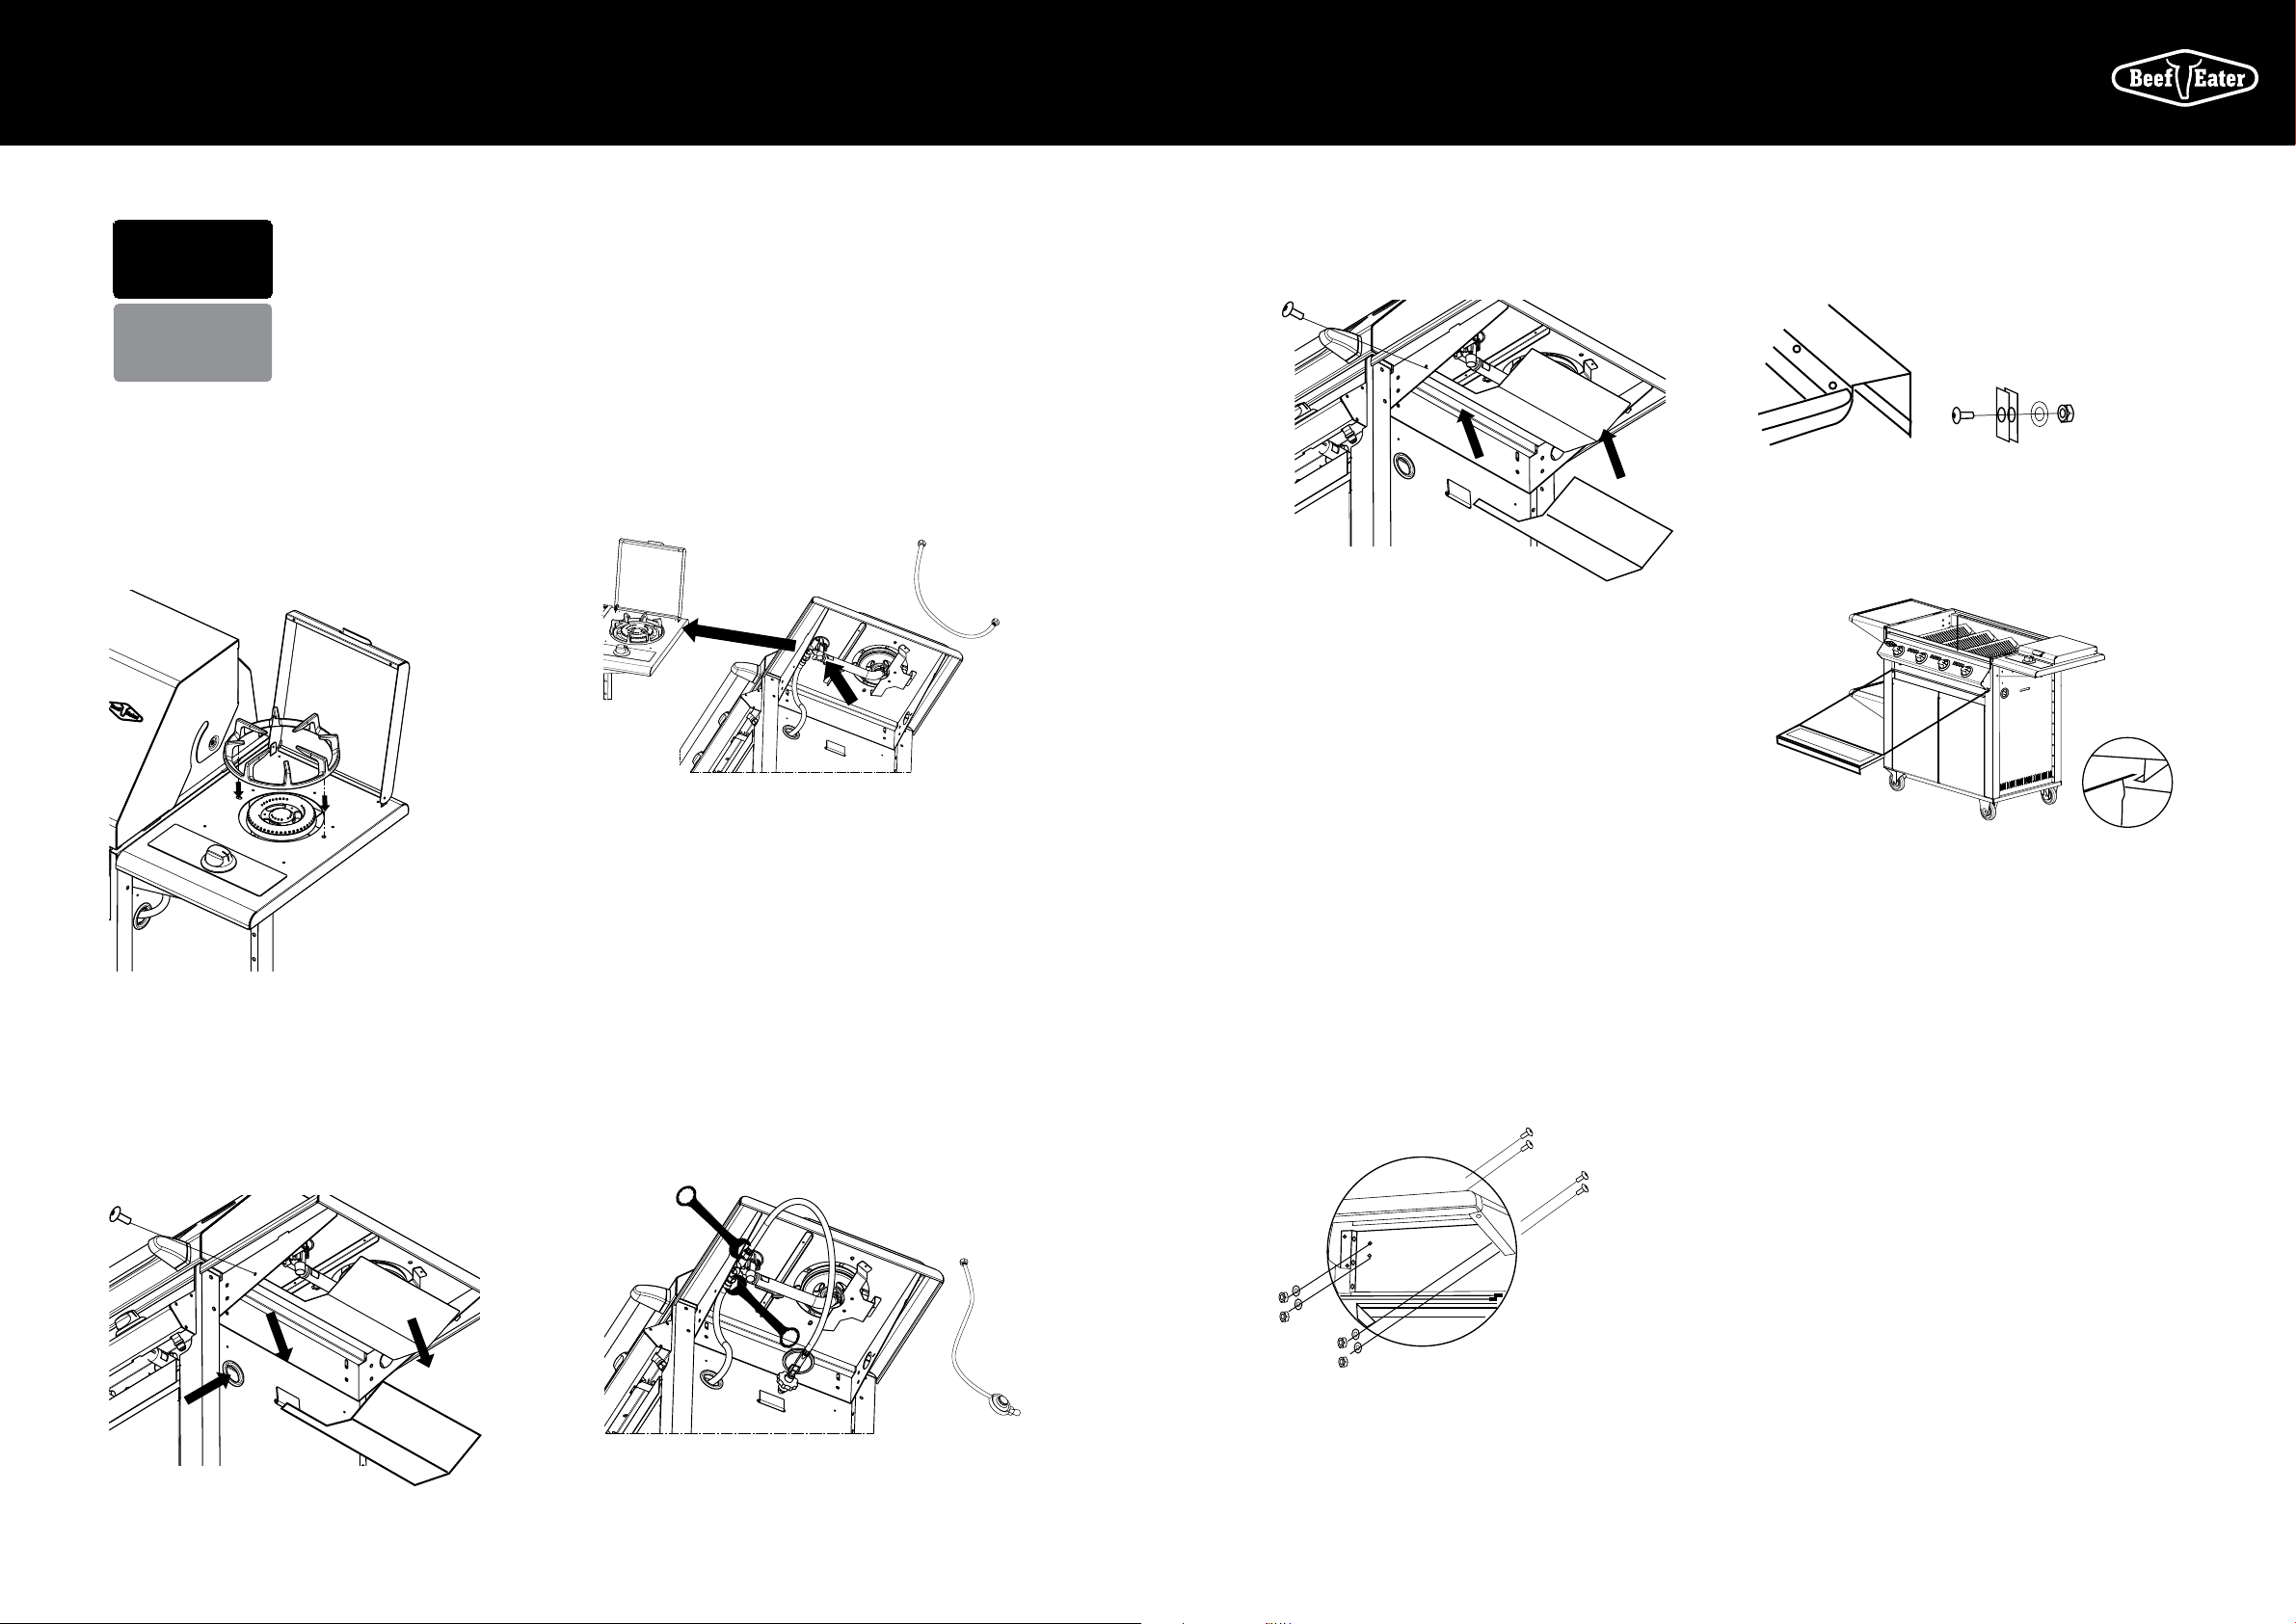
Replace The Drip Plate
Push the rear drip plate tabs back into the slots at the back
of the side burner body, and secure the front of the drip plate
with the screw removed earlier.
Secure All Joints And Leak Test
The gas leak testing procedure should be conducted every
time a gas cylinder is refilled and reconnected to the
appliance, or after any new gas connection is made. Never
use a naked flame to check for gas leaks.
In a small container, mix up a solution of water and
detergent or soap. Mix the solution well.
Make sure that the gas supply valve on the gas cylinder or
the shut off valve on the supply line is turned on. Make sure
that the gas control valves on the appliance are all turned off.
Using a brush or spray bottle apply the solution to the gas
line and each joint in the gas line, including the hose and
regulator.
Bubbling of the solution will indicate that there is a leak
present. Re-tighten or re-seal any joints that are leaking.
If a leak persists contact your distributor for assistance.
20) Finish Screwing In The Barbecue
The barbecue should be secured using 4 Allen head screws,
washers and nuts, as shown. If you have a side burner, the
right side of the barbecue will already be secured.
Connection to Barbecue
Ensure all gas controls on the barbecue and side burner are
set to OFF.
Take the connector hose that came with the side burner.
Connect one end to the inlet of the barbecue. Connect the
other end to the left side gas connection point of the side
burner.
If your barbecue came with a cabinet trolley/ cart, your
connector hose should already be attached to the barbecue
inlet (as indicated by the separate cart instructions). In this
case, simply pass the free end of the hose through the hose
access hole in the side of the cart prior to connecting to the
side burner inlet.
Connection To Gas Supply
Ensure all gas controls on the barbecue and side burner are
set to OFF.
Attach the gas supply hose to the right side inlet of the side
burner.
If the gas supply hose is not already attached to the gas
supply, then attach it now.
If your barbecue came with a cabinet trolley/cart, your gas
supply hose may already be attached to a portable gas
cylinder located inside the cabinet. In this case, simply pass
the free end of the hose through the hose access hole in the
side of the cart prior to connecting to the side burner inlet.
Using two spanners, tighten all gas connections. Do not
overtighten.
ASSEMBLY AND GAS CONNECTION INSTRUCTIONS FOR SIDE BURNER
NATURAL
GAS
REFER TO LOCAL
GAS AUTHORITY F OR CONFIRMATION OF GAS
TY FIEP DNI OU TB
LPG
PROPANE
GAS
REFER TO LOCAL
GAS AUTHORITY FOR CONFIRMATION OF GAS
TY TBUODNIFIEP
hose access
hole
Assembly
Attach your side burner to your barbecue trolley as explained
in the separate barbecue/trolley instructions.
Attach The Trivet
Place the trivet on the body of the side burner. The small
notches underneath the trivet should sit neatly in the holes
in the steel, as shown.
Temporarily Remove The Drip Plate
In order to properly connect the hoses to the side burner, you
may find it easier to remove the drip plate from underneath
the side burner.
Simply undo the screw at the front of the side burner as
shown, and then ease the rear drip plate tabs from the side
burner body.
You now have clear access to the side burner inlets.
21) Fit The Dress Fascia To The Drip Tray
Screw the dress fascia to the drip tray using the small
Phillips head screws, washers and nuts packed with the
fascia.
22) Slide The Drip Tray Into Place
Ensure the drip tray slides along the top of the tracks
underneath the barbecue.
Now tighten all remaining screws and your assembly is
complete.
ASSEMBLY AND GAS CONNECTION INSTRUCTIONS FOR SIDE BURNER
hose
access
hole
side burner gas
connection
LPG gas
supply hose
connector hose
Loading ...
Loading ...
Loading ...