Loading ...
Loading ...
Loading ...
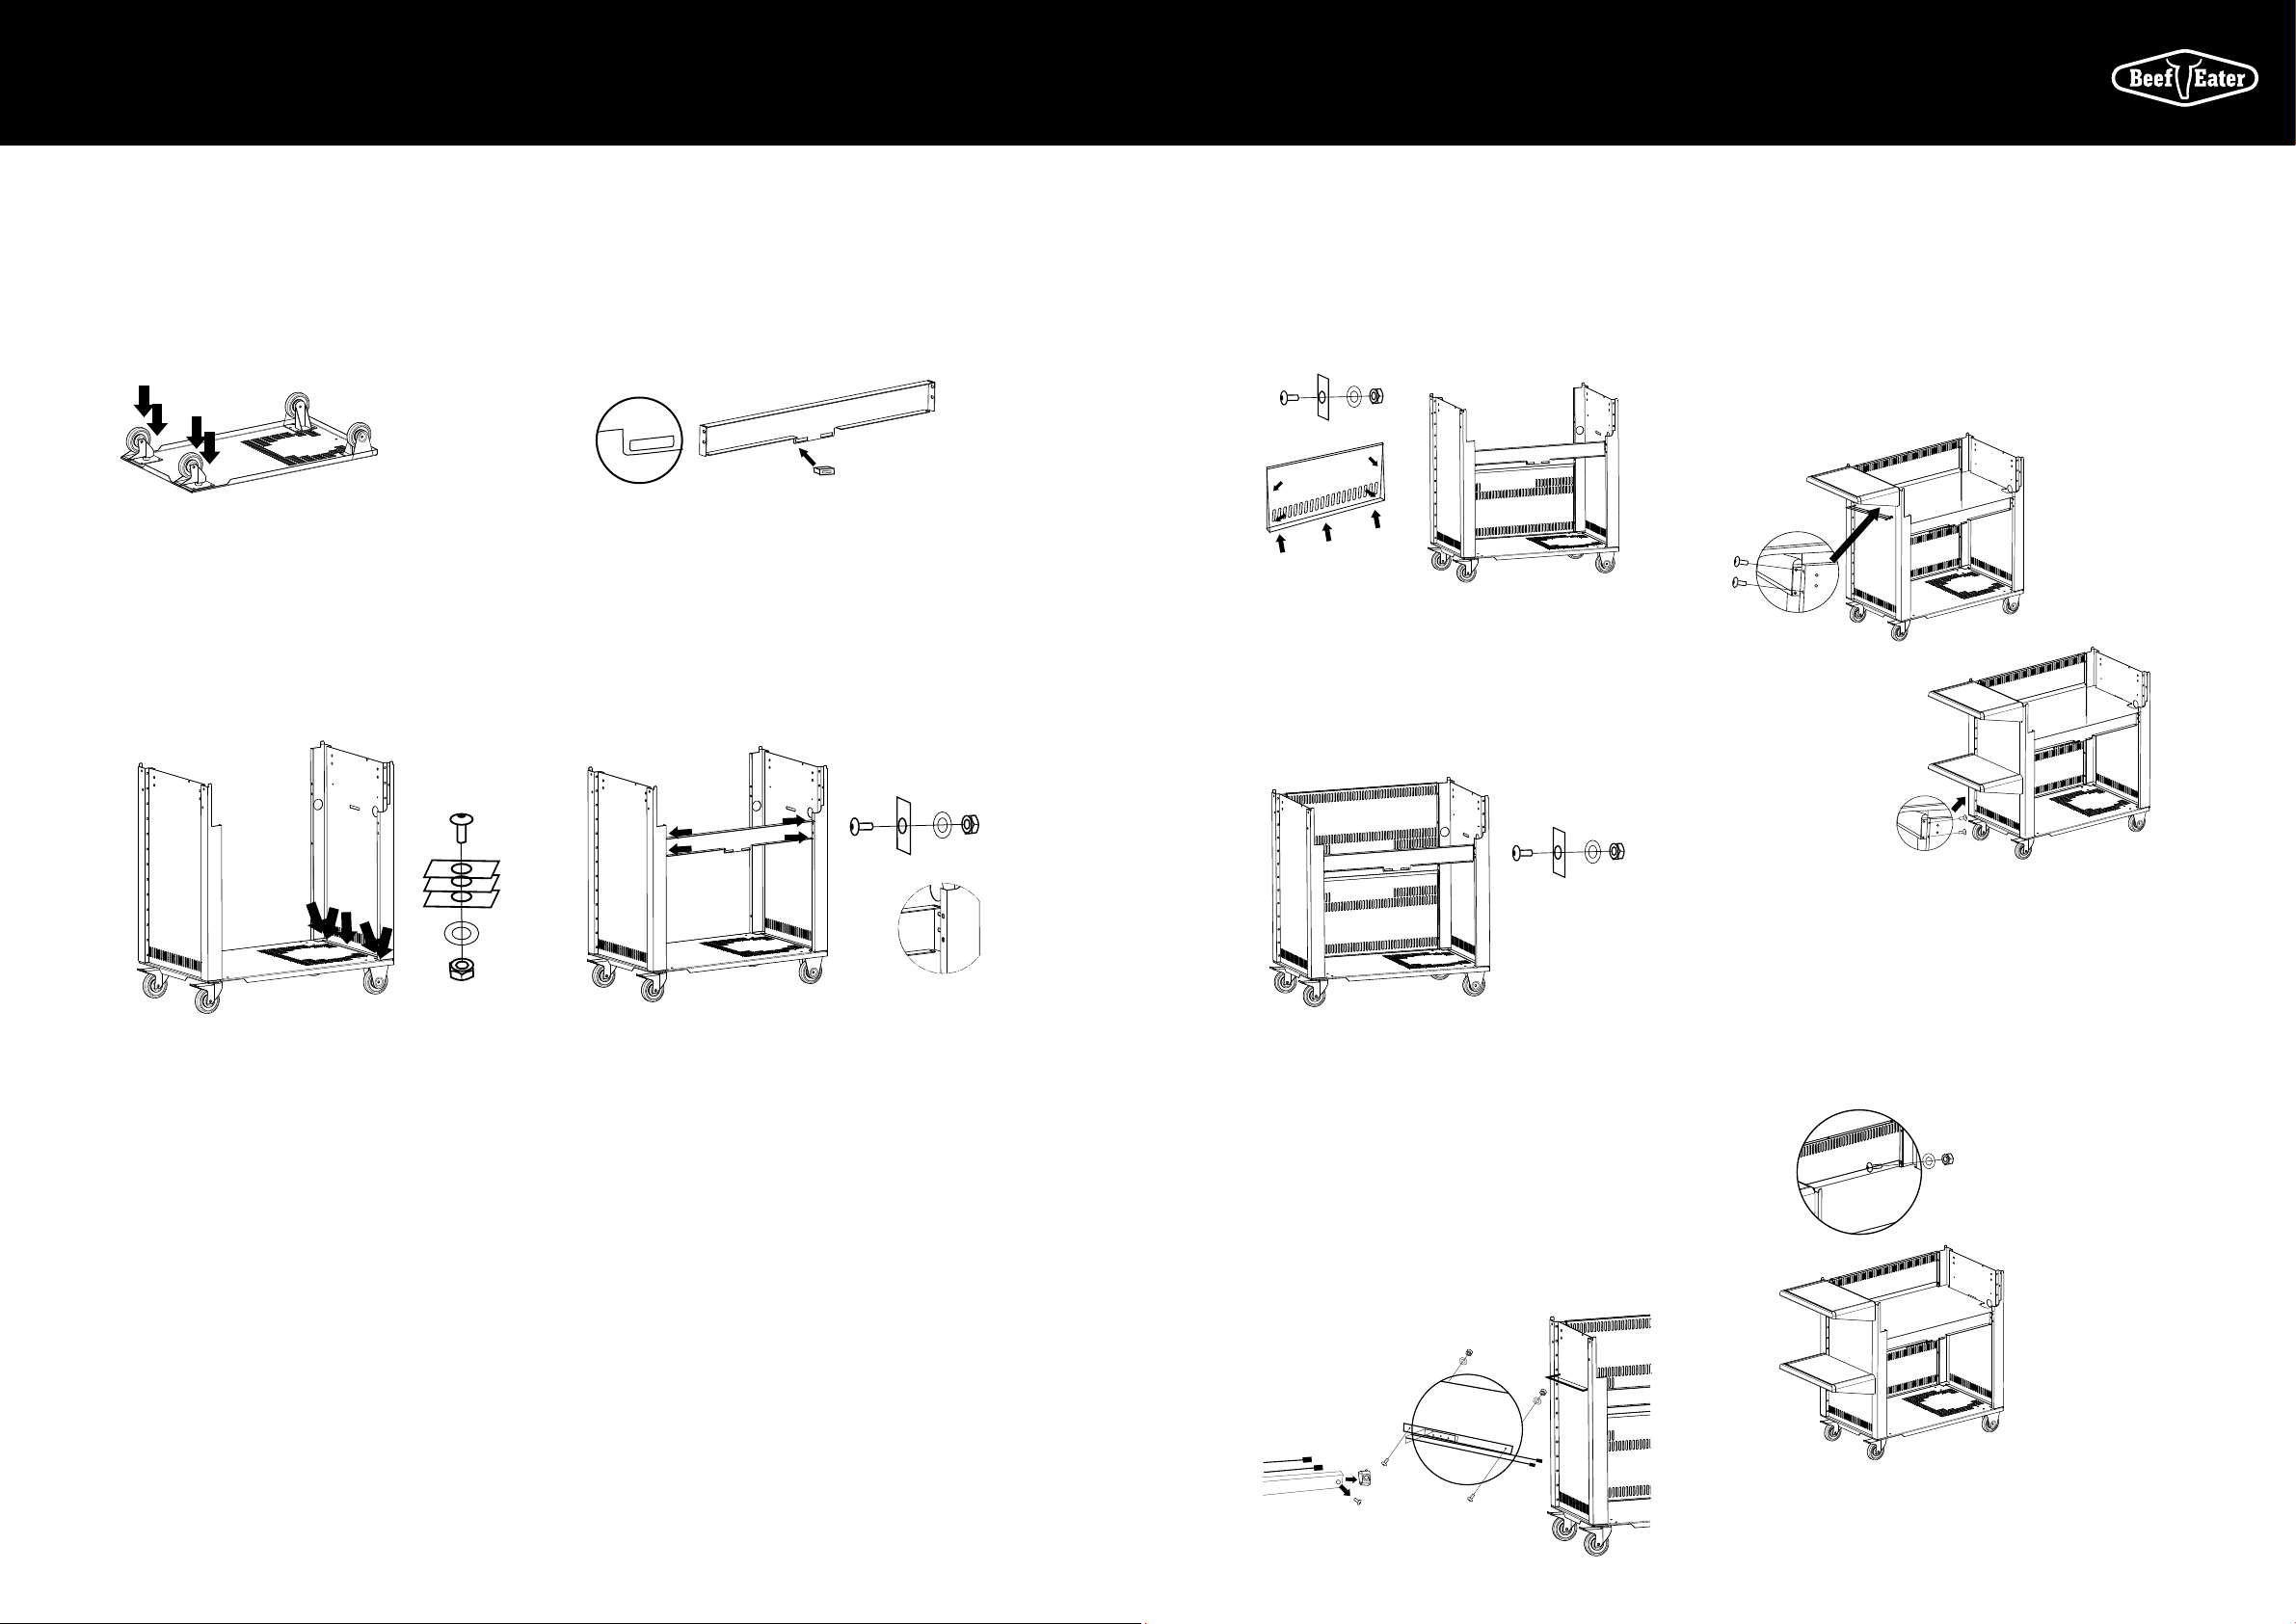
12 13ASSEMBLY INSTRUCTIONS FOR TROLLEY ASSEMBLY INSTRUCTIONS FOR TROLLEY
6) Fit The Lower Back Panel
Both back panels are identical.
Screw one of the back panels to the base and side panels
using 7 Allen head screws, washers and nuts.
Hand tighten only at this stage.
7) Fit The Upper Back Panel
Screw the other back panel to the side panels. Use only
one Allen head screw, washer and nut on each side, in the
uppermost hole.
Hand tighten only at this stage.
8) Fit The Towel Rack
If you purchased the optional towel rack, you can attach it to
either the right or left side panel.
First, unscrew and remove the plastic end caps from the
towel rack. Then, using 2 countersunk screws, washers and
nuts, attach the towel rack to the side panel.
You may need to slide the towel rails out of the way to
access the screw holes.
Tighten immediately.
2) Fit The Rotating Castors
Fit the rotating castors into the holes in the bottom of the
base. Again, use only two Allen head screws, washers and
nuts for each castor in the positions shown.
Spanner/wrench tighten immediately.
3) Fit The Right And Left Side Panels
Use 5 Allen head screws, washers and nuts on each panel.
You may find it easier to lay the cart on its side for this step.
Only hand tighten at this stage - You will wrench/spanner
tighten at a later step.
The right side has holes
for the gas hose
ASSEMBLY INSTRUCTIONS FOR TROLLEY
4) Fit The Magnets To The Cross Brace
Hold the cross brace so the folded tabs are facing towards
you. Push the magnets into place so the magnetic side is
facing you.
Steel is folded up
towards you
5) Fit The Front Cross Brace
Use 4 Allen head screws, washers and nuts. Ensure the
magnets are towards the bottom and the folded tabs are
facing outwards.
The cross brace “wraps around” the side panels, to bring
them closer together, as shown in the inset.
Hand tighten only at this stage.
9) Fit The Left Side Shelf
Use 4 Allen head screws, nuts and washers. Get in
underneath the side shelf and screw the shelf to the side
panel. The screws go into the slotted holes as shown.
If you have a second side shelf you should fit it at this point,
only for lower shelves, the screws go in the round holes at
the side.
All side shelves should be tightened immediately.
10) Fit The Top Enclosure Panel
The front of the enclosure panel sits neatly on the front
cross brace. The back of the panel screws into both the
upper back panel and the side panel. Use two Allen head
screws, washers and nuts.
Hand tighten only at this stage.
ASSEMBLY INSTRUCTIONS FOR TROLLEY
Loading ...
Loading ...
Loading ...