Loading ...
Loading ...
Loading ...
84
UTILITY STITCHES — — — — — — — — — — — — — — — — — — — — — — — — — — — — — — — — — — — — — — — — — — —
2
Attach buttonhole foot “A”.
• For details, refer to “Replacing the presser
foot” (page 33).
3
Select stitch
47
.
• For details, refer to “Selecting stitching”
(page 56).
4
Position the fabric so that the opening of the
pocket faces toward you, and then lower the
presser foot lever so that the needle drops 2 mm
(1/16 inch) in front of the pocket opening.
1 2mm (1/16inch)
Pass the upper thread down through the hole
in the presser foot.
•
When lowering the presser foot, do not push
in the front of the presser foot, otherwise the
bar tack will not be sewn with the correct size.
1 Do not reduce the gap.
5
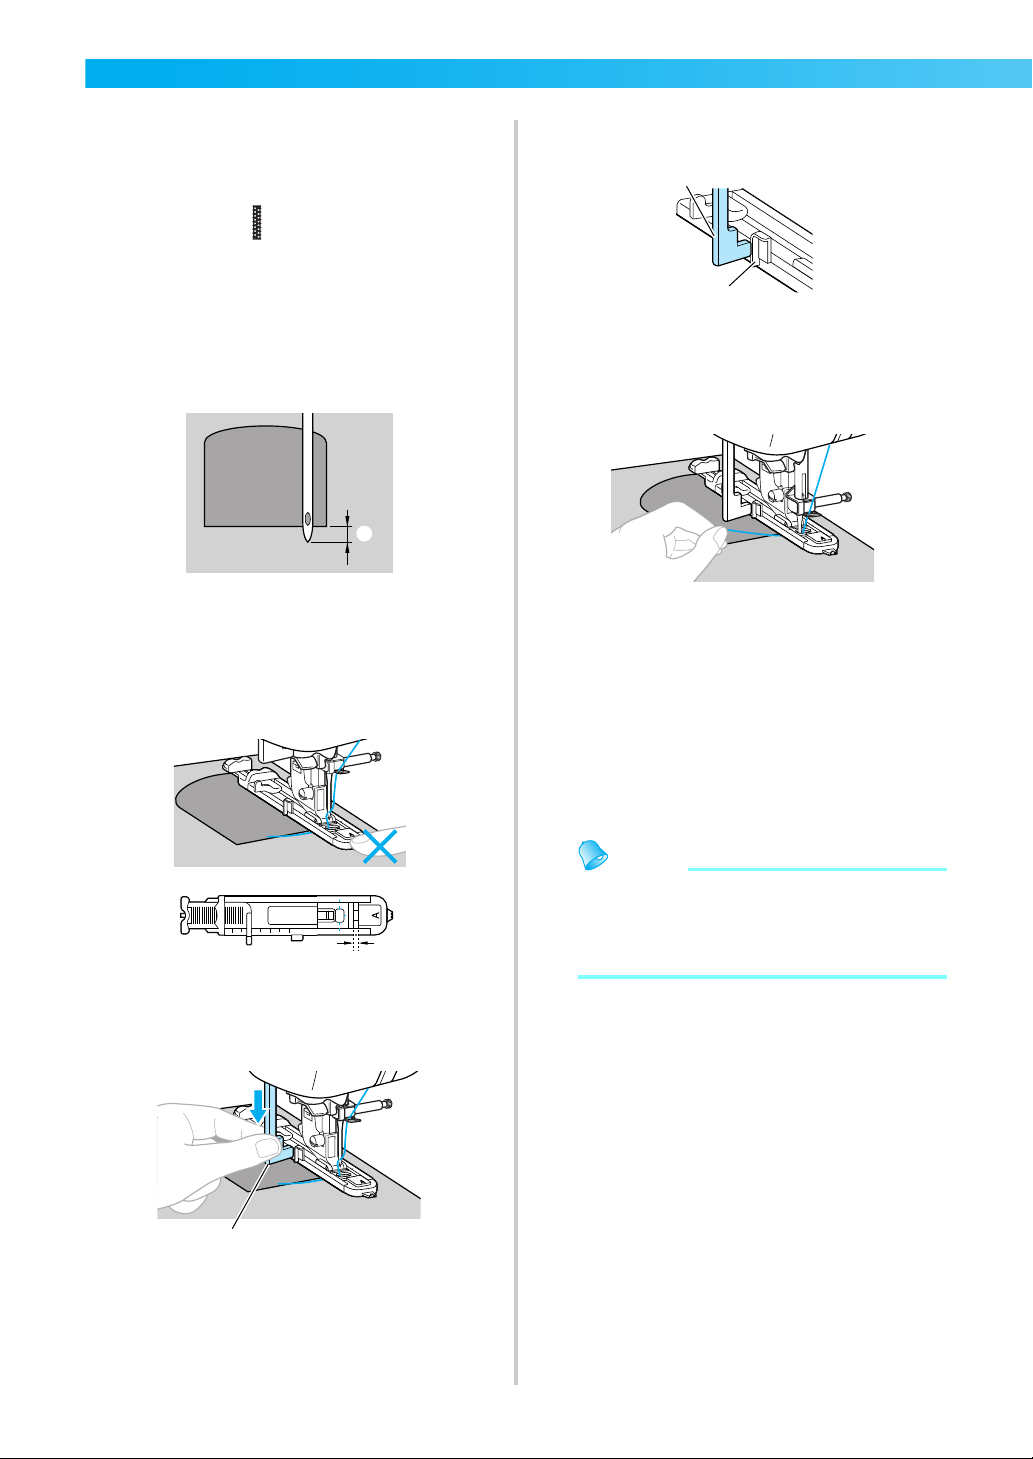
Pull down the buttonhole lever as far as
possible.
1 Buttonhole lever
The buttonhole lever is positioned behind the
bracket on the buttonhole foot.
1 Buttonhole lever
2 Bracket
6
Gently hold the end of the upper thread in
your left hand, and then start sewing.
X Once sewing is completed, the machine
automatically sews reinforcement stitches,
then stops.
7
Raise the presser foot lever, remove the
fabric, and cut the threads.
8
Raise the buttonhole lever to its original
position.
Memo
● If the fabric does not feed, for example,
because it is too thick, increase the stitch
length. For details, refer to “Adjusting the
stitch length” (page 48).
1
a
a
2
1
Loading ...
Loading ...
Loading ...