Loading ...
Loading ...
Loading ...
32
GETTING READY — — — — — — — — — — — — — — — — — — — — — — — — — — — — — — — — — — — — — — — — — — — —
—
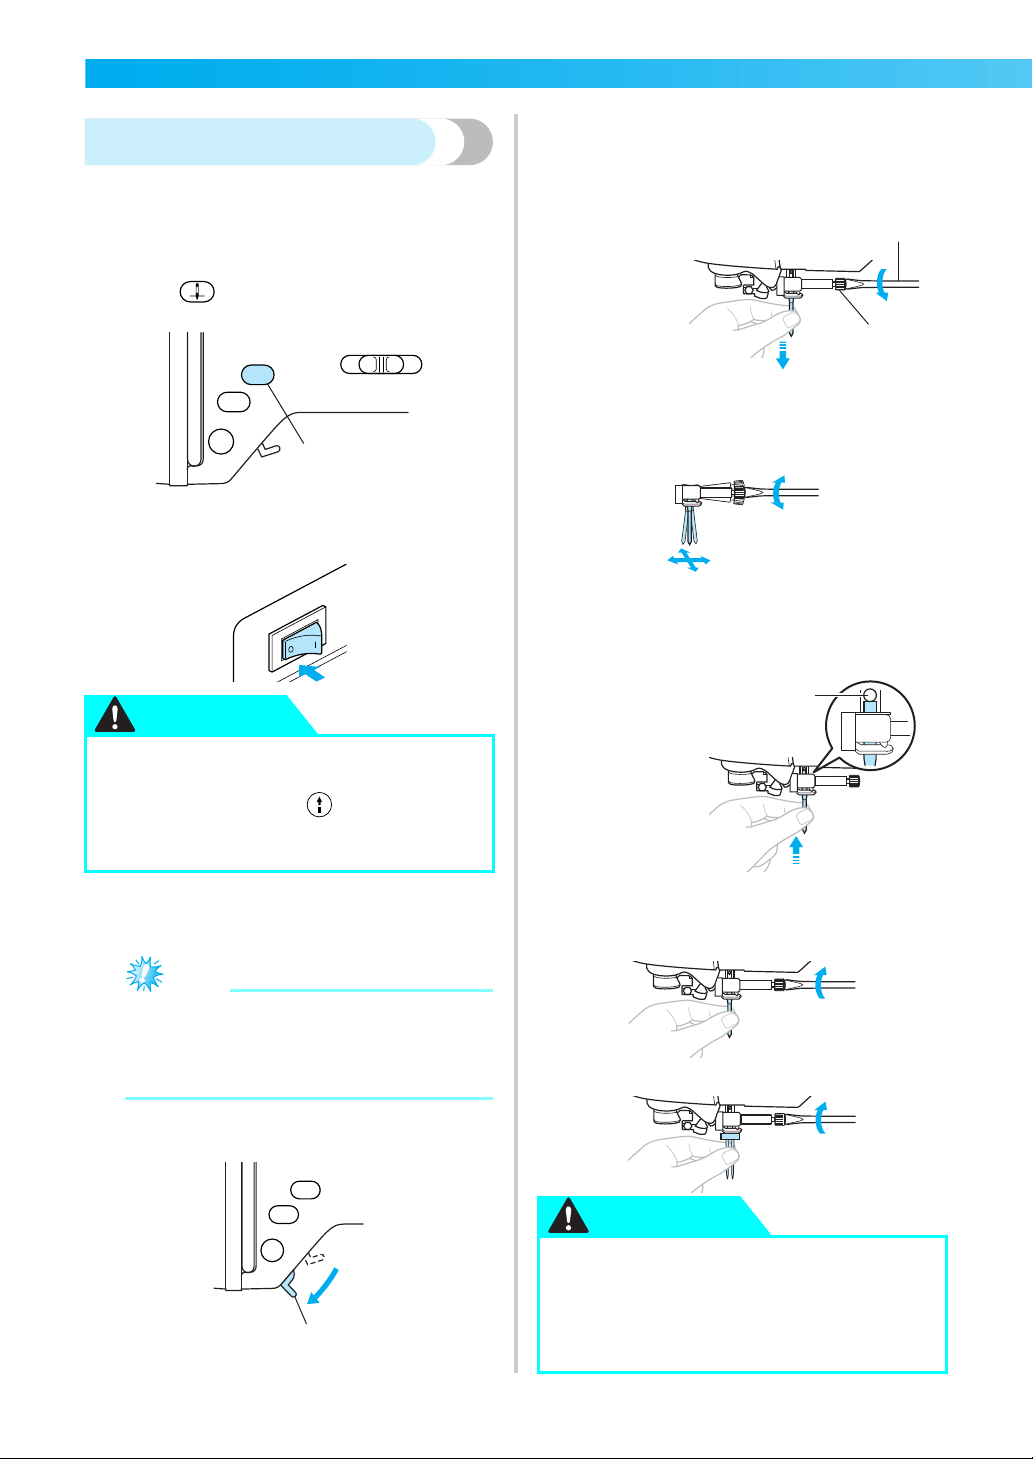
Replacing the needle
Replace the needle as described below. Use the
screwdriver and a needle that has been determined
to be straight according to the instructions in
“Checking the needle”.
1
Press (“Needle Position” button) once
or twice to raise the needle.
1 “Needle Position” button
2
Turn off the sewing machine.
3
Place fabric or paper under the presser foot to
cover the hole in the needle plate.
Note
● Before replacing the needle, cover the hole
in the needle plate with fabric or paper to
prevent the needle from falling into the
machine.
4
Lower the presser foot lever.
1 Presser foot lever
5
Hold the needle with your left hand, and then
use a screwdriver to turn the needle clamp
screw toward you (counterclockwise) to
remove the needle.
• Do not apply a strong force when loosening
or tightening the needle clamp screw,
otherwise certain parts of the sewing
machine may be damaged.
6
With the flat side of the needle toward the
rear of the machine, insert the needle until it
touches the needle stopper.
7
While holding the needle with your left hand,
use the screwdriver to tighten the needle
clamp screw.
Install the twin needle in the same way.
● Before replacing the needle, be sure to
turn off the sewing machine, otherwise
injuries may occur if (“Start/Stop”
button) is accidentally pressed and the
machine starts sewing.
1
CAUTION
1
1 Screwdriver
2 Needle clamp
screw
1 Needle stopper
● Be sure to insert the needle until it
touches the needle stopper and securely
tighten the needle clamp screw with the
screwdriver, otherwise the needle may
break or damage may result.
2
1
1
CAUTION
Loading ...
Loading ...
Loading ...