Loading ...
Loading ...
Loading ...
104
APPENDIX — — — — — — — — — — — — — — — — — — — — — — — — — — — — — — — — — — — — — — — — — — — — — —
4
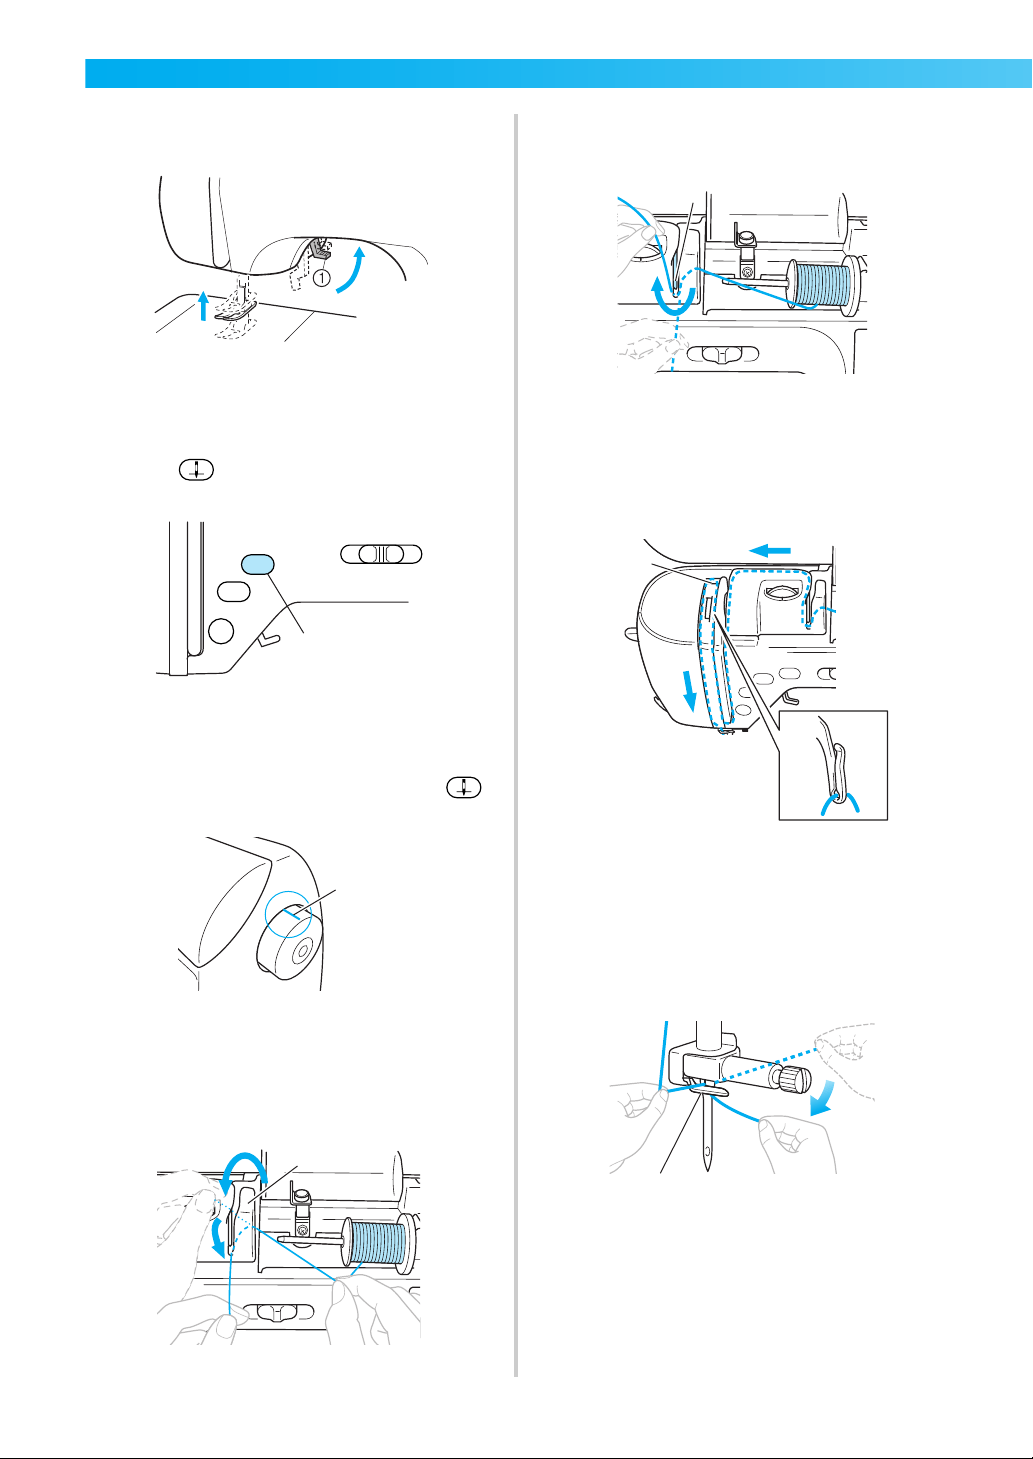
Raise the presser foot using the presser foot
lever.
1 Presser foot lever
• If the presser foot is not raised, the sewing
machine cannot be threaded correctly.
5
Press (“Needle Position” button) once
or twice to raise the needle.
1 “Needle Position” button
X The needle is correctly raised when the
mark on the handwheel is at the top, as
shown below. Check the handwheel and, if
this mark is not at this position, press
(“Needle Position” button) until it is.
1 Mark on handwheel
6
While holding the thread lightly with your
right hand, pull the thread with your left
hand, and then pass the thread behind the
thread guide cover and to the front.
1 Thread guide cover
7
Pass the thread under the thread guide plate,
and then pull it up.
1 Thread guide plate
8
While using your right hand to lightly hold the
thread passed under the thread guide plate,
pass the thread through the thread path in the
order shown below.
1 Shutter
9
Pass the thread behind the needle bar thread
guide.
The thread can easily be passed behind the
needle bar thread guide by holding the thread
in your left hand, then feeding the thread with
your right hand, as shown.
1 Needle bar thread guide
0
Next, use the needle threader to thread the
needle. Continue with the procedure in
“Threading the needle” (page 25).
1
1
1
1
1
1
Loading ...
Loading ...
Loading ...