Loading ...
Loading ...
Loading ...
Troubleshooting 105
4
Incorrect thread tension
■ Symptoms
• Symptom 1: The lower thread is visible from the upper side of the fabric.
• Symptom 2: The upper thread appears as a straight line on the upper side of the fabric.
• Symptom 3: The upper thread is visible from the lower side of the fabric.
• Symptom 4: The lower thread appears as a straight line on the lower side of the fabric.
• Symptom 5: The stitching on the lower side of the fabric is loose or has slack.
■ Cause/remedy/check details
Cause 1
The machine is not correctly threaded.
<With symptoms 1 and 2 described above>
The lower threading is incorrect.
Return the thread tension dial to “4”, and
then refer to “Upper thread tightened up”
(page 102) to correct the threading.
<With symptoms 3 through 5 described above>
The upper threading is incorrect.
Return the thread tension dial to “4”, and
then refer to “Tangled thread on wrong side
of fabric” (page 103) to correct the upper
threading.
Cause 2
A needle and thread appropriate for the
fabric are not being used.
The sewing machine needle that should be
used depends on the type of fabric sewn and
the thread thickness.
If a needle and thread appropriate for the
fabric are not being used, the thread tension
will not be adjusted correctly, causing
wrinkles in the fabric or skipped stitches.
• Refer to “Needle types and their uses”
(page 30) to check that a needle and thread
appropriate for the fabric are being used.
Cause 3
An appropriate setting on the thread tension
dial is not selected.
Turn the thread tension dial to select an
appropriate thread tension.
The appropriate thread tension differs
according to the type of fabric and thread
being used.
* Adjust the thread tension while test sewing
on a piece of scrap fabric that is the same as
that used in your project.
Note
● If the upper threading and lower threading
are incorrect, the thread tension cannot be
adjusted correctly, even by turning the
thread tension dial. Check the upper
threading and lower threading first, and
then adjust the thread tension.
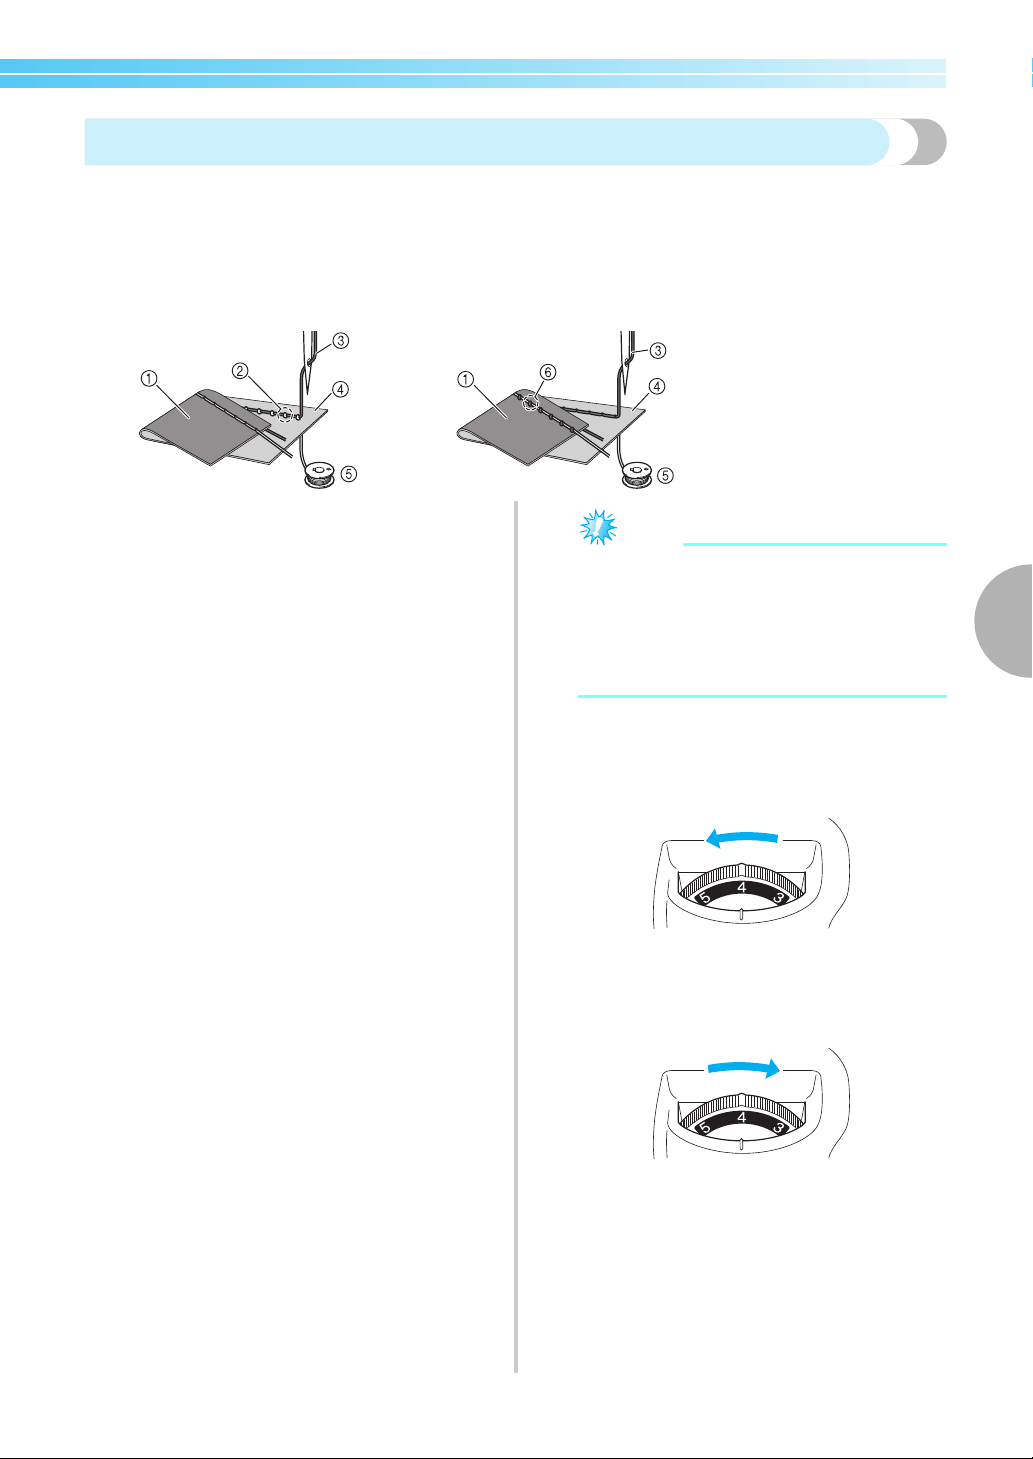
• When the lower thread is visible from the
upper side of the fabric. Turn the thread
tension dial to a lower number (toward the
left). (Loosen the thread tension.)
• When the upper thread is visible from the
lower side of the fabric. Turn the thread
tension dial to a higher number (toward the
right). (Tighten the thread tension.)
Symptom 1 Symptom 3
1 Lower side of fabric
2 Lower thread visible from
upper side of fabric
3 Upper thread
4 Upper side of fabric
5 Lower thread
6 Upper thread visible from
lower side of fabric
Loading ...
Loading ...
Loading ...