User Manual
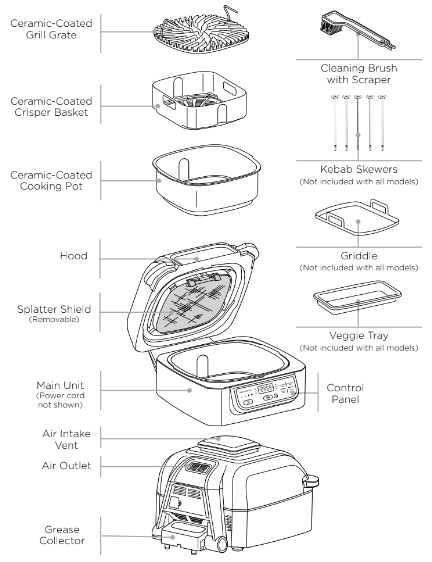
PARTS
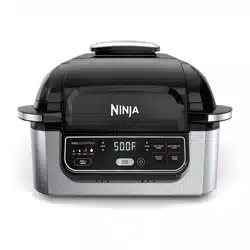
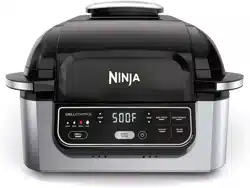
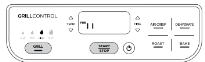
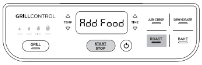
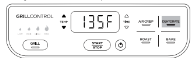
GETTING TO KNOW YOUR FOODITM GRILL
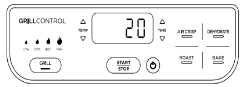
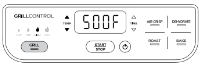
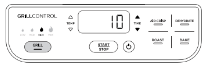
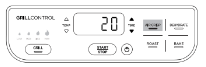
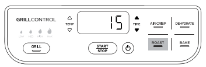
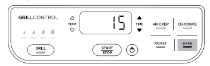
The control panel display shows time in an HH:MM format. The display to the left reads 20 minutes.
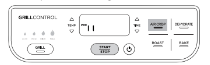
FUNCTION BUTTONS
NOTE: Not all functions are included on every model.
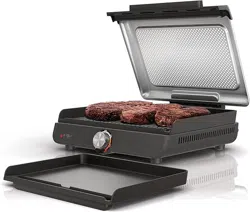
GRILL Grill indoors while creating even char, grill marks, and grilled flavor.
AIR CRISP For crispiness and crunch with little to no oil.
ROAST Tenderize meats, roast vegetables, and more.
BAKE Use to bake cakes, treats, desserts, and more.
DEHYDRATE Dehydrate meats, fruits, and vegetables for healthy homemade snacks.
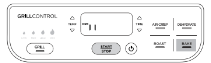
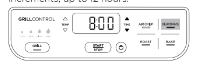
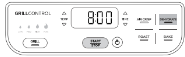
OPERATING BUTTONS
POWER button Once the unit is plugged in, press the power button to turn on the unit. Pressing it during cooking stops the current cooking function and turns off the unit.
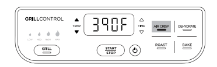
TEMP arrows Use the up  and down
  TEMP arrows to adjust the cooking temperature in any function. When using the Grill function, toggle the GRILL button or use the up and down arrows to adjust cooking temperature.
TIME arrows Use the up and down
  TIME arrows to adjust the cook time in any function.
NOTE: To adjust temperature or time during cooking, press the up and down arrows. The unit will then resume at those settings.
START/STOP button After selecting temperature and time, press the START/STOP button to begin cooking.
STANDBY MODE
The unit will power off if cooking is not in process and there has been no interaction with the control panel for 10 minutes.
BEFORE FIRST USE
- Remove all packaging material, promotional labels, and tape from the unit.
- Remove all accessories from the package and read this manual carefully. Please pay particular attention to operational instructions, warnings, and important safeguards to avoid any injury or property damage.
- Wash the grill grate, splatter shield, crisper basket, cleaning brush, veggie tray, griddle, kebabs, and cooking pot in warm, soapy water, then rinse and dry thoroughly. The grill grate, splatter shield, crisper basket, cleaning brush, veggie tray, griddle, kebabs, and cooking pot are also dishwasher safe. NEVER clean the main unit in the dishwasher.
USING YOUR FOODI™ GRILL
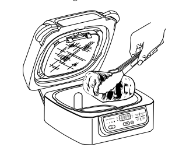
SPLATTER SHIELD
Located on the underside of the hood, the splatter shield keeps the heating element clean and prevents smoking. The splatter shield is removable for cleaning, but we recommend keeping it in place when cooking.
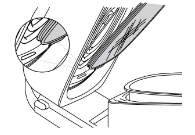
Removing the splatter shield
Remove the splatter shield for cleaning after every use. First allow the splatter shield to cool completely, then remove it by using your thumb to release the front clip by pushing the front clip upward and using your other hand to pull one of the tabs toward you. This will release the splatter shield, allowing you to pull it out of the slot along the back of the hood.

Installing the splatter shield
To install, gently push the splatter shield into the back of the hood. Insert the back tab on shield with the slot on the back of the hood. Then push the splatter shield upward until it clicks into the clip on the front of the hood.
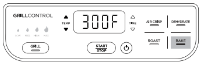
GRILLCONTROL TECHNOLOGY
Our technology allows you to control the temperature of the grill grate for precise cooking and keep smoke out of the kitchen.
When using the Grill function, you will need to select the grill grate temperature setting. Below are recommended temperature levels for common ingredients.
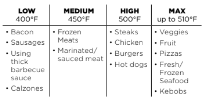
NOTE: The unit could create smoke during the cooking process. For less smoke, we recommend using canola, coconut, avocado, grapeseed, or vegetable oil instead of olive oil.
NOTE: The unit may produce smoke when cooking meats on a hotter setting than what is recommended.
Switching to Grill after using another function
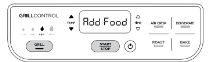
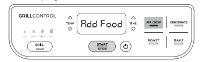
If the unit is already warm from using a different function, and the grill grate is at room temperature when you place it in the unit, “Add Food” may appear on the screen immediately. We recommend allowing the grill grate to heat up for at least 6 minutes before placing ingredients on it. As the unit continues to run and the grill grate heats up, “Add Food” will remain on the screen until you open the hood and place ingredients on the grate.
Batch grilling
When grilling more than two consecutive batches of food, it is recommended that you empty the fat/oil from the removable cooking pot. This will help prevent grease from burning and causing smoke.
We also recommend allowing the grill grate to heat back up for at least 3–5 minutes between batches to ensure consistent grill marks and char.
COOKING FUNCTIONS
Ensure the unit is plugged in before turning it on. Press the power button.
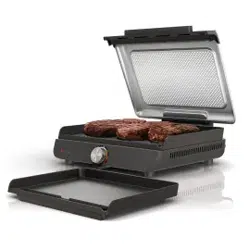
Grill
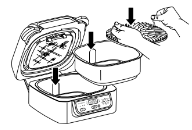
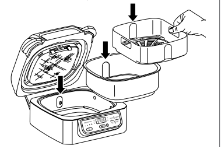
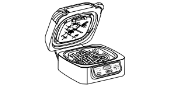
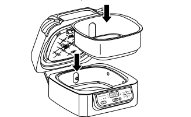
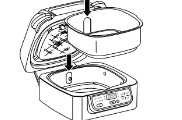
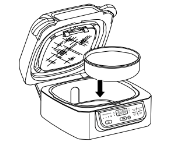
1. Place the cooking pot in the unit with the indent on the pot aligned with the rear bump on the main unit. Then place the grill grate in the pot with the handles facing up. Ensure the splatter shield is in place and close the hood.
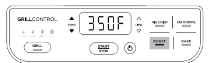
2. Press the GRILL button. The default temperature level will illuminate on the left side of the control panel and the corresponding air temperature will appear on the display screen. Press the Grill button or the up and down TEMP arrows to adjust the temperature setting.
3. Press the up and down TIME arrows to set the cooking time in one-minute increments, up to 30 minutes.
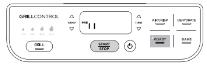
4. Press the START/STOP button to begin preheating. PRE will appear on the display screen, and the progress bar will begin. It can take about 8 minutes to preheat, depending on the selected temperature setting.
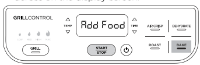
5. When preheating is complete, the unit will beep and “Add Food” will flash across on the display screen.
6. Open the hood and place ingredients on the grill grate. Once the hood is closed, cooking will begin and the timer will start counting down.
NOTE: During cooking, you can open the hood to check on or flip your food. The timer will pause when the hood is opened and then automatically resume after it is closed.
7. When cook time is complete, the unit will beep and END will appear on the display screen. Keep the hood open after removing your food so the unit will cool down more quickly. The stainless steel wrap on the exterior of the unit will be hot after cooking. If you need to cook your food longer, simply press the TIME up arrow to add more time, then press the START/STOP button.
NOTE: If batch cooking, empty the oil from the removable cooking pot after every 2 batches. This will help prevent grease from burning and causing smoke.
Air Crisp
1. Place cooking pot in the unit with the indent on the pot aligned with the bump on the main unit. Place the crisper basket in the pot, then close the hood.
2. Press the AIR CRISP button. The default temperature setting will display. Use the up and down TEMP arrows to adjust the temperature.
3. Use the up and down TIME arrows to set the cook time in 1-minute increments up to 1 hour.
4. Press the START/STOP button to begin preheating. PRE will appear on the display screen, and the progress bar will begin. It can take up to 3 minutes to preheat, depending on the selected temperature setting.
NOTE: While preheating is strongly recommended for best results, you can skip it by pressing the AIR CRISP button again. “Add Food” will flash across the screen. Open the hood and place ingredients in the crisper basket. Once the hood is closed cooking will begin and the timer will start counting down. Skip to step 7 for further instructions.
5. When preheating is complete, the unit will beep and “Add Food” will flash across on the display screen.
6. Open the hood and place ingredients in the crisper basket. Once the hood is closed, cooking will begin and the timer will start counting down.
7. For best results, we recommend shaking ingredients frequently. When you open the hood, the unit will pause. Use silicone tipped tongs when tossing your food or oven mitts to shake the basket. When done, replace the basket and close the hood. Cooking will automatically resume after hood is closed.

8. When cook time is complete, the unit will beep and END will appear on the display screen. Keep the hood open after removing your food so the unit will cool down more quickly. The stainless steel wrap on the exterior of the unit will be hot after cooking. If you need to cook your food longer, simply press the TIME up arrow to add more time, then press the START/STOP button.
Roast
1. Place cooking pot in the unit with the indent on the pot aligned with the bump on the main unit, then close the hood.
2. Press the ROAST button. The default temperature setting will display. Use the up and down TEMP arrows to adjust the temperature.
NOTE: To convert conventional oven recipes, reduce the temperature by 25°F. Check food frequently to avoid overcooking.
3. Use the up and down TIME arrows to set the cook time, in 15-minute increments, up to 4 hours.
4. Press the START/STOP button to begin preheating. PRE will appear on the display screen, and the progress bar will begin. It can take up to 3 minutes to preheat, depending on the selected temperature setting.
NOTE: While preheating is strongly recommended for best results, you can skip it by pressing the ROAST button again. “Add Food” will flash across the screen. Open the hood and place ingredients in the crisper basket. Once the hood is closed cooking will begin and the timer will start counting down.
5. When preheating is complete, the unit will beep and “Add Food” will flash across on the display screen.
6. Open the hood and place ingredients in the pot. Once the hood is closed, cooking will begin and the timer will start counting down.
NOTE: During cooking, you can open the hood to check on your food. The timer will pause when the hood is opened and then automatically resume after it is closed.
7. When cook time is complete, the unit will beep and END will appear on the display screen. Keep the hood open after removing your food so the unit will cool down more quickly. The stainless steel wrap on the exterior of the unit will be hot after cooking. If you need to cook your food longer, simply press the TIME up arrow to add more time, then press the START/STOP button.
Bake
1. Place cooking pot in the unit so the indent on the pot aligned with the bump on the main unit, then close the hood.
2. Press the BAKE button. The default temperature setting will display. Use the up and down TEMP arrows to adjust the temperature.
NOTE: To convert conventional oven recipes, reduce the temperature by 25°F. Check food frequently to avoid overcooking.
3. Use the up and down TIME arrows to set the cook time, in 15-minute increments, up to 4 hours.
4. Press the START/STOP button to begin preheating. PRE will appear on the display screen, and the progress bar will begin. It can take up to 3 minutes to preheat, depending on the selected temperature setting.
NOTE: While preheating is strongly recommended for best results, you can skip it by pressing the BAKE button again. "Add Food” will flash across the screen. Open the hood and place ingredients in the crisper basket. Once the hood is closed cooking will begin and the timer will start counting down.
5. When preheating is complete, the unit will beep and “Add Food” will flash across on the display screen.
6. Open the hood and add ingredients to the pot or set your bake pan directly in the bottom of the pot, and close the hood to start cooking. Once the hood is closed, cooking will begin and the timer will start counting down.
NOTE: During cooking, you can open the hood to check on your food. The timer will pause when the hood is opened and then automatically resume after it is closed.
7. When cook time is complete, the unit will beep and END will appear on the display screen. Keep the hood open after removing your food so the unit will cool down more quickly. The stainless steel wrap on the exterior of the unit will be hot after cooking. If you need to cook your food longer, simply press the TIME up arrow to add more time, then press the START/STOP button.
Dehydrate
NOTE: The Dehydrate function is not included on all models.
1. Place cooking pot in the unit with the indent on the pot aligned with the bump on the main unit, then add a single layer of ingredients to the bottom of the pot. Place the crisper basket in the pot and add a layer of ingredients to the bottom of the basket. Close the hood.

2. Press the DEHYDRATE button. The default temperature setting will display. Use the up and down TEMP arrows to set your desired temperature.
3. Use the up and down TIME arrows to set the dehydration time, in 15-minute increments, up to 12 hours.
4. Press the START/STOP button to begin. The unit does not need to preheat.
NOTE: During dehydration, you can open the hood to check on your food. The timer will pause when the hood is opened and then automatically resume after it is closed.
5. When dehydration time is complete, the unit will beep and END will appear on the display screen. Remove your food and close the hood.
CLEANING YOUR FOODITM GRILL
The unit should be cleaned thoroughly after every use. Always let the appliance cool before cleaning.
- Unplug the unit from the wall outlet before cleaning. Keep the hood open after removing your food so the unit will cool down more quickly.
- To clean the main unit, and control panel, wipe them with a damp cloth.
- The cooking pot, grill grate, crisper basket, splatter shield, cleaning brush, and any other included Ninja Foodi Grill accessories are dishwasher safe.
NOTE: NEVER use abrasive tools or cleaners. NEVER immerse the main unit in water or any other liquid.
- If hand-washing, use the cleaning brush to help wash the parts. Use the opposite end of the cleaning brush as a scraper to assist with releasing baked-on sauces or cheese. Air-dry or towel-dry all parts after hand-washing.
- If food residue or grease are stuck on the grill grate, splatter shield, or any other removable part, place them in a sink or stack them in the pot and fill with warm, soapy water and allow to soak for a couple hours or overnight. After soaking, use the cleaning brush to clean each part.
- Over time, the splatter shield front tabs and frame may accumulate grease buildup. Soaking the splatter shield overnight will help soften the baked-on grease. After soaking, use the cleaning brush to remove the grease from the stainless steel frame and front tabs.
TROUBLESHOOTING GUIDE
"Add Food” appears on the control panel display.
- The unit has completed its Grill preheating and it is now time to add your ingredients.
"Shut Lid” appears on the control panel display.
- The hood is open and needs to be closed for the selected function to start.
"Add Pot” appears on the control panel display.
- The pot is not installed in the unit.
"E” appears on the control panel display.
- The unit is not functioning properly. Please contact Customer Service at 1-877-646-5288. So we may better assist you, please register your product online at registeryourninja.com and have the product on hand when you call.
Why do blinking lights appear after I press the START/STOP button?
- This is a progress bar indicating how far along you are in the preheating cycle.
Why does the preheat progress bar not start from the beginning?
- When the unit is warm from previously being used, it will not require the full preheating time.
Should I add my ingredients before or after preheating?
- Let the unit preheat before adding ingredients.
Why is my unit emitting smoke?
- When using the Grill function, always select the recommended temperature setting. Recommended settings can be found in the Quick Start Guide and in the Inspiration Guide. Make sure the splatter shield is installed.
How do I pause the unit so I can check my food?
- When the hood is opened during a cooking function, the unit will automatically pause.
My food is burned.
- Do not add food until preheating is complete. For best results, check progress throughout cooking, and remove food when desired level of brownness has been achieved. Remove food immediately after the cook time is complete to avoid overcooking.
My food didn’t cook when air crisping.
- For consistent browning, make sure ingredients are arranged in an even layer on the bottom of the crisper basket with no overlapping. Shake loose ingredients during cooking for consistent crispiness.
Why is my food blowing around when air crisping?
- Occasionally, the fan will blow lightweight foods around. To prevent this, secure loose food (like the top slice of bread on a sandwich) with toothpicks.
Can I air crisp fresh battered ingredients?
- Yes, but use the proper breading technique. It is important to coat foods first with flour, then with egg, and then with bread crumbs. Be sure to press the bread crumbs onto the food so they stick in place. Loose breading may be blown off by the unit’s powerful fan.
The control panel display is no longer illuminated.
- The unit is off. Press the power button to turn it back on.
Can I cancel or override preheating?
- Preheating is highly recommended for best results. skip preheating by selecting the function again after you press the START/STOP button. However, you cannot override preheating when using the Grill function.
How can I deep clean the splatter shield?
- The splatter shield should be cleaned after each use and is dishwasher safe. Over time, the splatter shield front tabs and frame may accumulate grease buildup. Soaking the splatter shield overnight will help soften the baked-on grease. After soaking, use the cleaning brush to the stainless steel frame and front tabs.