Documents: Go to download!
- User Manual - (English)
- User Manual (Operator/Owner/Guide) - (English)

- PARTS
- GETTING TO KNOW YOUR GRILL
- USING THE NINJA® FOODI® MAX PRO
- COOKING FUNCTIONS
- CLEANING & MAINTENANCE
- TROUBLESHOOTING
Table of contents
User Manual Air Fryer
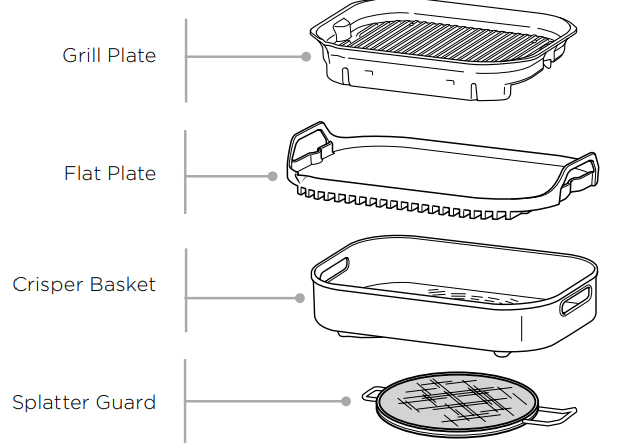
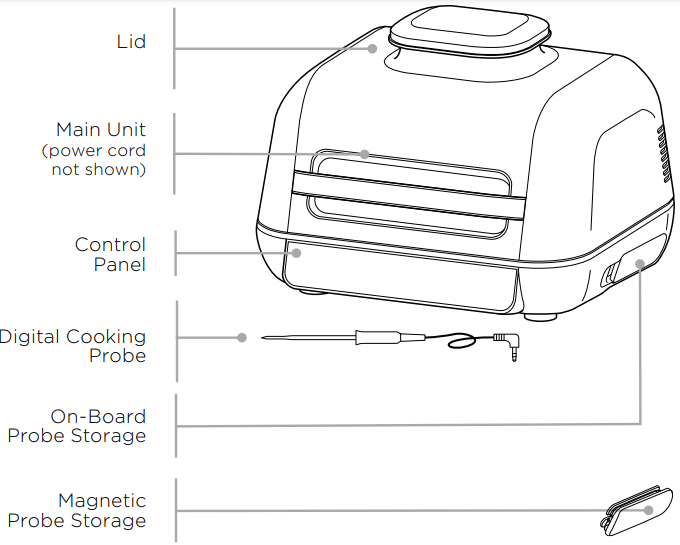
PARTS
GETTING TO KNOW YOUR GRILL

FUNCTION BUTTONS
GRILL : Closed-lid cooking: Top and bottom heat which is best for grilling large or thick cuts of meat, frozen food or for an all-around sear. Open lid cooking: Ideal for grilling delicate foods or lean proteins to develop char-grilled textures without over-cooking.
ROAST : Tenderise meats, roast vegetables and more.
AIR FRY : For crispiness and crunch with little to no oil.
BAKE : Make cakes, treats, desserts and more.
FLAT PLATE : Perfect for delicate foods like onions, eggs, fish or fajitas.
REHEAT : Revive leftovers by gently warming them, leaving you with crispy results.
DEHYDRATE : Dehydrate meats, fruits and vegetables for healthy snacks.
MANUAL : Switches the display so you can manually set the internal outcome with the dial.
PRESET : When probe is inserted, the display will allow you to select your food type. Turn the dial to select your protein.
COOK LEVEL : Cook to your preference, choose from Rare to Well Done.
OPERATING BUTTONS
 POWER : Make sure unit is plugged in. To turn on the unit, press the
 button.
DIAL : To select a cooking function or other setting, turn the dial .
.
START/STOP : Press the centre of the dial to start or stop the selected cooking function. When most cooking functions are started, the unit enters preheat mode, then cooking begins when the temperature setting is reached.
TEMP :To select temperature, press the TEMP button and use the dial to adjust.
TIME : To select cook time, press TIME button and use the dial to adjust.
FUNCTION : Press to clear all settings or when probe is in “Rest” state (if preheating and cooking have not begun).
PREHEAT : After you set function, time and temperature then press the dial, the unit will automatically begin preheating. If PREHEAT button is selected after pressing dial, the unit will skip preheating (not recommended).
PREHEAT FOR BETTER RESULTS : For best grilling results, let the unit fully preheat before adding food. Adding food before preheating is complete may lead to overcooking, smoke and longer preheat time.
BEFORE FIRST USE
1. Remove all packaging material, promotional labels and tape from the unit.
2. Remove all accessories from the package and read this manual carefully. Please pay particular attention to operational instructions, warnings and important safeguards to avoid any injury or property damage.
3. Wash the grill plate, flat plate, crisper basket, probe and splatter guard in warm, soapy water, then rinse and dry thoroughly. All accessories, except the probe and probe storage, are dishwasher safe. NEVER clean the main unit or probe in the dishwasher.
4. Do not use abrasive brushes or sponges on the cooking surfaces, as they will cause damage to the coating.
USING THE NINJA® FOODI® MAX PRO
SPLATTER GUARD
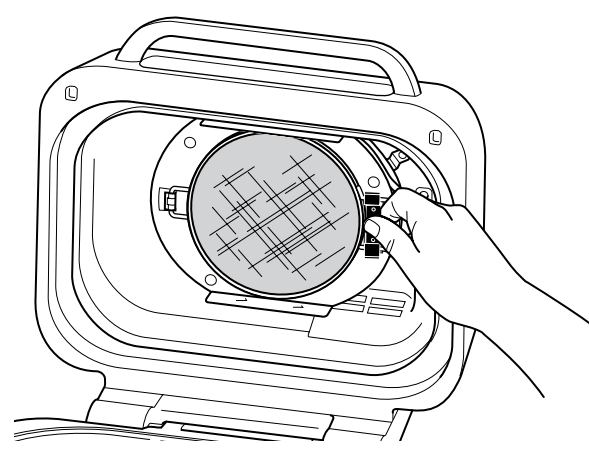
Located on the underside of the lid, the splatter guard keeps the heating element clean. ALWAYS ensure the splatter guard is installed when cooking. Failure to use the splatter guard will result in oil build-up on the heating element, which can cause smoking.
Installing the splatter guard
To install, hook the left side of the splatter guard into place and then snap the right side into place until you hear it click and it feels secure.
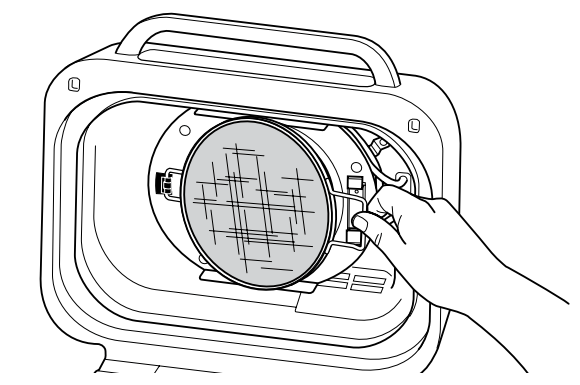
Removing the splatter guard
Remove the splatter guard for cleaning after each use. Allow the shield to cool completely, then unhook the shield from the back of the lid by pressing the top tab back, then pull handle forward.
GRILL CONTROL
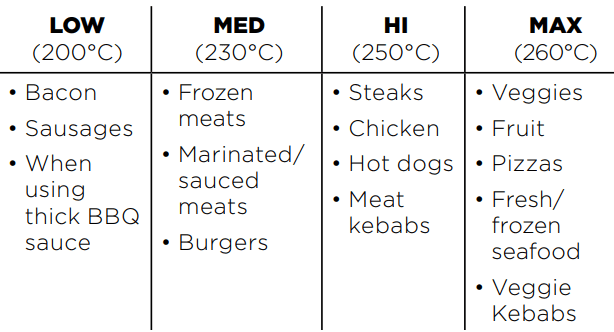
Closed-lid cooking for top and bottom heat. Best when grilling large or thick cuts of meat or frozen food or for an all-around sear. When using the Grill function, you will need to select the temperature for the grill plate. Below are recommended temperature levels for common ingredients. The unit may produce smoke when cooking ingredients on a setting hotter than recommended.
Switching to Grill after using another function
If the unit is already warm from using a different function, “ADD FOOD” may appear on the screen immediately. We recommend allowing the grill plate to heat up for at least 6 minutes before placing ingredients on it.
Batch grilling
When grilling more than two consecutive batches of food, it is recommended that you empty the fat/oil from the removable cooking pot. It is also HIGHLY recommended to clean the splatter guard in between uses. This will help prevent grease from burning and causing smoke.
USING THE DIGITAL COOKING PROBE
Before First Use
Make sure the probe jack is free of any residue and the cord is free of knots before plugging it into the socket. Handle cord with care.
1. Pull the magnetic probe storage compartment on the right side of the unit outward. Then unwind the wire from the compartment to remove the probe.
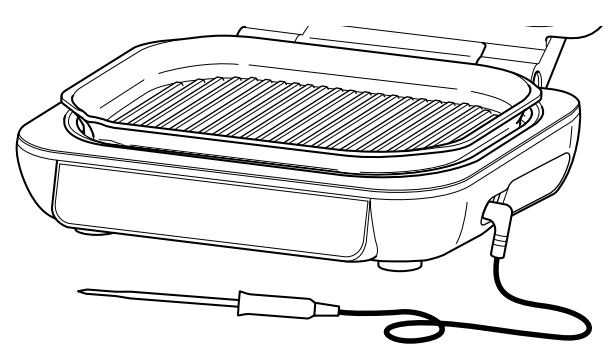
2. Plug the probe into the input jack on the right hand side of the unit. Push firmly on the plug until it cannot go into the jack any further and you feel or hear it click into place. Place the storage compartment back onto the side of the unit.
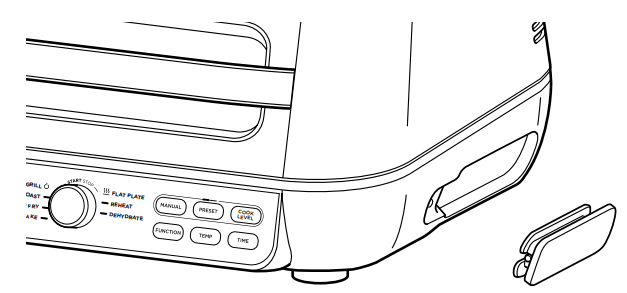
3. Once the probe is plugged into the jack, it will enable and illuminate the PRESET and MANUAL probe buttons. Turn the dial to select the desired cook function (e.g., Grill) and cook temperature.
4. If using PRESET, then press the PRESET button and turn the centre dial to select your desired food type. Upon selection, press the COOK LEVEL button and turn the dial to choose your preferred internal outcome of your food (rare to well done).
5. Place the accessory required for your selected cook function in the unit and close the lid. Press the dial to begin preheating.
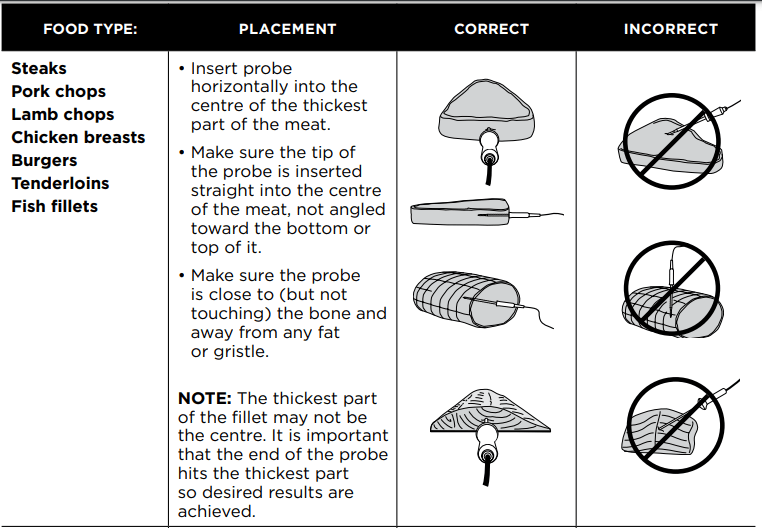
6. While the unit is preheating, insert the probe horizontally into the centre of the thickest part of the piece of protein. Refer to the chart on the adjacent page on further probe placement instructions.
7. When the unit has preheated and “ADD FOOD” appears on the screen, open the lid, place food with inserted probe in the unit and close the lid over the probe cord if the function requires the lid to be closed.
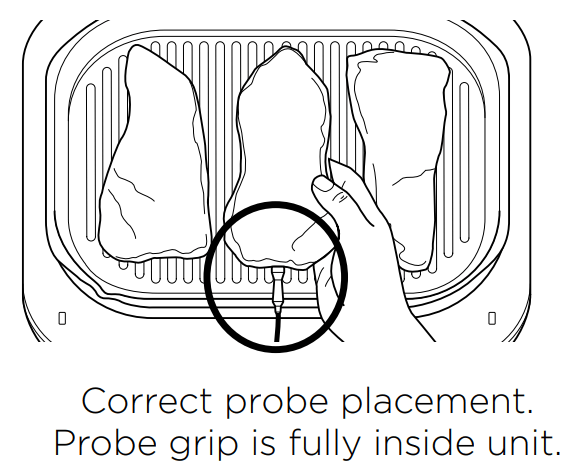
8. The progress bar at the top of the display will track the stages of cook. Flashing indications progression to that stage.

9. The unit will automatically stop when your selection is almost reached, as it accounts for carry-over cooking and GET FOOD will display on the screen.
10. When REST displays on the screen, transfer the protein to a plate. Probe can be removed before transferring. The protein will continue to carry-over cook to your set outcome, which takes about 3–5 minutes. This is an important step, as not resting could lead to results looking less cooked. Carry-over cook times can vary based on size of protein, cut of protein and type of protein.
USING THE PROBE IN DIFFERENT COOKING SCENARIOS:
Cooking 2 or more proteins of the same size to different levels of outcome:
• Set the cook level to the highest required.
• Insert the probe in the protein with the highest desired cook level.
• After preheating, place proteins inside the grill. When the progress bar shows that the lowest cook level is reached, remove the protein without probe.
• Continue cooking the remaining protein until the next desired cook level is reached.
Cooking 2 or more proteins of different sizes:
• Insert probe in the smaller protein and use the Preset feature to choose the level of outcome.
• When that protein is cooked, remove it from the unit.
• Using oven gloves, transfer probe to the larger protein and use the arrows to the left of the display to choose its level of outcome.
Cooking 2 or more different types of protein:
• Insert probe in the protein with the lower desired level of outcome.
• Use the Manual feature to choose the desired internal temperature.
• When that protein is cooked, remove it from the unit.
• Using oven gloves, transfer probe to the other protein and use the Manual feature to choose the desired internal temperature.
HOW TO INSERT THE PROBE

COOKING FUNCTIONS
Grill
Cook with lid open for bottom heat only, best for cooking delicate foods and lean proteins such as kebabs or vegetables. Cook with lid closed for top and bottom heat which is best for thick cuts or frozen proteins.
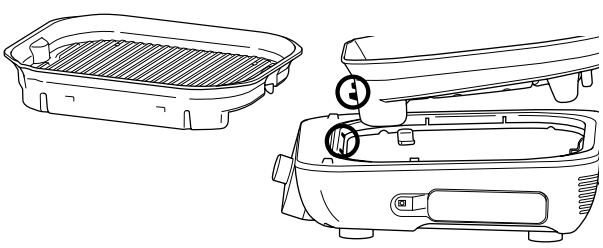
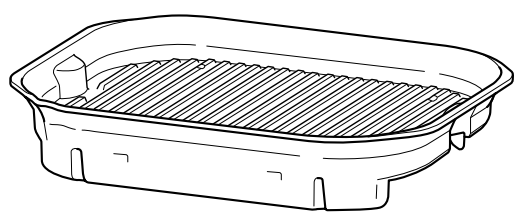
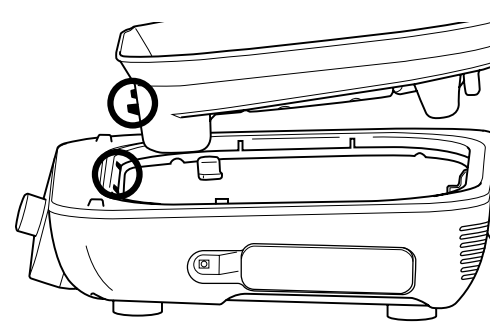
1. To install the grill plate, position it in the front of the base so it hooks in, then press down on the back of the plate until it clicks in place. Ensure the splatter guard is in place, then close the lid.
2. Make sure the unit is plugged in and press to turn the unit on. Grill will be selected by default.
3. The default temperature setting will display. To adjust temperature if desired, press TEMP button and turn dial.
4. Press the TIME button and turn the dial to select the desired time.
5. Press dial to begin preheating. The progress bar will illuminate. It will take approximately 4-7 minutes to preheat.
6. When preheating is complete, the unit will beep and ADD FOOD will appear on the display.
7. Open the lid and place ingredients on the grill plate. Close the lid when cooking thick cuts of meats, frozen protein. Keep lid open when cooking delicate food or lean proteins.
8. When cook time is complete, the unit will beep and END will appear on the display.
9. Remove food from the grill plate.
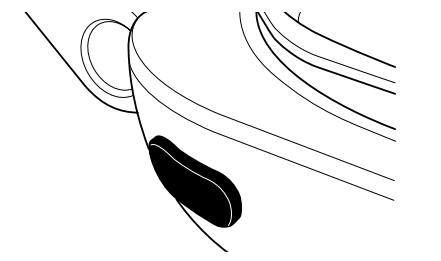
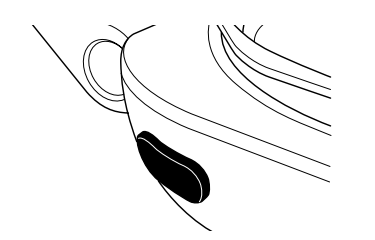
10. Remove the grill plate by pressing the orange release button on the left side of the unit. The plate will pop up from the back, then you can lift it up and out.
Flat Plate
Cook with lid open with heat from the bottom for foods that require flipping or stirring and constant attention like sliced vegetables or fried eggs. Cook with lid closed for top and bottom heat, ideal for melting cheese, crisping toppings or quickly cooking thicker foods.
1. To install the grill plate, position it in the front of the base so it hooks in, then press down on the back of the plate until it clicks in place. Ensure the splatter guard is in place.
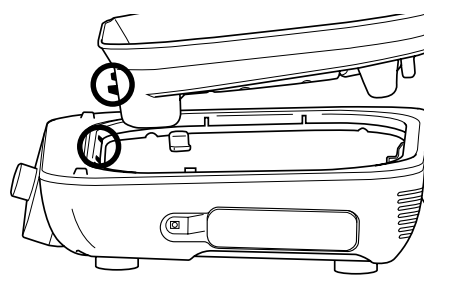
2. Place flat plate on the grill so plate sits level. Line up the lip on the flat plate with the lip on the grill plate (if incorrectly installed it will tilt forward). Close the lid.
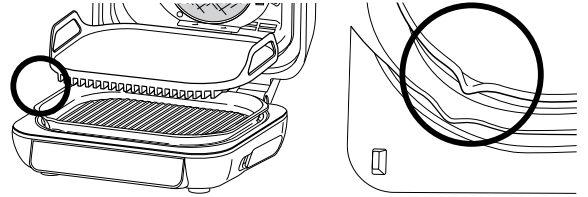
3. Make sure the unit is plugged in and press to turn the unit on.
4. Turn the dial to FLAT PLATE function. The default temperature setting will display. To adjust temperature if desired, press TEMP button and turn dial.
5. Press the TIME button and turn the dial to select the desired time.
6. Press the dial to begin preheating. The progress bar will illuminate. It will take approximately 7-9 minutes to preheat.
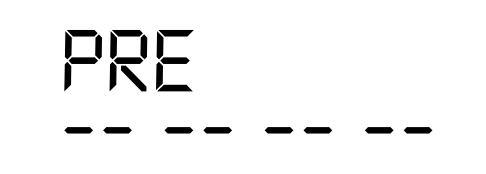
7. When preheating is complete, the unit will beep and ADD FOOD will appear on the display.
8. Open the lid and place ingredients on the flat plate. The countdown timer has a 15-second delayed start. Leave lid open unless recipe directs otherwise.
9. When cook time reaches zero, the unit will beep and END will appear on the display.
10. Remove food from the flat plate, then remove the flat plate from the grill plate.
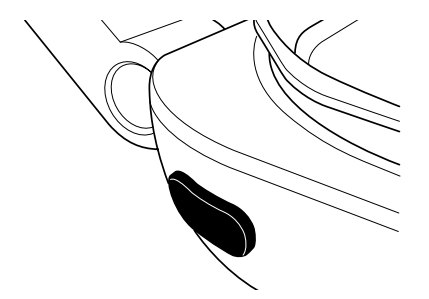
11. Remove the grill plate by pressing the orange release button on the left side of the unit. The plate will pop from the back then lift up.
Roast
1. To install the grill plate, position it in the front of the base so it hooks in, then press down on the back of the plate until it clicks in place. Ensure the splatter guard is in place, then close the lid.
2. Make sure the unit is plugged in and press  to turn the unit on.
3. Turn the dial to ROAST. The default temperature setting will appear on the display. To adjust temperature if desired, press TEMP button and turn dial.
4. Press the TIME button and turn the dial to select the desired time.
5. Press the dial to begin preheating. The progress bar will begin illuminating. It will take approximately 3 minutes to preheat.
6. When preheating is complete, the unit will beep and ADD FOOD will appear on the display.
7. Open the lid and place ingredients on the grill plate. Once the lid is closed, cooking will begin and the timer will begin counting down.
8. When cook time reaches zero, the unit will beep and END will appear on the display.
9. Remove food from the grill plate.
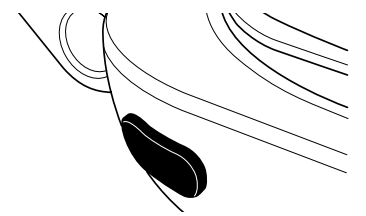
10. Remove the grill plate by pressing the orange release button on the left side of the unit. The plate will pop from the back, then lift up
Air Fry
1. To install the grill plate, position it in the front of the base so it hooks in, then press down on the back of the plate until it clicks in place. Ensure the splatter guard is in place.
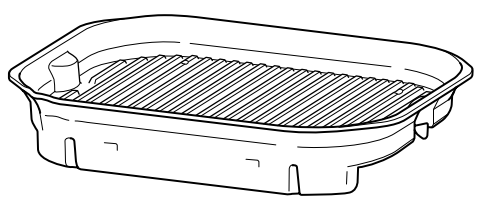
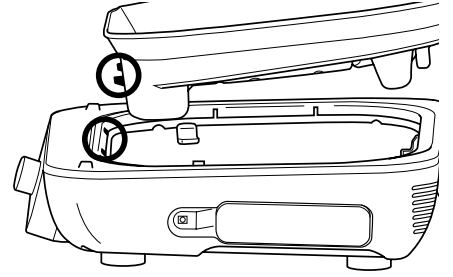
2. Place the crisper basket on the plate and position the basket to sit along the rear of the grill plate so the basket feet sit in the grill plate spaces, then close the lid.
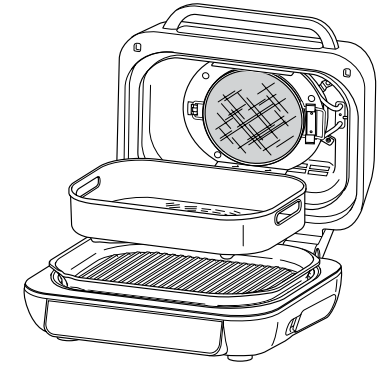
3. Make sure the unit is plugged in and press to turn the unit on.
4. Tu.rn the dial to AIR FRY. The default temperature setting will appear on the display. To adjust temperature if desired, press TEMP button and turn dial.
5. Press the TIME button and turn the dial to select the desired time.
6. Press the dial to begin preheating. The progress bar will illuminate. It will take approximately 3 minutes to preheat.
7. When preheating is complete, the unit will beep and ADD FOOD will appear on the display
8. Open the lid and place ingredients in the crisper basket. Once the lid is closed, cooking will begin and the timer will start counting down.
9. For best results, we recommend shaking ingredients frequently. When you open the lid, the unit will pause. Use silicone-tipped tongs or oven gloves to shake the basket. When done, replace the basket and close the lid. Cooking will automatically resume after lid is closed.
10. When cook time reaches zero, the unit will beep and END will appear on the display.
11. Remove crisper basket from the grill plate.
12. Remove the grill plate by pressing the orange release button on the left side of the unit. The plate will pop from the back, then lift up
Bake
1. To install the grill plate, position it in the front of the base so it hooks in, then press down on the back of the plate until it clicks in place. Ensure the splatter guard is in place, then close the lid.
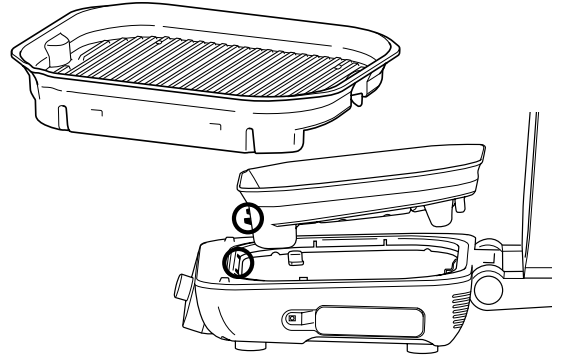
2. Make sure the unit is plugged in and press  to turn the unit on.
3. Turn the dial to BAKE. The default temperature setting will appear on the display. To adjust temperature if desired, press TEMP button and turn dial.
4. Press the TIME button and turn the dial to select the desired time.
5. Press the dial to begin preheating. The progress bar will begin illuminating. It will take approximately 3 minutes to preheat
6. When preheating is complete, the unit will beep and ADD FOOD will appear on the display.
7. Open the lid and place ingredients on the plate or place loaf tin on the plate. Once the lid is closed, cooking will begin and the timer will start counting down.
8. When cook time reaches zero, the unit will beep and END will appear on the display.
9. Remove food from the grill plate.
10. Remove the grill plate by pressing the orange release button on the left side of the unit. The plate will pop up from the back, then you can lift it up and out.

Dehydrate
1. To install the grill plate, position it in the front of the base so it hooks in, then press down on the back of the plate until it clicks in place. Ensure the splatter guard is in place.
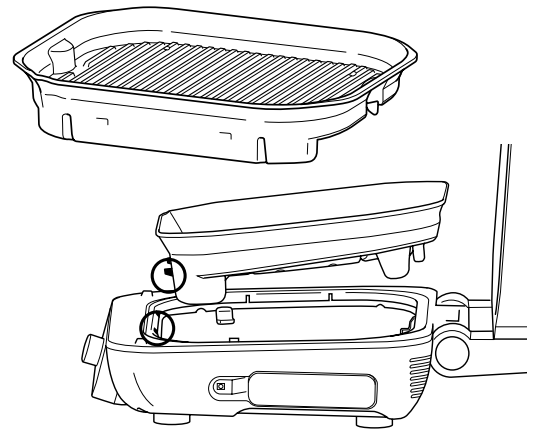
2. Place the crisper basket on the grill plate and add ingredients to the basket. Close the lid, as the unit does not require preheating for this function.
3. Make sure the unit is plugged in and press to turn the unit on.
4. Turn the dial to DEHYDRATE function. The default temperature setting will display. To adjust temperature if desired, press TEMP button and turn dial.
5. Press the TIME button and turn the dial to select the desired time.
6. Press the dial to begin. (The unit does not preheat in dehydrate mode.)
7. When dehydrate time reaches zero, the unit will beep and END will appear on the display.
8. Remove ingredients and basket from the grill plate.
9. Remove the grill plate by pressing the orange release button on the left side of the unit. The plate will pop up from the back, then you can lift it up and out.
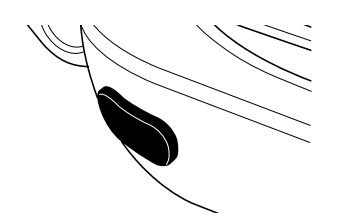
Reheat
1. To install the grill plate, position it in the front of the base so it hooks in, then press down on the back of the plate until it clicks in place. Ensure the splatter guard is in place.
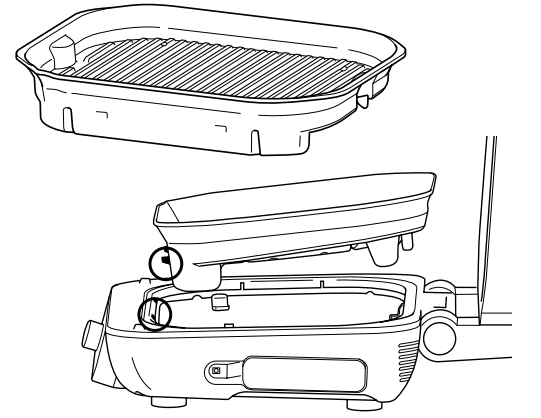
2. Place the crisper basket on the plate and position the basket to sit along the rear of the grill plate so the basket feet sit in the grill plate spaces. Add ingredients, then close the lid.
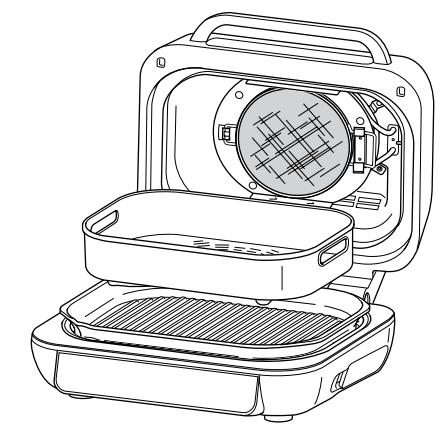
3. Make sure the unit is plugged in and press to turn the unit on.
4. Turn the dial to REHEAT. The default temperature setting will appear on the display. To adjust temperature if desired, press TEMP button and turn dial.
5. Press the TIME button and turn the dial to select the desired time. Press the dial to begin (the unit does not preheat in Reheat mode). Cooking will begin and the timer will start counting down.
6. For best results, we recommend shaking ingredients frequently. When you open the lid, the unit will pause. use silicone-tipped tongs or oven gloves to shake the basket and close the lid. Cooking will automatically resume after lid is closed.
7. When cook time reaches zero, the unit will beep and END will appear on the display.
8. Remove crisper basket from the grill plate.
9. Remove the grill plate by pressing the orange release button on the left side of the unit. The plate will pop from the back, then lift up.
CLEANING & MAINTENANCE
The unit should be cleaned thoroughly after every use. Always let the appliance cool before cleaning.
• Unplug the unit from the wall socket before cleaning. Keep the lid open after removing your food to allow the unit to cool more quickly.
• The grill plate, flat plate, crisper basket and splatter guard are dishwasher safe. The probe and probe holder are NOT dishwasher safe.
• For the best dishwasher cleaning results, we recommend rinsing the grill plate, flat plate, crisper basket and splatter guard with warm water before placing them in the dishwasher.
• If hand-washing, air-dry or towel-dry all parts after hand-washing.
• The inner lid should be wiped down with a damp towel or cloth after each use to deodorise the unit and remove any grease.
• If food residue or grease are stuck on the grill plate, splatter guard, or any other removable part, soak in warm soapy water before cleaning.
• Clean the splatter guard after every use. Soaking the splatter guard overnight will help soften the baked-on grease. After soaking, use a cleaning brush to remove the grease from the stainless steel frame and front tabs.
• Deep clean the splatter guard by putting it in a pan of water and boiling it for 10 minutes. Then, rinse with room temperature water and allow to dry completely.
• Gently wipe down the inside of the lid with a damp cloth.
• When stacking your coated accessories to store, place a cloth or paper towel between each piece to protect the coated surfaces.
TROUBLESHOOTING
• “ADD FOOD” appears on the control panel display.
The unit has completed preheating and it is now time to add your ingredients.
• “Shut Lid” appears on the control panel display.
The lid is open and needs to be closed for the selected function to start.
• “Plug In” appears on the control panel display.
The probe is not plugged into the socket on the right side of the control panel. Plug the probe in before proceeding. Press the probe in until you hear a click.
• “PRBE ERR” appears on the control panel display.
This means the unit timed out before food reached the set internal temperature. As a protection for the unit, it can run for only certain lengths of time at specific temperatures. • “Add Plate” appears on the control panel display. The grill plate must be installed in the base unit before cooking. Add the grill plate.
• “E” appears on the control panel display.
The unit is not functioning properly. Please contact Customer Service at 0800 862 0453 So we may better assist you, please register your product online at ninjakitchen.co.uk and have the product on hand when you call.
• Why is my food overcooked or undercooked even though I used the probe?
It is important to insert the probe lengthwise into the thickest part of the ingredient to get the most accurate reading. Make sure to allow food to rest for 3-5 minutes to complete cooking. For more information, refer to the Using the Digital Cooking Probe section.
• Why is there no noise during Flat Plate preheat even though the preheat progress bars are showing?
As long as the progress bar shows, your unit is preheating. Flat Plate will preheat the bottom plate and switch on the fan several minutes into the preheat cycle.
• Can I cancel or override preheating?
Preheating is highly recommended for best results, but you can skip it by selecting the PREHEAT button after you press the dial. Display will show ADD FOOD, lift and close lid to begin cooking.
• Should I add my ingredients before or after preheating?
For best results, let the unit preheat before adding ingredients.
• Why is my unit emitting smoke?
When using the Grill and Flat Plate functions, always select the recommended temperature setting. Recommended settings can be found in the Recipe Guide. Make sure the splatter guard is installed.
• How do I pause the unit so I can check my food?
By opening the lid during a cooking function besides Grill and Flat Plate, the unit will automatically pause.
• Will the probe grip melt if it touches the hot grill plate?
No, the grip is made of a high-temperature silicone that can handle the unit’s high temperatures.
• Why does the unit have a 1-9 scale for the Beef Preset?
Perception of how well something is cooked differs. The 1-9 scale provides a wide range of options for each level of cook so you can customise to your liking.
• Can I use the Flat Top function and flat top accessory after having cooked on the grill plate?
Yes, but we highly recommend cleaning the grill plate first so there is no debris to interfere with the flat top-to-grill plate contact.
See other models: OL750UK OL650UK OL550UK NC300UK JC100UK
