USING THE CONTROL PANEL

NOTE: Control panel may differ per model.
FUNCTION BUTTONS
PRESSURE: Use to cook food quickly while maintaining tenderness.
STEAM: Use to gently cook delicate foods at a high temperature.
SLOW COOK: Cook your food at a lower temperature for longer periods of time.
SEAR/SAUTÉ: To use the unit as a stovetop for browning meats, sautéing veggies, simmering sauces, and more.
AIR CRISP: To use the unit as an air fryer to give foods crispiness and crunch with little to no oil.
BAKE/ROAST: To use the unit as an oven for tender meats, baked treats, and more.
BROIL: Use to caramelize and brown your food.
DEHYDRATE: Dehydrate meats, fruits, and vegetables for healthy snacks.
NOTE: The DEHYDRATE function is not included on all models.
OPERATING BUTTONS
TEMP arrows: Use the up and down TEMP arrows to adjust the cook temperature and/or pressure level.
TIME arrows: Use the up and down TIME arrows to adjust the cook time.
NOTE: While cooking, to adjust temp or time, use the up and down arrows. The unit will then resume at those settings
START/STOP button: Press the START/STOP button after selecting your temperature (or pressure) and time to start cooking. Pressing this button while the unit is cooking will stop the function.
KEEP WARM button: After pressure cooking, steaming, or slow cooking, the unit will automatically switch to Keep Warm mode and start counting up. Keep Warm will stay on for 12 hours, or you may press KEEP WARM to turn it off. Keep Warm mode is not intended to warm food from a cold state but to keep it warm at a foodsafe temperature.
POWER button: The Power button shuts the unit off and stops all cooking modes. STANDBY MODE After 10 minutes with no interaction with the control panel, the unit will enter standby mode.
BEFORE FIRST USE
1 Remove and discard any packaging material, promotional labels, and tape from the unit.
2 Remove all accessories from the package and read this manual carefully. Please pay particular attention to operational instructions, warnings, and important safeguards to avoid any injury or property damage.
3 Wash the pressure lid, silicone ring, removable cooking pot, Cook & Crisp™ Basket, reversible rack, and condensation collector in hot, soapy water, then rinse and dry thoroughly. NEVER clean the cooker base or pressure lid in the dishwasher. Inspect the pressure lid to ensure there is no debris blocking the valves.
4 The silicone ring is reversible and can be inserted in either direction. Insert the silicone ring around the outer edge of the silicone ring rack on the underside of the lid. Ensure it is fully inserted and lies flat under the silicone ring rack.

INSTALLING THE CONDENSATION COLLECTOR
To install the condensation collector, slide it into the slot on the cooker base. Slide it out to remove it for hand-washing after each use.

NOTE: Prior to each use, make sure the silicone ring is well seated in the silicone ring rack and the anti-clog cap is mounted properly on the pressure release valve.
REMOVING & REINSTALLING THE ANTI-CLOG CAP
Make sure your anti-clog cap is in the correct position before using the pressure lid. The anti-clog cap protects the inner valve of the pressure lid from clogging and protects users from potential food splatters. It should be cleaned after every use with a cleaning brush. To remove it, squeeze and pull upward. To reinstall, position it in place and press down.


USING YOUR FOODI™ TENDERCRISP™ PRESSURE COOKER
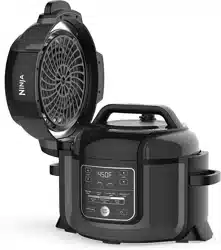
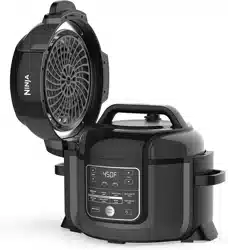
DROP THE TOP
The two lids allow you to seamlessly transition between all your favorite cooking methods. Use the pressure lid to tenderize, then use the crisping lid to crisp up your food.
USING THE CRISPING LID
The crisping lid is affixed to the unit by a hinge and features an easy-open design. The lid can be opened during any convection cooking function so you can check on and access the ingredients. When the lid is opened, cooking will stop, the timer will pause, and the heating element in the lid will turn off. When the lid is closed, cooking will begin again and the timer will resume counting down.
USING THE COOKING FUNCTIONS WITH THE CRISPING LID
To turn on the unit, plug the power cord into a wall outlet, then press the Power button.
Air Crisp
1 Press the AIR CRISP button. The default temperature setting will display. Use the up and down TEMP arrows to choose a temperature between 300°F and 400°F.

2 Use the up and down TIME arrows to set the cook time in minute increments up to 1 hour.

3 With the pot installed, place either the Cook & Crisp™ Basket or reversible rack in the pot. Basket should have diffuser attached.

NOTE: It is recommended to let the unit preheat for 5 minutes before adding ingredients. If preheating, before step 4, close the lid, and press the START/STOP button to begin.
4 Add ingredients to the Cook & Crisp™ Basket or reversible rack. Close the lid and press the START/STOP button to begin cooking.

5 During cooking, you can open the lid and lift out the basket to shake or toss ingredients for even browning, if needed. When done, lower basket back into pot and close lid. Cooking will automatically resume after lid is closed.

NOTE: If you press the STOP during Air Crisp Mode, the unit will wait 10 seconds before entering Standby mode.
6 When cook time is complete, the unit will beep.
Bake/Roast
1 Press the BAKE/ROAST button. The default temperature setting will display. Use the up and down TEMP arrows to choose a temperature between 250°F and 400°F.

2 Use the up and down TIME arrows to set the cook time in minute increments up to 4 hours. After 1 hour, you may increase the time in 5-minute increments up to 4 hours

NOTE: If running for 1 hour or less, the clock will count down by minutes and seconds. If running for more than 1 hour, the clock will count down by minutes only
NOTE: It is recommended to let the unit preheat for 5 minutes before adding ingredients. If preheating, before step 3, close the lid, and press the START/STOP button to begin.
3 Add ingredients, along with any accessories called for in your recipe, to the pot. Close the lid and press the START/STOP button to begin cooking.
4 When cook time is complete, the unit will beep.
Broil
1 Press the BROIL button.

NOTE: There is no temperature adjustment available or necessary when using the Broil function.
2 Use the up and down TIME arrows to set the cook time in minute increments up to 30 minutes.

3 Place the reversible rack in the pot in the upper broil position or follow directions per recipe.

4 Place ingredients on the rack, then close the lid.

5 Press the BROIL button.
6 Press the START/STOP button to begin cooking.

7 When cook time is complete, the unit will beep.
Dehydrate
NOTE: The DEHYDRATE function is not included on all models.
1 Press the DEHYDRATE button. The default temperature setting will display. Use the up and down TEMP arrows to choose a temperature between 105°F and 195°F.

2 Use the up and down TIME arrows to set the cook time in 15-minute increments up to 12 hours.

3 Place the ingredients on the bottom of the Cook & Crisp™ Basket.

4 If included in your model or purchased separately, add ingredients to the Cook & Crisp Layered Insert* in the Cook & Crisp Basket to create two levels for dehydrating.

NOTE: For five levels of capacity, use the dehydrating rack** directly in the cooking pot.
5 Press the START/STOP button to begin dehydrating.

6 When cook time is complete, the unit will beep.
FAMILIARIZING YOURSELF WITH PRESSURE COOKING
In order to familiarize yourself with the Pressure Cook function and start cooking, it is highly recommended for first-time users to do an initial run.
1 Place the pot in the cooker base and add 3 cups room-temperature water to the pot.

2 Assemble the pressure lid by aligning the arrow on the front of the lid with the arrow on the front of the cooker base. Then turn the lid clockwise until it locks into place.

3 Make sure the pressure release valve on the lid is in the SEAL position.

4 Press the PRESSURE button, the unit will default to high (HI) pressure. Set the time to 2 minutes and press the START/STOP button to begin.

5 Your Foodi will begin to build pressure, indicated by the rotating lights. The unit will begin counting down when it is fully pressurized

6 When the countdown is finished, the Foodi will beep, automatically switch to the Keep Warm mode, and begin counting up.

7 Turn the pressure release valve to the VENT position to quick release the pressurized steam. A quick burst of steam will spurt out of the pressure release valve. When steam is completely released, the unit will be ready to open.

NATURAL PRESSURE RELEASE VS. QUICK PRESSURE RELEASE
Natural Pressure Release: When pressure cooking is complete, steam will naturally release from the unit as it cools down. This can take up to 20 minutes or more, depending on the amount of liquid and food in the pot. During this time, the unit will switch to Keep Warm mode. Press the KEEP WARM button if you would like to turn Keep Warm mode off. When natural pressure release is complete, the red float valve will drop down.
Quick Pressure Release: Use ONLY if your recipe calls for it. Whe pressure cooking is complete and the KEEP WARM light is on, turn the pressure release valve to the VENT position to instantly release pressure through the valve. Even after releasing pressure naturally or using the pressure release valve, some steam will remain in the unit and will escape when the lid is opened. Lift and tilt it away from you, making sure no condensation drips into the cooker base.

NOTE: At any time during the natural release process, you can switch to quick release by turning the pressure release valve to the VENT position.
PRESSURIZING
As pressure builds in the unit, the control panel will display rotating lights. Pressurizing time varies, depending on the amount of ingredients and liquid in the pot. As the unit pressurizes, the lid will lock as a safety measure, and it will not unlock until pressure is released. Once the unit has reached full pressure, the lid pressure icon light will glow steadily. The pressure cooking cycle will begin and the timer will start counting down.

INSTALLING & REMOVING THE PRESSURE LID
Place the pressure lid on top of the unit with the  on the lid and the on the base lined up evenly. Turn the lid clockwise until it locks in place. To unlock the pressure lid, turn it counterclockwise. Lift it up and away from you, as some steam will remain in the unit and escape when the lid is opened.
NOTE: The pressure lid will not unlock until the unit is completely depressurized.

USING THE COOKING FUNCTIONS WITH THE PRESSURE LID
To turn on the unit, plug the power cord into a wall outlet, then press the Power button.
Pressure Cook
1 Place ingredients and at least 1 /2 cup of liquid in the pot, including an accessory if your recipe calls for it. DO NOT exceed the line marked PRESSURE MAX when pressure cooking.

NOTE: When cooking rice, beans, or other ingredients that expand, DO NOT fill the pot more than halfway.
2 Follow the steps to the left to install the pressure lid. Turn the pressure release valve to the SEAL position

3 Press the PRESSURE button. The default pressure level will display. Use the up and down TEMP arrows to select either HIGH or LOW.

NOTE: If running for 1 hour or less, the clock will count down by minutes and seconds. If running for more than 1 hour, the clock will count down by minutes only.
4 Use the up and down TIME arrows to set the cook time 1-minute increments up to 1 hour, and in 5-minute increments from 1 hour to 4 hours.

5 Press the START/STOP button. The display will show rotating lights during this time. When the unit reaches the proper temperature, the time you set will begin counting down.

6 When cook time is complete, the unit will beep, automatically switch to Keep Warm mode, and start counting up from 00:00.

NOTE: After Pressure Cooking is complete, you may press the KEEP WARM button to turn the Keep Warm mode off.
7 Let the unit naturally release pressure or, if the recipe instructs, turn the pressure release valve to the VENT position, quickly releasing steam through the valve.

Steam
1 Add at least 1 cup of liquid (or the amount stated in your recipe) to the pot.

2 Follow the steps above to install the pressure lid. Turn the pressure release valve to the VENT position.

3 Press the STEAM button. Use the up and down TIME arrows to set the cook time in minute increments up to 30 minutes.

NOTE: There is no temperature adjustment available or necessary when using the Steam function.
4 Press the START/STOP button.
5 The unit will automatically preheat to bring the steaming liquid to a boil. The display will show rotating lights during this time. When the unit reaches the proper temperature, the time you set will begin counting down.

6 When cook time is complete, the unit will beep and automatically switch to Keep Warm mode. If the red float valve pops up, wait for it to drop and then you can open the lid.

NOTE: After Steam cooking is complete, you may press the KEEP WARM button to turn the Keep Warm mode off.
Slow Cook
1 Add ingredients to the pot. DO NOT exceed the line marked MAX when slow cooking.
2 Follow the steps above to install pressure lid. Turn the pressure release valve to the VENT position.

3 Press the SLOW COOK button. The default temperature setting will display. Use the up and down TEMP arrows to select either Slow Cook HIGH or LOW.

4 Use the up and down TIME arrows to set the cook time in 15-minute increments up to 12 hours.
5 Press the START/STOP button to begin cooking.
NOTE: The Slow Cook HIGH time setting may be adjusted anywhere between 4 and 12 hours; the Slow Cook LOW time setting may be adjusted anywhere between 6 and 12 hours.
6 When cook time is complete, the unit will beep and automatically switch to Keep Warm mode.
Sear/Sauté
1 Install the pot.

2 Press the SEAR/SAUTÉ button. The default temperature setting will display. Use the up and down TEMP arrows to select one of the setting options (low, medium-low, medium, medium-high, or high).

NOTE: There is no time adjustment available or necessary when using the Sear/Sauté function.
3 Press the START/STOP button to begin cooking.
4 To turn off the Sear/Sauté function, press the START/STOP button. To switch to a different cooking function, press the corresponding function button.
NOTE: You can use this function with either the crisping lid in the open position or the pressure lid with the pressure release valve in the VENT position.
NOTE: ALWAYS use nonstick utensils in the cooking pot. DO NOT use metal utensils, as they will scratch the nonstick coating on the pot.
CLEANING & MAINTENANCE

Cleaning: Dishwasher & Hand-Washing
The unit should be cleaned thoroughly after every use.
1 Unplug the unit from the wall outlet before cleaning.
2 NEVER put the cooker base in the dishwasher, or immerse it in water or any other liquid.
3 To clean the cooker base and the control panel, wipe them clean with a damp cloth.
4 The cooking pot, silicone ring, reversible rack, Cook & Crisp™ Basket, and detachable diffuser can be washed in the dishwasher.
5 The pressure lid, including the pressure release valve and anti-clog cap, can be washed with water and dish soap. DO NOT wash the pressure lid or any of its components in the dishwasher, and DO NOT take apart the pressure release valve or red float valve assembly.
6 To clean the crisping lid, wipe it down with a wet cloth or paper towel after the heat shield cools.
7 If food residue is stuck on the cooking pot, reversible rack, or Cook & Crisp Basket, fill the pot with water and allow to soak before cleaning. DO NOT use scouring pads. If scrubbing is necessary, use a non-abrasive cleanser or liquid dish soap with a nylon pad or brush.
8 Air-dry all parts after each use.

Removing & Reinstalling the Silicone Ring
To remove the silicone ring, pull it outward, section by section, from the silicone ring rack. The ring can be installed with either side facing up. To reinstall, press it down into the rack section by section. After use, remove any food debris from the silicone ring and anti-clog cap.
Keep the silicone ring clean to avoid odor. Washing it in warm, soapy water or in the dishwasher can remove odor. However, it is normal for it to absorb the smell of certain acidic foods. It is recommended to have more than one silicone ring on hand. You can purchase additional silicone rings on ninjaaccessories.com.
NEVER pull out the silicone ring with excessive force, as that may deform it and the rack and affect the pressure-sealing function. A silicone ring with cracks, cuts, or other damage should be replaced immediately
TROUBLESHOOTING GUIDE
Why is my unit taking so long to come to pressure? How long does it take to come to pressure?
- Cooking times may vary based on the selected temperature, current temperature of the cooking pot, and temperature or quantity of the ingredients.
- Check to make sure your silicone ring is fully seated and flush against the lid. If installed correctly, you should be able to tug lightly on the ring to rotate it.
- Check that the pressure lid is fully locked, and the pressure release valve is in the SEAL position when pressure cooking.
Why is the time counting down so slowly?
- You may have set hours rather than minutes. When setting time, the display will show HH:MM and the time will increase/decrease in minute increments.
How can I tell when the unit is pressurizing?
- The rotating lights will display on the screen to indicate the unit is building pressure.
Lights are rotating on the display screen when using the Pressure or Steam function.
- This indicates the unit is building pressure or preheating when using STEAM or PRESSURE. When the unit has finished building pressure, your set cook time will begin counting down.
There is a lot of steam coming from my unit when using the Steam function.
- It’s normal for steam to release through the pressure release valve during cooking. Leave the pressure release valve in the VENT position for Steam, Slow Cook, and Sear/Sauté.
Why can’t I take the pressure lid off?
- As a safety feature, the pressure lid will not unlock until the unit is completely depressurized. To release pressure, turn the pressure release valve to the VENT position to quick release the pressurized steam. A quick burst of steam will spurt out of the pressure release valve. When the steam is completely released, the unit will be ready to open. Turn the pressure lid counterclockwise, then lift it up and away from you.
Is the pressure release valve supposed to be loose?
- Yes. The pressure release valve’s loose fit is intentional; it enables a quick and easy transition between SEAL and VENT and helps regulate pressure by releasing small amounts of steam during cooking to ensure great results. Please make sure it is turned as far as possible toward the SEAL position when pressure cooking and as far as possible toward the VENT position when quick releasing.
The unit is hissing and not reaching pressure.
- Make sure the pressure release valve is turned to the SEAL position. If you’ve done this and still hear a loud hissing noise, it may indicate your silicone seal is not fully in place. Press START/STOP to stop cooking, VENT as necessary, and remove the pressure lid. Press down on the silicone ring, ensuring it is fully inserted and lies flat under the ring rack. Once fully installed, you should be able to tug lightly on the ring to rotate it.
The unit is counting up rather than down.
- The cooking cycle is complete and the unit is in Keep Warm mode.
How long does the unit take to depressurize?
- Quick release is about 2 minutes or less. Natural release can take up to 20 minutes or more, depending on the type of food and/or the amount of ingredients in the pot.
"POT” error message appears on display screen.
- Cooking pot is not inside the cooker base. Cooking pot is required for all functions.
"LID” error message appears on display screen and lid icon flashes.
- The incorrect lid is installed for your desired cooking function. Place the pressure lid on the unit if you want to use the Pressure, Slow Cook, Steam, Sear/Sauté, or Keep Warm functions and ensure it is in the closed position.
"SHUT” error message appears on display screen.
The crisping lid is open and needs to be closed for the selected function to start.
"VENT” error message appears on display screen.
- When set to Slow Cook or Sear/Sauté, and the unit senses pressure building up, this message indicates the pressure release valve is in the SEAL position.
- Turn the pressure release valve to the VENT position and leave it there for the remainder of the cooking function.
- If you do not turn the pressure release valve to the VENT position within 5 minutes, the program will cancel and the unit will shut off.
"WATR” error message appears on display screen when using the Steam function.
The water level is too low. Add more water to the unit for the function to continue.
"WATR” error message appears on display screen when using the Pressure function.
- Add more liquid to the cooking pot before restarting the pressure cook cycle.
- Make sure the pressure release valve is in the SEAL position.
- Make sure the silicone ring is installed correctly.
"HOT” error message appears on display screen.
- This indicates the unit has overheated. Let the unit cool down. Once unit has cooled down, ensure there is no food caked on the bottom of the pot and there is enough liquid in the pot for the recipe you are preparing.
"ERR1,” “ERR2,” “ERR3,” “ERR4,” “ERR5,” “ERR6.”
- The unit is not functioning properly. Please contact Customer Service at 1-877-646-5288.
HELPFUL TIPS
1 For consistent browning, make sure ingredients are arranged in an even layer on the bottom of the cooking pot with no overlapping. If ingredients are overlapping, make sure to shake half way through the set cook time.
2 For smaller ingredients that could fall through the reversible rack, we recommend first wrapping them in a parchment paper or foil pouch.
3 When switching from pressure cooking to using the crisping lid it is recommended to empty the pot of any remaining liquid for best crisping results.
4 Press and hold down the Time Up or Down arrows to move faster through the display to get to your desired time.
5 Use the Keep Warm mode to keep food at a warm, food-safe temperature after cooking. To prevent food from drying out, we recommend keeping the lid closed and using this function just before serving. To reheat food, use the Air Crisp function.
6 To have your unit build pressure quicker, set it to SEAR/SAUTÉ HIGH. Once ready to pressure cook, press the PRESSURE button and continue as you normally would.