Loading ...
Loading ...
Loading ...
Residen al Standard Gas Water Heater Use and Care Guide • 23
OPERATION
Residen al Standard Gas Water Heater Use and Care Guide • 23
OPERATION
Ligh ng Instruc ons
WARNING! Explosion Hazard –
Replace viewport if glass is missing or
damaged. Failure to do so can result
in death, explosion or fi re.
Read and understand these direc ons
thoroughly before a emp ng to light
or re-light the pilot. Make sure the
viewport is not missing or damaged.
Make sure the tank is completely fi lled
with water before ligh ng the pilot.
Check the data plate near the gas
control valve to ensure the correct gas
type. Do not use this water heater with
any gas other than the one listed on the
data plate. If you have any ques ons or
doubts, consult your gas supplier or gas
u lity company.
NOTICE! A newly installed water heater
will have air in the gas line. It may take
several ligh ng a empts to clear all the
air from the gas line and light the pilot.
Follow these steps to light the pilot:
1
Make sure the manual gas
valve for the water heater’s
supply line is ON.
Figure 32 - Gas valve in “on” position
2
Turn the gas control knob to
the PILOT posi on.
Figure 33 - Gas control/valve.
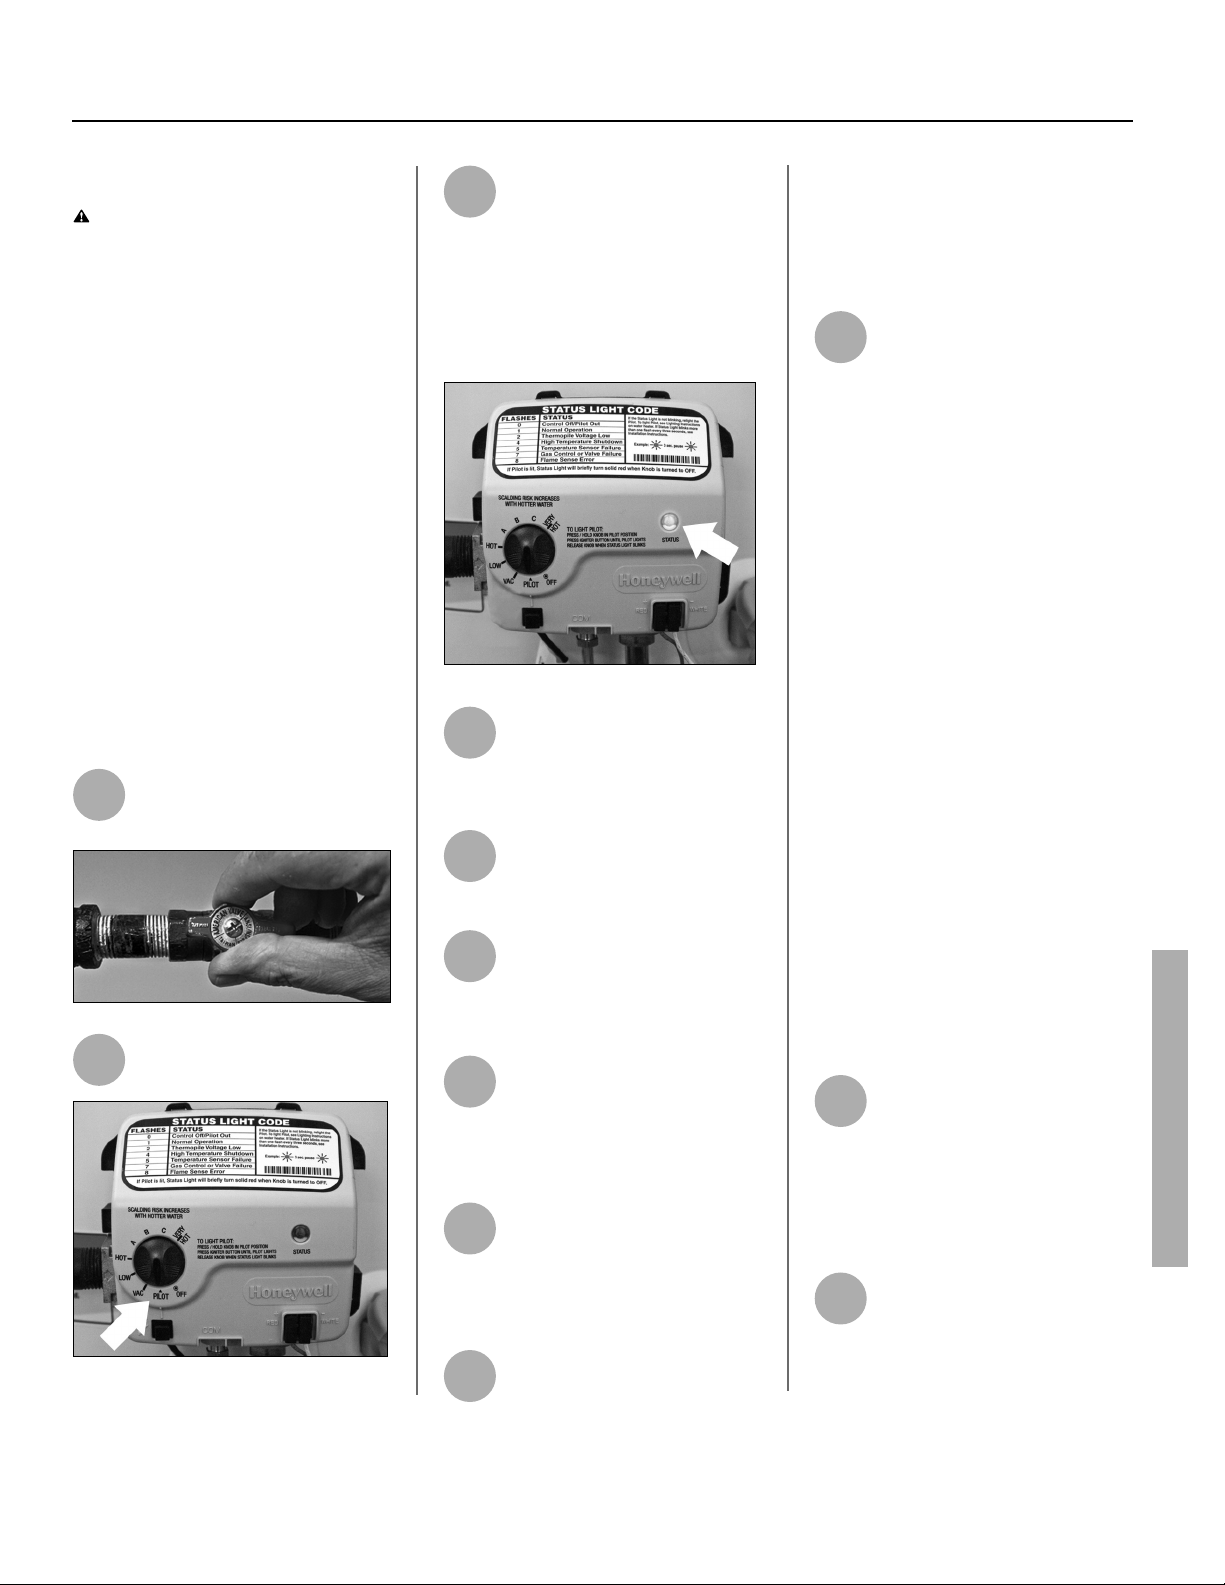
3
Press the gas control knob in
fully and hold it in. While
holding in the gas control
knob, repeatedly click the igniter bu on
(approximately once per second) for up
to 90 seconds or un l the Status Light
starts to fl ash. You can tell the pilot is lit
when the Status Light fl ashes once
every three seconds.
Figure 34 - Status light.
4
Once the Status Light starts
fl ashing, release the gas
control knob. Adjust the gas
control knob to the desired tempera-
ture se ng.
5
If the Status Light doesn’t start
fl ashing a er 90 seconds,
release the gas control knob
and wait 10 minutes.
6
Repeat ligh ng steps 2 through
5 at least two addi onal mes
or un l the Status Light starts
fl ashing once every three seconds. Wait
10 minutes between ligh ng a empts.
7
A solid Status Light means the
pilot was lit but is now off .
Release the gas control knob
and wait 10 minutes. Once the Status
Light goes out, repeat ligh ng steps 2
through 5.
8
If the Status Light doesn’t start
fl ashing a er three ligh ng
a empts, turn the gas control
knob to the OFF posi on and refer to
the “Troubleshoo ng-No Hot Water”
sec on (see page 25).
9
When a gas water heater is fi rst
lit and the tank is cold, conden-
sa on o en forms inside the
water heater. You may hear drips or a
sizzling sound when the water heater is
fi rst lit or, you may see a small puddle on
the fl oor. Condensa on is not a leak and
will go away once the tank reaches
normal opera ng temperature.
10
The air fi lter at the bo om of
the water heater must be
cleaned from me to me. See
the Maintenance sec on for steps on
cleaning the air fi lter. If the air fi lter is
not cleaned as needed, the water
heater’s pilot may go out.
Shut down Instruc ons
Turn the gas control/temperature knob
counterclockwise to the “OFF” se ng.
The status light will stop blinking and stay
on for a short me a er the water heater
is turned off .
Emergency Shut down
Should overhea ng occur or the gas
supply fail to shut off , turn off the water
heater’s manual gas control valve and call
a qualifi ed person.
Checking the Vent
System and Air Supply
Once the water heater is lit and the gas
control knob is set to the desired temper-
ature, the burner will light (if the tank is
cold). Perform an air supply and vent test
to make sure the unit is ven ng properly
and the air supply is adequate:
1
The main burner must be on
for this test. With a newly
installed water heater full of
cold water, turning the temperature
control knob to HOT should cause the
main burner to come on. You can view
the burner through the sight glass at
the base of the water heater.
2
Close all windows and doors
and turn on all gas appliances
and air-moving devices (range
hoods, bathroom exhaust fans, ceiling
fans, etc.) in your home. Also, close any
fi replace dampers.
Loading ...
Loading ...
Loading ...