Loading ...
Loading ...
Loading ...
18 • Residen al Standard Gas Water Heater Use and Care Guide
INSTALLATION
18 • Residen al Standard Gas Water Heater Use and Care Guide
INSTALLATION
line is turned off . Disconnect the gas
line from the water heater’s gas
control valve and cap it.
13
Remove the old water heater.
Use an appliance dolly or
hand truck to move the water
heater.
WARNING! Use two or more
people to remove or install a water
heater. Failure to do so can result in
back or other injury.
Step 4:
Installing the New
Water Heater
1
Completely read all instruc-
ons before beginning. If you
are not sure you can safely
complete the installa on, seek assis-
tance from any of the following sources:
• Lowe’s® Professional Installa on
is available for this product and
the work is guaranteed. Call your
Lowe’s® store to have this water
heater installed.
• Schedule an appointment with
a qualifi ed person to install your
water heater.
• Call our Technical Assistance Hotline
a t .
2
Install a metal drain pan that
is piped to an adequate drain.
Figure 23 - Metal drain pan piped to drain.
3
Set the water heater in place
taking care not to damage the
drain pan. When installing
directly on carpet, the water heater
must be installed on a wood or metal
base that extends beyond the dimen-
sions of the water heater (width and
depth) by at least 3 inches (76.2 mm)
in any direc on. If the water heater is
installed on carpet in an alcove or
closet, the en re fl oor must be covered
by a wood or metal panel.
NOTICE: Most codes require se ng
the water heater in a metal drain pan
piped to an adequate drain. The drain
pan helps avoid property damage
which may occur from condensa on
or leaks in the piping connec ons or
tank. The drain pan must be at least
two inches wider than the diameter
of the water heater. Install the drain
pan so the water level is limited to a
maximum depth of 1-3/4”.
4
Verify that the water heater is
set in place properly. Check
that:
• There is adequate space to install
the T&P Relief Valve discharge
pipe and that it can be piped to a
separate drain (and not into the
drain pan).
• There is adequate access and
space around the water heater
for future maintenance.
The water heater is installed ver cally.
Step 5:
Air Filter Installa on
Once you’ve posi oned the water
heater in the installa on area, install
the wrap-around air fi lter (supplied with
the water heater). The wrap-around air
fi lter fi ts around the base of the unit. Do
not operate the water heater without a
clean air fi lter in place.
1
Before installing the Air Filter
Assembly, remove any dust,
lint or debris (including any
packaging materials or tape) from
under the water heater.
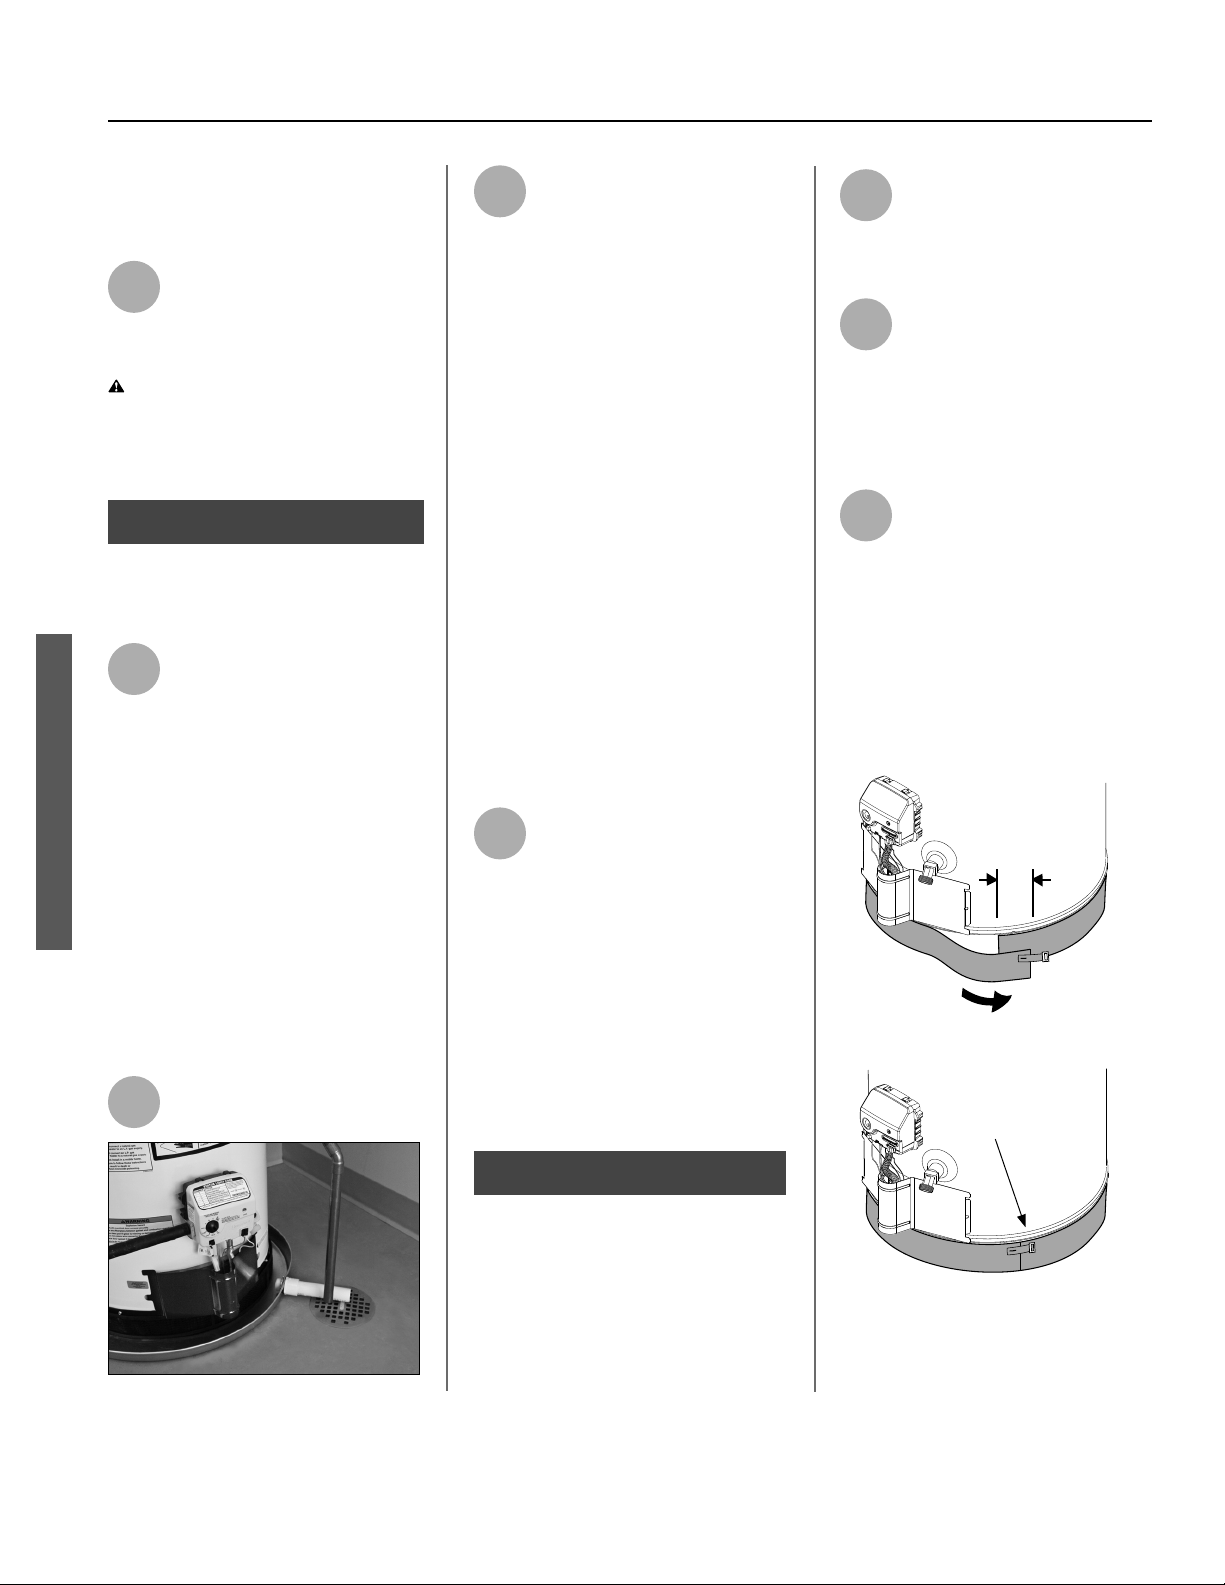
2
Installation: Wrap the filter
around the base of the water
heater. Cut to fit around a
sensor if present. Trim excess filter
material with scissors but allow filter
material to overlap a few inches (see
Figure 2).
3
The filter should fit snugly
against base of the water
heater with no gaps. The filter
must fit flush against the bottom of the
drain pan and/or floor. Hold the filter in
place, then stretch the filter clip over
the overlapped joint and hook in place
(see Figure 24).
FLUSH FIT AGAINST BOTTOM
OF DRAIN PAN
AND/OR FLOOR.
ATTACH FILTER CLIP AS
SHOWN HOLDING THE
AIR FILTER ASSEMBLY
IN PLACE.
NOTE: DRAIN PAN SHOWN
REMOVED FOR CLARITY.
OVERLAP
4” (100 mm)
WRAP THE AIR FILTER ASSEMBLY
AROUND THE BOTTOM OF THE WATER
HEATER (NOTE: CLIP ON TOP EDGE).
Figure 24 - Air Filter Installation
Loading ...
Loading ...
Loading ...