Loading ...
Loading ...
Loading ...
40
OPERATION
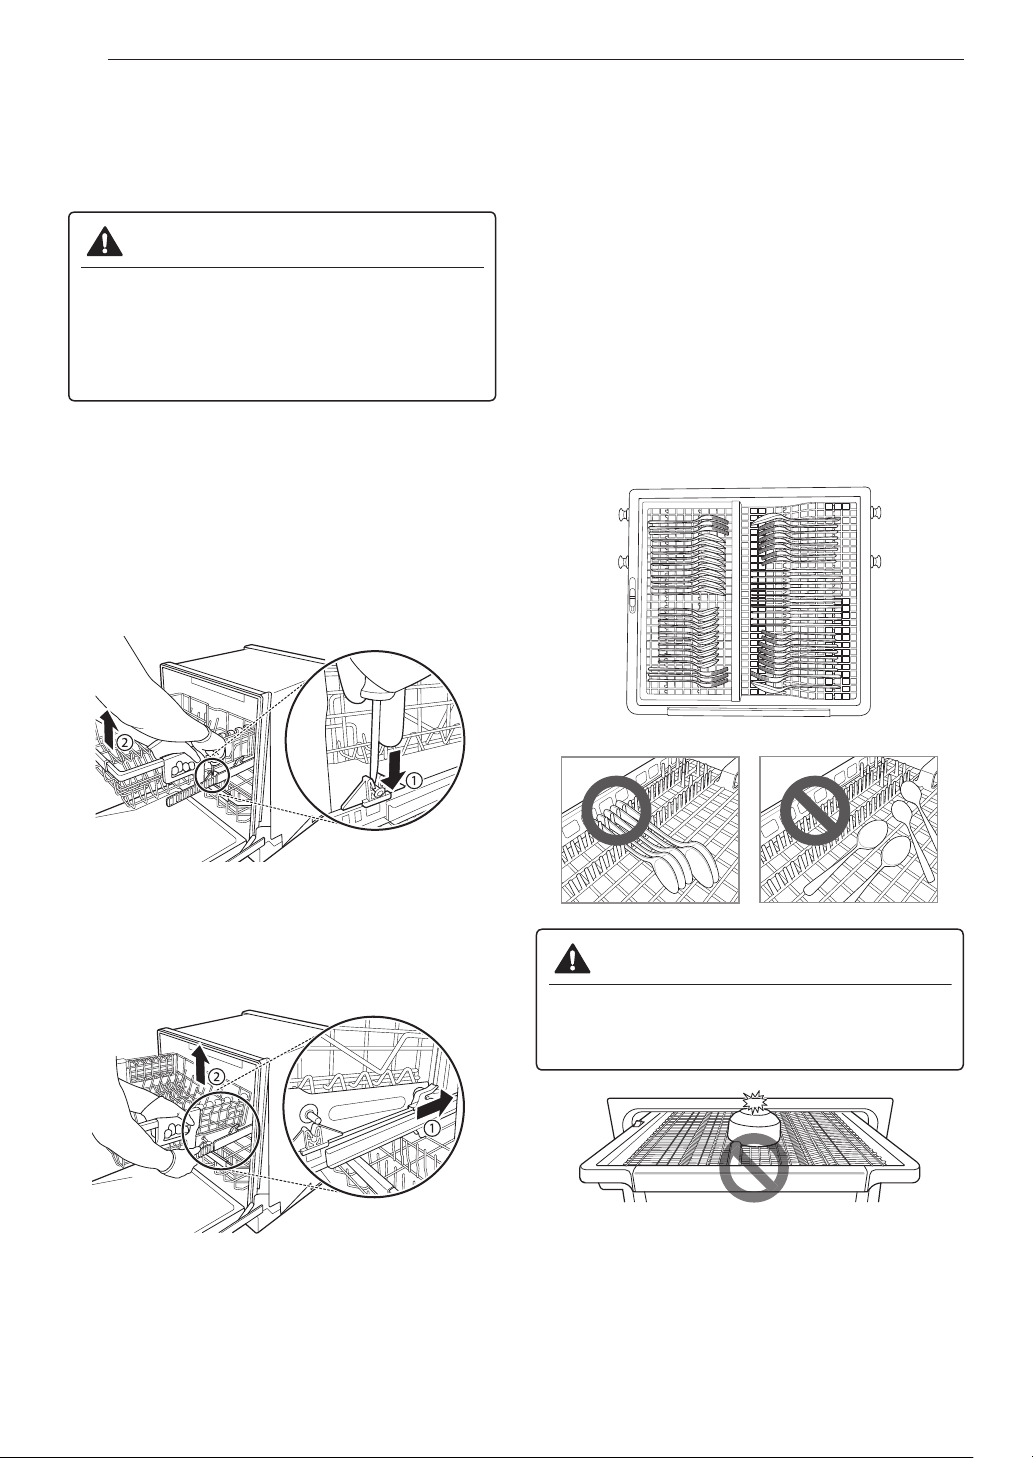
Removing the Snap-In Gliding Upper
Rack
These instructions are for models with snap-in
rack supports rather than wheeled rack supports.
CAUTION
• The snap-in upper rack should only be
removed for servicing. If you need to remove
the rack, wear gloves and handle the
screwdriver carefully to avoid personal injury
or damage to the dishwasher.
1
Pull the upper rack out until it stops. Remove
any contents from the rack.
2
To remove the front rack supports from the
rails, push the front hooks open with a flat-
blade screwdriver while pulling the front of the
rack up to snap the front rack support out of
the hooks. Repeat to snap the front support
out on the opposite side.
3
To remove the back rack supports from the
rails, hold a side rail with one hand, lift the
front of the rack, and firmly push the rack back
to snap the support out of the hooks in the
rear. Repeat on the opposite side.
4
To replace the rack, place the back rack
supports behind the rear hooks and pull the
rack forward to snap the supports into the
hooks. Then align the front rack supports with
the front hooks and push the front of the rack
down to snap the supports into the front hooks.
Loading the Cutlery Rack
The cutlery rack is best suited for flatware and
most cooking or serving utensils. It can also fit
small prep bowls and lids. The separators on the
cutlery racks help keep flatware separated to avoid
damage and improve cleaning.
NOTE
• For best cleaning performance, place flatware
in the silverware baskets. Heavily soiled utensils
or items with baked on foods should be placed
in the middle rack or spoon basket for best
performance.
Loading 10 Place Settings
CAUTION
• Do not place bowls in the center of the
cutlery rack. The door may not close
properly, resulting in leakage.
Loading ...
Loading ...
Loading ...