Loading ...
Loading ...
Loading ...
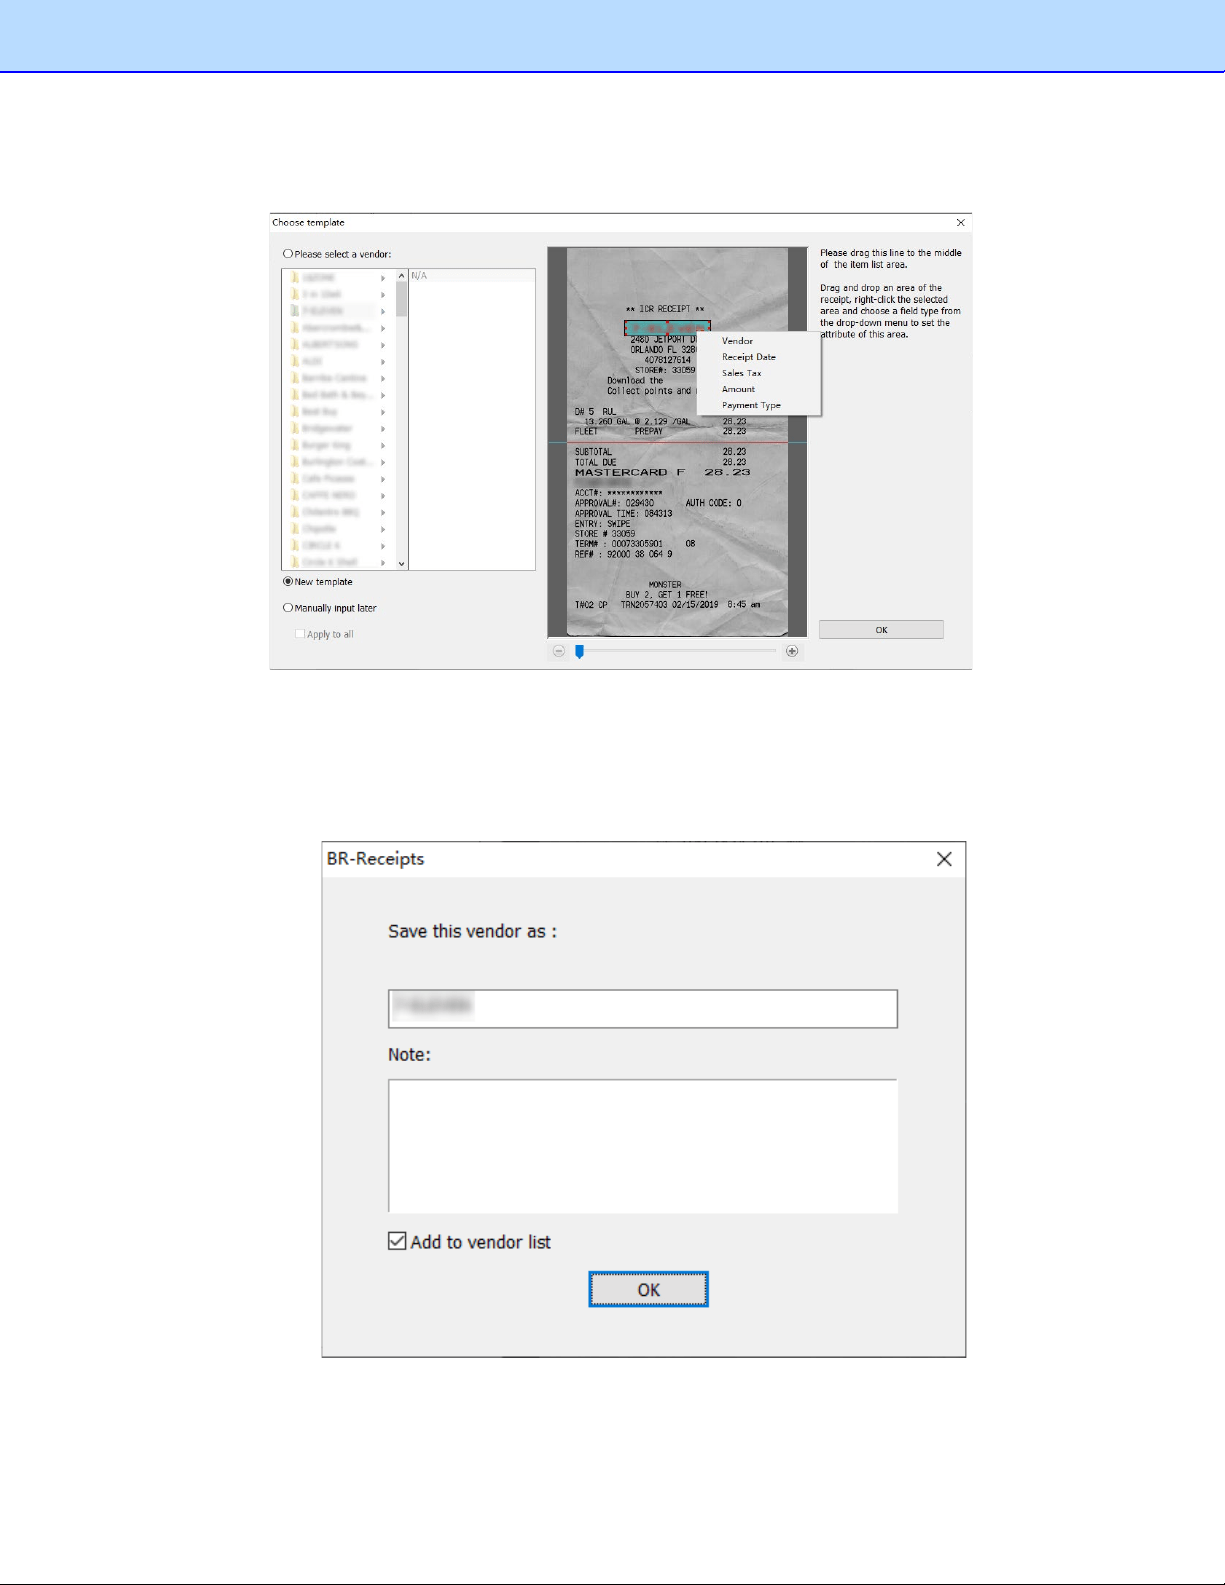
1. Click New template the receipt image will be displayed with a red bar. Click and drag the red bar
to separate the top and bottom areas of the receipt. Drag to select an area of the receipt,
right-click the selected area, and choose a field type from the pop-up menu to verify this area.
2. Set the expense data attributes this way.
Drag a rectangle to select an area, right-click the area and choose a field type. Each data unit
must be mapped to a separate field type. If you choose a data unit that is being used, the previous
field type will be removed. Make sure your selections are accurate for the best OCR results.
3. When the field verification finished, name the template, add notes to the template, and then click
OK to save it.
20
Loading ...
Loading ...
Loading ...