Loading ...
Loading ...
Loading ...
4
Working with BR-Receipts
BR- Receipts is designed to help you organize and track your expenses. Once you start scanning and
saving your receipts, use these basic functions to keep your database current.
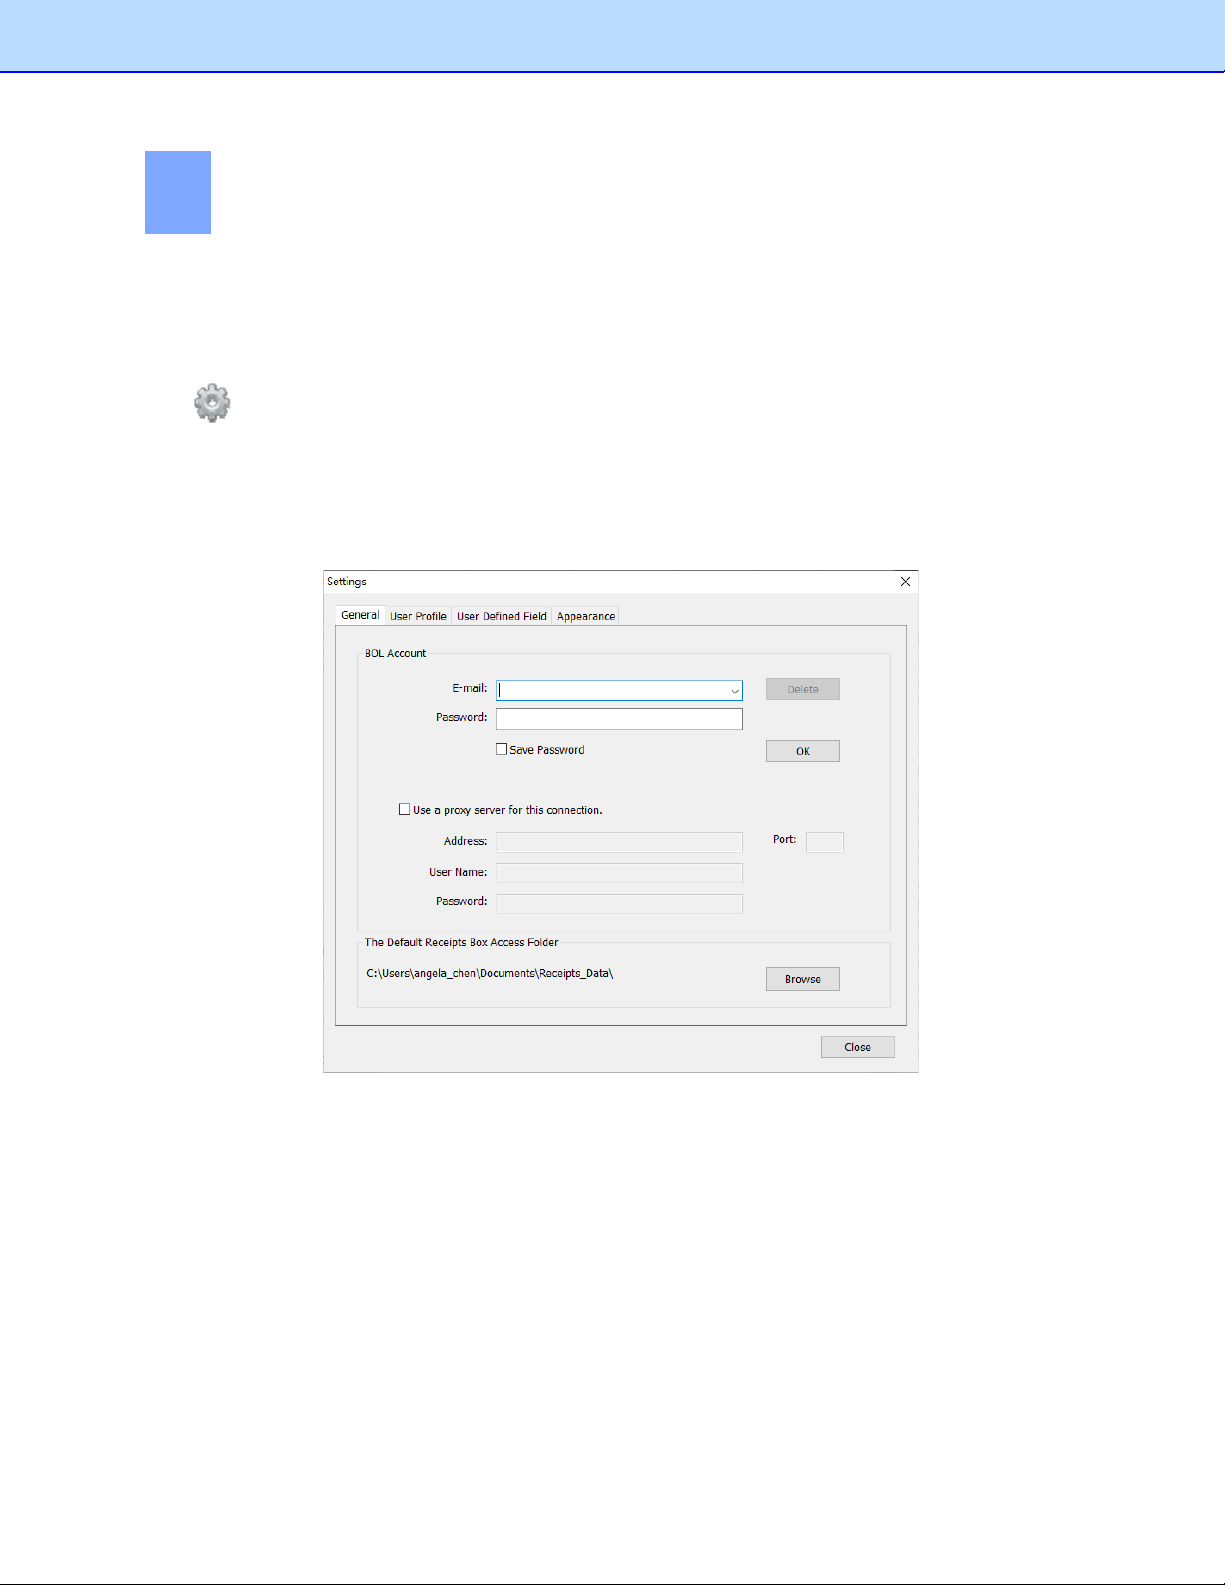
Setting Up BR-Receipts
Click on the toolbar or click the File menu and select Settings, and then enter your BOL account
information, user profile and defined field values, and the user interface language to personalize your
program.
General: Type your e-mail address and password, select Save Password and then click OK to save
the account information, providing easy access when you send receipt images to the cloud from your
computer.
In addition to uploading from your computer, you can add a proxy to upload your receipt images or
data. Select Use a proxy server for this connection, and then type the proxy address, user name,
password, and port to enable the proxy.
Click Browse to specify a receipt box path. When you create a receipt box, the receipt box will be
placed under the path specified in the Settings. When you open a receipt box, you can open the
receipt box under the specified path, and the next time you start BR-Receipts, the default receipt box
path will be the path specified.
12
Loading ...
Loading ...
Loading ...