Loading ...
Loading ...
Loading ...
en Appliance door
34
qAppliance door
Ap p l i a n c e door
With good care and cleaning, your appliance will retain
its appearance and remain fully functional for a long
time to come. This will tell you how to clean the
appliance door.
Detaching and refitting the appliance door
For cleaning purposes or to remove the door panels,
you can detach the appliance door.
The appliance door hinges each have a locking lever.
When the locking levers are closed (fig. !), the
appliance door is secured in place. It cannot be
detached.
When the locking levers are open in order to detach the
appliance door (fig. "), the hinges are locked. They
cannot snap shut.
:Warning
Risk of injury!
■ If the hinges are not locked, they can snap shut with
great force. Ensure that the locking levers are always
fully closed or, when detaching the appliance door,
fully open.
Risk of injury!
■ The hinges on the appliance door move when
opening and closing the door, and you may be
trapped. Keep your hands away from the hinges.
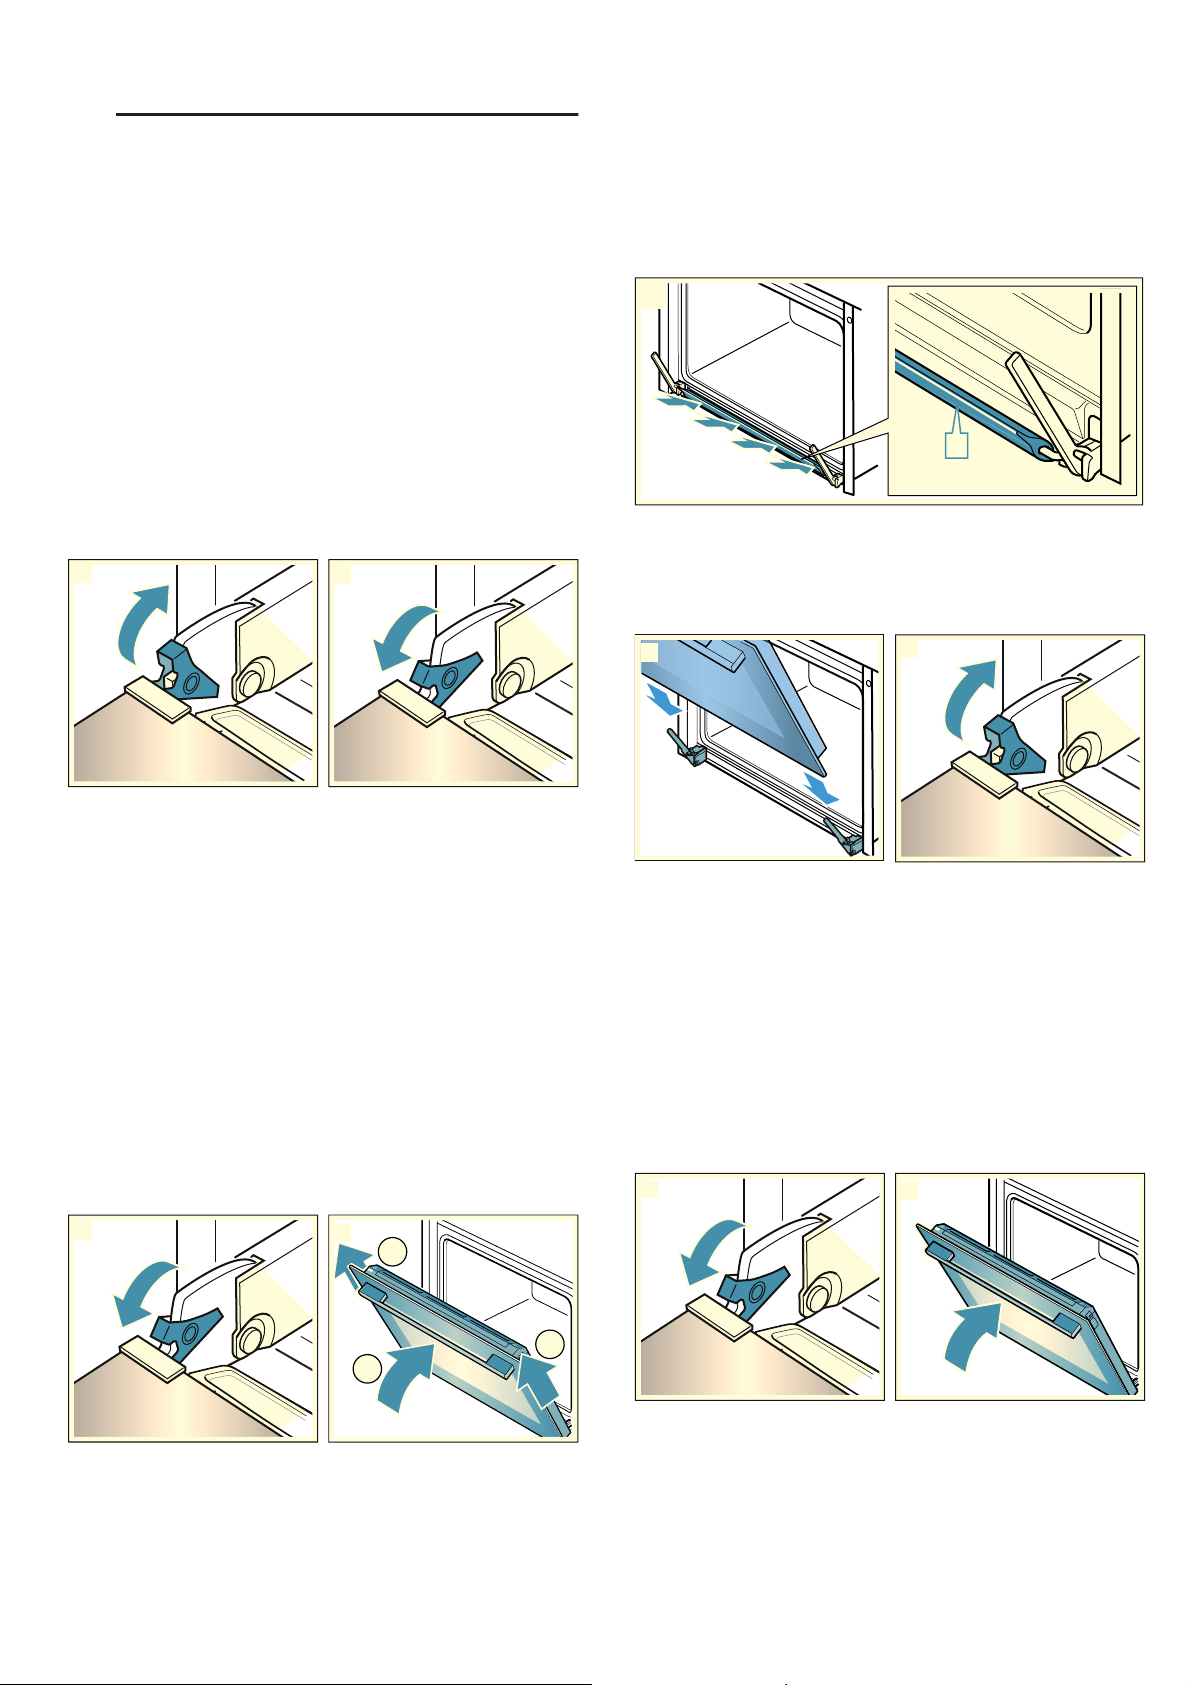
Detaching the appliance door
1. Open the appliance door fully.
2. Open the two locking levers on the left and right
(fig. !).
3. Close the appliance door fully ‚. Take hold of the
appliance door with both hands, one on the left and
one on the right ƒ, and pull it up and out (fig. ").
Refitting the appliance door
Follow the instructions in the reverse order to refit the
appliance door.
1. Press down on the seal ‚ along the drip trough
(fig. !); otherwise, the seal ‚ may become detached
during cleaning.
2. When fitting the appliance door, ensure that both
hinges are inserted straight into the opening (fig.
").
Slide the appliance door down as far as it will go.
3. Open the appliance door fully. Close the two locking
levers (fig. #).
4. Close the cooking compartment door.
Removing and installing the door panels
To facilitate cleaning, you can remove the glass panels
from the appliance door.
Locking the appliance door
1. Open the appliance door fully.
2. Open the two locking levers on the left and right
(fig. !).
3. Close the appliance door as far as it goes (fig. ").
2
1
2
1
1
D
2
2
1
Loading ...
Loading ...
Loading ...