Loading ...
Loading ...
Loading ...
User Manual BDH4222V/4223V
32
Changing the Input Source for Main Picture
1 Press the INPUT key or any of the DIRECT INPUT KEYS to change.
Notes:
● PIP mode can only be turned on if the monitor’s input is set to: AV1,
AV2 (S-Video), Component 1 and 2. If the monitor’s main input is set
to RGB or DVI, the PIP and POP will not function.
● If the monitor’s input is set to Component 1 or Component 2, the
PIP will only turn on if the input signal source is compatible with
15KHz signals such as 480i and Y/C
B/CR signals.
● When changing input source for sub-pictures to Component 1 and
Component 2, only 15KHz compatible signals such as 480i and Y/C
B/
C
R will result in a video picture display. If another signal other than
15KHz is detected, the sub-picture may display distorted video
signals.
● Once PIP is turned off, the next time you return on PIP mode, the
position of the sub-window will start at default position.
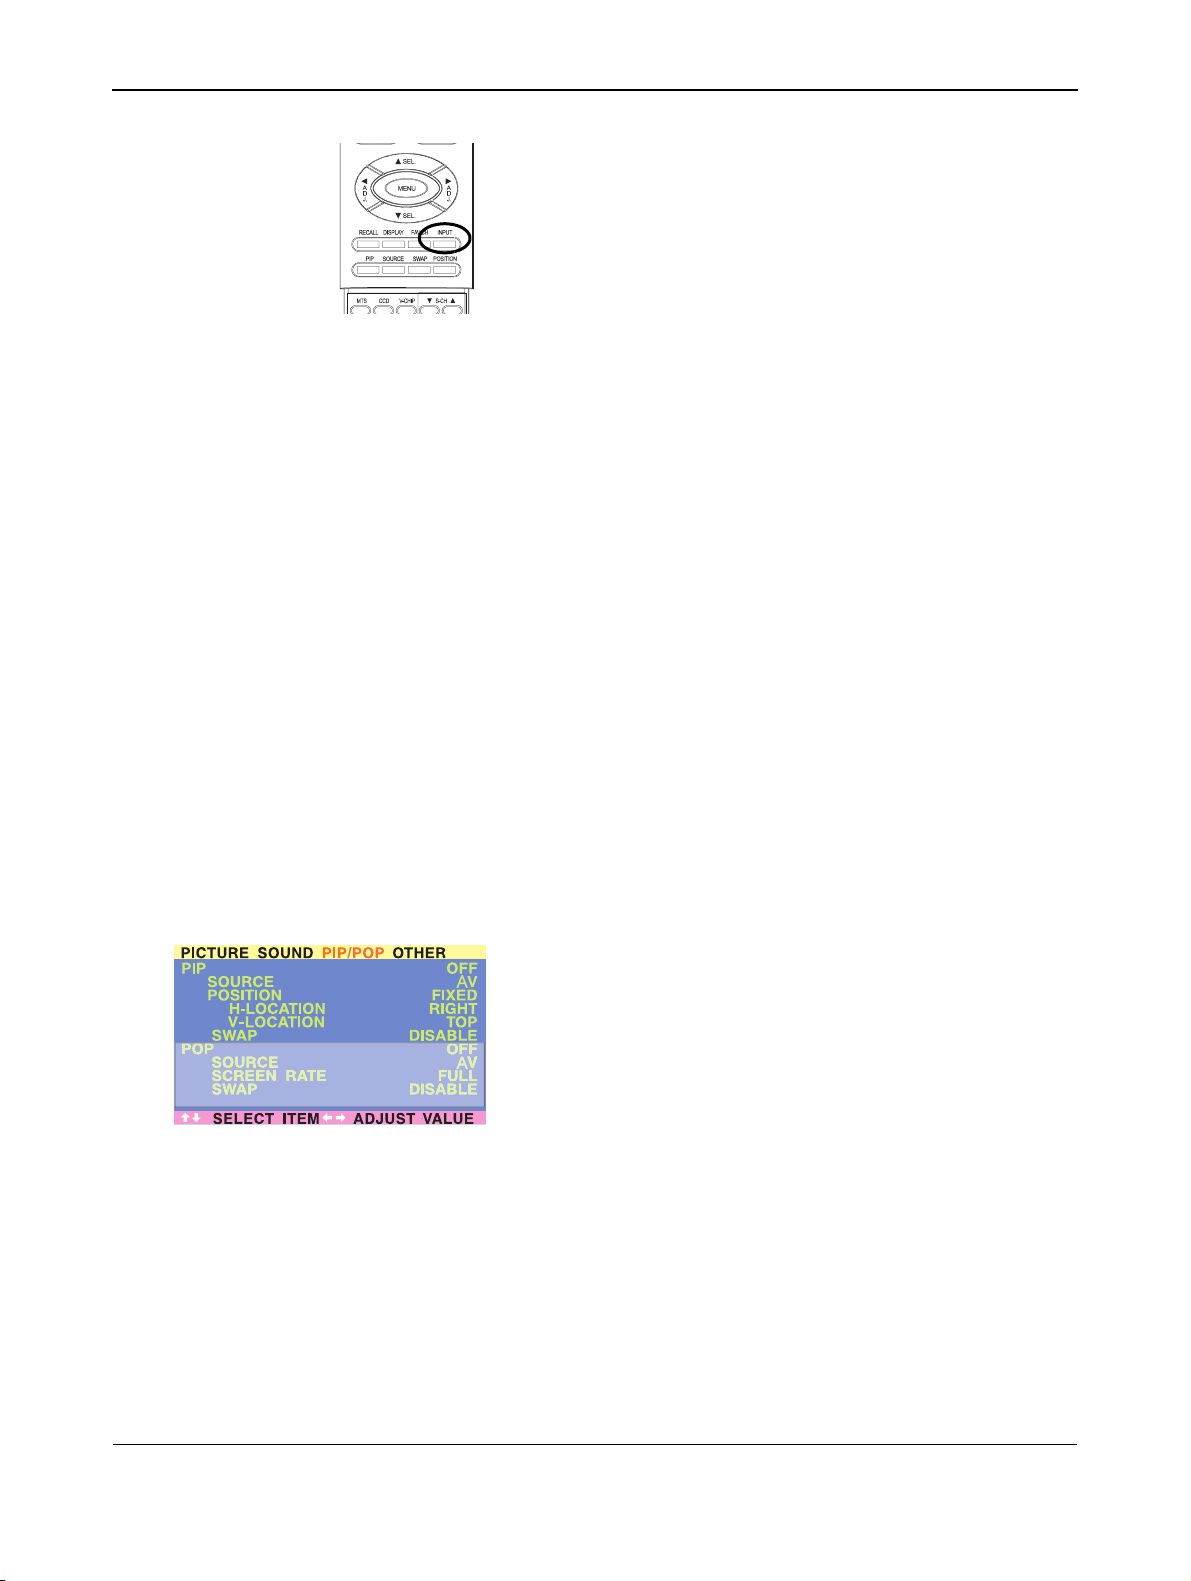
Accessing PIP and POP Modes Modes using OSD
To access these modes using OSD:
1 Press the MENU +/- keys on the remote or on the front control
panel of the monitor.
2 Use the ADJ +/- keys to switch to "PIP/POP" Menu.
3 Make sure that the "Picture" OSD menu below is displayed.
4 Use the MENU +/- keys to move up and down to choose the sub-
category you wish to change.
5 Use the ADJ +/- keys to actually change the setting.
PIP options:
■ PIP On/Off
■ Input Source Selection
■ PIP Window Position
Choose between FIXED or VARIABLE windows position:
● If set to FIXED, the PIP window can be set in any of the four
corners of the screen. Use H-LOCATION and V-LOCATION to
set the position of the window.
● If set to VARIABLE, the PIP window can be variably set to
anywhere on the screen using H-LOCATION and
V-LOCATION.
■ PIP Window SWAP
By default, the OSD will always display DISABLE. To swap the main
and sub windows, use the ADJ +/- key to swith to ENABLE. Once
the swap is complete, the OSD will return to display DISABLE.
Loading ...
Loading ...
Loading ...