Samsung HW-R50C 2.1ch Soundbar

User Manual

For HW-R50C/ZC. Additionally, the document applies to other Samsung models: HW-R50C, HW-R50C/ZA

PDF File Manual, 82 pages, Read Online | Download pdf file
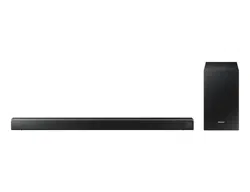
HW-R50C/ZC photo
background
HW-R50C
FULL MANUAL
Imagine the possibilities
Thank you for purchasing this Samsung product.
To receive more complete service, please register
your product at www.samsung.com/register
Loading page 2...
Loading page 3...
Loading page 4...
Loading page 5...
Loading page 6...
Loading page 7...
Loading page 8...
Loading page 9...
Loading page 10...
Loading page 11...
Loading page 12...
Loading page 13...
Loading page 14...
Loading page 15...
Loading page 16...
Loading page 17...
Loading page 18...
Loading page 19...
Loading page 20...
Loading page 21...
Loading page 22...
Loading page 23...
Loading page 24...
Loading page 25...
Loading page 26...
Loading page 27...
Loading page 28...
Loading page 29...
Loading page 30...
Loading page 31...
Loading page 32...
Loading page 33...
Loading page 34...
Loading page 35...
Loading page 36...
Loading page 37...
Loading page 38...
Loading page 39...
Loading page 40...
Loading page 41...
Loading page 42...
Loading page 43...
Loading page 44...
Loading page 45...
Loading page 46...
Loading page 47...
Loading page 48...
Loading page 49...
Loading page 50...
Loading page 51...
Loading page 52...
Loading page 53...
Loading page 54...
Loading page 55...
Loading page 56...
Loading page 57...
Loading page 58...
Loading page 59...
Loading page 60...
Loading page 61...
Loading page 62...
Loading page 63...
Loading page 64...
Loading page 65...
Loading page 66...
Loading page 67...
Loading page 68...
Loading page 69...
Loading page 70...
Loading page 71...
Loading page 72...
Loading page 73...
Loading page 74...
Loading page 75...
Loading page 76...
Loading page 77...
Loading page 78...
Loading page 79...
Loading page 80...
Loading page 81...
Loading page 82...

Other documents for Samsung HW-R50C/ZC

The following documents are available:
User Manual Other Documents Photos

Specifications

User Manual - Transcript

  • Page 1 - English - : HWR50C FULL MANUAL Imagine the possibilities Thank you for purchasing this Samsung product To receive more complete service please register your product at wwwsamsungcomregister
  • Page 2 - English - : ENG ii SAFETY INFORMATION SAFETY WARNINGS TO REDUCE THE RISK OF ELECTRIC SHOCK DO NOT REMOVE THE COVER OR BACK NO USERSERVICEABLE PARTS ARE INSIDE REFER SERVICING TO QUALIFIED SERVICE PERSONNEL Refer to the table below for an explanation of symbols which may be on your Samsung product CAUTION RISK OF ELECTRIC SHOCK DO NOT OPEN This symbol indicates that high voltage is present inside It is dangerous to make any kind of contact with any internal part of this product This symbol indicates that this product has included important literature concerning operation and maintenance Class II product This symbol indicates that it does not require a safety connection to electrical earth ground If this symbol is not present on a product with a power cord the product MUST have a reliable connection to protective earth ground AC voltage This symbol indicates that the rated voltage marked with the symbol is AC voltage DC voltage This symbol indicates that the rated voltage marked with the symbol is DC voltage Caution Consult instructions for use This symbol instructs the user to consult the user manual for further safety related information WARNING To reduce the risk of re or electric shock do not expose this appliance to rain or moisture To prevent injury this apparatus must be securely attached to the oorwall in accordance with the installation instructions CAUTION Do not expose this apparatus to dripping or splashing Do not put objects lled with liquids such as vases on the apparatus To turn this apparatus off completely you must pull the power plug out of the wall socket Consequently the power plug must be easily and readily accessible at all times CAUTION for Canada This device contains licenceexempt transmittersreceivers that comply with Innovation Science and Economic Development Canadas licenceexempt RSSs Operation is subject to the following two conditions 1 This device may not cause interference 2 This device must accept any interference including interference that may cause undesired operation of the device This device and its antennas must not be co located or operation in conjunction with any other antenna or transmitter This device may automatically discontinue transmission if there is no information to transmit or an operational failure Note that this is not intended to prohibit the transmission of control or signaling information or the use of repetitive codes where required by the technology This Class B digital apparatus complies with Canadian ICES003
  • Page 3 - English - : ENG iii Radiation Exposure Statement This equipment complies with IC RSS102 radiation exposure limits set forth for an uncontrolled environment This equipment should be installed and operated with minimum distance 20 cm between the radiator amp your body Important Safety Instructions Read these operating instructions carefully before using the unit Follow all the safety instructions listed below Keep these operating instructions handy for future reference 1 Read these instructions 2 Keep these Instructions 3 Heed all warnings 4 Follow all instructions 5 Do not use this apparatus near water 6 Clean only with dry cloth 7 Do not block any ventilation openings Install in accordance with the manufacturers instructions 8 Do not install near any heat sources such as radiators heat registers stoves or other apparatus including ampliers that produce heat 9 Do not defeat the safety purpose of the polarized or groundingtype plug A polarized plug has two blades with one wider than the other A grounding type plug has two blades and a third grounding prong The wide blade or the third prong are provided for your safety If the provided plug does not t into your outlet consult an electrician for replacement of the obsolete outlet 10 Protect the power cord from being walked on or pinched particularly at plugs convenience receptacles and the point where they exit from the apparatus 11 Only use attachmentsaccessories specied by the manufacturer 12 Use only with the cart stand tripod bracket or table specied by the manufacturer or sold with the apparatus When a cart is used use caution when moving the cartapparatus combination to avoid injury from tipover 13 Unplug this apparatus during lightning storms or when unused for long periods of time 14 Refer all servicing to qualied service personnel Servicing is required when the apparatus has been damaged in any way such as powersupply cord or plug is damaged liquid has been spilled or objects have fallen into the apparatus the apparatus has been exposed to rain or moisture does not operate normally or has been dropped
  • Page 4 - English - : ENG iv PRECAUTIONS 1 Ensure that the AC power supply in your house complies with the power requirements listed on the identication sticker located on the bottom of your product Install your product horizontally on a suitable base furniture with enough space around it for ventilation 34 inches Make sure the ventilation slots are not covered Do not place the unit on ampliers or other equipment which may become hot This unit is designed for continuous use To fully turn off the unit disconnect the AC plug from the wall outlet Unplug the unit if you intend to leave it unused for a long period of time 2 During thunderstorms disconnect the AC plug from the wall outlet Voltage peaks due to lightning could damage the unit 3 Do not expose the unit to direct sunlight or other heat sources This could lead to overheating and cause the unit to malfunction 4 Protect the product from moisture ie vases and excess heat eg a replace or equipment creating strong magnetic or electric elds Unplug the power cable from the AC wall socket if the unit malfunctions Your product is not intended for industrial use It is for personal use only Condensation may occur if your product has been stored in cold temperatures If transporting the unit during the winter wait approximately 2 hours until the unit has reached room temperature before using 5 The battery used with this product contains chemicals that are harmful to the environment Do not dispose of the battery in the general household trash Do not expose the battery to excess heat direct sunlight or re Do not short circuit disassemble or overheat the battery Danger of explosion if the battery is replaced incorrectly Replace only with the same or equivalent type
  • Page 5 - English - : ENG v ABOUT THIS MANUAL The user manual has two parts this simple paper USER MANUAL and a detailed FULL MANUAL you can download USER MANUAL See this manual for safety instructions product installation components connections and product specications FULL MANUAL You can access the FULL MANUAL on Samsungs online customer support center by scanning the QR code on the left To see the manual on your PC or mobile device download the manual in document format from Samsungs website httpwwwsamsungcomsupport Design and specications are subject to change without prior notice
  • Page 6 - English - : ENG vi CONTENTS 01 Checking the Components 2 Inserting Batteries before using the Remote Control AA batteries X 2 2 02 Product Overview 3 Front Panel Right Side Panel of the Soundbar 3 Bottom Panel of the Soundbar 4 03 Connecting the Soundbar 5 Connecting Electrical Power Connecting the Soundbar to the Subwoofer Automatic connection between the Subwoofer and the Soundbar Manually connecting the Subwoofer if automatic connection fails Connecting an SWA8500S Sold Separately to your Soundbar 04 Connecting to your TV 10 Method 1 Connecting with a Cable Connecting a TV using an HDMI Cable Connecting using an Optical Cable Method 2 Connecting Wirelessly Connecting a TV via Bluetooth 05 Connecting an External Device 14 Connecting using an HDMI Cable Connecting using an Optical or Analog Audio AUX Cable 06 Connecting a USB Storage Device 16
  • Page 7 - English - : ENG vii 07 Connecting a Mobile Device 18 Connecting via Bluetooth Using the Samsung Audio Remote App Installing the Samsung Audio Remote App Launching the Samsung Audio Remote App 08 Using the Remote Control 22 How to Use the Remote Control Adjusting the Soundbar volume with a TV remote control Using the Hidden Buttons Buttons with more than one function Output specications for the different sound effect modes 09 Installing the Wall Mount 27 Installation Precautions Wallmount Components 10 Software Update 29 Updating Procedure If UPDATE is not displayed 11 Troubleshooting 31 12 License 32 13 Open Source License Notice 32 14 Important Notes About Service 32 15 SpecicationsandGuide 33 Specications
  • Page 8 - English - : ENG 2 01 CHECKING THE COMPONENTS VOL WOOFER SOUNDBAR SOUND MODE PAIR Soundbar Main Unit Subwoofer Remote Control Batteries 1 2 3 Power Cord Subwoofer ACDC Adapter Main Unit Power Cord ACDC Adapter HDMI Cable Optical Cable x 2 x 2 Wall Mount Guide HolderScrew Screw BracketWall Mount L BracketWall Mount R For more information about the power supply and power consumption refer to the label attached to the product Label Bottom of the Soundbar Main Unit The power components are labelled 1 2 3 For more information about power connections see page 5 To purchase additional components or optional cables contact a Samsung Service Center or Samsung Customer Care Depending on the region the appearance of the AC plug may differ from the plug displayed above or it may be supplied integrated with the ACDC adapter The appearance of the accessories may differ slightly from the illustrations above Inserting Batteries before using the Remote Control AA batteries X 2 Slide the battery cover in the direction of the arrow until it is completely removed Insert 2 AA batteries 15V oriented so that their polarity is correct Slide the battery cover back into position
  • Page 9 - English - : ENG 3 02 PRODUCT OVERVIEW Front Panel Right Side Panel of the Soundbar Position the product so that the SAMSUNG logo is located on the top Right Side of the Soundbar Display Displays the products status and current mode Volume Button Adjusts the volume When adjusted the volume level appears on the Soundbars front display Source Button Selects the source input mode Input mode Display Optical Digital input DIN ARC HDMI OUT input DIN TV ARC Auto conversion AUX input AUX HDMI input HDMI BLUETOOTH mode BT USB mode USB To turn on BT PAIRING mode change the source to BT mode and then press and hold the Source button for more than 5 seconds Power Button Turns the power on and off When you plug in the AC cord the power button will begin working in 4 to 6 seconds When you turn on this unit there will be a 4 to 5 second delay before it produces sound If you want to enjoy sound only from the Soundbar you must turn off the TVs speakers in the Audio Setup menu of your TV Refer to the owners manual supplied with your TV
  • Page 10 - English - : ENG 4 Bottom Panel of the Soundbar HDMI IN USB 5V 05A AUX IN DIGITAL AUDIO IN OPTICAL DC 24V HDMI OUT TVARC HDMI OUT TVARC HDMI IN DC 24V HDMI OUT TVARC USB 5V 05A AUX IN HDMI IN DIGITAL AUDIO IN OPTICAL DIGITAL AUDIO IN OPTICAL Connect to the digital optical output of an external device USB 5V 05A Connect a USB device here to play music les on the USB device through the Soundbar AUX IN Connect to the Analog output of an external device HDMI IN Inputs digital video and audio signals simultaneously using an HDMI cable Connect to the HDMI output of an external device HDMI OUT TVARC Connect to the HDMI ARC jack on a TV DC 24V Power Supply In Connect the ACDC power adapter When disconnecting the power cable of the ACDC power adaptor from a wall outlet pull the plug Do not pull the cable Do not connect this unit or other components to an AC outlet until all connections between components are complete
  • Page 11 - English - : ENG 5 03 CONNECTING THE SOUNDBAR Connecting Electrical Power Use the power components 1 2 3 to connect the Subwoofer and Soundbar to an electrical outlet in the following order 1 Connect the power cord to the Subwoofer 2 Connect the power output cable to the power adapter and then to the Soundbar Connect the power cord to a wall socket See the illustrations below For more information about the required electrical power and power consumption refer to the label attached to the product Label Bottom of the Soundbar Main Unit POWER Rear of Subwoofer 1 Power Cord Connecting Electrical Power HDMI IN USB 5V 05A AUX IN DIGITAL AUDIO IN OPTICAL DC 24V HDMI OUT TVARC DC 24V Bottom of the Soundbar Main Unit 2 ACDC Adapter 3 Power Cord Connecting Electrical Power Make sure to rest the ACDC Adapter at on a table or the oor If you place the ACDC Adapter so that it is hanging with the AC cord input facing upwards water or other foreign substances could enter the Adapter and cause the Adapter to malfunction
  • Page 12 - English - : ENG 6 Connecting the Soundbar to the Subwoofer When the subwoofer is connected you can enjoy rich bass sound Automatic connection between the Subwoofer and the Soundbar When you turn the power on after connecting the power cables to the Soundbar and subwoofer the subwoofer is automatically connected to the Soundbar When auto pairing is complete the blue indicators at the rear of the subwoofer turn on LED Indicator Lights on the Rear of Subwoofer LED Status Description Resolution Blue On Successfully connected normal operation Blinking Recovering the connection Check if the power cable attached to the main Soundbar unit is connected properly or wait about 5 minutes If blinking persists try manually connecting the subwoofer See page 7 Red On Standby with the Soundbar main unit turned off Check if the power cable attached to the main Soundbar unit is connected properly Connection failed Connect again See the instructions for manual connection on page 7 Red and blue Blinking Malfunction See the contact information for the Samsung Service Center in this manual
  • Page 13 - English - : ENG 7 Manually connecting the Subwoofer if automatic connection fails Before performing the manual connection procedure below Check whether the power cables for the Soundbar and subwoofer are connected properly Make sure that the Soundbar is turned on 1 Press and hold ID SET on the rear of the subwoofer for at least 5 seconds The red indicator on the rear of the subwoofer turns off and the blue indicator blinks 5 Sec Rear of Subwoofer 2 Press and hold the Up button on the remote control for at least 5 seconds The ID SET message appears on the display of the Soundbar for a moment and then it disappears The Soundbar will automatically power on when ID SET is complete ID SET SOUND MODE PAIR 5 Sec 3 Check if the LINK LED is solid blue connection complete Blue is On The LINK LED indicator stops blinking and glows a solid blue when a connection is established between the Soundbar and the Wireless Subwoofer
  • Page 14 - English - : ENG 8 NOTES Do not connect the power cord of this product or your TV to a wall outlet until all connections between components are complete Before moving or installing this product be sure to turn off the power and disconnect the power cord If the main unit is powered off the wireless subwoofer will go into standby mode and the STANDBY LED on the rear of the subwoofer will turn red after blinking in blue several times If you use a device that uses the same frequency 58GHz as the Soundbar near the Soundbar interference may cause some sound interruption The maximum transmission distance of the main units wireless signal is about 328 ft but may vary depending on your operating environment If a steelconcrete or metallic wall is between the main unit and the wireless subwoofer the system may not operate at all because the wireless signal cannot penetrate metal PRECAUTIONS Wireless receiving antennas are built into the wireless subwoofer Keep the unit away from water and moisture For optimal listening performance make sure that the area around the wireless subwoofer and the Wireless Receiver Module sold separately is clear of any obstructions Connecting an SWA8500S Sold Separately to your Soundbar Expand to true wireless surround sound by connecting the Samsung Wireless Rear Speaker Kit SWA8500S sold separately to your Soundbar 1 Connect the Wireless Receiver Module to 2 Surround Speakers The speaker cables are color coded SURROUNDLEFT ID SET L R SURROUND SPEAKERS OUT SPEAKER IMPEDANCE 3Ω POWER ID SET L R SURROUND SPEAKERS OUT SPEAKER IMPEDANCE 3Ω SURROUNDRIGHT SURROUNDLEFT SURROUNDRIGHT
  • Page 15 - English - : ENG 9 2 Check the standby status of the Wireless Receiver Module after plugging it into an electrical outlet The LINK LED indicator blue LED on the Wireless Receiver Module blinks If the LED does not blink press the ID SET button on the back of the Wireless Receiver Module with a pen tip for 56 seconds until the LINK LED indicator blinks in Blue For more about the LED please refer to the SWA8500S user manual ID SET L R SURROUND SPEAKERS OUT SPEAKER IMPEDANCE 3Ω POWER POWER ID SET SURROUND SPEAKERS OUT SPEAKER IMPEDANCE 3Ω STANDBY LINK STANDBY LINK Blue blinking 5 Sec 3 Press and hold the Up button on the remote control for at least 5 seconds The ID SET message appears on the display of the Soundbar for a moment and then it disappears The Soundbar will automatically power on when ID SET is complete ID SET SOUND MODE PAIR 5 Sec CAUTION If your Soundbar was playing music when it connects to the SWA8500S you may hear some stuttering from the woofer as the connection nalizes 4 Check if the LINK LED is solid blue connection complete STANDBY LINK STANDBY LINK Blue is On The LINK LED indicator stops blinking and glows a solid blue when a connection is established between the Soundbar and the Wireless Receiver Module 5 If the SWA8500S is not connected repeat the procedure from Step 2
  • Page 16 - English - : ENG 10 04 CONNECTING TO YOUR TV Hear TV sound from your Soundbar through wired or wireless connections When the Soundbar is connected to selected Samsung TVs the Soundbar can be controlled using the TVs remote control This feature is supported by 2017 and later Samsung Smart TVs that support Bluetooth when you connect the Soundbar to the TV using an optical cable This function also allows you to use the TV menu to adjust the sound eld and various settings as well as the volume and mute Method 1 Connecting with a Cable When the audio in a broadcast is encoded in Dolby Digital and the Digital Output Audio Format on your TV is set to PCM we recommend that you change the setting to Dolby Digital When the setting on the TV is changed you will experience better sound quality The TV menu may use different words for Dolby Digital and PCM depending on the TV manufacturer Connecting a TV using an HDMI Cable Connect to the HDMI IN ARC port of your TV HDMI OUT TVARC HDMI IN HDMI IN ARC HDMI Cable Bottom of the Soundbar Connect to the HDMI OUT TVARC port of the Soundbar main unit Right Side of the Soundbar TV ARC 1 With the Soundbar and TV turned on connect the HDMI cable as shown in the gure 2 TV ARC appears in the display window of the Soundbar main unit and the Soundbar plays TV sound If TV sound is inaudible press the Source button on the remote control or on the right side of the Soundbar to switch to DIN mode The screen displays DIN and TV ARC in sequence and TV sound is played
  • Page 17 - English - : ENG 11 If TV ARC does not appear in the display window of the Soundbar main unit conrm that the HDMI cable is connected to the correct port Use the volume buttons on the TVs remote control to change the volume on the Soundbar NOTES HDMI is an interface that enables the digital transmission of video and audio data with just a single connector If the TV provides an ARC port connect the HDMI cable to the HDMI IN ARC port We recommend you use a coreless HDMI cable if possible If you use a cored HDMI cable use one whose diameter is less than 055 inches Anynet must be turned on This function is not available if the HDMI cable does not support ARC Connecting using an Optical Cable USB 5V 05A AUX IN DIGITAL AUDIO IN OPTICAL OPTICAL OUT Optical Cable Bottom of the Soundbar Right Side of the Soundbar DIN 1 Connect the DIGITAL AUDIO IN OPTICAL jack on the Soundbar to the OPTICAL OUT jack of the TV with a digital optical cable 2 Press the Source button on the right side panel or remote control and then select the DIN mode
  • Page 18 - English - : ENG 12 Auto Power Link Auto Power Link automatically turns on the Soundbar when the TV is turned on 1 Connect the Soundbar and a TV with a digital optical cable 2 Press the Left button on the remote control for 5 seconds to turn Auto Power Link on or off Auto Power Link is set to ON by default To turn off this function hold the Left button on the remote for 5 seconds Depending on the connected device Auto Power Link may not function This function is only available in the DIN mode Method 2 Connecting Wirelessly Connecting a TV via Bluetooth When a TV is connected using Bluetooth you can hear stereo sound without the hassle of cabling Only one TV can be connected at a time SOUND MODE PAIR OR The initial connection 1 Press the PAIR button on the remote control to enter the BT PAIRING mode OR a Press the Source button on the right side panel and then select BT BT changes to BT READY in a few seconds automatically if there is no Bluetooth device connected to the Soundbar b When BT READY appears press and hold the Source button on the right side panel of the Soundbar for more than 5 seconds to display BT PAIRING 2 Select Bluetooth mode on the TV For more information see the TVs manual 3 Select AV Samsung Soundbar R5Series from the list on TVs screen An available Soundbar is indicated with Need Pairing or Paired on the TVs Bluetooth device list To connect the TV to the Soundbar select the message and then establish a connection When the TV is connected TV Name BT appears on the Soundbars front display 4 You can now hear TV sound from the Soundbar
  • Page 19 - English - : ENG 13 If the device fails to connect If a previously connected Soundbar listing eg AV Samsung Soundbar R5Series appears in the list delete it Then repeat steps 1 through 3 NOTE After you have connected the Soundbar to your TV the rst time use the BT READY mode to reconnect Disconnecting the Soundbar from the TV Press the Source button on the right side panel or on the remote control and switch to any mode but BT Disconnecting takes time because the TV must receive a response from the Soundbar The time required may differ depending on the TV model To cancel the automatic Bluetooth connection between the Soundbar and TV press the p PlayPause button on the remote control for 5 seconds with the Soundbar in BT READY status Toggle On Off What is the difference between BT READY and BT PAIRING BT READY In this mode you can search for previously connected TVs or connect a previously connected mobile device to the Soundbar BT PAIRING In this mode you can connect a new device to the Soundbar Press the PAIR button on the remote control or press and hold the Source button on the right side of the Soundbar for more than 5 seconds while the Soundbar is in BT mode NOTES If asked for a PIN code when connecting a Bluetooth device enter lt0000gt In Bluetooth connection mode the Bluetooth connection will be lost if the distance between the Soundbar and the Bluetooth device exceeds 328 ft The Soundbar automatically turns off after 20 minutes in the Ready state The Soundbar may not perform Bluetooth search or connection correctly under the following circumstances If there is a strong electrical eld around the Soundbar If several Bluetooth devices are simultaneously paired with the Soundbar If the Bluetooth device is turned off not in place or malfunctions Electronic devices may cause radio interference Devices that generate electromagnetic waves must be kept away from the Soundbar main unit eg microwaves wireless LAN devices etc
  • Page 20 - English - : ENG 14 05 CONNECTING AN EXTERNAL DEVICE Connect to an external device via a wired or wireless network to play the external devices sound through the Soundbar Connecting using an HDMI Cable HDMI OUT HDMI OUT TVARC HDMI IN HDMI IN ARC HDMI Cable HDMI Cable Bottom of the Soundbar External Device Right Side of the Soundbar HDMI 1 Connect an HDMI cable from the HDMI IN jack on the back of the product to the HDMI OUT jack on your digital device 2 Connect an HDMI cable from the HDMI OUT TVARC jack on the back of the product to the HDMI IN jack on your TV 3 Press the Source button on the right side panel or on the remote control and then select HDMI 4 HDMI mode is displayed on the Soundbar display panel and sound plays
  • Page 21 - English - : ENG 15 Connecting using an Optical or Analog Audio AUX Cable HDMI OUT TVARC USB 5V 05A AUX IN HDMI IN DIGITAL AUDIO IN OPTICAL OPTICAL OUT AUDIO R L Bottom of the Soundbar Optical Cable Audio AUX Cable not supplied BD DVD player Settop box Game console Right Side of the Soundbar 1 Optical Cable X Connect DIGITAL AUDIO IN OPTICAL on the main unit to the OPTICAL OUT jack of the Source Device using a digital optical cable Y Select DIN mode by pressing the Source button on the right side panel or on the remote control 2 Audio AUX Cable X Connect AUX IN Audio on the main unit to the AUDIO OUT jack of the Source Device using an audio cable Y Select AUX mode by pressing the Source button on the right side panel or on the remote control
  • Page 22 - English - : ENG 16 06 CONNECTING A USB STORAGE DEVICE You can play music les located on USB storage devices through the Soundbar HDMI IN HDMI OUT TVARC USB 5V 05A AUX IN DIGITAL AUDIO IN OPTICAL DC 24V USB 5V 05A Display USB port Micro USB to USB adapter Cable not supplied USB 1 Connect a Micro USB to USB adapter cable with a male USB 20 Micro USB plug Type B on one end and a standard female 20 USB jack Type A on the other end to the micro USB jack on your Soundbar The Micro USB to USB adapter cable is sold separately To purchase contact a Samsung Service Center or Samsung Customer Care 2 Connect your USB device to the female end of the adapter cable 3 Press the Source button on the right side panel or on the remote control and then select USB 4 USB appears in the display screen 5 Play music les from the USB storage device through the Soundbar The Soundbar automatically turns off Auto Power Down if no USB device has been connected for more than 20 minutes
  • Page 24 - English - : ENG 18 07 CONNECTING A MOBILE DEVICE Connecting via Bluetooth When a mobile device is connected using Bluetooth you can hear stereo sound without the hassle of cabling You cannot connect more than one Bluetooth device at a time SOUND MODE PAIR OR Bluetooth device The initial connection 1 Press the PAIR button on the remote control to enter the BT PAIRING mode OR a Press the Source button on the right side panel and then select BT BT changes to BT READY in a few seconds automatically if there is no Bluetooth device connected to the Soundbar b When BT READY appears press and hold the Source button on the right side panel of the Soundbar for more than 5 seconds to display BT PAIRING 2 On your device select AV Samsung Soundbar R5Series from the list that appears When the Soundbar is connected to the Bluetooth device Bluetooth Device Name BT appears in the front display 3 Play music les from the device connected via Bluetooth through the Soundbar If the device fails to connect If a previously connected Soundbar listing eg AV Samsung Soundbar R5Series appears in the list delete it Then repeat steps 1 and 2 NOTE After you have connected the Soundbar to your mobile device the rst time use the BT READY mode to reconnect
  • Page 25 - English - : ENG 19 What is the difference between BT READY and BT PAIRING BT READY In this mode you can search for previously connected TVs or connect a previously connected mobile device to the Soundbar BT PAIRING In this mode you can connect a new device to the Soundbar Press the PAIR button on the remote control or press and hold the Source button on the right side of the Soundbar for more than 5 seconds while the Soundbar is in BT mode NOTES If asked for a PIN code when connecting a Bluetooth device enter lt0000gt In Bluetooth connection mode the Bluetooth connection will be lost if the distance between the Soundbar and the Bluetooth device exceeds 328 ft The Soundbar automatically turns off after 20 minutes in the Ready state The Soundbar may not perform Bluetooth search or connection correctly under the following circumstances If there is a strong electrical eld around the Soundbar If several Bluetooth devices are simultaneously paired with the Soundbar If the Bluetooth device is turned off not in place or malfunctions Electronic devices may cause radio interference Devices that generate electromagnetic waves must be kept away from the Soundbar main unit eg microwaves wireless LAN devices etc The Soundbar supports SBC data 441kHz 48kHz Connect only to a Bluetooth device that supports the A2DP AV function You cannot connect the Soundbar to a Bluetooth device that supports only the HF Hands Free function Once you have paired the Soundbar to a Bluetooth device selecting AV Samsung Soundbar R5Series from the devices scanned devices list will automatically change the Soundbar to BT mode Available only if the Soundbar is listed among the Bluetooth devices paired devices The Bluetooth device and the Soundbar must have been previously paired at least once The Soundbar will appear in the Bluetooth devices searched devices list only when the Soundbar is displaying BT READY The Soundbar cannot be paired to another Bluetooth device if already in Bluetooth mode and paired to a Bluetooth device Bluetooth Power On SOUND MODE If a previously paired Bluetooth device tries to pair with the Soundbar when the Bluetooth Power On function is on and the Soundbar is turned off the Soundbar turns on automatically 1 Press and hold the SOUND MODE button for more than 5 seconds on the remote while the Soundbar is turned on 2 ONBLUETOOTH POWER appears on the Soundbars display
  • Page 26 - English - : ENG 20 Disconnecting the Bluetooth device from a Soundbar You can disconnect a Bluetooth device from the Soundbar For instructions see the Bluetooth devices user manual The Soundbar will be disconnected When the Soundbar is disconnected from the Bluetooth device the Soundbar will display BT DISCONNECTED on the front display Disconnecting the Soundbar from the Bluetooth device Press the Source button on the right side panel or on the remote control and then change to any mode except BT Disconnecting takes time because the Bluetooth device must receive a response from the Soundbar Disconnection time may differ depending on the Bluetooth device When the Soundbar is disconnected from the Bluetooth device the Soundbar will display BT DISCONNECTED on the front display NOTES In Bluetooth connection mode the Bluetooth connection will be lost if the distance between the Soundbar and the Bluetooth device exceeds 328 ft The Soundbar automatically turns off after 20 minutes in the Ready state More About Bluetooth Bluetooth is a technology that enables Bluetoothcompliant devices to interconnect easily with each other using a short wireless connection A Bluetooth device may cause noise or malfunction depending on usage if A part of your body is in contact with the receivingtransmitting system of the Bluetooth device or the Soundbar It is subject to electrical variation from obstructions caused by a wall corner or ofce partition It is exposed to electrical interference from same frequencyband devices including medical equipment microwave ovens and wireless LANs Pair the Soundbar with the Bluetooth device while they are close together The further the distance between the Soundbar and Bluetooth device the worse the quality is If the distance exceeds the Bluetooth operational range the connection is lost In poor reception areas the Bluetooth connection may not work properly The Bluetooth connection only works when it is close to the unit The connection will be automatically cut off if the Bluetooth device is out of range Even within range the sound quality may be degraded by obstacles such as walls or doors This wireless device may cause electric interference during its operation
  • Page 27 - English - : ENG 21 Using the Samsung Audio Remote App Installing the Samsung Audio Remote App To control the Soundbar with your smart device and the Samsung Audio Remote app download the Samsung Audio Remote app from the Google Play store Market search Samsung Audio Remote Launching the Samsung Audio Remote App To launch and use the Samsung Audio Remote app touch the Audio Remote icon on your smart device and then follow the directions on the screen Audio Remote The Samsung Audio Remote app is only compatible with Android mobile phones and mobile devices running Android OS 30 or later
  • Page 28 - English - : ENG 22 08 USING THE REMOTE CONTROL How to Use the Remote Control VOL WOOFER SOUNDBAR SOUND MODE PAIR Power VOL WOOFER SOUND MODE PAIR Turns the Soundbar on and off VOL WOOFER SOUND MODE PAIR Source Press to select a source connected to the Soundbar BT PAIRING mode To turn on BT PAIRING mode change the source to BT mode and then press and hold the Source button for more than 5 seconds Mute VOL WOOFER SOUND MODE PAIR Press the Mute button to mute the sound Press it again to unmute the sound SOUND MODE VOL WOOFER SOUND MODE PAIR You can select the desired sound effect by choosing STANDARD or SURROUND SOUND Select the STANDARD mode if you want to enjoy the original sound DRC Dynamic Range Control Lets you apply dynamic range control to Dolby Digital tracks Press and hold the SOUND MODE button while the Soundbar is powered off to turn DRC Dynamic Range Control on or off With the DRC turned on loud sound is reduced The sound may be distorted Bluetooth Power This feature automatically turns the Soundbar on when it receives a connection request from a previously connected TV or Bluetooth device The setting is On by default Press and hold the SOUND MODE button for more than 5 seconds to turn off the Bluetooth Power function
  • Page 29 - English - : ENG 23 VOL WOOFER SOUND MODE PAIR Bluetooth PAIR Press the PAIR button BT PAIRING appears in the Soundbars display You can connect the Soundbar to a new Bluetooth device in this mode by selecting the Soundbar from the Bluetooth devices search list Play Pause VOL WOOFER SOUND MODE PAIR Press the p button to pause a music le temporarily When you press the button again the music le plays Auto Power Down Function The unit turns off automatically in the following situations In DIN HDMI BT USB Mode If there is no audio signal for 20 minutes In AUX Mode If the Audio AUX Cable is disconnected for 20 minutes If there is no KEY input for 8 hours when the Audio AUX Cable is connected The Auto Power Down function can be turned off only when the unit is in AUX mode To turn off Auto Power Down function while the unit is in AUX mode press and hold the p button for 5 seconds ONAUTO POWER DOWN OFF AUTO POWER DOWN appears on the display VOL WOOFER SOUND MODE PAIR UpDown LeftRight Press the indicated areas to select UpDownLeftRight Press UpDownLeftRight on the button to select or set functions Repeat To use the Repeat function in USB mode press the Up button Music Skip Press the Right button to select the next music le Press the Left button to select the previous music le Anynet Auto Power Link You can turn Anynet and Auto Power Link on or off Anynet and Auto Power Link are turned on and turned off by the Right and Left buttons respectively Anynet If the Soundbar is connected to a Samsung TV through an HDMI cable you can control your Soundbar with a Samsung TV remote control Press and hold the Right button for 5 seconds to toggle Anynet ON and OFF Auto Power Link If the Soundbar is connected to your TV through a digital optical cable the Soundbar can automatically turn on when you turn on your TV Press and hold the Left button for 5 seconds to toggle Auto Power Link ON and OFF Anynet Auto Power Link are set to ON by default ID SET Press and hold the Up button for 5 seconds to complete ID SET when connecting to an accessary item
  • Page 30 - English - : ENG 24 Volume Restriction function To protect your hearing the Volume Restriction function restricts the volume to 20 if you turn on the Soundbar when the volume is set higher than 20 The default value for the Volume Restriction function is Off You must turn it on to activate it When turned on the Volume Restriction function stays on even when the power is turned off To turn Volume Restriction on or off press and hold the Down button on the remote control for 5 seconds With Volume Restriction off V FREE appears on the front display With the function on V LOCK appears Sound Control VOL WOOFER SOUND MODE PAIR You can select TREBLE BASS or AUDIO SYNC To control the volume of the treble or bass sound select TREBLE or BASS in Sound Settings and then adjust the volume between 66 by using the UpDown buttons Press and hold the Sound Control button for about 5 seconds to adjust the sound for each frequency band 150Hz 300Hz 600Hz 12kHz 25kHz 5kHz and 10kHz are selectable using the LeftRight buttons and each can be adjusted to a setting between 6 to 6 using the UpDown buttons If the video on the TV and audio from the Soundbar are not synchronized select AUDIO SYNC in Sound Settings and then set the audio delay between 0300 milliseconds by using the UpDown buttons Not available in USB mode AUDIO SYNC is only supported for some functions VOL WOOFER SOUND MODE PAIR WOOFER SOUND MODE VOL WOOFER SOUNDBAR SOUND MODE VOL WOOFER SOUNDBAR SOUND MODE VOL WOOFER SOUNDBAR SOUND MODE VOL WOOFER SOUNDBAR Push the WOOFER button up or down to adjust the volume of the subwoofer to 12 or between 6 to 6 To set the subwoofer volume level to 0 press the button VOL WOOFER SOUND MODE PAIR VOL SOUND MODE VOL WOOFER SOUNDBAR SOUND MODE VOL WOOFER SOUNDBAR SOUND MODE VOL WOOFER SOUNDBAR SOUND MODE VOL WOOFER SOUNDBAR Push the VOL button up or down to adjust the volume Mute Press the VOL button to mute the sound Press it again to unmute the sound
  • Page 31 - English - : ENG 25 Adjusting the Soundbar volume with a TV remote control If you have a Samsung TV you can adjust the Soundbars volume using the IR remote control that came with your Samsung TV First use the TV menu to set the TV audio on your Samsung TV to external speakers then use your Samsung remote to control the Soundbars volume For more information see the TVs user manual The default mode for this function is control by a Samsung TV remote If your TV is not a Samsung TV follow the directions below to change the settings of this function 1 Turn Off the Soundbar BYE 2 If you do not want to use this function push up and hold the WOOFER button for 5 seconds repeatedly until OFFTV REMOTE appears in the display SOUND MODE VOL WOOFER SOUNDBAR 5 Sec OFFTV REMOTE 3 If you want to control the Soundbar with your TVs remote push up and hold the WOOFER button for 5 seconds repeatedly until ALLTV REMOTE appears in the display Then use your TVs menu to select external speakers SOUND MODE VOL WOOFER SOUNDBAR 5 Sec ALLTV REMOTE 4 If you want to return the Soundbar to the default mode control by a Samsung TV remote push up and hold the WOOFER button for 5 seconds repeatedly until SAMSUNGTV REMOTE appears in the display SOUND MODE VOL WOOFER SOUNDBAR 5 Sec Default mode SAMSUNGTV REMOTE Each time you push the WOOFER button up and hold it for 5 seconds the mode switches in the following order SAMSUNGTV REMOTE Default mode OFFTV REMOTE ALLTV REMOTE This function may not be available depending on the remote control Manufacturers supporting this function VIZIO LG Sony Sharp PHILIPS PANASONIC TOSHIBA GRUNDIG Hisense RCA
  • Page 32 - English - : ENG 26 Using the Hidden Buttons Buttons with more than one function Hidden Button Reference page Remote Control Button Function WOOFER TV remote control OnOff Standby page 25 Source BT Pairing page 22 p Play Pause Auto Power Down OnOff AUX mode page 23 Initialize Standby page 30 BT Ready page 13 Left Auto Power Link ONOFF page 23 Right Anynet ONOFF page 23 Up ID SET page 23 Down Volume Restriction OnOff page 24 Sound Control 7 Band EQ page 24 SOUND MODE DRC ONOFF Standby page 22 Bluetooth Power page 22 Outputspecicationsforthedifferentsoundeffectmodes Effect Input Output Without Wireless Rear Speaker Kit With Wireless Rear Speaker Kit SOUND MODE Surround VOL WOOFER SOUND MODE Bluetooth POWER STANDARD 20 ch 21 ch 41 ch 51 ch 21 ch 41 ch SURROUND SOUND 20 ch 21 ch 41 ch 51 ch 21 ch 41 ch The Samsung Wireless Rear Speaker Kit can be purchased separately To purchase a Kit contact the vendor you purchased the Soundbar from
  • Page 33 - English - : ENG 27 09 INSTALLING THE WALL MOUNT Installation Precautions Install on a vertical wall only Do not install in a place with high temperature or humidity Verify whether the wall is strong enough to support the products weight If not reinforce the wall or choose another installation point Purchase and use the xing screws or anchors appropriate for the kind of wall you have plaster board iron board wood etc If possible x the support screws into wall studs Purchase wall mounting screws according to the type and thickness of the wall you want to mount the Soundbar on Diameter M5 Length 1 38 inches or longer recommended Connect cables from the unit to external devices before you install the Soundbar on the wall Make sure the unit is turned off and unplugged before you install it Otherwise it may cause an electric shock Wallmount Components Wall Mount Guide x 2 x 2 HolderScrew Screw x 2 BracketWall Mount 1 Place the Wall Mount Guide against the wall surface The Wall Mount Guide must be level If your TV is mounted on the wall install the Soundbar at least 2 inches 5 cm below the TV 2 inches or more
  • Page 34 - English - : ENG 28 2 Align the Wall Mount Guides Center Line with the center of your TV if you are mounting the Soundbar below your TV and then x the Wall Mount Guide to the wall using tape If you are not mounting below a TV place the Center Line in the center of the installation area Center Line 3 Push a pen tip or sharpened pencil tip through the center of the BTYPE images on each end of the Guide to mark the holes for the supporting screws and then remove the Wall Mount Guide 4 Using an appropriately sized drill bit drill a hole in the wall at each marking If the markings do not correspond to the positions of studs make sure you insert appropriate anchors or mollies into the holes before you insert the support screws If you use anchors or mollies make sure the holes you drill are large enough for the anchors or mollies you use 5 Push a screw not supplied through each HolderScrew and then screw each screw rmly into a support screw hole 6 Install the 2 BracketWall Mounts in the correct orientation on the bottom of the Soundbar using 2 Screws When assembling make sure the hanger part of the BracketWall Mounts are located behind the rear of the Soundbar Rear of Soundbar Right end of Soundbar
  • Page 35 - English - : ENG 29 7 Install the Soundbar with the attached BracketWall Mounts by hanging the BracketWall Mounts on the HolderScrews on the wall 8 Slide the Soundbar down as shown below so that the BracketWall Mounts rest securely on the HolderScrews Insert the HolderScrews into the wide bottom part of the BracketWall Mounts and then slide the BracketWall Mounts down so that the BracketWall Mounts rest securely on the HolderScrews 10 SOFTWARE UPDATE Samsung may offer updates for the Soundbars systemrmwareinthefuture HDMI IN HDMI OUT TVARC USB 5V 05A AUX IN DIGITAL AUDIO IN OPTICAL DC 24V USB 5V 05A USB port Micro USB to USB adapter Cable not supplied If an update is offered you can update the rmware by connecting a USB device with the rmware update stored on it to the USB port on your Soundbar For more information about how to download update les go to the Samsung Electronics website at wwwsamsungcom Support Then enter or select the model number of your Soundbar select the Software amp Apps option and then Downloads Note that the option names can vary For updating instructions see the next page
  • Page 36 - English - : ENG 30 Updating Procedure Important The updating function erases all user settings We recommend you write down your settings so that you can easily reset them after the update Note that updating the rmware resets the subwoofer connection too 1 Connect a Micro USB to USB adapter cable with a male USB 20 Micro USB plug Type B on one end and a standard female 20 USB jack Type A on the other end to the micro USB jack on your Soundbar The Micro USB to USB adapter cable is sold separately To purchase contact a Samsung Service Center or Samsung Customer Care 2 Follow the steps below to download the product software Go to the Samsung website at samsungcom search for the model name select the customer support option the option name is subject to change 3 Save the downloaded software to a USB stick and select Extract Here to unzip the folder 4 Turn off the Soundbar and connect the USB stick containing the software update to the female port on a Micro USB adapter cable Connect the cable to the USB port on the Soundbar 5 Turn on the Soundbar Within 3 minutes UPDATE is displayed and updating begins 6 When the update nishes the Soundbar turns off Press the p button on the remote control for 5 seconds INIT appears on the display and then the Soundbar turns off The update is complete This product has a DUAL BOOT function If the rmware fails to update you can update the rmware again 7 Reset your settings If UPDATE is not displayed 1 Turn off the Soundbar disconnect and then reconnect the USB storage device that contains the update les to the Soundbars USB port 2 Disconnect the Soundbars power cord reconnect it and then turn on the Soundbar NOTES The rmware update may not work properly if audio les supported by the Soundbar are stored in the USB storage device Do not disconnect the power or remove the USB device while updates are being applied The main unit will turn off automatically after completing the rmware update After the update is completed the user setup in the Soundbar is initialized so you can reset your settings We recommend you write down your settings so that you can easily reset them after the update Note that updating rmware resets the subwoofer connection too If the connection to the subwoofer is not reestablished automatically after the update refer to page 6 If the software update fails check if the USB stick is defective Mac OS users should use MSDOS FAT as the USB format Updating via USB may not be available depending on the USB storage device manufacturer
  • Page 37 - English - : ENG 31 11 TROUBLESHOOTING Before seeking assistance check the following The unit will not turn on Is the power cord plugged into the outlet Connect the power plug to the outlet A function does not work when the button is pressed Is there static electricity in the air Disconnect the power plug and connect it again Sound dropouts occur in BT mode See the Bluetooth connection sections on pages 12 and 18 Sound is not produced Is the Mute function on Press the VOL button to cancel the function Is the volume set to minimum Adjust the Volume The remote control does not work Are the batteries drained Replace with new batteries Is the distance between the remote control and Soundbar main unit too far Move the remote control closer to the Soundbar main unit The red LED on the subwoofer blinks and the subwoofer is not producing sound This issue can occur if the subwoofer is not connected to the Soundbar main unit Try to connect your subwoofer again See page 6 The subwoofer drones and vibrates noticeably Try to adjust the vibration of your subwoofer Push the WOOFER button on your remote control up or down to adjust the subwoofer volume to 12 or between 6 6
  • Page 38 - English - : ENG 32 12 LICENSE Manufactured under license from Dolby Laboratories Dolby Dolby Audio Pro Logic and the doubleD symbol are trademarks of Dolby Laboratories For DTS patents see httppatentsdtscom Manufactured under license from DTS Licensing Limited DTS the Symbol DTS in combination with the Symbol and DTS 20 Channel are registered trademarks or trademarks of DTS Inc in the United States andor other countries DTS Inc All Rights Reserved The terms HDMI and HDMI HighDenition Multimedia Interface and the HDMI Logo are trademarks or registered trademarks of HDMI Licensing LLC in the United States and other countries 13 OPEN SOURCE LICENSE NOTICE To send inquiries and requests regarding open sources contact Samsung via Email ossrequestsamsungcom 14 IMPORTANT NOTES ABOUT SERVICE Figures and illustrations in this User Manual are provided for reference only and may differ from actual product appearance
  • Page 39 - English - : ENG 33 15 SPECIFICATIONS AND GUIDE Specications Model Name HWR50C USB 5V05A Weight 49 lbs 22 kg Dimensions W x H x D 356 x 22 x 32 inches 9040 x 550 x 800 mm Operating Temperature Range 41F to 95F 5C to 35C Operating Humidity Range 10 75 AMPLIFIER Rated Output power 40W x 4 Supported play formats DTS 20 sound is played in DTS format LPCM 2ch Dolby Audio supporting Dolby Digital DTS Subwoofer Name PSWR55D Weight 110 lbs 50 kg Dimensions W x H x D 79 x 139 x 114 inches 2006 x 3530 x 2900 mm AMPLIFIER Rated Output power 160W NOTES Samsung Electronics Co Ltd reserves the right to change the specications without notice Weight and dimensions are approximate
  • Page 40 - English - : LIMITED WARRANTY TO ORIGINAL PURCHASER Samsung Electronics Canada IncSECA warrants that this product is free from defective material and workmanship SECA further warrants that if this product falls to operate properly within the specied warranty period and the failure is due to improper workmanship or defective materials SECA will repair or replace the product at its option All warranty repairs must be performed by a SECA Authorized Service Center The name and address of the location nearest you can be obtained by calling toll free 1 800 SAMSUNG LABOR One year Carry in PARTS One year On carryin models transportation to and from the service center is the customers responsibility The original dated sales receipt must be retained by the customer and is the only acceptable proof of purchase It must be presented to the authorized service center at the time service is requested EXCLUSIONS WHAT IS NOT COVERED This warranty does not cover damage due to accident re ood and or other acts of God misuse incorrect line voltage improper installation improper or unauthorized repairs commercial use or damage that occurs in shipping Exterior and interior nish lamps glass are not covered under this warranty Customer adjustments which are explained in the instruction manual are not covered under the terms of this warranty This warranty will automatically be voided for any unit found with a missing or altered serial number This warranty is valid only on products purchased and used in Canada Samsung Electronics Canada Inc 2050 Derry Rd West Mississauga On L5N 0B9 Tel 1800SAMSUNG 7267864 Fax 905 542 1199 Website wwwsamsungcomca
  • Page 41 - English - : 2019 Samsung Electronics Co Ltd All rights reserved Contact SAMSUNG WORLD WIDE If you have any questions or comments relating to Samsung products please contact the SAMSUNG customer care Center HEADQUARTERS Samsung Electronics Canada Inc 2050 Derry Road West Mississauga Ontario L5N 0B9 Canada TEL 1800SAMSUNG 18007267864 wwwsamsungcomcasupport Country Contact Center Web Site North America CANADA 1800SAMSUNG 7267864 wwwsamsungcomcasupport English wwwsamsungcomcafrsupport French USA 1800SAMSUNG 7267864 wwwsamsungcomussupport
  • Page 42 - French - : HWR50C MANUEL COMPLET Imaginez les possibilités Merci davoir choisi un appareil Samsung Pour recevoir une assistance plus complète veuillez enregistrer votre produit sur wwwsamsungcomregister
  • Page 43 - French - : FRA ii INFORMATIONS RELATIVES À LA SÉCURITÉ AVERTISSEMENTS POUR ÉVITER LES RISQUES DE CHOC ÉLECTRIQUE NE DÉMONTEZ PAS LE CAPOT LAPPAREIL NE CONTIENT PAS DE PIÈCES RÉPARABLES PAR LUTILISATEUR SADRESSER À UN SERVICE APRÈSVENTE QUALIFIÉ Reportezvous au tableau cidessous pour comprendre les symboles pouvant gurer sur votre produit Samsung MISE EN GARDE RISQUE DE CHOC ÉLECTRIQUE NE PAS OUVRIR Ce symbole indique la présence dune haute tension à lintérieur Tout contact avec une pièce interne de lappareil présente un danger Ce symbole vous informe quune documentation importante relative au fonctionnement et à lentretien est fournie avec le produit Produit de catégorie II Ce symbole indique quil ne nécessite pas une connextion de sécurité à la terre masse Si ce symbole nest pas présent sur un produit équipé dun cordon dalimentation le produit DOIT être raccordé à la terre de manière able à des ns de protection Tension CA Ce symbole indique que la tension nominale est la tension CA Tension CC Ce symbole indique que la tension nominale est la tension CC Attention consultez les instructions aux ns dutilisation Ce symbole indique à lutilisateur quil doit consulter le guide dutilisation pour avoir de linformation au sujet de la sécurité AVERTISSEMENT An de diminuer les risques dincendie ou de choc électrique nexposez pas cet appareil à la pluie ou à lhumidité Pour éviter des blessures cet appareil doit être solidement xé au plancherau mur conformément aux directives dinstallation MISE EN GARDE Veillez à éviter toute projection sur lappareil Ne placez jamais de récipients contenant un liquide ex vase dessus La prise dalimentation fait ofce de système de déconnexion Elle doit donc rester disponible en permanence ATTENTION Pour le Canada Lémetteurrécepteur exempt de licence contenu dans le présent appareil est conforme aux CNR dInnovation Sciences et Développement économique Canada applicables aux appareils radio exempts de licence Lexploitation est autorisée aux deux conditions suivantes 1 Lappareil ne doit pas produire de brouillage 2 Lappareil doit accepter tout brouillage radioélectrique subi même si le brouillage est susceptible den compromettre le fonctionnement Cet appareil et son ou ses antennes ne doivent pas etre installés a proximité ou etre utilisés conjointement avec une autre antenne ou un autre émetteur Le dispositif pourrait automatiquement cesser démettre en cas dabsence dinformations à transmettre ou une défaillance opérationnelle Notez que ce nest pas lintention dinterdire la transmission des informations de contrôle ou de signalisation ou lutilisation de codes répétitifs lorsque requis par la technologie Cet appareil numerique de la classe B est conforme a la norme NMB003 du Canada
  • Page 44 - French - : FRA iii Declaration dexposition aux radiations Cet equipement est conforme aux limites dexposition aux rayonnements IC RSS102 etablies pour un environnement non controle Cet equipement doit etre installe et utilise avec un minimum de 20 cm de distance entre la source de rayonnement et votre corps Consignes de sécurité importantes Lisez attentivement ces consignes avant dutiliser lappareil Veillez à respecter toutes les consignes répertoriées ciaprès Conservez ces instructions à portée de main pour vous y référer ultérieurement 1 Lisez attentivement ces consignes 2 Conservezles précieusement 3 Tenez compte de tous les avertissements mentionnés 4 Respectez toutes les instructions sans exception 5 Nutilisez pas cet appareil à proximité de leau 6 Nettoyezle à laide dun tissu sec 7 Ne bloquez pas les ouvertures de ventilation Installez lappareil conformément aux instructions du fabricant 8 Ninstallez pas le lecteur à proximité dune source de chaleur de type radiateur registre de chaleur cuisinière ou tout autre appareil y compris les récepteurs AV générateur de chaleur 9 Ne désactivez pas le dispositif de sécurité de la che de mise à la terre ou de la che polarisée Une che polarisée comporte deux lames dont lune est plus large que lautre Une che de mise à la terre comporte deux lames et une troisième broche de mise à la terre La lame la plus large et la troisième broche sont destinées à assurer votre sécurité Si la che fournie ne sinsère pas dans la prise utilisée faites appel à un électricien pour faire remplacer celleci 10 Placez le cordon dalimentation de sorte quil ne puisse être ni piétiné ni pincé particulièrement au niveau de la che de la prise de courant et du point de sortie de lappareil 11 Utilisez exclusivement les xations accessoires spéciés par le fabricant 12 Utilisez exclusivement le meuble à roulettes le socle le trépied le support ou la table recommandés par le fabricant ou vendus avec lappareil Si lappareil est posé sur un meuble à roulettes déplacez lensemble avec précaution pour éviter de faire tomber le lecteur et de vous blesser 13 Débranchez lappareil en cas dorage ou lorsquil est inutilisé pendant une période prolongée 14 Conez toutes les réparations à un technicien qualié Votre appareil doit impérativement être réparé lorsquil a été endommagé de quelque manière que ce soit détérioration du cordon ou de la che dalimentation projection de liquide sur lappareil chute dobjets à lintérieur de lappareil exposition à la pluie ou à lhumidité dysfonctionnement chute
  • Page 45 - French - : FRA iv PRÉCAUTIONS 1 Assurezvous que le bloc dalimentation CA chez vous est conforme aux exigences de puissance gurant sur la plaque didentication située à larrière de votre produit Installez votre produit horizontalement sur un socle approprié meuble en laissant un espace sufsant pour la ventilation sur le pourtour 34 po Faites attention à ne pas obstruer les orices de ventilation Ne posez pas lensemble sur un amplicateur ou un autre appareil susceptible de chauffer Cet ensemble est conçu pour une utilisation en continu Pour éteindre totalement lappareil débranchez la che ca de la prise murale Débranchez lappareil si vous prévoyez une longue période dinactivité 2 En cas dorage débranchez la che de lappareil de la prise murale Les surtensions occasionnées par lorage pourraient endommager votre appareil 3 Nexposez pas lensemble aux rayons directs du soleil ou à toute autre source de chaleur Cela pourrait causer une surchauffe du l et causer un dysfonctionnement de lunité Protégez le produit de lhumidité comme les vases et dune chaleur excessive comme une cheminée ou de tout équipement capable de créer des champs magnétiques ou électriques Débranchez le câble dalimentation en cas de dysfonctionnement Votre produit nest pas prévu pour un usage industriel Ce produit ne peut être utilisé quà des ns personnelles Une condensation peut se former si le produit ou un disque a été stocké à basse température Si vous devez transporter lensemble pendant lhiver attendez environ 2 heures que lappareil ait atteint la température de la pièce avant de lutiliser 5 Les piles utilisées dans ce produit peuvent contenir des produits chimiques dangereux pour lenvironnement Ne jetez pas les piles dans votre poubelle habituelle Ne vous débarrassez pas des piles en les faisant brûler Les piles ne doivent pas être court circuitées démontées ou subir de surchauffe Le remplacement incorrect des piles peut entraîner un danger dexplosion Remplacezles uniquement par des produits similaires ou équivalents
  • Page 46 - French - : FRA v À PROPOS DE CE MANUEL Le manuel utilisateur se compose de deux éléments la version papier simpliée du MANUEL DUTILISATEUR et un MANUEL COMPLET détaillé que vous pouvez télécharger MANUEL DUTILISATEUR Consultez ce manuel pour obtenir des instructions relatives à la sécurité ainsi que des informations sur linstallation du produit les composants les connexions et les caractéristiques du produit MANUEL COMPLET Vous pouvez accéder au MANUEL COMPLET sur le centre dassistance à la clientèle en ligne de Samsung en scannant le code QR sur la gauche Pour visualiser le manuel sur votre ordinateur ou appareil mobile téléchargezle au format document depuis le site Web de Samsung httpwwwsamsungcomsupport La conception et les spécications sont susceptibles dêtre modiées sans préavis
  • Page 47 - French - : FRA vi SOMMAIRE 01 VéricationdesComposants 2 Insertion des piles avant dutiliser la télécommande 2 piles AA 2 02 Présentation du Produit 3 Face avantFace latérale droite du Soundbar Partie inférieure du panneau du Soundbar 4 03 Branchement du Soundbar 5 Branchement de lalimentation Raccordement du Soundbar au caisson de basses Raccordement automatique du caisson des basses et du Soundbar Connexion manuelle du caisson des basses en cas déchec de la connexion automatique Raccordement du module SWA8500S vendu séparément au Soundbar 04 Branchement à votre Téléviseur 10 Méthode 1 Branchement avec un câble Branchement dun téléviseur à laide dun câble HDMI Branchement à laide dun câble optique Méthode 2 Connexion sans l Connexion dun téléviseur par Bluetooth 05 Branchement dun Périphérique Externe 14 Branchement à laide dun câble HDMI Connexion à laide dun câble optique ou audio analogue AUX 06 Connexion à un périphérique de stockage USB 16
  • Page 48 - French - : FRA vii 07 Branchement dun Appareil Mobile 18 Connexion par Bluetooth Utilisation de lapplication Samsung Audio Remote Installation du Samsung Audio Remote application Lancement de lapplication Samsung Audio Remote 08 Utlisation de la Télécommande 22 Procédure dutilisation de la télécommande Réglage du volume du Soundbar à laide dune télécommande de téléviseur Utilisation des boutons masqués boutons ayant plusieurs fonctions Caractéristiques de sortie pour les différents modes deffets sonores 09 Installation du Support Mural 27 Précautions dinstallation Composantes murales 10 Mise à jour Logicielle 29 Procédure de mise à jour Si UPDATE ne safche pas 11 Dépannage 31 12 Licence 32 13 Avis de Licences Libres 32 14 Remarque Importante Concernant le Service 32 15 Caractéristiques et Guide 33 Spécications
  • Page 49 - French - : FRA 2 01 VÉRIFICATION DES COMPOSANTS VOL WOOFER SOUNDBAR SOUND MODE PAIR Unité principale du Soundbar Caisson de basses TélécommandePiles 1 2 3 Cordon dalimentation Caisson de basses Adaptateur CACC Unité principale Cordon dalimentation Adaptateur CACC Câble HDMI Câble optique x 2 x 2 Guide de montage mural Vis de support Vis Support de xationmuraleG Support de xationmuraleD Pour obtenir de linformation sur la source dalimentation et la consommation électrique veuillez vous reporter à létiquette apposée sur le produit Étiquette Partie inférieure de lunité principale du Soundbar Les étapes de connexion dalimentation sont numérotées 1 2 3 Pour plus dinformations sur les connexions dalimentation reportezvous à la page 5 Pour acheter des composants supplémentaires ou des câbles en option veuillez contacter un centre de service Samsung ou le service clientèle Samsung Selon votre zone géographique la prise CA peut avoir différents aspects et peut être fournie avec ladaptateur CACC intégré Les accessoires pourraient légèrement différer de ceux gurant sur la photo cidessus Insertion des piles avant dutiliser la télécommande 2 piles AA Faites glisser le couvercle des piles dans la direction de la èche jusquà son retrait complet Insérez 2 piles AA 15V dans le bon sens polarité correcte Remettez le couvercle en place
  • Page 50 - French - : FRA 3 02 PRÉSENTATION DU PRODUIT Face avantFace latérale droite du Soundbar Placez le produit de sorte que le logo SAMSUNG soit situé sur le dessus Face droite du Soundbar Afchage Afche le statut et le mode actuel du produit Bouton volume Permet de régler le volume Une fois réglé le volume apparaît sur lafchage avant du Soundbar Bouton Source Permet de sélectionner le mode dentrée source Mode dentrée Afchage Entrée numérique optique DIN Entrée ARC HDMI OUT DIN TV ARC Conversion automatique Entrée AUX AUX Entrée HDMI HDMI Mode BLUETOOTH BT Mode USB USB Pour activer le mode BT PAIRING dénissez la source sur le mode BT puis appuyez sur le bouton Source et maintenezle appuyé pendant plus de 5 secondes Bouton Alimentation Permet dallumer et déteindre lappareil Lorsque vous branchez le cordon ca la touche de mise en fonction sactivera dans un délai de 4 à 6 secondes Lorsque vous mettez cet appareil sous tension un délai de 4 à 5 secondes précède lémission du son Si vous souhaitez restituer le son uniquement du Soundbar vous devez mettre les hautparleurs du téléviseur hors fonction dans le menu de réglage du son de votre téléviseur Reportezvous au manuel fourni avec votre téléviseur
  • Page 51 - French - : FRA 4 Partie inférieure du panneau du Soundbar HDMI IN USB 5V 05A AUX IN DIGITAL AUDIO IN OPTICAL DC 24V HDMI OUT TVARC HDMI OUT TVARC HDMI IN DC 24V HDMI OUT TVARC USB 5V 05A AUX IN HDMI IN DIGITAL AUDIO IN OPTICAL DIGITAL AUDIO IN OPTICAL Se branche à la sortie numérique optique dun périphérique externe USB 5V 05A Se branche à un périphérique USB pour lire des morceaux de ce périphérique via le Soundbar AUX IN Se branche à la sortie analogue dun périphérique externe HDMI IN Permet dentrer simultanément des signaux vidéo et audio numériques à laide dun câble HDMI Se branche à la sortie HDMI dun périphérique externe HDMI OUT TVARC Se branche au raccord HDMI ARC dun téléviseur DC 24V Entrée dalimentation Se branche à ladaptateur dalimentation CACC Lorsque vous débranchez dune prise murale le câble dalimentation de ladaptateur CCCA tirez sur la che Ne tirez pas sur le câble Ne raccordez pas cette unité ou dautres composants à une prise secteur CA tant que tous les composants ne sont pas connectés