The use of all electrical appliances implies the observance of some fundamental rules.
READ AND FOLLOW ALL INSTRUCTIONS
Do not touch hot surfaces. Use handles or knobs.
To protect against electrical shock do not immerse cord, plugs, or (state specific part or parts in question) in wa- ter or other liquid.
Close supervision is necessary when any appliance is used by or near children.
Unplug from outlet when not in use and before clean- ing. Allow to cool before putting on or taking off parts.
Do not operate any appliance with a damaged cord or plug or after the appliance malfunctions or has been damaged in any manner. Return appliance to the near- est authorized service facility for examination, repair, or adjustment.
The use of accessory attachments not recommended by the appliance manufacturer may cause injuries.
Do not use outdoors.
Do not let cord hang over edge of table or counter, or touch hot surfaces.
Do not place on or near a hot gas or electric burner, or in a heated oven.
Always attach plug to appliance first, then plug cord into the wall outlet. To disconnect, turn any control to off’, then remove plug from wall outlet.
Do not use appliance for other than intended use.
The use of accessory attachments not recommended by the appliance manufacturer may cause injuries.
SAVE THESE INSTRUCTIONS
THIS PRODUCT IS INTENDED FOR HOUSHOLD USE ONLY
WARNINGS
Never immerse the appliance in water.
When in operation, accessible external surfaces and the lid could become very hot. Always use the handgrip, handles and buttons.
Use oven gloves if necessary.
This electrical appliance operates at high temperatures which could cause burns.
Do not preheat the appliance when empty.
Do not use the appliance without food, you might damage it.
While in operation, the appliance becomes hot. DO NOT LEAVE WITHIN REACH OF CHILDREN.
Move the appliance by the handles only.
Never move the appliance using the bowl handgrip.
Never leave the power cable hanging from the edge of the surface the appliance is resting on where it could be grasped by a child or get in the way of the user.
Hot steam may come out of the vents. Take great care!
Never locate the appliance near sources of heat.
Never insert anything into the ventilation openings.
Make sure they are unobstructed.
Do not fill the bowl with liquid.
Do not put more oil in the bowl than 1 1/2 tablespoon.
Before using the appliance for the first time, remove any paper and other material inside the oven such as protective cardboard, booklets, plastic bags, etc.
Before using the appliance for the first time, wash the bowl, paddle and lid in hot water and washing up liquid.
At the end of the operation, dry all components thoroughly and remove any water left in the bottom of the bowl.
It is normal for the appliance to give off a “new” smell when used for the first time. Ventilate the room.
The appliance must be kept at a distance of at least 7.8 in from the mains power socket to which it is connected.
A short power-supply cord Is provided to reduce the risk result- ing from becoming entangled in or tripping over a longer cord. Longer detachable power-supply cords or extension cords are available and may be used if care is exercised in their use. If a longer detachable power-supply cord or extension cord is used:
The marked electrical rating of the cord set or extension cord should be at least as great as the electrical rating of the appliance;
The cord should be arranged so that it will not drape over the countertop or tabletop where it can be pulled on by children or tripped over unintentionally; and
If the appliance is of the grounded type, the cord set or extension cord should be a grounding-type 3-wire cord.'
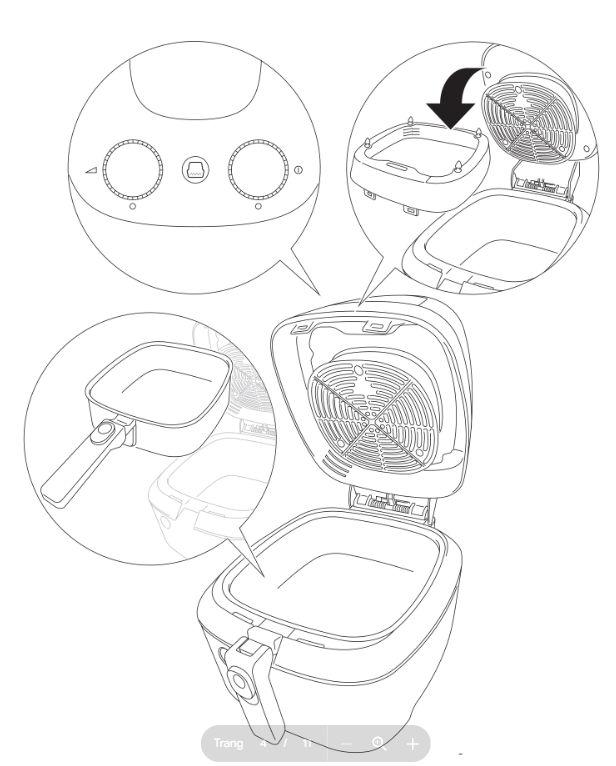
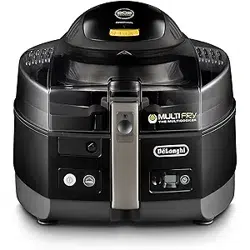
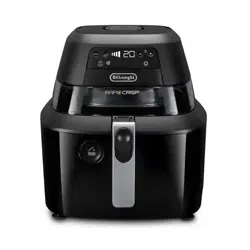
DESCRIPTION OF APPLIANCE
A Bottom heating element button
B Power level knob
C Timer knob
D Removable viewing window
E Heat convection grille
F Lid
G Handle for lifting the appliance
H Main unit
I Lid open button
L Bowl handle
M Handgrip slide
N Bowl
SETTING UP THE APPLIANCE
Please note: Before using the appliance for the first time, wash the bowl (N) and removable viewing window (D) in hot water and neutral washing liquid.
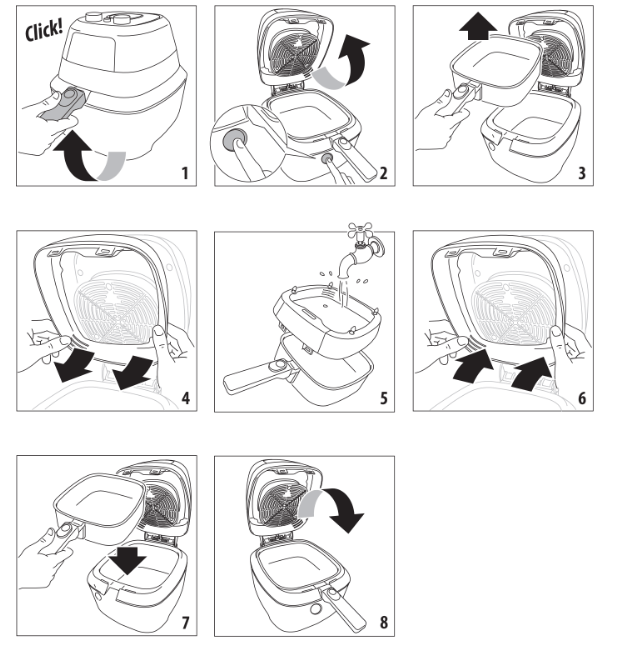
Proceed as follows:
Lift the bowl handle (L) until you hear a ‘click’ (fig. 1).
Open lid (F) by pressing button (I) (fig. 2).
Extract the bowl (N) by pulling upwards (fig. 3).
Release the removable viewing window (D); pulling it down (fig. 4).
Wash the bowl and removable viewing window (fig. 5)
At the end of operation, dry all components thoroughly and remove any water left in the bottom of the bowl.
Replace the viewing window; align insert and push it up into the lid (fig. 6).
Insert the bowl (fig. 7).
Close the lid (fig. 8).
The appliance is ready to cook.
COOKING
Put the bowl (N) back in the appliance, making sure it is correctly positioned.
Lower the bowl handle (L) using the handgrip slide (M).
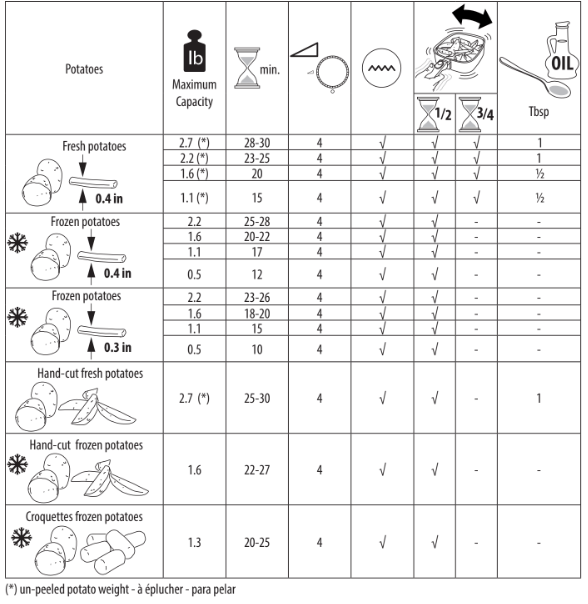
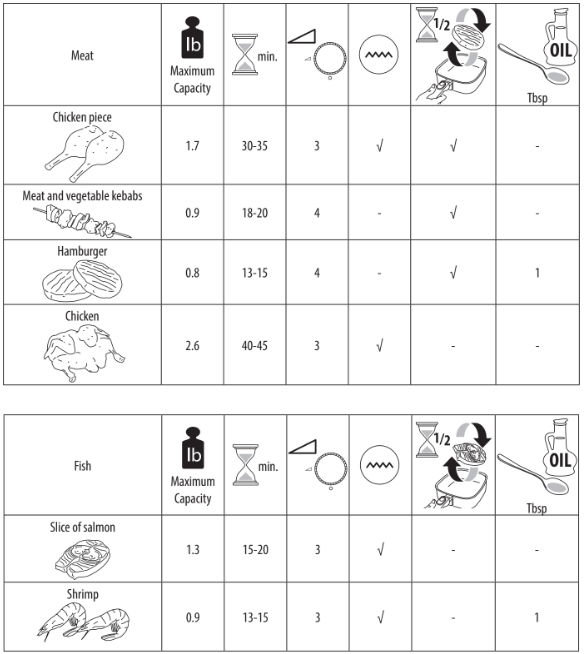
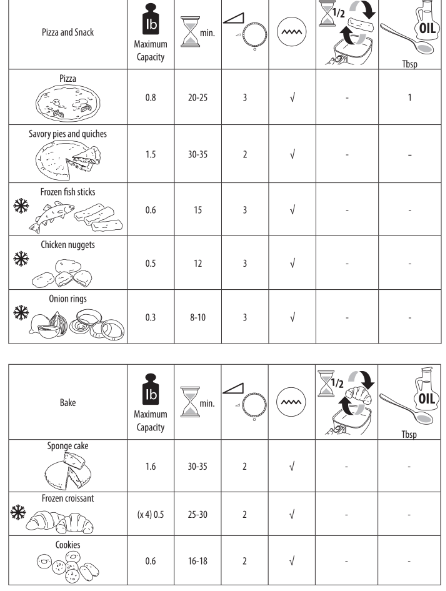
Place the ingredients to be cooked in the bowl (N), respect- ing the quantities given in the cooking tables/recipes on page 8-10.
Close the lid (F).
Plug the appliance into the main socket and the appliance is ready for cooking.
Adjust the cooking time with timer knob (C).
Adjust the power level with power level knob (B) (see the cooking tables/recipes on page 8-10).
If required by the cooking procedure, press the bottom heating element button (A).
If you make a mistake, you can set the new cooking time and power level.
During cooking mode the available options will be:
Change the cooking time by turning the timer knob (C).
Adjust the power level by turning the power level knob (B).
Open lid and the appliance will go in pause mode;
During cooking, you can open the lid to add ingredients or check cooking progress. Ventilation stops briefly, then starts again when you close the lid.
At the end of cooking the appliance emits a ‘‘beep’. If an extra cooking in required, turn the timer knob (C).
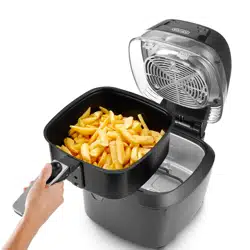
FRESH FRENCH FRIES
Peel and cut the potatoes.
Rinse potatoes under tap water.
Dry the potatoes.
Put the peeled potatoes (2.2 lb MAX) in a mixing bowl and add one tablespoon of oil ( For optimal results, we suggest sunflower seed oil).
Mix the potatoes into the mixing bowl.
Fill the air fryer with the oiled potatoes.
Close the lid (F) of appliance.
Plug the appliance into the main socket. The appliance is ready for potatoes recipe.
Adjust the power level by turning the the power level knob ̣̣̣̣B).
Adjust the cooking time with timer knob (C).
Please note: During cooking operation the top surface and the back of the appliance could to be hot. Don’t touch this surfaces end keep away.
At the middle cooking time lift the bowl handgrip until you hear a ‘click’ .
Extract the bowl by pulling upwards
Shake the potatoes
Replace the bowl and close the lid
At the end of cooking the appliance stop the cooking and will emit a ‘beep’.
CLEANING AND MAINTENANCE
Danger! Before cleaning the appliance, always unplug from the mains socket and allow to cool.
Never immerse the appliance in water and never place under running tap water.
If water gets into the appliance, it could cause electric shock.
Wash the bowl (N) and removable viewing window (D) thoroughly with hot water and neutral washing liquid.
Clean the heat convection grille (H) without removing it.
Please note: Do not use sharp, abrasive or metallic uten- sils to remove food from the bowl as this can damage the teflon coating. Clean with a soft cloth and neutral deter- gent only.
DE’LONGHI RAPID CRISP TEMPERATURE RECAP CHART - FH2133, COOKING TEMPERATURE
(*) average temperature; Indicative values subjected to variation due to production tolerance
Note: Consider that the cooking temperatures of this product will be lower than a conventional oven, due to the Duo Heat techno- logy that uses two heating elements with a powerful combination of radiant and convection heat to surround and cook your food with accuracy and speed to provide perfect cooking results.