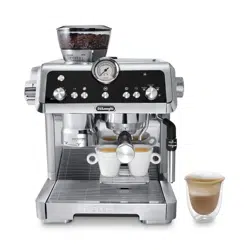
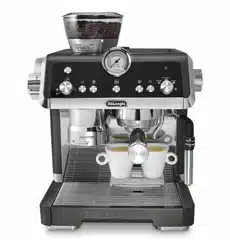
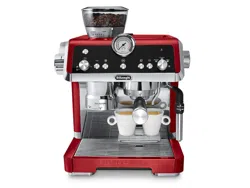
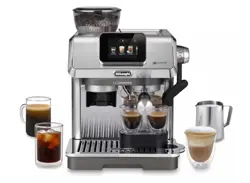
USER MANUAL Espresso Machine
PREPARING THE APPLIANCE
Wash all accessories with warm water and washing-up liquid, then proceed as follows:
- Insert the Bean container (A2) in the coffee mill (fig. 1). The container is correctly inserted when the arrow is lined up with the
 symbol and you hear a “click”;
- Insert the drip tray (A13) complete with cup grill (A11) and drip tray grille (A12) (fig. 2);
- Remove the water tank (A17) (fig. 3) and fill with fresh clean water, taking care not to exceed the MAX level (fig. 4). 4. Put the tank back in the appliance.
Important: Never operate the appliance without water in the tank or without the tank.
SETTING UP THE APPLIANCE
- Plug the power cord connector (C7) into the socket (A19) at the back of the appliance (fig. 5), then plug the plug into the mains socket. Make sure the main switch (A20) at the back of the appliance is pressed and in the I position (fig. 6);
- The
 light corresponding to the button (B6) comes on and the
  light (B15) flashes to indicate that you need to deliver water to fill the circuit (fig. 7);
- Place a container with a minimum capacity of 100 ml (3.5 oz) under the hot water spout (A5) and Frothing wand (A8) (fig. 8);
- Press the button (B6) corresponding to the light (fig. 9). Delivery begins and stops automatically. Empty the container.
- Attach the portafilter (C1) complete with filter to the appliance. To attach correctly, align the portafilter handle with "INSERT" (fig. 10), then turn the handle to the right until it is aligned in the "CLOSE" position;
- Place a container under the portafilter and frothing wand (A8) (fig. 11);
- Press the button (B4) corresponding to the
 light. Delivery begins (fig. 12);
- When delivery is complete, turn the steam dial (A4) (fig. 13) and deliver steam for 10 seconds to rinse the steam circuit;
- Repeat points 7 and 8 until you have delivered at least 1 litre of water (about half the tank);
- Remove the water tank (A17) (fig. 3), rinse and will with fresh clean water, taking care not to exceed the MAX level (fig. 4).
The appliance is ready for use.
Please note: We also recommend rinsing the internal circuits if the appliance is not used for a long period.
PREPARE THE PERFECT COFFEE DOSE
Preparing the coffee grinder
- Make sure the bean container is correctly inserted and lined up to position "3" (fig. 14) (factory setting);
- Remove the bean container lid (A1);
- Place the required quantity of coffee beans in the container (fig. 15);
- Close the lid, pressing firmly.
- The first time you use the appliance, make sure the dial (B2) is in the
 position (default setting)
Select the coffee grinding (coarse to fine)
- The grinding level affects delivery speed and therefore the quality of the coffee extraction.
- The first time you use the machine, we recommend using the factory setting (medium grinding, setting "3") (fig. 14), then if you are not satisfied with the result, adjust the level according to your personal taste and the type of coffee by setting a finer (setting "1") or coarser grinding level (setting "6"), referring to the tips in section "4.4 Adjusting the quantity of ground coffee in the filter".
The coffee filters
The appliance is provided with two coffee filters.
- The 1 coffee filter (C2) has the
 symbol marked on the bottom.
- The 2 coffee filter (C3) has the
 symbol marked on the bottom.
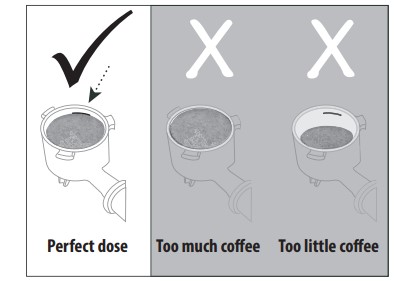
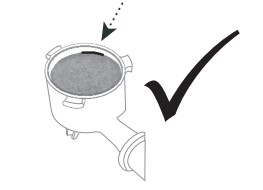
For the perfect coffee dose, the ideal level of tamped coffee is marked inside the filters (fig. 16). If the quantity is above or below the level indicated, the result may not be satisfactory. The next times you use the coffee grinder, you can adjust the grinding level using the dial (B2) (see section "4.4 Adjusting the quantity of ground coffee in the filter").
Grind the coffee directly into the filter
- Place the ground coffee filter (C2) or (C3) in the portafilter (C1) (fig. 17);
- Press the "X2" button if you are using the 2 coffee filter;
- Attach the portafilter to the outlet of the coffee grinder (A22), aligning it with "INSERT", then turning it to the right (fig. 18). Grinding begins when the portafilter reaches the CLOSE position and stops automatically;
- Once grinding is complete, the
 light (B16) flashes. Pull the tamping lever (A23) as far as it will go. The force exerted on the coffee is indicated on the lever itself (
 ) (fig. 19). The light remains on steadily.
- Remove the portafilter by turning it towards the left.
Adjusting the quantity of ground coffee in the filter
Important: The first time you use the coffee grinder, leave the ground coffee quantity dial (B2) in the position (min). It is normal for you to have to grind the coffee a number of times before finding the correct adjustment for the perfect coffee dose.
After grinding coffee for the first time, turn the dial gradually, starting from the “min” position (see following figure) until you reach the correct quantity, depending on the type of coffee. The ideal position is within the sector shown in grey in the following figure.

By adjusting this dial, you can adapt the grinding to any type of coffee and to wear of the burrs over time.
Grinding adjustment over time
- Over time, the burrs will wear down and the quantity of ground coffee will dimish. If you are unable to achieve the ideal quantity of coffee outlined in section "4.4 Adjusting the quantity of ground coffee in the filter" even after turning the dial (B2) to + position, contact De'Longhi Customer Service who will guide you to reach the perfect dose again
- Prepare the appliance to deliver 1 or 2 cups of the coffee beverage you want to make, as far as attaching the porta- filter (C1) complete with the (C2) or (C3) filter and ground coffee.
- Turn the dial (B8) to select the coffee to be programmed.
- Press the
 button: the light corresponding to the "OK" button (B5) comes on steadily and the light corresponding to the button flashes.
- Press the "OK" button to start delivering the beverage. The lights corresponding to the "OK" and buttons flash.
- When you have reached the desired quantity of the beverage, press the "OK" button again.
- Press the button to save the new setting. The appliance is ready for use again and the button remains on.
Beverage reset
- To reset the default beverage quantities, press and hold the button (B7) until it goes off.
- The selected beverage is reset to the default values.
USING PRE-GROUND COFFEE
- Place the ground coffee filter (C2) or (C3) in the portafilter (C1) (fig. 17);
- Place the quantity of ground coffee in the filter;
- Turn the dial (B2) to the
 position to disable the coffee mill;
- Attach the portafilter to the outlet of the coffee mill (A22), aligning it with "INSERT", then turning it to the right (fig. 10).
- Pull the tamping lever (A23) as far as it will go. The printing on the lever indicates the tamping force exerted () (fig. 19).
- Remove the portafilter by turning it towards the left.
DELIVERING HOT WATER
- Choose the cup and place it on the correct cup grille ((A10) or (A11)).
- Press the button (B6): the appliance delivers hot water from the spout (A5) then goes off automatically.
- To interrupt delivery, press the button again.
CLEANING
Cleaning the machine
The following parts of the machine must be cleaned regularly:
- drip tray (A13) complete with cup grille (A11) and drip tray grille (A12);
- espresso cup grille (A10);
- coffee filters (C2) and (C3);
- the bean container (A2);
- the coffee grinder burrs;
- the coffee grinder outlet (A22) (smart tamping station);
- boiler outlet (A21);
- water tank (A17);
- frothing wand (A8) as described in section "10. Cleaning the frothing wand after use".
Important!
- Do not use solvents, abrasive detergents or alcohol to clean the coffee machine.
- Do not use metal objects to remove residues or coffee deposits as they could scratch metal or plastic surfaces.
- None of the components of the appliance can be washed in a dishwasher with the exception of the drip tray (A13) and cup grilles (A10) and (A11).
- If the appliance was not used for more than a week, before using it again, we recommend you perform a rinse cycle as described in section "3. Setting up the appliance".
Cleaning the drip tray
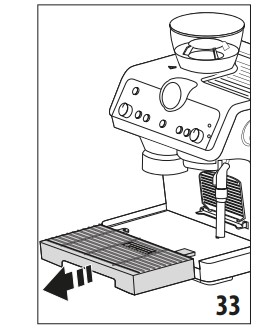
The drip tray is fitted with a level indicator (A14) showing the amount of water it contains. Before the indicator protrudes from the cup tray, the drip tray must be emptied and cleaned, otherwise the water may over- flow the edge and damage the appliance, the surface it rests on or the surrounding area.
- Remove the drip tray (fig. 33).
- Remove the cup grille (A11), drip tray grille (A12) and level indicator (A14), empty the water and clean all the components with a cloth, then reassemble the drip tray.
- Put the drip tray back in place.
Cleaning the espresso cup grille
- Extract the grille (A10) by pulling it from the left, then removing it from the support (fig. 34).
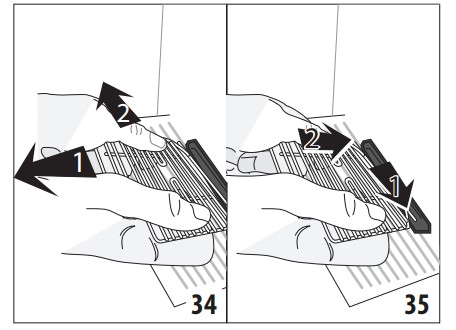
- Clean the support with a cloth and wash the grille (dishwasher safe).
- Put the grille back on the support from the right side, then push until it is correctly attached (fig. 35).
TECHNICAL DATA
- Voltage: 120V˜60Hz
- Power: 1450W
- Size LxDxH: 375x368x445 mm/ 14.8x14.4x17.5 in
- Pressure: 19 bar
- Water tank capacity: 2 L/67.6 fl oz
- Cord length: 1200 mm/47.21 in
- Weight: 12 kg/ 26.4 lbs
HOW TO MAKE PERFECT COFFEE

EXPLANATION OF LIGHTS
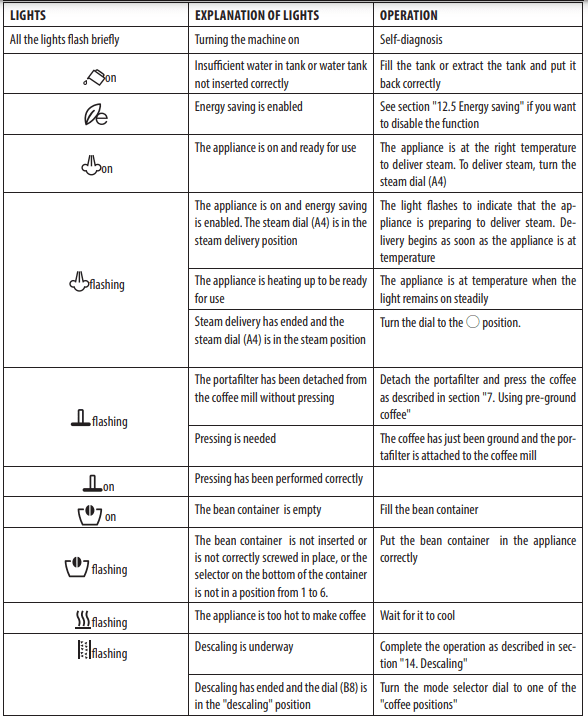
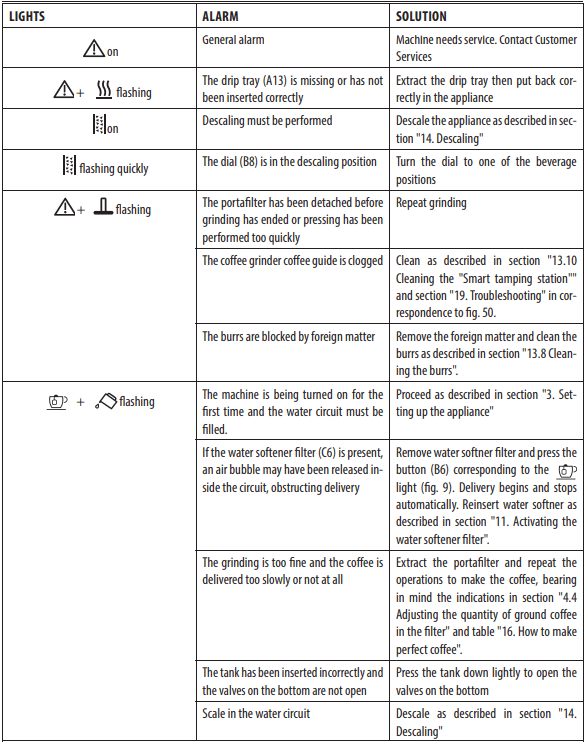
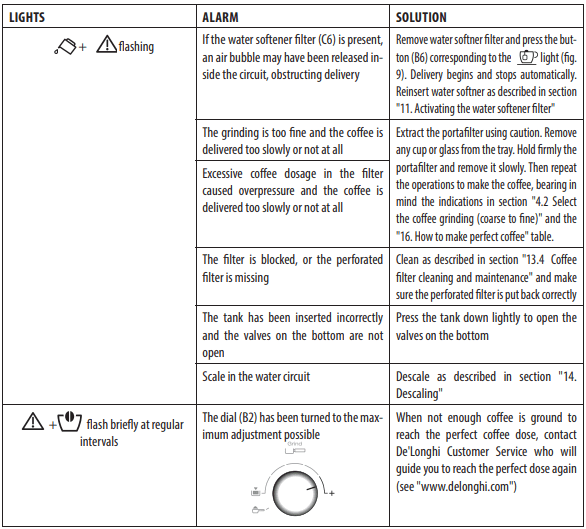
ALARMS
TROUBLESHOOTING
No espresso coffee is delivered
- No water in the tank (A17)
- The light is on and the light is flashing to indicate that the coffee or steam circuit is empty.
- Press the button corresponding to the light to fill the circuit.
- The filter is blocked, or the perforated filter is missing
- Clean as described in section "13.4 Coffee filter cleaning and maintenance" and make sure the perforated filter is put back correctly
- The tank has been inserted incorrectly and the valves on the bottom are not open
- Press the tank down lightly to open the valves on the bottom
- Scale in the water circuit
- Descale as described in section "14. Descaling"
The portafilter cannot be attached to the appliance
- The ground coffee has not been pressed or is too much
- Clean as described in section "4.3 Grind the coffee directly into the filter"
The espresso coffee drips from the edges of the portafilter rather than the holes
- The portafilter is inserted incorrectly
- Attach the portafilter correctly and rotate firmly as far as it will go
- The espresso boiler gasket has lost elasticity or is dirty
- Have the espresso boiler gasket replaced by Customer Services
- The filter is clogged, or the perforated filter is missing or dirty
- Clean as described in section "13.4 Coffee filter cleaning and maintenance"
The coffee crema is too light (delivered from the spout too fast)
- The appliance settings need reviewing
- See section "16. How to make perfect coffee"
The coffee crema is too dark (delivered from the spout too slowly)
- The appliance settings need reviewing
- See section "16. How to make perfect coffee"
No milk froth is formed when making cappuccino
- The ring (A7) is in the "FLAT" (NO FROTH) position
- Push the ring into the "FOAM" position
- Milk not cold enough
- Always use semi-skimmed milk at refrigerator temperature.
- The frothing wand (A8) is dirty
- Clean the frothing wand as described in section "10. Cleaning the frothing wand after use"
- Scale in the water circuit
- Descale as described in section "14. Descaling"
At the end of descaling, the appliance requests a further rinse
- During the rinse cycle, the water tank has not been filled to the MAX level
- Repeat the rinse cycle from point (8) of section "14. Descaling"
The appliance does not grind the coffee
- There is foreign matter that cannot be ground in the coffee mill
- Clean the burrs as described in section "13.8 Cleaning the burrs", making sure you remove all the beans from the bean container (A2) before extracting it.
- Before putting the burr back, vacuum all residues from the housing (fig. 44).
If you want to change the type of coffee
- You must remove all the beans present in the machine
- Empty the bean container (if necessary, operate the coffee mill without beans or use a vacuum cleaner to remove any remaining beans).
- Attach the portafilter and operate the coffee mill a number of times without beans to free the coffee guide. Attach the portafilter to the outlet of the mill (A22), lining it up with "INSERT", then turning it to the right (fig. 22). Grinding begins when the portafilter reaches the CLOSE position and stops automatically. Repeat until the filter is empty.
- Place the new coffee in the bean container.
- If the amount of coffee ground is not enough to reach the “perfect quantity”, proceed as described in section "4.4 Adjusting the quantity of ground coffee in the filter".
After grinding, the coffee filter is empty/ After grinding, there is too much coffee in the filter
- The coffee mill coffee guide is clogged
- Clean as described in section "13.10 Cleaning the "Smart tamping station". If the problem persists, access the guide by opening the hatch and free it using the brush (fig. 50).

After grinding, the ground coffee in the filter does not reach the “perfect amount of coffee”
- The "Smart Tamping Station" needs cleaning
- Clean as described in section “13.11 Cleaning the "tamping station", then grind again.
- The quantity of ground coffee needs adjusting
- Adjust the quantity of coffee with the dial (B2), following the instructions in section "4.4 Adjusting the quantity of ground coffee in the filter". If the dial is already in the max. position, contact De'Longhi Customer Service who will guide you to reach the perfect dose again
- Over time the burrs wear down
- Contact De'Longhi Customer Service who will guide you to reach the perfect dose again