Loading ...
Loading ...
Loading ...
Overview 5
Power supply
Use only a power adapter which is certified for
this product (see Technical data, page 16).
Check whether the mains voltage of the power
supply matches the mains voltage available at
the setup location. This product complies with
the voltage type specified on the product.
The power outlet shall be installed near the
product and shall be easily accessible.
The capacity of the built-in battery diminishes
with time. If the product functions only with AC
power supply, the built-in battery is defective.
Contact an authorised service centre to replace
the built-in battery.
CAUTION!
Always use the button to turn the
projector off.
Turn off the product and unplug from the
power outlet before cleaning the surface
(see Cleaning, page 13). Use a soft, lint-
free cloth. Never use liquid, gaseous or easily
flammable cleaners (sprays, abrasives, polishes,
alcohol). Do not allow any moisture to reach
the interior of the product.
DANGER!
Risk of eye irritation!
This product is equipped with a high
power LED (Light Emitting Diode),
which emits very bright light. Do not
look directly into the projector lens
during operation. This could cause eye
irritation or damage.
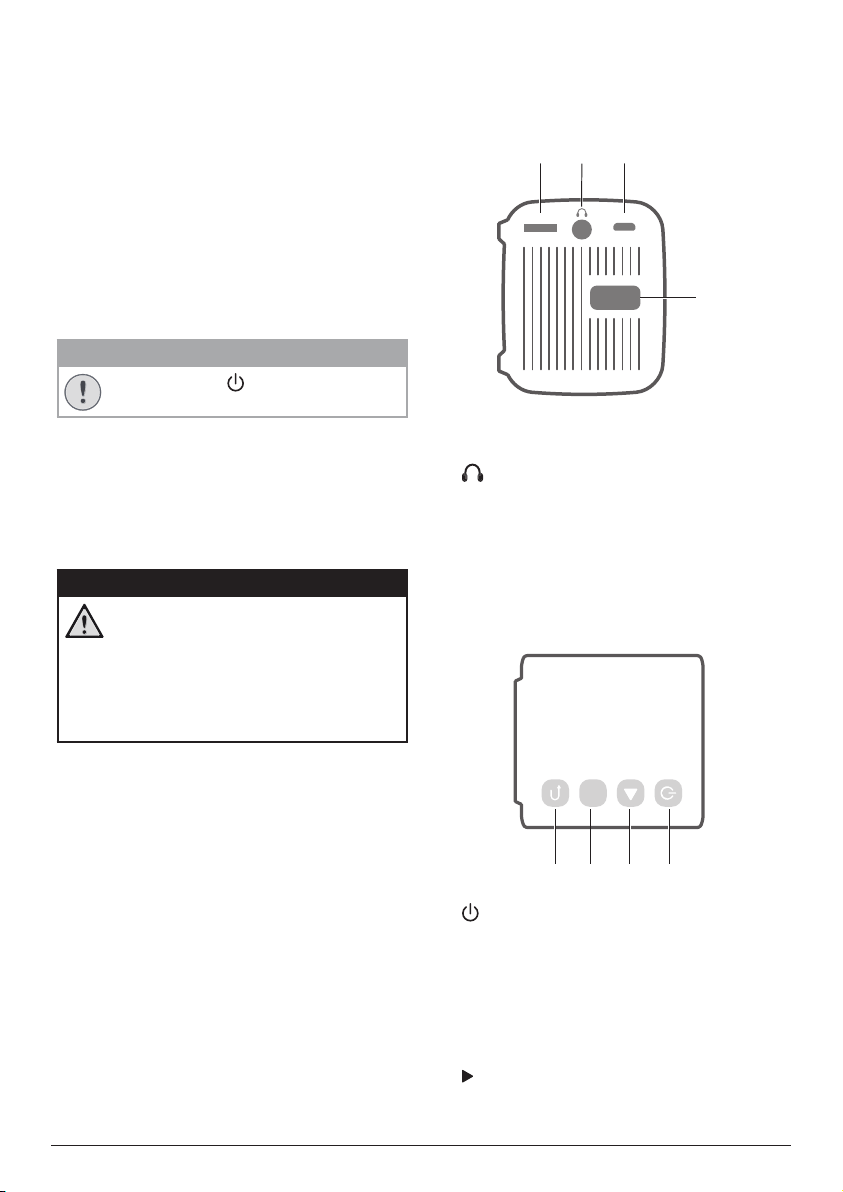
2 Overview
Rear view
a
d
MICRO SD USB
bc
a
Micro SD card slot
Connect to a Micro SD card for media play.
b
3.5 mm audio output; connect to external
speakers or headphones.
c
Micro USB port
Connect to the power supply.
d
Focus adjustment knob
Adjust image sharpness.
Side view
a
OK
bcd
a
• Press and hold three seconds to switch
the projector on or off.
• When the projector is switched on, the
LED turns white. When the projector is
switched off, the LED turns off.
• When charging the projector, the LED
turns red in power off mode.
b
Navigate menu options.
Loading ...
Loading ...
Loading ...