WARNING! There are several areas during the assembly process that special attention must be paid. It is very important to follow the assembly instructions correctly and to make sure all parts are firmly tightened. If the assembly instructions are not followed correctly, the equipment could have parts that are not tightened and will seem loose and may cause irritating noises. To prevent damage to the equipment, the assembly instructions must be reviewed and corrective actions should be taken.
SERIAL NUMBER LOCATION
Before proceeding, find your ascent trainer’s serial number located on a barcode sticker and enter it in the space provided below.
SERIAL NUMBER
MODEL NAME
* Use the information above when calling for service.
UNPACKING
Unpack the equipment where you will be using it. Place the carton on a level flat surface. It is recommended that you leave the frame in the Styrofoam base until instructed. Never open box when it is on its side.
TOOLS INCLUDED:
6 mm Allen Wrench
8 mm Allen Wrench
10 mm Allen Wrench
13/17 mm Flat Wrench
Phillips Screwdriver
IMPORTANT NOTES
During each assembly step, ensure that ALL nuts and bolts are in place and partially threaded.
Several parts have been pre-lubricated to aid in assembly and usage. Please do not wipe this off. If you have difficulty, a light application of lithium grease is recommended.
PARTS INCLUDED:
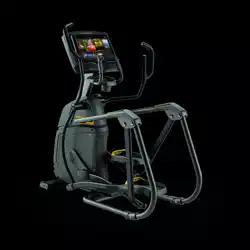
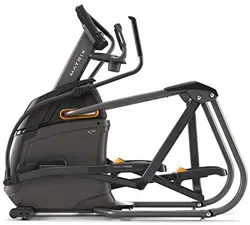
1 Ascent Trainer Frame
1 Top Rail Bracket
2 Hand Rail Covers
1 Pedal Arm Cover Set
1 Upper Assembly
2 Incline Frame Boots
1 Top Cap Front Cover
1 Top Cap Rear Cover
2 Upper/lower Dual Action Arms
2 Link Arm Cover Sets
2 Handlebar Caps
1 Power Cord
1 Hardware Kit
Console sold separately
NEED HELP?
If you have questions or if there are any missing parts, contact Customer Tech Support. Contact information is located on the information card
1.
A. Open HARDWARE FOR STEP 1.
B. Gently lift up top HAND RAIL (1) and align with MAIN FRAME (2).
C. Remove the wire tie from the MAIN FRAME (2).
D. Attach TOP HAND RAIL (1) to MAIN FRAME (2) using 1 BOLT (A), 2 flat WASHERS (B), and 1 NUT (C) and tighten to 45.9 Nm / 33.9 lb-ft.
E. Attach TOP RAIL BRACKET (3) to TOP HAND RAIL (1) using 2 SCREWS (D).
F. Attach HAND RAIL COVERS (4) using 6 SCREWS (D) and 4 FLAT WASHERS (E)
Hardware For Step 1
Description
Qty
A
Bolt
1
B
Flat Washer
2
C
Nut
1
D
Screw
8
E
Flat Washer
4
2.
A. Open HARDWARE FOR STEP 2.
B. Slide LEFT PEDAL ARM (5) onto CRANK (6) and attach using 1 BOLT (F) and 1 NUT (G) and tighten to 77.4 Nm / 57 lb-ft.
Hardware For Step 2
Description
Qty
F
Bolt
1
G
Nut
1
3.
A. Open HARDWARE FOR STEP 3.
B. Carefully pull the CABLE (7) through the UPPER ASSEMBLY (8) using the LEAD WIRE (9) located inside the UPPER ASSEMBLY (8).
C. Attach UPPER ASSEMBLY (8) to MAIN FRAME (2) using 4 BOLTS (H) and 4 FLAT WASHERS (I) and tighten to 64.5 Nm / 47.6 lb-ft.
D. Insert 2 SCREWS (J) into bottom rear of MAIN FRAME (2).
E. Insert INCLINE FRAME BOOTS (10) into bottom area of UPPER ASSEMBLY (8).
Hardware For Step 3
Description
Qty
H
Bolt
4
I
Flat Washer
4
J
Screw
2
Note: Be careful not to pinch any wires while attaching the upper assembly.
4.
A. Open HARDWARE FOR STEP 4.
B. Attach the REAR TOP CAP COVER (11) to the UPPER ASSEMBLY (8) using 2 SCREWS (L).
C. Attach the FRONT TOP CAP COVER (12) to the UPPER ASSEMBLY (8) using 2 SCREWS (K).
Hardware For Step 4
Description
Qty
K
Screw
4
5.
A. Open HARDWARE FOR STEP 5.
B. Slide the UPPER DUAL ACTION ARM (13) onto the UPPER ASSEMBLY (9) and attach using 1 FLAT WASHER (L) , 1 HANDLEBAR CAP (14) and 1 BOLT (M). Torque settings: 64.5 Nm / 47.6 lb-ft.
C. Attach inside LINK ARM COVER (15) to LINK ARM (16) using 1 SCREW (N).
D. Slide LINK ARM (16) onto the lower DUAL ACTION ARM (17) and attach using 1 BOLT (O) and tighten to 80 Nm / 59 lb-ft.
E. Attach outside LINK ARM COVER (15) to LINK ARM (17) using 2 SCREWS (P) and 1 SCREW (N).
F. Repeat steps B–E on other side.
G. Move frame off Styrofoam base and cardboard.
Hardware For Step 5
Description
Qty
L
Flat Washer
2
M
Bolt (20 mm)
2
N
Screw (8 mm)
4
O
Bolt (25 mm)
2
P
Screw (12 mm)
4
6.
A. Open HARDWARE FOR STEP 6.
B. Attach the PEDAL ARM COVERS (18) to the LEFT PEDAL ARM (5) using 4 SCREWS (Q).
C. Connect the CABLES (8) to the CONSOLE (20) and carefully tuck the excess cable into the CONSOLE MAST (21).
D. Attach the CONSOLE (20) to the CONSOLE MAST (8) using 4 BOLTS (R).
Hardware For Step 6
Description
Qty
Q
Screw
4
R
Bolt
4
Note: Be careful not to pinch any wires while attaching the console.