Owner's Guide Vacuum
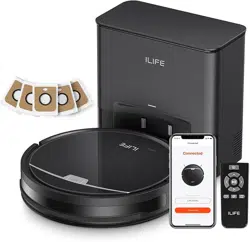
PRODUCT PARTS
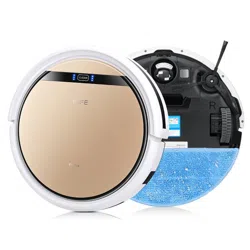
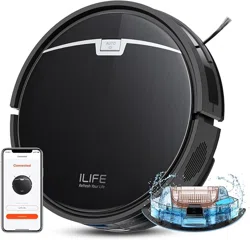
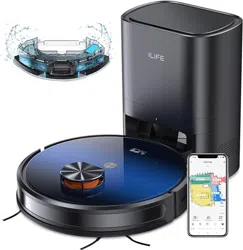
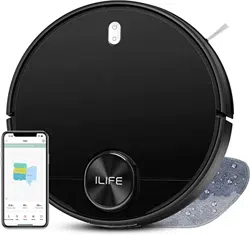
Main body and accessories


Robot anatomy


Charging dock

Remote Control

CLEAN button status

Remote Control operating
- ''
 '' Starting up/Pause
To start cleaning in selected mode
To stop current cleaning cycle
To change form sleep mode to selected mode
- Direction Buttons
A. ''  '' Button :
To increase minute and hour setting in schedule or clock mode.
To move robot forward in selected mode.
To stop the robot when it hits against objects.
B. "MAX" Button :
To decrease minute and hour setting in schedule or clock mode.
To move robot backward in selected mode.
To maximize vacuuming power.
C. "  " Button :
To change from minute to hour in schedule or clock mode.|
To turn the robot left.
D. "  " Button :
To change from minute to hour in schedule or clock mode.
To turn the robot right.
- "
 " Plan
To enter schedule mode when robot is in selected mode.
To confirm cleaning schedule.
- "
 '' Clock
To enter clock mode when robot is in selected mode.
To confirm time setting.
- ''
 '' Home
To return robot to charging home base.
- ''
 '' Edge
To clean along the edge of the walls.
- ''
 '' Spot
To clean specific areas.
 To display scheduled time.
 To display clock
NOTE:
- Place two AAA batteries into the remote control
- Remove batteries if the remote control will not be used for a long time.
How to Use
Getting started
- Place charging dock on the floor and plug inadapter. Signal light on charging dock will turn solid.
Note: Put charging dock against a wall and remove obstacles about 1 meter on both sides and about 2 meters in front.

- Display panel will flash after the power switch (near the power socked) is turned on.
(If no command is received, the robot will switch to sleep mode after 45 seconds)
Note:
A. Always keep the power switch on, otherwise the robot will not work
B. If power switch is turned off, all scheduled cleaning will be lost.
Caution: Before charging the robot, make sure the power switch is turned on, otherwise the robot will not be charged.
- Robot can be recharged by:
A. plugging into an electrical outlet;
B. pressing (HOME) button on remote control - the robot will return to charging dock for auto recharge.

Extending battery life:
A. Before first use, charge the robot overnight. When charging finishes, light at AUTO button will turn off.
B. Always place the robot on the charging dock that is connected to power.
C. If the robot will not be used for a long time, fully recharge it and turn off the power switch before storing it in a cool, dry place.
- Auto charging
The robot will automatically return to charging dock when battery runs low.
Started / Pause / Sleep
Sleep mode: robot is not working, light at CLEAN button is off and power switch is on.
Selected mode: robot is not working, green light at CLEAN button flashes.
Cleaning mode: robot is working, green light at CLEAN button turns solid.
- Starting up
A. Make sure the power switch is on.
B. Press CLEAN button on robot or remote control to start cleaning.
Note: If robot is in sleep mode, press CLEAN button to recover it from sleep mode. Press CLEAN button again to start the cleaning cycle.
- Pause
Press CLEAN button on robot or remote control to change from Clean mode to selected mode.
Note: When robot is paused, press CLEAN button to resume the cleaning cycle.
- Sleep
Change from selected mode to sleep mode:
A. Press and hold CLEAN button on robot for 3 seconds.
B. Robot automatically enters sleep mode if no command is received after 15 seconds.
Schedule
You can schedule to let the robot start cleaning from a certain time.
Note: Remember to set the clock time and schedule once replace the remote control battery. Once the clock time is set, any scheduling you have set will make robot workon the scheduled time.
Setting the clock time
- Point the remote control at robot (make sure the power switch is on).
- Press CLOCK and then use direcional buttons to set the correct time.
- Press CLOCK to save the setting. To cancel the schedule, please turn off the robot.
Setting the schedule
The robot will always work at the scheduled time unless power switch of the robot is turned off.
- Point the remote towards the robot.
- Press PLAN and then use directional buttons to set the schedule.
- Press PLAN to save the setting. To cancel the schedule, please turn off the robot.
Note: When you set the clock time or schedule, the final operation will be confirmed br beep from robot; If no tone received, your setting is unsuccessful.
Cleaning mode
- Auto cleaning
The robot will clean a room automatically and adjust its cleaning according to situation.
Note: Press CLEAN button on robot or remote control to start Auto Cleaning.
- Spot Cleaning
A. Press Spot on the remote toward the robot when the robot is working. The robot will circle around and turn into Auto clean mode after Spot clean is finished.
B. Press Spot on the remote toward when the robot is in selected mode and the robot will begin ro circle around. The robot will turn into selected mode after Spot clean is finished.
- Edge cleaning
Put the robot near the edge (wall) and press EDGE on remote control to start edge cleaning
Note: Edge cleaning will automatically stop when robot could not detect any edges. Or you could manually press CLEAN to stop edge cleaning.
MAINTENANCE
Cleaning side brushes
Clean the side brushes when it gets dirty and replace if it's damaged.
Note: Before replacing side brushes, check and match "L", "R" marks on both and bottom of robot.
Cleaning dustbin and filter
Clean empty dustbin after each use, steps are as shown in below figures.
- After taking dustbin, check whether there is foreign matter stuck in suck passage and clean it.
- Clean Filter after 15-30 days' use. And replace it after use for 6 months at maximum.
- Install both Filter and primary filters when they are dry.
- Filter and primary filter could be replaced if needed.


Cleaning cliff sensors and auto charging pins
Slightly clean the sensor window and anto charging pins with a soft dry cloth.
Note: Charging pins on charging dock need to clean if dirty.

Front wheel clean up
When there is foreign matter in front wheel, it will affect the cleaning performance, please clean it follow the way below:
- Pull the wheel up vertically and clean it. Please note whether the gasket is off.
- It should be noted that whether the gasket is installed well after clean the front wheel.

TROUBLESHOOTING
Error code sheet
When the robot meets with some routine troubles, it will remind you by beep
 Short tone
| NO. |
Tone
|
Cause |
Solution |
| 01 |
 |
Wheels or side brushes no work. |
Check wheels or side brushes. |
| 02 |
 |
Cliff sensor or bumper sensor failure. |
Clean cliff sensor and shake bumper slightly, check whether there is foreign matter. |
| 03 |

|
Main body gets stuck. |
Move main body and start again. |
Error appearance
|
Error appearance
|
Likely Cause |
Solution |
| Circle around a small area |
Side wheels are jammed |
- Remove hair and debris from side wheels.
- While reinstalling, push the wheels in and out to make sure they can rotate freely.
- Restart robot in another spot.
|
| Keep moving backward |
Cliff sensor is dirty or broken |
- Check cliff sensor lens. Clean or replace it if needed.
|
| Bump into obstacles repeatedly |
The bumper is stucked |
- Tap the bumper 10-20 times to remove debris lodged in it.
- Loosen the screw of the bumper.
|
| Working time shortened |
- Battery capacity dropped.
- Robot is not fully charged.
|
- Replace battery.
- Recharge robot.
|
| CLEAN button light is off white charging |
- Hair or small debris stuck in charging pins.
- Robot is not properly connected to charging pins.
|
- Clean charging pins.
- Check if robot is connected to charging pins.
|
| Pick up less dirt and debris |
Filter is dirty or wet. |
|
| Spit out litter. |
Dustbin is full |
|
|
Robot doesn't start at scheduled time
|
- Schedule was not saved successfully.
- Schedule was canceled after you restarted robot.
- Power Switch is off.
- Battery is low
- Debris jammed in components.
|
- Reset schedule. Wait for a beep to confirm completion of scheduling.
- Turn on power switch on robot.
- Keep the robot's power switch on and put it on charging dock to make sure robot is fully charged for the next job.
- Turn off the power switch on robot and empty the dustbin.
- Clean side brushes and main brushes.
|
PRODUCT SPECIFICATIONS

Remark: The storage temperature of this product is between -10°C and 40°C.
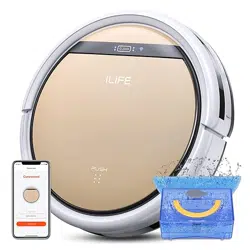
ANNEX - OPERATION MANUAL
(For model with water tank only)

- Dry clean is made with dustbin, and wet clean is made with water tank.
- The mop bracket with mop should be on the robot when the water tank is used.
- Pouring the water into the water tank.
- Open the robot lid and put the water tank onto the body, the weep hole of the water tank should be aligned with the weep hold on the robot body.
- Close the robot lid, press CLEAN button to start the wet cleaning. There is no vacuum suction function during the wet cleaning.
- It is suggest to make the suction (dry clean) before wet clean for a better cleaning result.
- The water in the water tank is flow out automatically. So it is prohibited to let water tank be still inside or outside of the robot when there is still water in the tank. This will cause the water logging on floor.
- Please take out the water tank when you charge the robot vacuum cleaner.