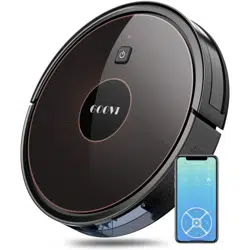
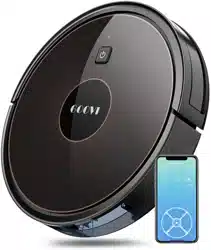
Goovi D380 Robot Vacuum Cleaner
Product's Documents
Below are documents related to this product, you can read online or download:
- Owner's manual - (English) Read Online | Download pdf
D380 ROBOT VACUUM User Manual

This appliance can be used by children aged from 8 years and above or elder people or induction ability or lack of experience and knowledge if they have been given supervision or instruction conceming use of the appliance ina safe way and understand the hazards involved. Children shall not play with the appliance. Cleaning and user maintenance shall not be made by children without supervision
The robot must be used in accordance with the directions in this Instruction Manual. GOOVI cannot be held liable or responsible for any damages or injuries caused by improper use.
To reduce the risk of injury or damage. keep these safety precautions in mind when setting up, using and maintaining your robot:
 symbol on the product or The indication on package:
Do not dispose of electrical appliances as unsorted municipal waste, use separate collection facilities.
Contact your local authority for information regarding the collection systems available. If electrical appliances are disposed of in landfills or dumps hazardous substances can leak into the groundwater and get into the food Chain, damaging your health and well-being. Please contact your local or regional waste authority for more information on collection, reuse and recycling programs.
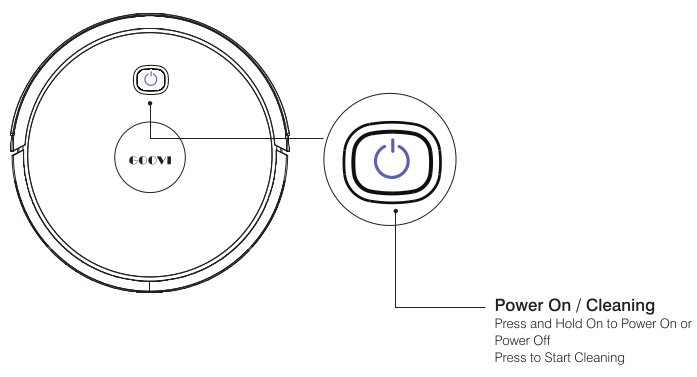
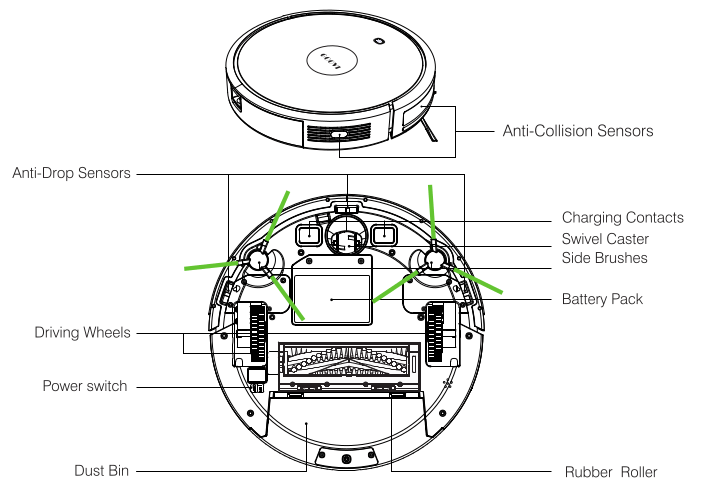
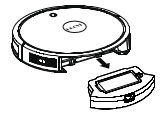
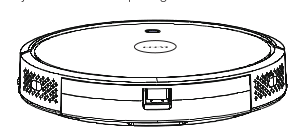
1.1 Robot
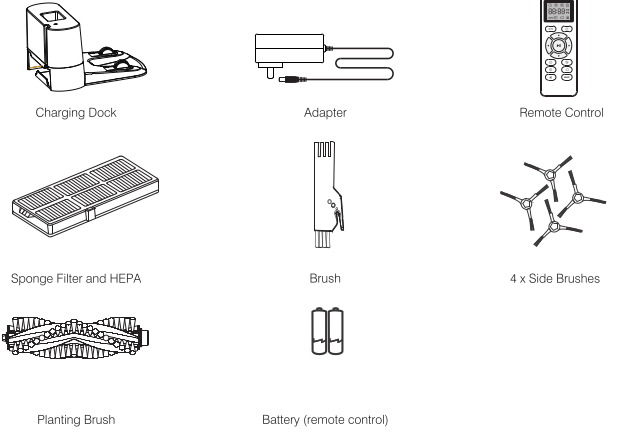
1.2 Accessories
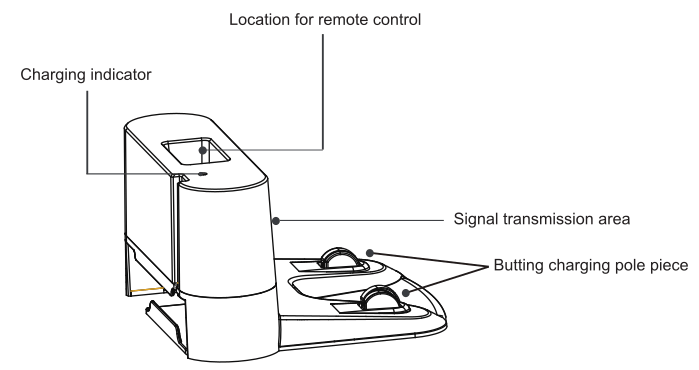
1.3 Charging Dock
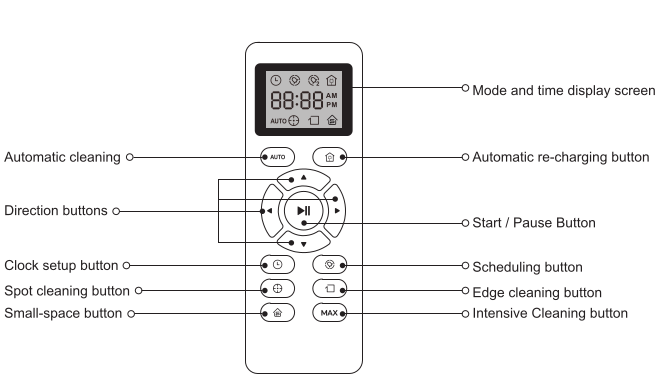
1.4 Remote Control
2.1 Notes Before Cleaning
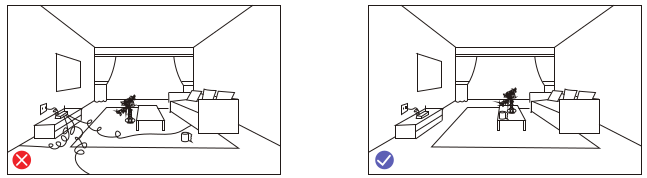
Before using Robot, pick up objects like clothing, loose papers, pull cords for blinds or curtains, power cords, and any fragile objects, if the Robot passes over a power cord and drags it, there is a chance an object could be pulled off a table or shelf.
If the room to be cleaned contains a balcony, a physical barrier should be used to prevent access to the balcony and ensure safe overation
2.2 Quick Start
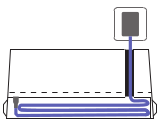
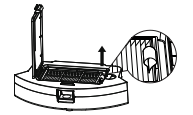
Plug in the Charging Dock. and take the rest wie into the trunking at The bottom of Charging Dock.
Note Dict put the rest wire into the trunking may stuck the Robot while Charging or Cleaning
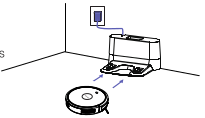
Charging Dock Position
Place the charging Dock again the wall& make sure the place is open uncluttered area leaving at least
+ 2 meters (6.5 feet) in front of the charging Dock
+ 1 meters (23 feet) on both sides of the charging dock.

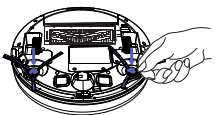
Install Side Brushes
Attach side brushes to the bottom of By pressing a brush into each slot with the matching color until it click.
Activate the Robot
Place onto the Charging Dock, making sure the metal charging contacts on the charging Dock match up with those underneath the robot, if successful you will hear a series of tones, once the  Power button iluminates is ready for use.
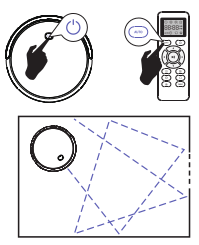
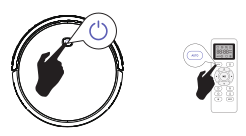
Start Cleaning Cycle
 the power button Once to wake up the robot. the power button again to start a cleaning cycle (or press the
  button on Remote control)
If its battery gets low before finishing a cleaning cycle, robot Returns to the Charging Dock to recharge.
If the Charging Dock is inaccessible. Robot will not be able to recharge please place the robot manually on.
Charging Dock for charging. (Refer Activate the Robot)
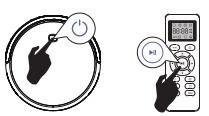
Pause
button or press the  button on Remote control. button again
 button.
Note: The actions listed above can also be managed from the Remote control
Power OFF
button unt robots indicators tum oft
2.3 How Cleans your home
Robot is designed to intelligently navigate and clean an entire level of your home a multifunctional function robot with cleaning Sweeping, Vacuuming, Wet/Dry mopping for your home
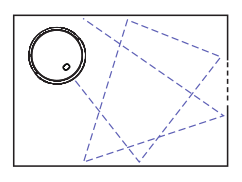
Auto Cleaning
+ At the start of a cleaning cycle, will map out your home and cleaning them efficiently
+ At various times throughout the cleaning cycle, touches up around the edges of the room. as well as chair legs and other furniture.
+ Once finishes its cleaning cycle. returns to the Charging Dock recharge.
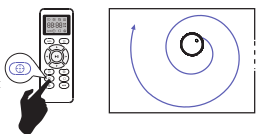
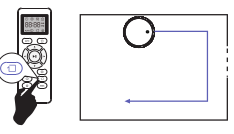
Spot Cleaning
When you select Spot Cleaning. robot intensely cleans a localized area by spiraling outward about 3 feet(1 meter) in diameter and then spiraling inward to where it started. When Spot Cleaning. Robot boosts is vacuum power to provide the best cleaning possible where you need it. To use Spot Cleaning. place robot on top of the localized debris and press  (Spot) on the Remote control.
Max vacuuming Cleaning
Robot increases its vacuum power to provide a deeper clean when press the  button on Remote control. Max Vacuuming Cleaning if Off by default
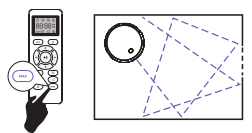
Edge Cleaning
After robot finishes cleaning the open areas of your floor. it uses Edge Clean to ensure that it has cleaned along walls and around furniture Legs. If you prefer a quicker edge cleaning. press the  button on Remote Control.
2.4 Cleaning Schedule
Robot has cleaning schedule settings which allow you to customize when Robot cleans your home. These settings are available only through the Remote Control
Note: Please make sure the Remote Control near by the Robot while sting the Clock or Schedule
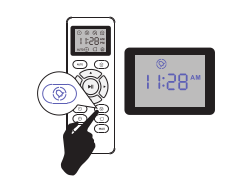
Set the Remote Control's Clock
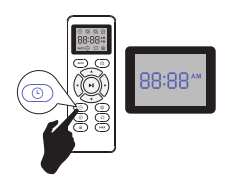
Press  button on Remote Control. and then the hour section begins to flash in the clock display setting window.
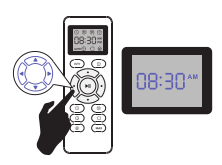
Press  or
or  button to select the desirad figures. Press the
  or
or  button to select the minute or hour section
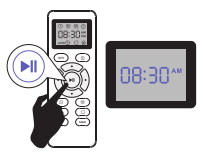
And then press the  button. the Robot "BEEP" when the élock setting completed.
Setting Cleaning Schedule
Press  button on Remote Control. and then the hour section begins to Hash in the Cleaning Schedule display setting window.
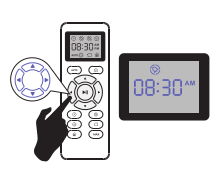
Press or button to select the desired figures. Press the or button to select the minute or hour section

And then press the  button. the Robot "BEEP" when the Cleaning Schedule setting completed.
Cancel the Cleaning Schedule
Press and hold button approximately 4 seconds on Remote Control. the Robot will "BEEP" when the Cleaning Schedule process cancel completed.

To keep robot running at peak performance. perform the following care procedures, if you notice robot picking up less debris from your floor then empty the bin clean the filter and clean the extractors
3.1 Emptying Robot 's Bin
1. Press bin release button to remove bin
2. Open bin door to empty bin
3.2 Cleaning Robot's Filter
2. Shake off debris by tapping the filter against your trash container.

3.3 Cleaning Robot's Floor Tracking Sensor
Use a clean dry microfiber or soft cotton cloth to wipe any debris that has accumulated in the round sensor opening on the right side of the bottom surface. Do not spray cleaning solution directly into the sensor Opening.
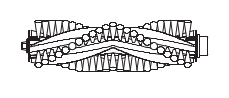
3.4 Cleaning Robot 's Extractors
1. Use a coin or small screwdriver to remove the screw. remove the extractor frame and obstructions.
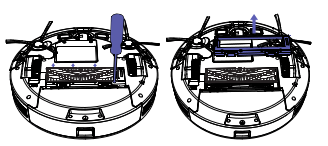
2. Remove the extractors. Remove any hair or debris that has collected underneath the caps and around the axles
3. Clear Robots Vacuum Path
4. Reinstall the extractors. Match the color and shape of the extractor pegs with the color and shape of the extractor icons on the cleaning head module
3.5 Battery and Charging / Information
Lithium | on Battery
Important: Lithium ion batteries and products that contain lithium ion batteries are subject to stringent transportation regulations.
If you need to ship this product (with the battery included) for service travel or any other reason, you MUST comply with the following shipping instructions:
+ Remove the Ihium ion battery from the product
+ Place a Piece of tape over the battery's metal charging contacts
+ Reinstall the battery (with the tape on it) in the product and secure the battery door
+ Package the product in its original packaging or in your own packaging that prevents any movement during transportation
+ Ship wa ground transportation only (no air shipping)
Battery Charging
To extend battery fe always keep robot charged on the home base when not use.
Battery Storage
I storing robot off ofthe Charging Dock. remove the battery frst. Then store robot and the battery in a cool. dy place.
Battery Disposal
Contact your local waste management authority for battery recycing and disposal regu | at ions in your area.
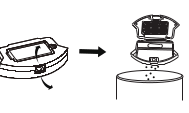
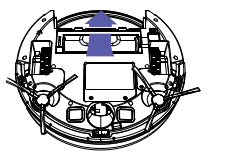
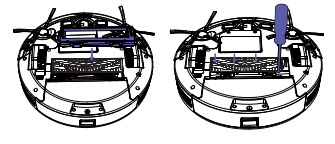
Battery Removal
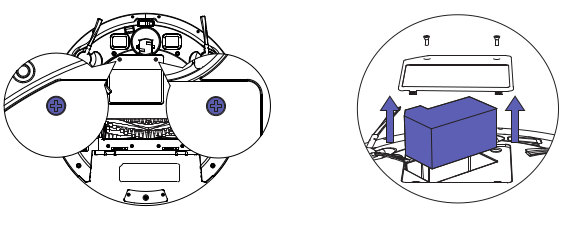
Follow these instructions to remove and reinstall robot's battery:
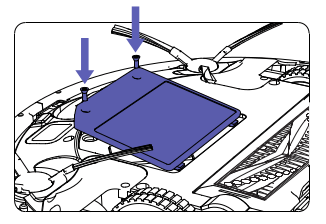
Unscrew the two screws on the battery door. then remove the door and battery.
Reinstall the battery with the battery label and tabs facing up.
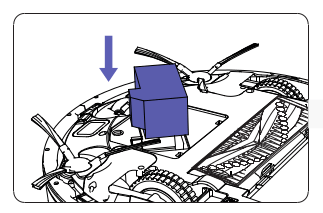
Reinstall the battery door and the two screws. Take care not to pinch the side brush in the battery door when re-installing the battery.
Robot will tell you something is wrong with a two-tone distress sound followed by a spoken message. The indicator will also blink or lit red. Refer to the chart as below to resolve Robots problem. If the e problem is not resolved. please contact our COST FREE customer service team for mo re assistance.
Rebooting Instructions
For some errors, rebooting Robot may resolve the problem.To reboot Robot. press the power button on the bottom on Robot, you will hear an audible tone signifying a successful reboot.
Robot signal | Likely Cause | What to Do | |
Red light solid | BEEP Once | Front caster wheel is stuck | Clean the front caster wheel and press the power button to restart the Robot. |
BEEP Twice | Robot's side brush may stuck | Clean the side brush and press the power button to restart the Robot | |
BEEP Triple | Robot's vacuum fan is stuck or its filter is clogged. | Remove and empty Robot's bin. Clean Robot's fiiter. Then, briskly tap the bin to loosen any remaining trapped debris. | |
BEEP Quartic | Robot's main extractors cant turn. | Remove and clean Robot's extractors and caps, | |
Red light flashing | BEEP Twice | Bumper is stuck. | Check whether the bumper is flexible |
BEEP Triple | Robot's cliff sensors are dirty.it is hanging over a drop, or it is stuck on a dark surface. | If Robot is hanging over a drop,or on a dark surface, start in a new location. Otherwise, wipe its cliff sensors with a dry cloth. | |
BEEP Quartic | Robot cannot return to its Charging Dock or starting position, | Ensure there are no obstacles in front of the Charging Dock or starting position. Wipe the Charging contacts on both the Charging Dock and robot with a clean, dry cloth. | |
Classification | Item | Specifications |
Structural Class | Diameter | 325mm |
Height | 70mm | |
| Net Weight | 2.6kg |
Electronic Class | Voltage | 14.4 V |
Battery Capacity | Lithium Battery 2600mAh | |
| Dustbin Volume | 0.5L |
| Charging Type | Automatic Charging |
Cleaning Parameters | Cleaning Mode | Automatic Cleaning |
Description of Light Display | Red Light: Failure warning | |
| ||
| One-time Charging Time | About 300 Minutes |
| One-time Cleaning Time | About 100 Minutes |
Host Button Type | Mechanical Button | |
Note: This product shall be stored in the ambient temperature range from -20°C to 60°C.