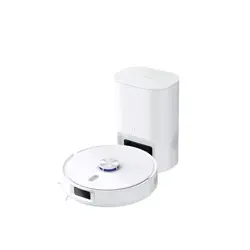
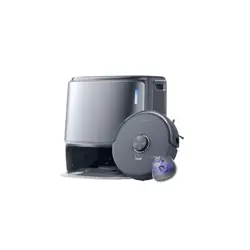
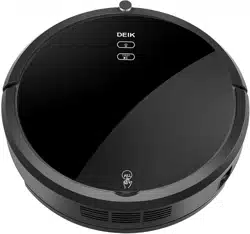
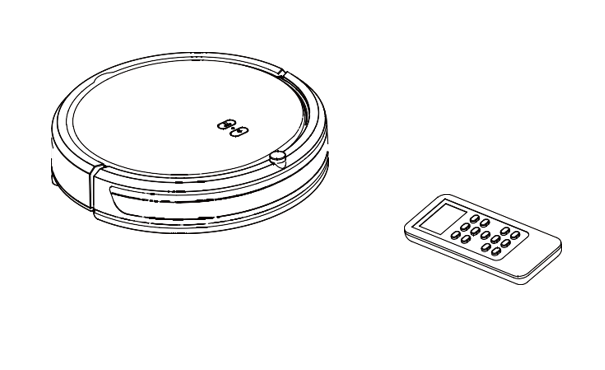
Deik MT820 Robot Vacuum Cleaner
Product's Documents
Below are documents related to this product, you can read online or download:
- Operation Manual - (English) Read Online | Download pdf


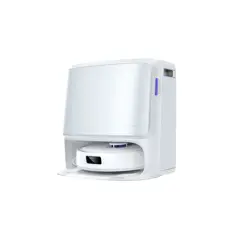
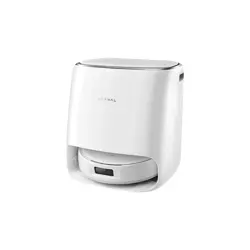
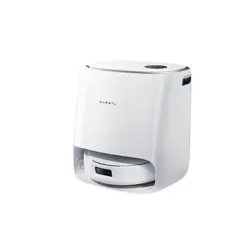
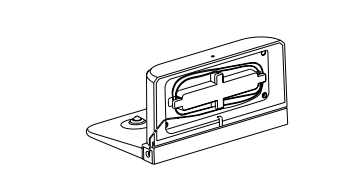
Charging Dock
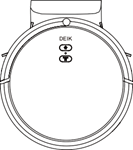
Panel
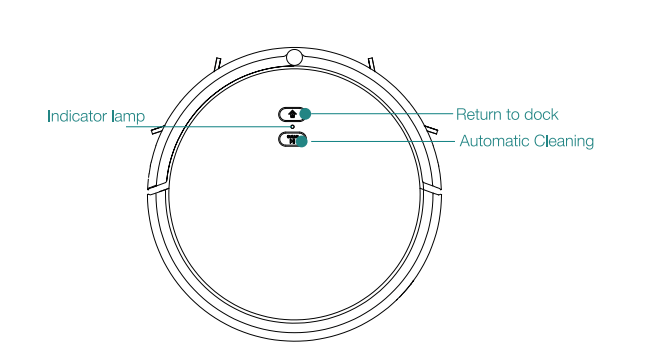
 Automatic Cleaning- Press this button while in standby mode and the robot will begin to clean. Press this button while the robot is cleaning to stop the cleaning session.
 Return to Dock- This icon will light up on the panel when the corresponding button is pushed on the remote. The robot will stop cleaning and return to the charging dock.

 Schedule-Press this button and the robot will enter schedule mode.
 Return Home- Press for the robot to stop cleaning and return to the charging dock.
 Forward- Press while cleaning and the robot will move in a forward direction.
 Backwards- Press while cleaning and the robot will move in a backwards direction.
 Left- Press while cleaning and the robot will turn in a circle to the left.
 Right- Press while cleaning and the robot will turn in a circle to the right.
 Press this button and the robot will enter cleaning mode until another button is pressed.
 Turbo- Press this button and the robot will enter turbo cleaning and the suction power will increase until another button is pressed.
 Wall Following- Press this button and the robot will enter wall following mode until finished or another button is pressed.
 Spot Cleaning- Press this button and the robot will enter spot cleaning mode until finished or another button is pressed
 Full Go- Press this button and the robot will enter full go cleaning mode until finished or another button is pressed.Tank-Press this button and the robot will enter standard seeping mode and quick seeping mode choice
 Press this button and the robot will confirm to enter settings of schedule mode.in any cleaning mode, press this button to stop it;in sleep mode, press this button to enter the wake-up mode.
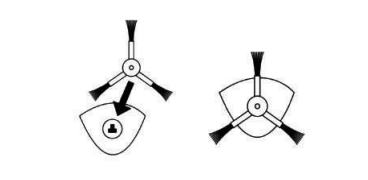
Side Brush Installation
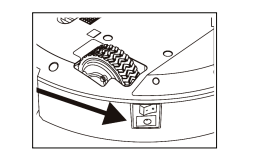
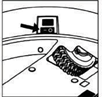
1. Ensure that the robot’s power is off. Turn off the power by flipping the power switch on the side of the robot

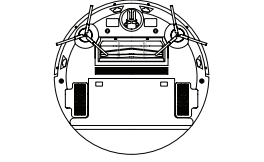
2. Gently pick up the robot and lay it with its wheels facing up
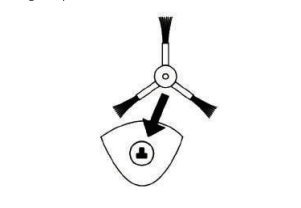
3. Position the side brush with the square hole pointed down and the brush bristles angled up. Align the square hole on the underside of the side brush to the square spoke located inside the hollow semi- circle next to the universal wheel. Push down until a click is heard
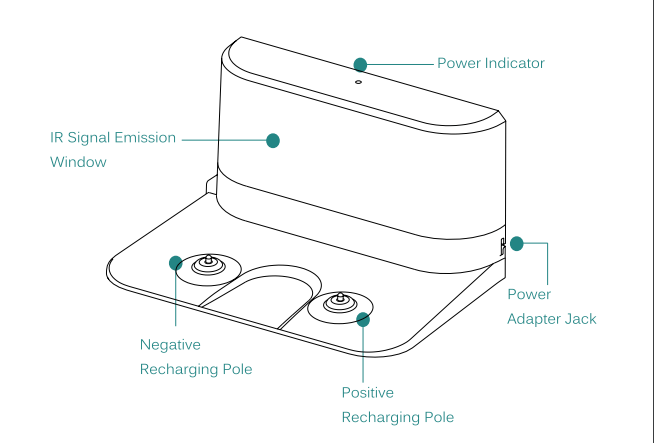
Charging Dock Setup
1. Place the charging dock in a position flat on the ground with the back pushed up against a wall. There should be no other objects or obstructions two meters in front of and one meter to the left, right and above the charging
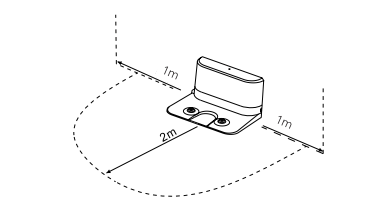
2. Connect the power adapter to the power adapter jack on the charging dock.
3. Locate an electrical outlet on the wall close to the ground and plug in the power adapter. The power indicator on top of the charging dock will emit a red light.
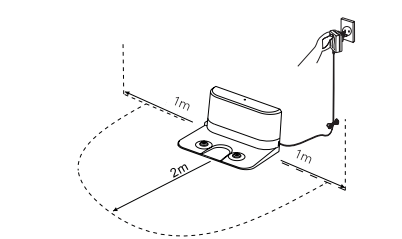
4. Tidy the excess cord from the power adapter by wrapping it around the prongs on the back side of the charging dock.
-The cord should not be on the ground or obstructing the charging dock as it will result in the robot being unable to find the charging dock.
-The charging dock should always be plugged in to ensure charging when
needed.
Charge DEIK
1.Setup the charging dock using the “Charging Dock Setup” steps
2.Place the robot on top of the charging dock and align the recharging signal on top of the robot to the red light on the charging dock
3. Turn on the power switch on the side of the robot
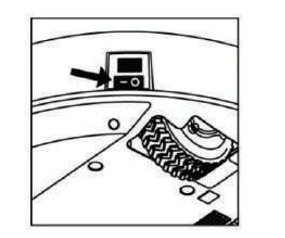
The average charging time between cleanings is around 3 hours.
-The battery will not be at its full potential until after 2 to 3 cleaning and recharging sessions.
-If the robot is not used on a regular basis recharge the robot once a month to maintain the battery.
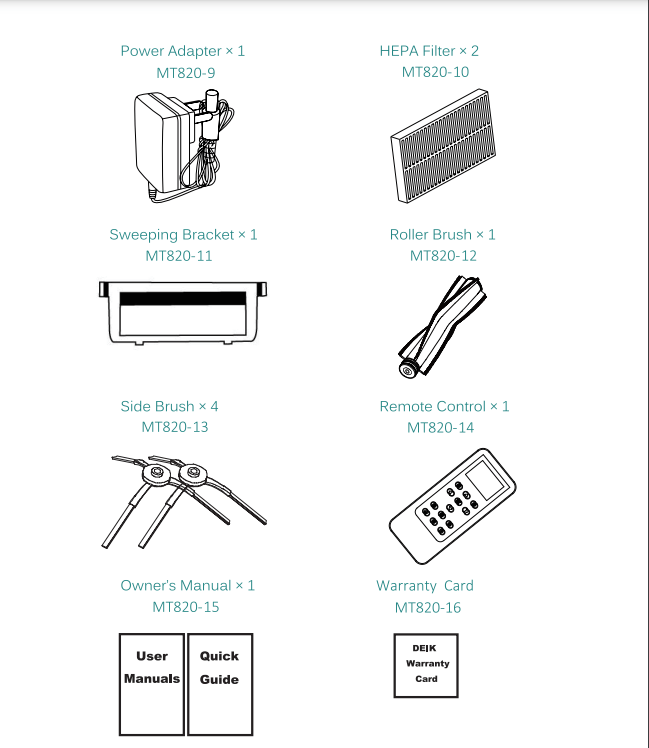
Remote Battery Installation
1. Remove the battery cover located on the backside of the remote.
2. Place two AAA batteries in the compartment in the correct polarity.
3. Replace the battery cover compartment.
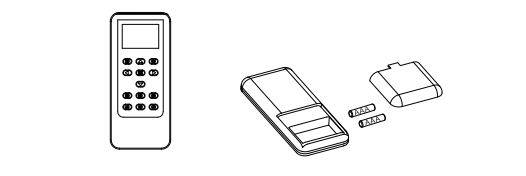
When in use, the remote should be pointed at the sensor head of the robot within 5 meters= 16 feet of the robot for the best results.
DEIK possesses two distinct cleaning methods: dry and wet cleaning. The dry cleaning method involves a vacuum sweep cleaning perfect for both hard flooring and low-pile carpet. DEIK strong suction will trap debris, hair and allergens. On the other hand, the wet cleaning method showcases a vacuum and mop cleaning perfect for all hard floorings. With a programmable tank to protect floors, DEIK will vacuum and collect dirt and debris seconds before mopping
Dry Cleaning
A dry vacuum-sweep cleaning method that collects and traps dirt and debris from the help of the side brushes and strong suction. Suitable for all types of flooring.
 button to turn the robot on.
 command on the panel or the
  button on the remote for DEIK to start.
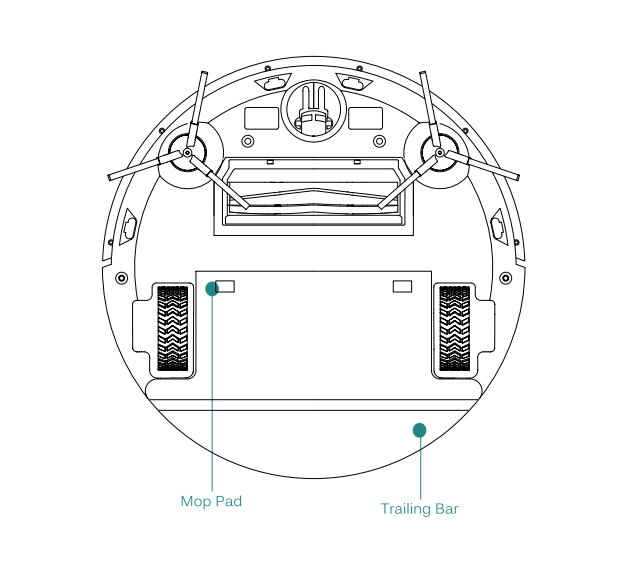
For dry mopping, attach the trailing bar and a clean, dry mop pad before cleaning.
Wet Cleaning
Vacuum and Mop Cleaning
A duo cleaning between the vacuum sweep method and the wet mop. DEIK collects dirt and debris seconds before mopping. With Mo programmable seeping modes available to protect flooring types.
Block DEIK from carpet and rugs while using this method.
Set up the charging dock in an approved position (see “Charging Dock Station Setup” on page 14). Ensure the power cord connected to the charging dock is not laying on the ground.
Tidy up the room being cleaned including moving small objects, potential obstacles and any rugs.
Attach the trailing bar and mop to DEIK (see “Installation of the Trailing Bar and Mop” on page 21).
Prepare the tank with preferred cleaning solution and the small dust bin and insert into DEix (see “Installation of the Tank” on page 22).
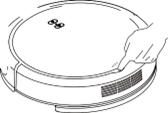
Place DEIK on the ground, flip the power switch on the side to turn DEIK on or press the  button to go into standby mode.
Program DEIK for the correct flooring (see “Setting the Intelligent Tank” on page 23).
Press the  command on the panel or the
  button on the remote for DEIK to start.
For the best results, ensure the tank is completely filled with solution and the mop attachment is clean before each cleaning.
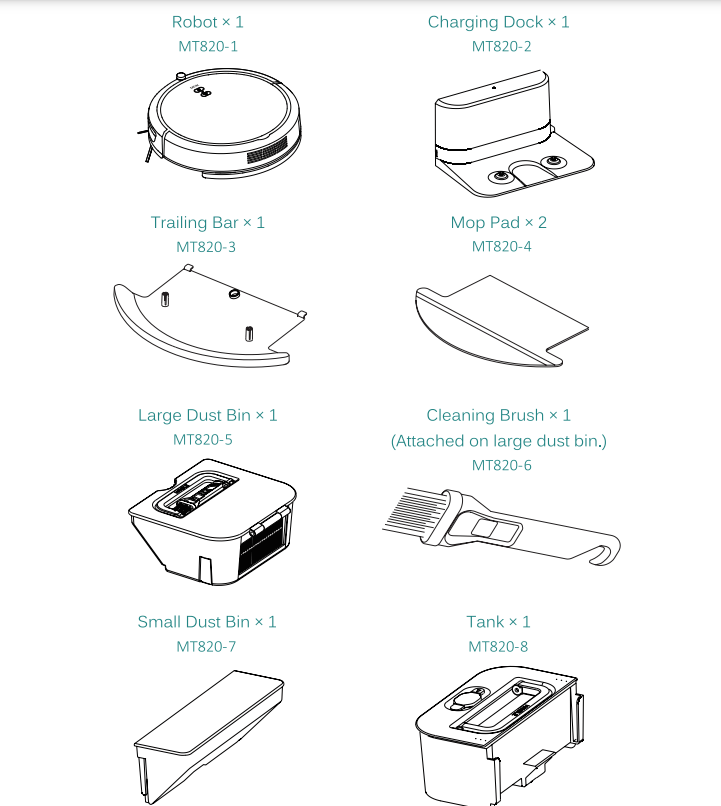
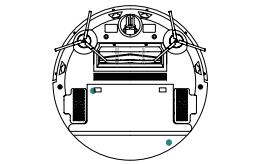
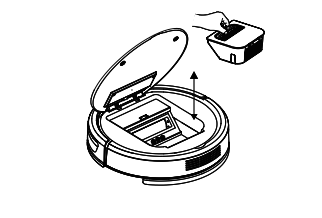
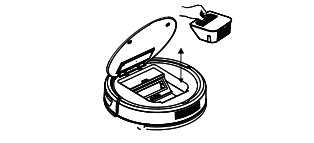
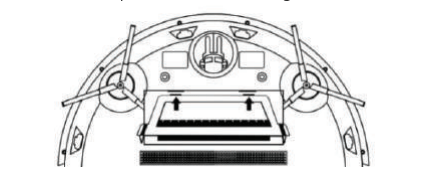
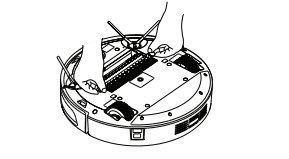
Installation of the Large Dust Bin
DEIK initially comes with the large dust bin installed.
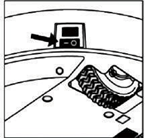
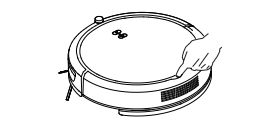
1. Pull up at Pull“ position on the top cover of the robot for the cover to open and expose its containments.
2. Lift the handle on the large dust bin to lift the whole container. Insert the dust bin with the filter facing the exhaust filter of the robot and the handle exposed

3. Lower the cover until it returns to its preexisting position and a click is heard.
For the best results, empty the dust bin after each cleaning.
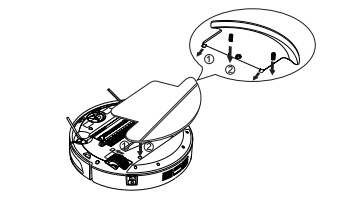
Installation of the Trailing Bar and Mop
The trailing bar and mop MUST be installed before the tank is installed. DEIK initially comes with trailing bar and mop installed.
1.Turn off the power to the robot by flipping the power switch or clicking the button located on the top left of the remote
2. Gently pick up the robot and lay it with its wheels facing up
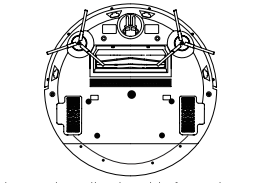
3. Flip the trailing bar so the adhesive side faces the mop pad and slide the front two prongs into the sleeve on the back side of the mop pad. Align the hole on the trailing bar to the hole on the sleeve of the mop pad. Firmly press down on the mop pad to secure the mop pad to the adhesives on the trailing bar
4.Flip the mop pad and trailing bar so that the mop pad is facing up. Insert the front two prongs of the trailing bar into the two matching holes adjacent to the back wheels on the robot. The curved edge of the trailing bar will match with the curved edge of the robot.
5.Insert the two prongs on the underside of the trailing bar into the matching holes located near the end of the wheels of the robot. Push down on the trailing bar and mop pad until they are lying flat and secure on the robot.
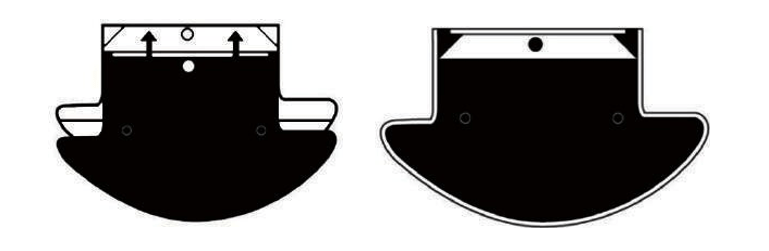
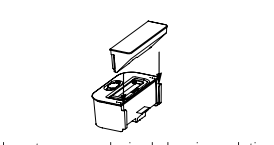
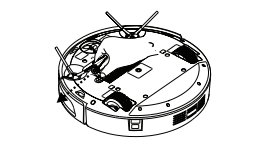
Installation of the Tank
The trailing bar and mop MUST be installed before the tank is installed.
1. Pull up at "PULL" positon on the top cover of the robot for the cover to open and expose its containments
2. Remove the large dust bin if necessary. Lift the handle to remove the whole container up and out of the robot.
3. Connect the small dust bin to the tank by sliding the prongs on the left and right side of the small dust bin into the slots on each side of thetank
4. Fill the tank with water or any desired cleaning solution by removing the orange plastic stopper with a nozzle symbol located on the top of the tank and filling until full. Reinsert the plastic stopper.
- Certain cleaning solutions may need to be diluted with water before inserting into the tank.
- Certain cleaning solutions may stain the mop pad
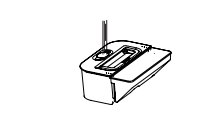
5. Place the tank and small dust bin combination into the robot by lifting the handle on the tank and inserting the combination with the tank closest to the exhaust filter on the robot
Do not allow the combination to sway or be turned upside down as solution will leak from the tank.
Setting the Intelligent Tank
Press the button  on the remote to enter the tank setting
 Advanced Cleaning
For a deeper and more precise clean, incorporate an advanced cleaning feature to the dry or wet cleaning session.
Be sure to move any obstacles including rugs, blinds, or cords that may be in the way.
Before selecting an advanced cleaning method, put DEIK into standby mode by pressing the  button.


Finishing a Cleaning Session
 button on the panel or the
  button on the remote to stop the cleaning. To stop thecleaning session and return to the charging dock to automatically recharge, press the
  button on the remote and DEIK will begin to find the charging dock.
DEIK might have difficulty finding the charging dock in a larger room or a room full of obstacles.
1.Turn off the power to the robot by flipping the power switch or clicking the  button located on the top left of the remote
2.Gently pick up the robot and lay it with its wheels facing up
3. Firmly grasp one of the plastic spokes containing the wire brushes and pull straight up.
The side brushes should only be replaced if the previous side brushes become damaged.
Installation and Removal of the Sweeping Bracket
The roller brush must be installed before the sweeping bracket.
DEIK initially comes with the sweeping bracket installed.
1. Turn off the power to the robot by flipping the power switch located on the side of the robot.
2. Gently pick up the robot and lay it with its wheels facing up

3. Taking the sweeping bracket with the rubber extension facing up, insert the two front prongs into the corresponding holes in the same hollow compartment containing the roller brush.
4. Lower the left and right U-shaped clips located on the sides of the sweeping bracket into their corresponding holes until a click is heard.

Follow the same steps for the removal of the sweeping bracket
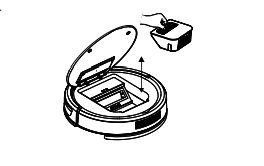
Cleaning of the Large and Small Dust Bin
1. Remove the dust bin from DEIK by pulling the handle straight up. Open the latch containing all the dirt and debris and discard. The small brush located on the top of the large dust bin can be used to help clean
2. Remove the filter by pulling it straight up out of the container and releasing it from the prongs of the dust bin. Take the filter screen out of the filter by pulling the fabric tab of the filter screen. Brush the dirt out with the small brush
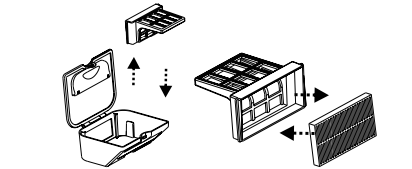
The HEPA filter should be replaced every 3-6 months and cleaned weekly if used regularly.
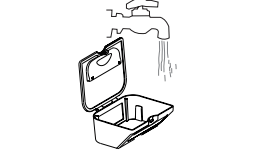
The dust bin can be more thoroughly cleaned by rinsing with water and drying completely before being reinstalled
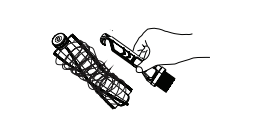
Cleaning the Roller Brush
Remove the sweeping bracket from DEIK
Remove the roller brush from DEIK
Use the pick end of the small brush located on the top of the large dust bin to help untangle any debris on the brush strips and the rubber stopper.
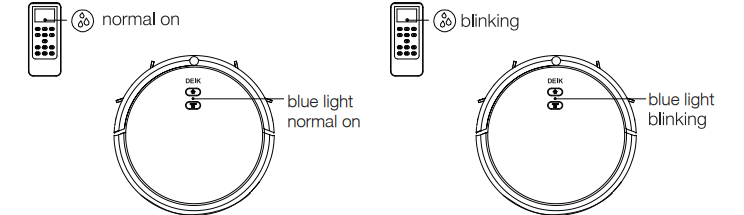
 Red light is normal on
Move the robot to the charging dock or plug it into the power adapter
Red light is normal on
 Red light
Red light is blinking
Vacuum cleaner turns off after a few minutes
1. How can | keep DEIK off unwanted areas?
2. Can have the trailing bar and mop attachment on DEIK while dry cleaning?
3. Can use the power adapter instead of the charging dock to charge DEIK
4. Can use cleaning solution instead of water when wet mop cleaning?
5. How often should the dust bins be emptied?
6 What should I do if DEIK cannot find the charging dock?
7. How can | protect my robot from falling down my stairs?
8. How long will the robot's battery last?
Reference file: Deik MT820 Robot Vacuum Cleaner
Additionally, the document applies to other Deik models: MT-820