
Loading ...
Loading ...
Loading ...
5-13
SCANNER/INTERNET FAX
Contents
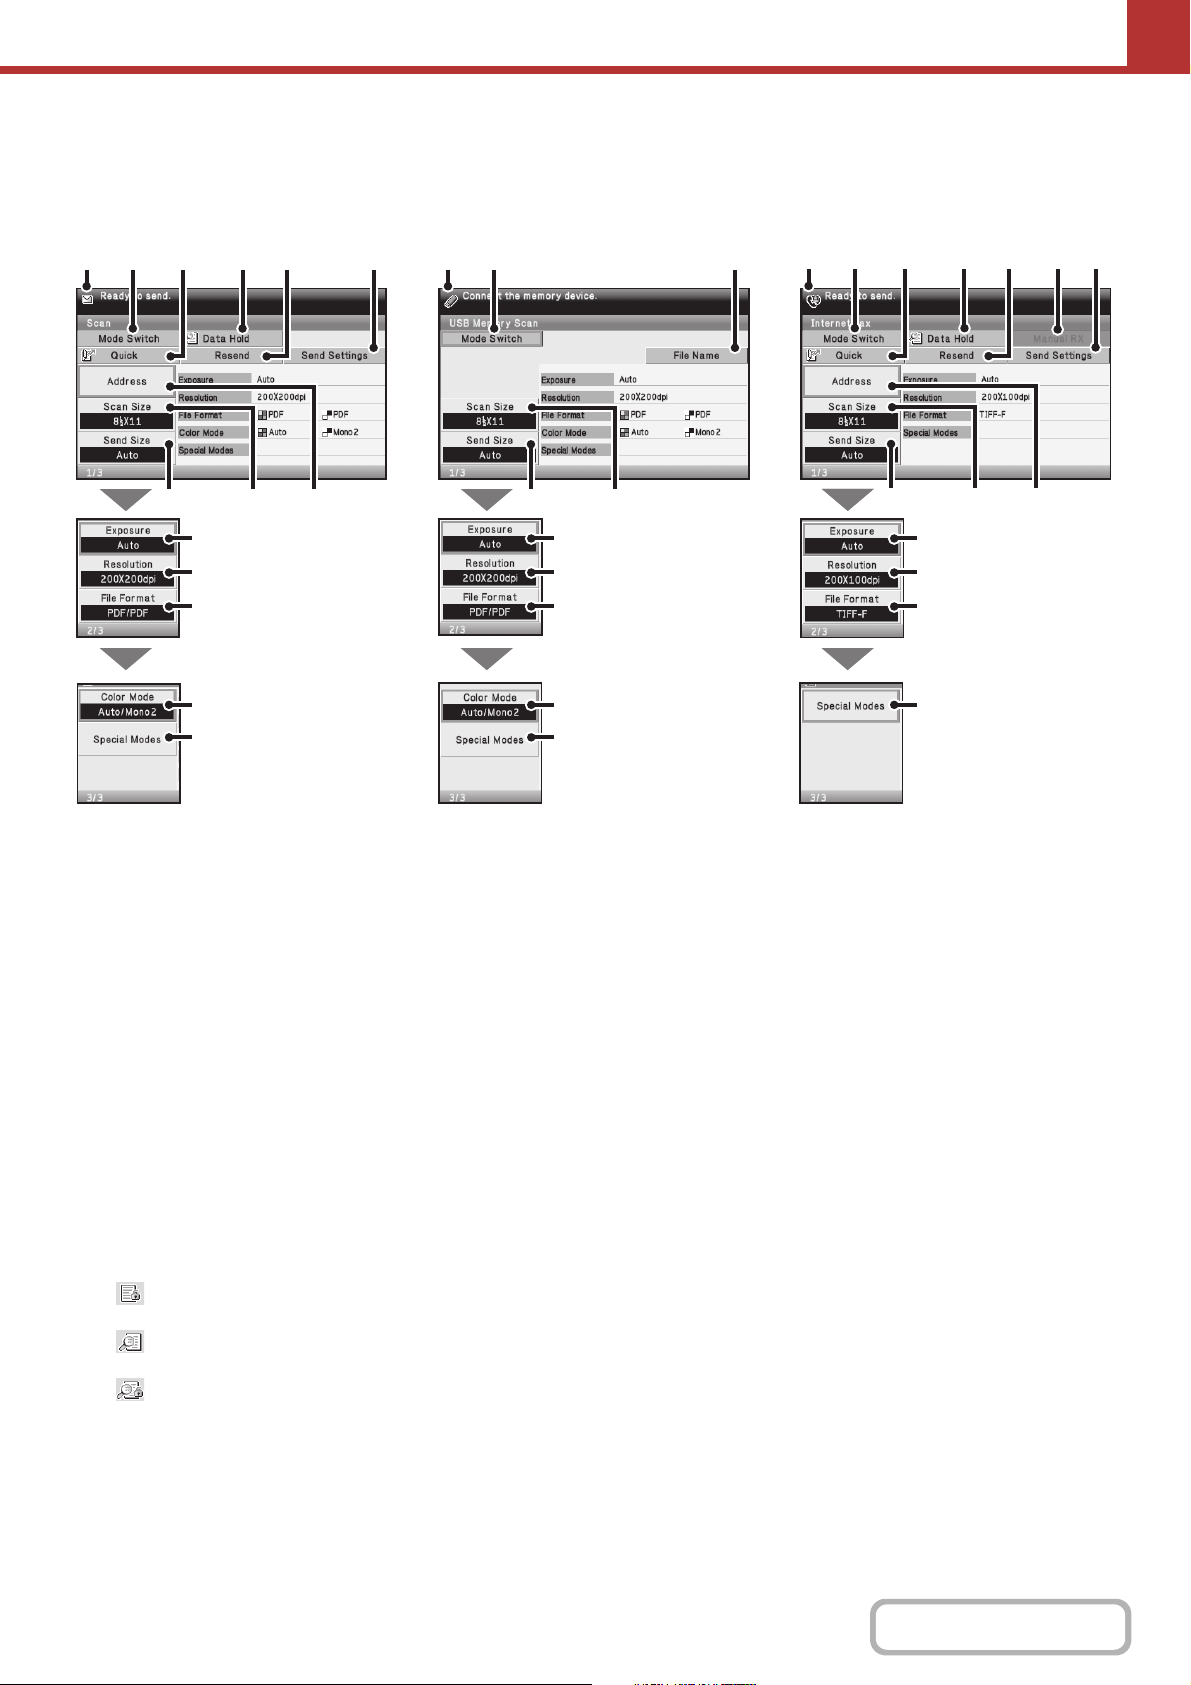
BASE SCREENS
Settings are selected in the base screen of each mode.
(1) Various messages are displayed here.
The icon of the selected mode appears on the left.
(2) [Mode Switch] key
Select one of these tabs to change the image send mode.
Modes that cannot be used because the corresponding
options are not installed do not appear.
☞ BASE SCREEN (page 5-12)
(3) [Quick] key
Select this key to specify a destination using a search number.
*
* 3-digit number assigned to a destination when it is stored.
☞ USING A SEARCH NUMBER TO RETRIEVE A
DESTINATION (page 5-26)
(4) [Data Hold] key
When "Hold Setting for Received Data Print" or
"Received Data Image Check Setting" is enabled in the
system settings (administrator), this will appear when an
Internet fax is received.
: Only "Hold Setting for Received Data Print" is
enabled
: Only "Received Data Image Check Setting" is
enabled
: Both settings are enabled
☞ PRINTING A PASSWORD-PROTECTED FAX
(Hold Setting For Received Data Print) (page 5-111)
☞ CHECKING THE IMAGE BEFORE PRINTING
(page 5-112)
(5) [Resend] key/[Next Address] key
The destinations of the most recent 8 transmissions by
Scan to E-mail, fax and/or Internet fax are stored. Select
this key to select one of these destinations. After a
destination is selected, this key changes to the [Next
Address] key.
☞ USING THE RESEND FUNCTION (page 5-31)
☞ RETRIEVING A DESTINATION (page 5-23)
(6) [Send Settings] key
Select this key to select or enter the subject, file name,
sender name, or body text, which has been previously
stored in the Web page.
Scan modes:
☞ CHANGING THE SUBJECT, FILE NAME,
REPLY-TO, AND BODY TEXT (page 5-36)
Internet fax mode:
☞ CHANGING THE SUBJECT, FILE NAME, AND
BODY TEXT (page 5-49)
(7) [Address] key
Select this key to use a one-touch key or a group key.
☞ RETRIEVING A DESTINATION FROM THE
ADDRESS BOOK (page 5-22)
(8) [Scan Size] key
Select this key to select the image settings (original size,
duplex setup, image orientation) can be selected.
☞ IMAGE SETTINGS (page 5-58)
(7)(8)(9) (8)(9)
(1) (4)(2) (5)(3) (6) (1) (2) (15)
(10)
(11)
(12)
(13)
(14)
(7)(8)(9)
(1) (4)(2) (5)(3) (6)(16)
(10)
(11)
(12)
(13)
(14)
(10)
(11)
(12)
(14)
Base screen of scan mode
Base screen of USB memory mode Base screen of Internet fax mode
Loading ...
Loading ...
Loading ...