Loading ...
Loading ...
Loading ...
18 19
PAGE HEADER..... PAGE HEADER.....
OPERATING YOUR BREVILLE PRODUCT
AUTO START
Auto Start is optional. It allows you to
program the specific time when the machine
will automatically turn on. By programming
your machine, you will not have to wait for
it to pre-heat. We recommend programming
the machine to start 15 minutes before you
plan to use it.
Press MENU button until ‘AUTO START’
flashes and the current Auto Start setting
(ON or OFF) is displayed on the LCD.
Press UP or DOWN arrow to set the
AUTO START to ON or OFF.
If OFF is selected, press the EXIT button
to set.
If ON is selected, press the MENU button.
Press UP or DOWN arrow to the desired
Auto Start time. For faster scrolling, press
and hold the UP or DOWN arrow.
Press the EXIT button to set. A small clock
icon will be displayed on the LCD when the
Auto Start function has been programmed.
CLEANING CYCLE
The cleaning cycle cleans the shower screen
and back-flushes the group head.
Select this feature when the LCD displays
‘CLEAN ME!’ Refer to ‘Cleaning Cycle’,
page 29.
OPERATING YOUR BREVILLE PRODUCT
ADVANCED FEATURES
These features should only be accessed by
experienced users.
To access Advanced Features, with the
machine turned off, press and hold the
1 CUP button, then also press the POWER
button. Press the UP arrow to the desired
feature then press MENU button to access
feature settings.
Press the EXIT button at any time to exit.
POWER
POWER
TURN
POWER OFF
THEN PRESS
& HOLD
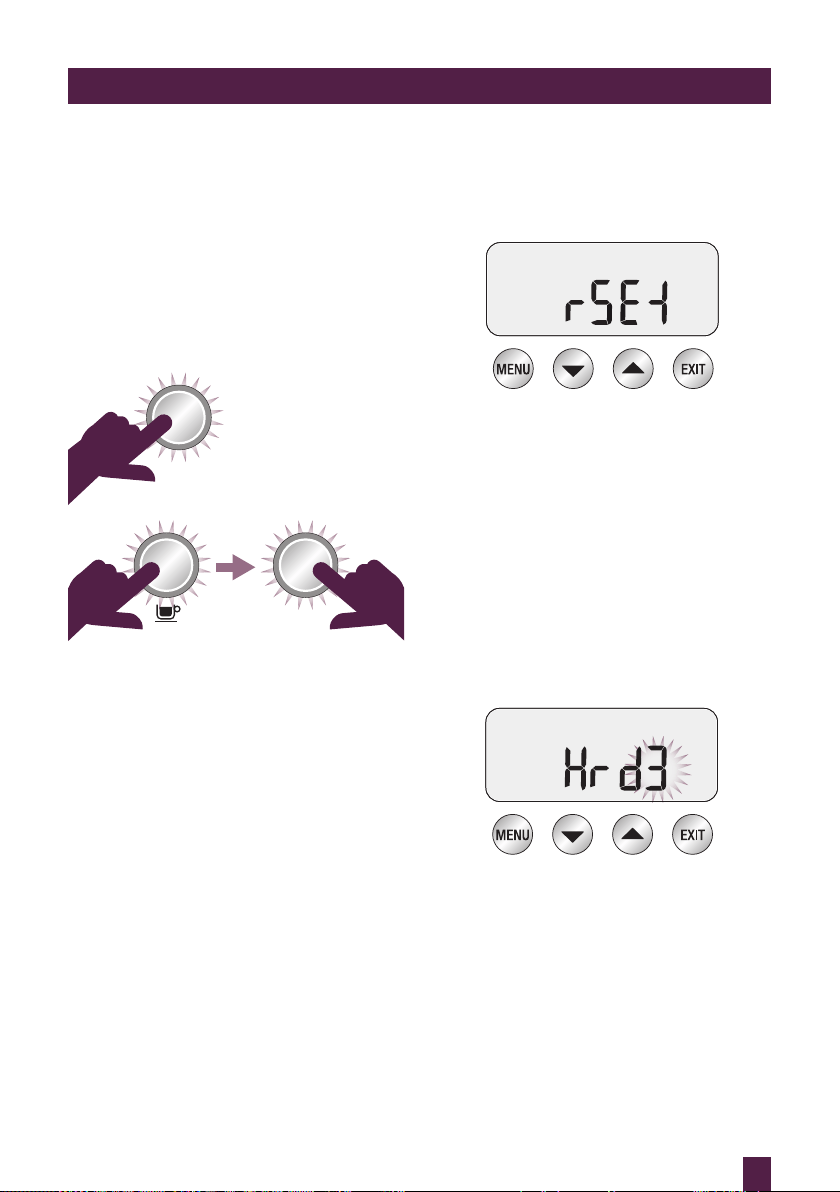
Reset Default Settings (rSET)
Use this function to reset all programmable
values back to the default settings. The
machine has the following default settings:
1. Temperature – 200°F (93°C)
2. Pre-Infusion – Duration Pd07
3. Pre-Infusion – Power PP60
4. Steam temperature – 275°F (135°C)
5. Machine Audio – LO
6. Auto Off – ON
7. Auto Start – OFF
8. Temperature Unit – Fahrenheit
9. Water Hardness – Hrd3
10. Shot Duration – 30 secs
While ‘rSET’ is displayed on the LCD, press
the MENU button to reset all settings to
factory defaults. Machine will beep to
confirm selection.
‘Hrd3’ will flash on screen. Machine is now
in Water Hardness mode. Determine water
hardness with the supplied water hardness
test strip. Refer to ‘Setting Water Hardness’,
page 11. Press UP or DOWN arrow to the
required setting from ‘Hrd1’ (softest water)
to ‘Hrd5’ (hardest water). Press MENU
button to set. Machine will beep to confirm
selection.
Setting water hardness will determine the
regularity of the ‘NEW FILTER’ alert which
indicates when the water filter in the water
tank needs to be replaced.
Descale (dESC)
Select this feature to access the step by step
descale procedure on the LCD. Refer to
page 28 for the accompanying instructions.
Loading ...
Loading ...
Loading ...