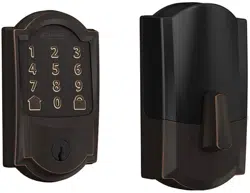
User Guide Smart WiFi Deadbolt
Quick Start Guide
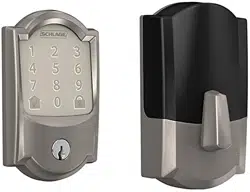
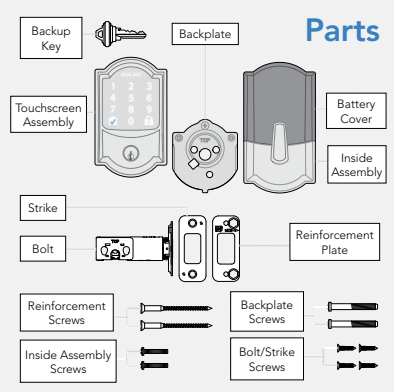
Parts
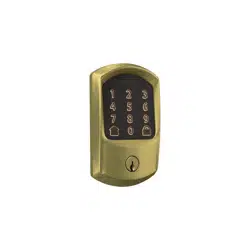
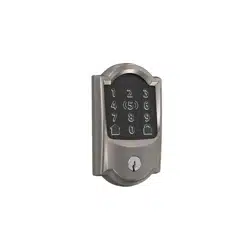
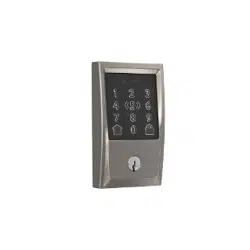
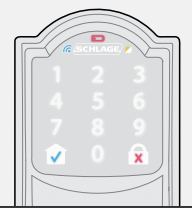
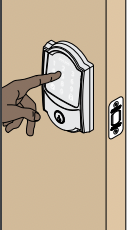
Touchscreen
 Communication Icon
• Flashes when lock is connecting to WiFi to check for updates.
 Low Battery Icon
• Flashes after code is entered when battery is low.
• Solid when battery is critical. The lock will not work without new batteries.
 Programming and Input LED
• Flashes white on every digit that is entered.
• Amber when using manual programming mode.
 Home Button and Checkmark Icon
• Turns on keypad backlight.
• Starts WiFi connection process.
• Checkmark flashes when code entry is correct.
• Checkmark flashes when manual programming are successful.
 Lock Button and “X” Icon
• Locks the lock.
• Turns on keypad backlight if the lock is locked.
• “X” flashes for a wrong user code.
 Phillips screwdriver. Don’t use a power drill!
step 1 Remove existing lock.
Remove the entire deadbolt, including the bolt. You may also want to remove the strike. A standard Schlage deadbolt is shown. Check with your specific deadbolt manufacturer if you need help.
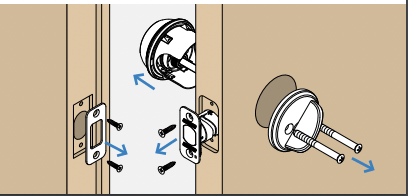
step 2 Install the bolt.
You may have to adjust your bolt length. Make sure the slot in the bolt is centered in the hole.
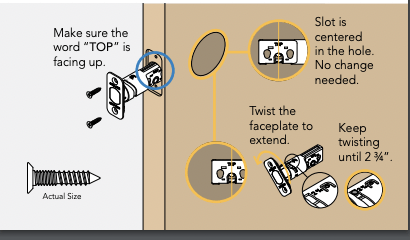
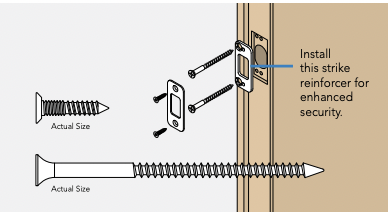
step 3 Install the strike into the door frame.
If you have a window next to your door, you may not be able to use the longer wood screws to install the reinforcer.
step 4 Install the touchscreen.
Route the cable through the door BELOW the bolt. Align the tailpiece as shown and push the touchscreen onto the door.
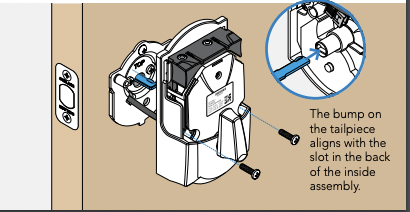
 The bump on the tailpiece aligns with the slot in the bolt.
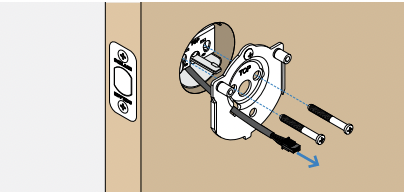
step 5 Install the backplate.
 Phillips screwdriver . Don’t use a power drill! You may damage your lock!
Route the cable under the bolt and through the hole on the bottom of the backplate. Secure the backplate with screws. Make sure the outside touchscreen is straight before tightening screws all the way
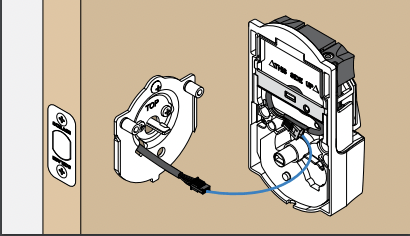
step 6 Connect the cable.
Tuck the cable and connector in the space above the spindle.
step 7 Secure the lock to the door
If the bump on the tailpiece doesn’t align with the slot in the back of the inside assembly, make sure your thumbturn is vertical (up and down).
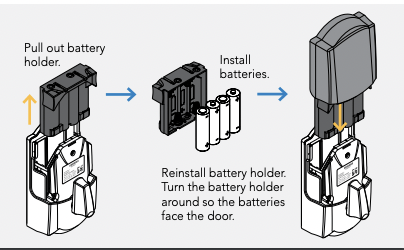
step 8 Install batteries and slide the cover on.
That wasn’t so bad, was it?
Your lock is now installed! Remember, you still have to set up your lock to use it.
step 9 Set up your lock.
- 1. Open your door!
- 2. Enter one of the two default user codes.
- 3. Your lock will enter a setup routine. When the bolt stops moving, setup is complete.
Final test!
- 1. Close your door.
- 2. Extend and retract the bolt using the inside thumbturn.
- 3. Make sure the bolt retracts smoothly.
- 4. Open your door.
- 5. Extend the bolt using the inside thumbturn.
- 6. Now enter a user code at the touchscreen.
Now that your lock is installed
you can use a smart home system to lock and unlock your door from anywhere and add user codes for guests and household members.
Lock and unlock
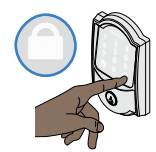
To lock your door just tap the lock icon.
You can also lock your door from inside by turning the thumbturn toward the door edge.
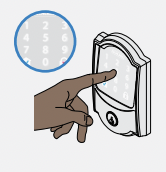
To unlock your door enter a user code.
You can also unlock your door from inside by turning the thumbturn away from the door edge.
Door Preparation Instructions for Door with No Holes
Tools Needed
 If you are uncomfortable performing these steps, call a locksmith for assistance.

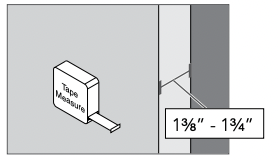
1 Measure door thickness.
If the door is thinner than 13/8” or thicker than 13/4”, then the lock will not fit properly on the door. A thick door kit is used to fit the Schlage Encode to doors that are between 17/8” and 21/4” thick.
A thick door kit is available from Product Support at (888) 805-9837
2 Mark door.
Mark lock centerline on door face, door edge and door jamb.
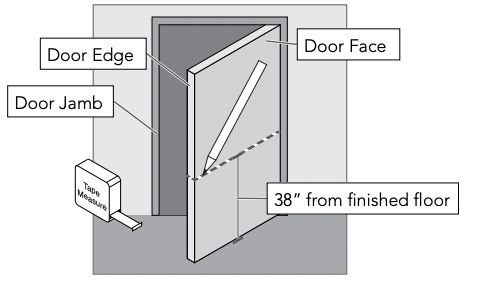
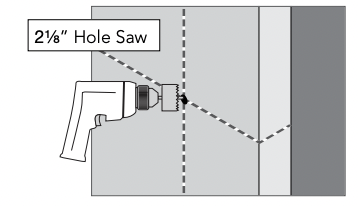
3 Prepare cross bore.
- 3a Measure backset and mark center of hole.

- 3b Drill hole with hole saw.
4 Prepare door edge hole.
- 4a Measure and mark 1/2 door thickness.
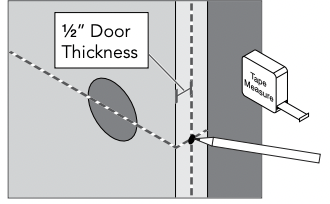
- 4b Drill hole in door edge.

5 Mortise for bolt.
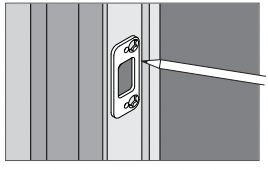
- 5a Insert bolt into door edge hole. Trace bolt faceplate and mark holes.
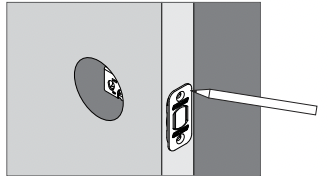
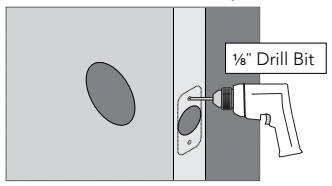
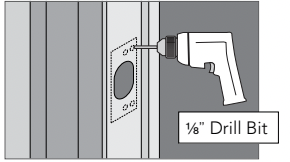
- 5b Remove bolt and drill two 1/8” pilot holes.
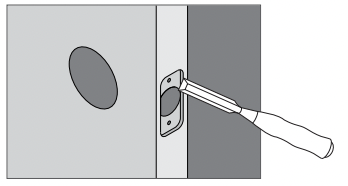
- 5c Use chisel and hammer to create bolt mortise.
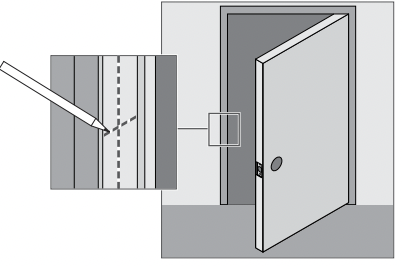
6 Measure, mark and drill holes in door jamb for strike.
- 6a Mark center for strike hole exactly opposite latch hole.
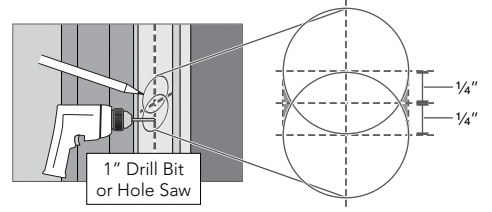
- 6b Measure, mark and drill two (2) 1” holes, 11/4” deep, as shown. Chisel out excess material on the sides.
7 Mortise for strike and reinforcement plate.
- 7a Trace strike and reinforcement plate and mark holes
- 7b Drill four (4) 1/8” pilot holes.
- 7c Use chisel and hammer to create mortise for strike and reinforcement plate.