User Manual
About Robot
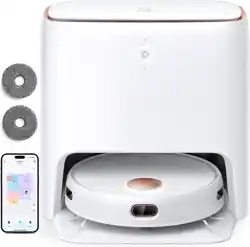
What's in the Box

Note: Figures and illustrations are for reference only and may differ from actual product appearance. Product design and specifications are subject to changes without notice.
Robot Anatomy
Top View

Bottom View

Dust Bin

Charging Station

LED Indication


Using Robot
Getting Started
1. Remove the protection material from both sides of the robot.

2. Install the side brushes before use. Put the left brush (L) and right brush (R) against the letters L and R on the bottom respectively.

3. Place the Charging Station on a level surface and against a wall. It is recommended to place the Charging Station against a wall, and on a hard-level surface rather than on rugs or carpets.

4. Remove objects within 3 ft/1 m of the left and right side and within 6 ft/2 m of the front of the Charging Station.

5. Connect the round connector of the adapter into the power socket on the Charging Station and the other end into a wall outlet.
When the Charging Station connects to AC power, the Power Status Light on the Charging Station is SOLID WHITE.
Always keep the Charging Station plugged in, otherwise Robot could not automatically return to it when Robot battery gets low.

6. Please fully charge your robot before your first use. Manually align the Charging Contacts on the bottom of the robot with those on the Charging Station.

Notes:
- It takes 6-6.5 hours to reach a full charge, which could last to clean for around 120 minutes with Auto Mode and the minimum suction power.
- The robot will find and return to the Charging Station when the battery gets low, while it will not move when the battery gets critical low, please manually get it to charge.
- To extend the battery's lifespan, please recharge the robot at least once every 3 months if not using for longtime
- Do not open the battery compartment and replace the battery by yourself. If the robot won't charge, please contact support.ustikom for further assistance.
Important Tips Before Usage

1. Please remove any objects from floor that may entangle robot vacuum, such as pet poop, socks, cloths, tissue. toys, slippery and power cords. You can use supplied Cable Ties to organize your wires and power cords.
2. Before using the robot on a rug with tasseled edges, please fold the rug edges under.
3. Keep robot away from wet areas, such as kitchen or bathing room.

4. The robot can climb to the top of objects with a thickness less than 0.63 in/16 mm. Please take the objects away, if you do not want the robot to climb them.
5. Keep robot away from spaces between 2.56in/65mm--3.54in/90mm(Robot thickness is 3in/76 mm) to prevent robot from getting stuck, like sofa, cabinet or other furniture. If necessary, you could use supplied Boundary Strip to block off the problem areas.
6. Cliff sensors will prevent robot from tumbling down stairs and steep drops in most cases Sensors are less effective if dirty or used on carpeted reflective / very dark-colored floors. It is recommended to apply the Boundary Strip to block off areas where Robot may fall

7. The Robot may not run on certain darker black colored surface since Cliff Sensor that recognize edge or a stair may regard black color as an edge, then the robot will not clean over it
8. Avoid cleaning high-pile rugs thicker than 0.78 in/20 mm as they may cause Robot to malfuntion
9. While your robot is cleaning, do not pick it up and move it, or move the charging station- this could impact the robot's ability to map your home or back to charging station.

10. To keep Robot away from any area or item you do not want Robot to clean, apply the supplied Boundary Strip on the floor with the supplied adhesive tape to create a virtual barrier. Make sure the strips are placed FLAT on the floor.
Power On/Off Robot
Power On Robot: Press and hold the button for 3 seconds.

Connect Robot with Wi-Fi
To enjoy all available features, it is recommended to control your Robot via the TuyaSmart app thru Wi-Fi.
app Downloading and Installation
app Downloading
Note: Please make sure your smart Phone or tablet is running 105 10.0 (or above) or Android 44 (or above)
Option 1: Search for TuyaSmart from App Store/Google Play, then download and install it onto your mobile device.
Option 2: Scan QR codes on robot or below to download and install onto your mobile device

app Registration and Login
Launch TuyaSmart app, register an account with your mobile phone number or a valid email address at your first use, then login.
Note: For a successful connection, please allow TuyaSmart app to use your WLAN & Cellular Data when running it
Wi-Fi Connection Requirement
Mobile Device Requirement
Make sure your Smartphone or tablet is connected to a 2.4GHz Wi-Fi.
Robot Requirement
- The Wi-Fi Status Light on Robot is flashing blue.
- Robot is attached to the Charging Station to ensure it has enough power during setup.
Wi-Fi Requirement
- Make sure you've entered the correct Wi-Fi name and password when connecting.
- Avoid using an emoji or special characters or symbols in your Wi-Fi name and password.
- It's not recommended to use a VPN (Virtual Private Network) or Proxy Server.
- If your router is a dual-band router, please select the 2.4GHz network, robot only support 2.4GHz network.
- When connecting to a hidden network, make sure you enter the correct network name, SSID (case sensitive), and connecting to a 2.4GHz wireless network.
- When using a network extender/repeater, make sure the network name (SSID) and password are the same as your primary network.
- Your Wi-Fi router supports 802.11b/g/n and IPv4 protocol.
- WPA and WPA2 using TKIP, PSK AES/CCMP encryption.
- WEP EAP (Enterprise Authentication Protocol) is not supported.
- Use Wi-Fi channels 1-11 in North America and channels 1-13 outside North America refer to local regulatory agency).
- Make sure the robot and your mobile device are close to the router when connection,
Wi-Fi Status Light

Connect with TuyaSmart app
There is 2 way to connect with TuyaSmart app, thru EZ mode or AP mode. EZ mode is default connection way. Detail please refer to Method A as below
If EZ mode connect fails, please try AP mode, Detail please refer to Method B as below
1. Open TuyaSmart app. Tap "Add Device" or "+" at the upper right corner.

2. "Small Home Appliance ----> "Clean" ----> "Robot Vacuum(Wi-Fi)".

3. Select the same router's 2.4GHz Wi-Fi as mobile phone and enter the correct password.

4. Press and hold  and
and  buttons on the robot at the same time for 3. seconds, Robot will say "Wi-Fi reset, ready for EZ mode connection, and Wi-Fi Status Light will Fast Flash, then choose "Confirm the indicator is blinking Rapidly" on app. and Tap "Next"

5. Connecting.

6. Connection Successfully. and Robot will say "Wi-Fi connected"

Method B: Connect with AP Mode
1. Open TuyaSmart app. Tap "Add Device" or "+" at the upper right corner.

2. "Small Home Appliance ----> "Clean" ----> "Robot Vacuum(Wi-Fi)".

3. Select the same router's. 2.4GHz Wi-Fi as mobile. phone and enter the correct password, then tap "next".

4. Tap "EZ Mode "at upper right corner, choose "AP Mode in appeared list.

5. Press and hold and O buttons on Robot at the same time for 3 seconds, Robot will say "Wi-Fi reset. ready for EZ mode connection" .Within 10 seconds. Press and hold and O buttons at the same time. for 3 seconds again, Robot will say "Wi-Fi reset, ready for AP mode connection" Wi-Fi Status Light will Slow Flash, then choose "Confirm the indicator is blinking Slowly on app. and Tap "Next"

6. Tap "Go to Connect".

7. Tap "Wi-Fi".

8. Connect to the Robot's AP hot spot "SmartLife-xxxxx" or "SL-XXXX".

9. Go back to app and tap "Confirm hot spot connection, next"

10. Connecting

11. Connection Successfully and Robot will say "Wi-Fi connected"

TuyaSmart app introduction
Open TuyaSmart app and enter robot control page as blow:
- Go to Robot Non-functional Setting Page
- Real Time Cleaning Map display
- Start/Pause
- Go back to Charging Station
- Smart Cleaning
- Edge Cleaning
- Spot Cleaning
- Random Cleaning
- Setting Schedule Cleaning time
- Go to Functional setting Page
- Manual Cleaning

Functional Setting Page Introduction as below:
- Suction Power setting.
- Mop Water Control
- Cleaning Record
- Find Robot
- Accessories Remain Time
- Carpet Boost Switch
- Robot Speak Language setting
- Robot Speaker Volume

Work with Amazon Alexa or Google Assistant
Amazon Alexa or Google Assistant is a smart voice control device that enables you to control Robot with your voice.
Before you start, make sure that:
- Robot is attached to the Charging Station to ensure Robot has enough power.
- Robot is connected with the TuyaSmart app successfully.
- You have an Amazon Alexa-enabled device (i.e, Amazon Echo Echo Dot and Amazon Tap. Echo Show, Echo Spot) or a device enabled with the Google Assistant (i.e. Google Home, Google Home Mini). These devices are sold separately.
- The Amazon Alexa app or Google Home app is already installed on your smart device, and you have created an account.
- You have registered your Amazon Alexa-enabled device onto Armazon Alexa app or your Google Assistant-enable device or to Google Home app.
To control Robot with Amazon Alexa or the Google Assistant
Step 1: Open TuyaSmart app and enter robot page, and tap top-right Pen icon.
Step 2: Tap Amazon Alexa icon or Google Home icon to link with Alexa or Google Home.
Just follow app instruction, then could add your robot into Amazon Alexa app or Google Home app.

You could talk below voice instruction to Amazon Alexa - enabled device or Google Assistant - enabled device to control your robot.

Cleaning Mode
Smart Cleaning
Press

on Robot or press Smart button on app to start Smart Cleaning mode.
Robot will clean all accessible space in zigzag route until the battery gets low.

Note:
- Robot will return to the Charging Station automatically to make a self-charging, when the battery level becomes low or when Robot finishes cleaning
- We recommend to fully charge the robot, then operate it as needed if no cleaning plans please let the robot always connect with the Charging Station
- If the robot is not managed to find the Charging Station due to obstacles or getting stuck please manually get it to contact with the Charging Station
Manual Cleaning
You can direct Robot to clean a particular area by using the directional buttons on app after choosing Manual.

Spot Cleaning
This cleaning mode aims to intensively clean a specific area with 3.9ft./1.2m diameter.
Step 1:
Locate any area where needs to be cleaned intensively, namely there exist much debris or dust, then move the robot to the center of the area by manual thru app which indicated in "Manual Cleaning" on this page.
Step 2:
Press Spot cleaning button on app to initiate the spot cleaning process in a spiral pattern.
The maximum diameter of the spiral circle is around 1.2 meter (3.9ft). The process will last around 2 minutes, therf the robot will go back to start point and enter standby mode if no any operation is resumed.
v
Edge Cleaning
This mode is to thoroughly clean the edges along the wall or any furniture.
Press Edge cleaning button on app to initiate the Edge cleaning process.

Random Cleaning
This mode is to clean in random routine.
This mode could be used for special carpet environment which robot couldn't clean in zigzag routine.
Press Random cleaning button on app to initiate the random cleaning process.

Carpet Boost
This function is set in app.
When enable this function in app, the robot automatically increases the suction power to Max on carpet to provide a deeper clean for carpet.
When on a hard surface, the robot will return to the setting suction power to provide just the right amount of power to save power,
This function will reduce the total cleaning time, and increase the noise level. If clean time is less or noise, you can disable this function in app.
Schedule Cleaning Setup
This function is set in app.
Thru app you can schedule Robot to start cleaning at a particular time.
You can set the time and customize the cleaning schedules from Sunday Saturday
Sleep Mode
To reduce battery consumption, the robot will go into the Sleep Mode when it is Standby Mode for 10 minutes;
Press on the robot or any clean button on app to wake robot up.
Robot will be in Standby Mode in below condition:
- Stop cleaning thru button or app.
- Robot has error and stop cleaning.
Error
If an error occurs, the Robot Status Light will be flash red and a voice prompt will sound. Refer to "5.1 Error & Voice Alarm" on page 31 for troubleshooting.
The robot will automatically enter Sleep Mode after 10 minutes of inactivity in an error state.
Note: Once error is fixed and robot start cleaning again, cleaning map in app will be re-draw as new, wouldn't draw on last cleaning map. Because fixing robot error would change robot place and direction, if draw on last cleaning map, will disorder cleaning map
Charging
Auto Charging
- When the battery gets low or deaning finish the robot will return automatically to the Charging Station to make a self-charging.
- We recommend to fully charge the robot ther operate it as needed. If no cleaning plans. please let the robot always connect with the Charging Station.
- If you set a schedule for Auto Mode, the robot will respond to the schedule even in low-battery status, but can't perform the cleaning due to the low battery,
- If the robot is not managed to find the Charging Station due to pastacles or getting stuck please manually get it to contact with the Charging Station.
Manual Charging: Standby Mode, press the button on robot or press  on app to start recharging,
Boundary Strip Usage
Boundary strip aims to set blocked-off areas, Robot will recognize the Boundary Strip and will not cross strip into the blocked-off areas.
Blocked-Off areas is listed as below:
A.Some furniture spaces between 2.5in/65mm--3.5in/90mm(Robot thickness is 3in/76 mm) to prevent robot from getting stuck, like sofa or cabinet.
B.Some place don't want robot to clean, like pet food bowls, kids toy, kitchen or bathing room.
Once identify Blocked-Off areas, please do as blow:
1. Identify the area or item you do not want Robot to get close to.
2. If necessary, use scissors to cut the Boundary Strip to a shorter length. Be sure to correctly measure the length before cutting.

3. Used supplied adhesive tape to paste the Boundary Strip flat on the floor, make sure the strip is placed FLAT on the floor or under an rug area.
Notes:
- If the Boundary Strip is rolled up remove and then re-apply on the floor with adhesive tape Otherwise the Boundary Strip may not work well
- Make sure the strip is affixed on the same surface level as the robot.
- Be careful not to damage the floor when using adhesive tape, it is not recommended for use on carpets
- Keep the Boundary Strip away from objects that emit excessive heat
Mopping the floor (Optional)
Note: Mopping cloth holder and water tank are Optional accessories, need buy separately. you could contact support.ustikom to order them.
1. Install Mopping cloth: Attach Mopping cloth onto Mopping cloth holder.

Note: It is suggested to clean the mopping cloth before using, to guarantee the cleaning result
2. Install the Mopping cloth holder: Insert the holder into the installation hole on the bottom of Robot.

3. Open the water tank cover, fill water and reseal it carefully.

Note:
- Do not spray and immerse the water tank
- Floor cleaners or disinfectants may damage the water tank, Don't add them into water tank
4. Install water tank into robot and slightly press it to ensure proper instalation.

Then close the top cover of robot. Tap the button on the Robot to enable the mopping mode.
Note:
- For safety purposes, remove mapping module (water tank and mopping cloth holder) in case of charging or put of operation
- Do not use the mopping function on the carpet
- To achieve a better mopping result Suggest cleaning floor before mopping
Firmware Update
Use the app to update the firmware.
To upgrade the firmware, the power must be equal to or greater than 50%.
It is recommended that you place the Robot on the charging station for upgrade,
Maitenance and Care
Cleaning and Replacement Frequency
To optimize the performance of your robot, we recommend to perform a regular maintenace and cleaning for some parts in the robot


Clean Dust Bin and Filter
- Open the top cover of the robot, lift the handle of dust bin and take out dust bin.
- Press the switch of dust bin to open it and pour out dust into trash bin.
- Open Filter cover to take out HEPA Filter, Sponge and Filter Cover.
- Tap the HEPA dust into trash bin. Sponge and filter cover could be washed by water, then dry them before usage. Note: Couldn't wash HEPA by water.
- Rinse Pre-Filter and dust bin with clean water without any detergent. Dry them before usage.
- Re-install Sponge, HEPA and Filter Cover onto Pre-filter, then put back bust bin into robot.

Note:
- You can wash the dust bin, pre-filter Filter sponge and Filter Cover with water Be sure to air-dry them thoroughly before reassembling
- Do not wash the HEPA with water as it may damage the HEPA and reduce the suction power
Clean Main Brush
- Press buckle on the brush guard to open it.
- Take out main brush.
- Open main brush cap on two sides of main brush, remove and clean hair or dirt on two side. Re-install cap onto main brush,
- Use the blade on the supplied Cleaning Brush to cut any hair or string that is wrapped on the main brush, and use brush to remove dirt on main brush,
- Install Main Brush into robot, please attention the direction, inserting the fixed protruding end first, then clicking into place.
- Press down to install the brush guard into place.

Clean Side Brush
- Remove the side brushes.
- Carefully unwind and pull off any hair or string that is wrapped between the robot and the side brushes.
- Use a cloth dampened with warm water to remove dust from the brushes or to gently reshape them.
- Reinstall side brush onto robot.

Note:
- Only use the side brushes when they are completely dry
- To protect your wooden or carpeted floor, our side brushes are made of soft materials and may become curled after used for some time, but it will not affect the cleaning effect.
Clean Sensor and Charging Contacts
- Use a damp cloth to clean all sensors on the robot and the Charging Station,
- Use a dry cloth to clean the charging contacts on the robot and Changing Station.


Note: Before Cleaning the charging contacts on the robot and Changing Station, turn the robot OFF and unplug the charging station.
Clean Caster Wheel
The Caster Wheel can't be pulled out, please remove any hair or debris that is wrapping the wheel or entangled inside the wheel cavity with the provided Cleaning Brush.

Note: Do not clean the Caster Wheel with water.
Water Tank and Mopping Cloth Maintenance (Optional)
Note: Mopping cloth holder and water tank are optional accessories, need buy separately. you could contact support.us tikom to order them
- Remove the Mopping Cloth from the Mopping Cloth Holder and wash it.
- Empty the remaining water and rinse the Water Tank to clean it.
- Air-dry the water tank and mopping cloth.
- Stick the Mopping Cloth and fix it to the Mopping Cloth Holder.


Note:
- Do not use hot water or any cleaning solution to clean the water tank, which will cause damage to it
- Do not use hot water to clean the mopping cloth.
Troubleshooting
Error & Voice Alarm
When a runtime error occurs, the Robot Status Light flashes also have error displayed on app.
Please use the table below to solve the problem.
Error 1: Insert dust bin
- Dust bin doesn't install well.
- Dust bin is taken out.
Error 2. Put the vacuurn on the floor before starting.
- Robot is picked up or suspended in the air.
- Please move the robot to a flat surface and restart robot.
- Cliff sensor is dirt.
- Clear cliff sensor by damp cloth.
Error 3. Move the vacuum to a safe area before starting.
- Robot is blocked or placed in a high place
- Please move the robot to a flat surface and restart robot.
- Cliff sensor is dirt.
- Clear cliff sensor by damp cloth.
Error 4. Put the machine flat on the ground before starting.
- Robot is tilted
- Please move the robot to a flat surface and restart robot.
- Cliff sensor is dirt.
- Clear diff sensor by damp cloth.
Error 5: Front bumper Front bumper is stuck.
- Front bumper is stuck.
- Please gently press the left, middle and right part of the bumper to check whether it can pop out. if still have error, please move robot to a new position and try again.
Error 6: Suction is not working well, please check.
- The suction inlet of your robot is being blocked.
- Power off the robot, then remove and empty the Dust Bin.
- Make sure there is no hair or debris blocking the suction inlet.
Error 7: The vacuum is stuck.
- Robot is stuck or trapped.
- Clear any obstacles in the surrounding area or move robot to an open ground before starting.
Error 8 Wheels are Stuck.
- Left or right wheels may be stuck or entangled with foreign objects.
- Power off robot, then please check the wheels and remove the foreign objects.
Error 9: Main Brush is Stuck.
- Main brush may be stuck or entangled with foreign objects.
- Power off robot and take off brush guard, then please check the main brush and remove the foreign objects.
Error 10. Side brush is stuck.
- Side brush may be stuck or entangled with foreign objects.
- Power off robot, then please check the side brush and remove the foreign objects.
Error 11: Back to the beginning.
- Robot can't find charging station
- To check it charging station is powered and power indication on charging station is on.
- Charging station isn't powered on
- Put robot onto charging station.
Frequently Asked Question
Robot cannot be activated
- Make sure the robot is turned on
- Make sure the battery is fully charged
- The robot only could work well among the ambient temperature 0°C to 40°C, if beyond this temperature range, robot will work abnormal
- If you still have trouble, turn off the robot wait for 5 seconds and restart it.
Robot stops working suddenly.
- Check if robot is trapped or stuck on an obstacle.
- Check if robot has error alarm(for details, please check 5.1 Error & Voice Alarm ,on page 31).
- Check if the battery level is too low.
- If you still have trouble, turn off the robot wait for 5seconds and restart it.
You cannot schedule cleanings.
- Make sure the robot is turned on
- You can set the time of day and scheduled cleaning time via app.
- Make sure the scheduled time has been set correctly.
- Check if Robot power is too low to start cleaning, Scheduled cleaning will be started only when the remaining power is 20% or above.
- Cleaning schedules are erased when Robot is powered off please reset schedule cleaning on app again.
- Check if robot has error alarm(for details, please check 5.1 Error & Voice Alarm ,on page 31), it can't start the scheduled cleaning.
Poor cleaning ability or dust falling out.
- Check if dust bin is full and needs emptying.
- Check if Main Brush is stuck by son foreign objects.
- Check if any obstructions are blocking the suction inlet.
- Check if HEPA filter is blocked and needs cleaning.
- Check if the HEPA filter is wet due to water or other liquid on the floor, Air-dry the filter completely before use.
Robot produces loud or sharp noises.
- It is a normal phenomenon that Robot produces certain sound during cleaning. Arrange your clearing time properly to avoid being interrupted by the sound.
- If a sharp noise is heard, check if the Main Brush Side Brush or Wheel is intertwined by any foreign objects. Remove the foreign objects twisted around Main Bruch Side Brush or Wheel.
- Check if the robot collected the objects that can make noise inside of the Dost Bin
- If you still have trouble, contact web support.us tikom for help.
Robot cannot be charged.
- Check if the Power Status Light on the Charging station lights up. If not, contact web support.us tikom to repair or replace the Charging station.
- Clear the charging contact pins on charging station and robot with a dry cloth.
- Check if you can hear a voice prompt "Start charging", when robot is docked onto the Charging Station. If not ,please contact web support.us tikom to repair or replace the Charging Station.
Slow charging speed.
- When used at high or low temperatures(>40°.<0°), the robot will automatically reduce the charging speed so as to extend battery life.
- Clear the charging contact pins on charging station and robot with a dry cloth.
- Check if used the right power adapter with charging station.
Robot cannot return to the Charging Station.
- Remove objects within 3 ft/1 m to the left and right side and within 6 ft/2 m of the front of the Charging Station.
- When Robot is in the vicinity of the Charging Station, it will return more quickly. However, if the Charging Station is located far away, Robot will need more time to return. Please be patient as it works its way back.
- Clean the charging contact pins on charging station and robot with a dry cloth, and sensors on charging station and robot with dump cloth, details refer to "4.5.Clean Sensor and "Charging Contacts" at page 29.
Unable to return to the charging station after spot cleaning or position change.
- The robot map will be disorder after spot cleaning or a significant position change. If the charging station is far away. the Robot may not be able to automatically return for recharge. Please put it onto the changing station manually.
Unable to return to the charging station after spot cleaning or position change.
- The robot map will be disorder after spot cleaning or a charging station after spot significant position change. If the charging station is far away. cleaning or position change the Robot may not be able to automatically return for recharge. Please put it onto the charging station manually.
Main Brush does not rotate.
- Check if the Main Brush is stuck by some foreign objects; if yes. please remove them and clean the brush.
- Check if the Main Brush and brush guard have been installed properly.
Side Brush does not rotate
- Check if the Side Brush is stuck by some foreign objects, if yes, please remove them and clean the brush.
- Check if Brush Guard trap the Bristles of Side Brush.
- Check if the Side Brush have been installed properly.
Robot movements or travel path are abnormal.
- Clean the sensors carefully with a dry cloth.
- Check wheels, side brushes and Main Brush have foreign objects on them if yes, please remove foreign objects.
- If you still have trouble, turn off the robot wait for 5 seconds and restart it
Robot cannot connect to la Wi-Fi network.
- Wi-Fi signal is poor. Please make sure that the robot is in an area with good Wi-Fi signal reception.
- Abnormal Wi-Fi connection: Please reset Wi-F and download the latest TuyaSmart app so netry connecter. For details, refer to the "3.4.Connect Robot with Wi-f. page 11 in this manual
In app, robot is shown offline.
- Make sure robot has powered on.
- Make sure Wi-Fi is connected successful, and Wi-Fi Status Light is solid blue.
- Please reset Wi-Fi and download the latest mobile app to retry connecting, For details, refer to the "3.4.Connect Robot with "Wi-Fi", page 11 in this manual.
In app, real time cleaning Map is not my home layout.
- Real time cleaning Map in app is just Map to show Robot cleaning track, so wouldn't be your home layout.
Once Robot is stopped or has error, after restart cleaning again, why cleaning map will re-draw as new? It wouldn't draw on last cleaning map
- Because each time after robot is stopped or fixing error, and restart cleaning again, robot place and direction will change a little. If draw on last cleaning map, will disorder cleaning map. as new? It wouldn't draw on So robot will re-draw new cleaning map after above condition. last cleaning map.
You cannot control Robot with Amazon Alexa.
- Check if there are any Internet connection problems.
- Check if you have installed the Amazon Alexa app onto your smart device.
- Make sure you have an TuyaSmart account and have connected to Robot successfully.
- Make sure you have connect Alexa on TuyaSmart ap, for detail please check "3.4.6.Work with Amazon Alexa or "Google Assistant" on page 18.
- Make sure you are using correct Alexa voice-commands which also listed in 3.4.6 on page 20.
You cannot control Robot with the Google Assistant.
- Check if there are any Internet connection problems.
- Check whether you have installed the Google Home app onto your smart device.
- Make sure you have an TuyaSmart account and have connected to Robot successfully.
- Make sure you have connect Google assistant on TuyaSmart app, for detail please check 3.4.6 Work with Amazon Alexa or Google Assistant on page 18.
- Make sure you are using correct Google home voice-commands which also listed in 3.4.6 on page 20.
No or little water during mopping.
- Please check whether there is water in the water tank.
- Please make sure that the water tank and mopping doth are properly installed in place, and adjust the water volume switch to high on app.
- For mopping function details, please check 3.11 Mopping the floor page 24 in this manual.
Too much water during mopping.
- Please make sure that the water tank and mopping cloth are properly installed in place, and adjust the water volume switch to low,
- For mopping function details, please check 13.11 Mopping the floor page 24 in this manual.
Do I need to charge the battery for at least 16 hours for the first three uses?
- The lithium battery has no memory effect, so it's okay to just fully charge t
Wi-Fi Connection
Wi-Fi Setup Requirement
Before Wi-Fi setup, make sure your mobile device, Robot and your Wi-Fi network meet the following requirements.
Mobile Device Requirement
Make sure your Smartphone or tablet is connected to a 2.4GHz Wi-Fi.
Robot Requirement
- The Wi-Fi Status Light on Robot is flashing blue for waiting for Wi-Fi connection.
- Robot is attached to the Charging Station to ensure it has enough power during setup.
Wi-Fi Requirement
- Make sure you've entered the correct Wi-Fi name and password when connecting.
- Avoid using an emoji or special characters or symbols in your Wi-Fi name and password.
- It's not recommended to use a VPN (Virtual Private Network) or Proxy Server.
- If your router is a dual-band router, please select the 2,4GHz network.
- When connecting to a hidden retwork, make sure you enter the correct network name. SSID (case sensitive), and connecting to a 2,4GHz wireless network.
- When using a network extender/repeater, make sure the network name (SSID) and passwork are the same as your primary network.
- Your Wi-Fi router supports 802.11b/g/n and IPv4 protocol.
- WPA and WPA2 using TKIP, PSK, AES/CCMP encryption.
- WEP EAP (Enterprise Authentication Protocol) is not supported.
- Use Wi-Fi channels 1-11 in North America and channels 1-13 outside North America (refer to local regulatory agency).
- Make sure the robot and your mobile device are close to the router when connection.
Wi-Fi Connection troubleshooting
If you cannot control Robot with your smart device, try the solutions below to solve the problem.
Wi - Fi Status Light: Flash Blue - Voice Prompt: Wi-Fi Connected
- Robot has connected to your router, but cannot access the Internet.
- Check if your router is connected to the Internet. Check with your Internet provider to see if there is any Internet connection problem.
- app Serve has problem.
- Wait several hours, to check app control again to check if app server is ok.
Wi - Fi Status Light: Flash blue
- Robot cannot connect to your wireless router.
- Wi-Fi connection is reset or has not been set up before.
- Reset Wi-Fi and connect Wi-Fi again, Refer to "3.4.4. Connect with TuyaSmart app" on page 13.
Wi - Fi Status Light: Off
- Robot is turned off.
- Robot power level is low.
- Fully charge Robot by attaching it to the Charging station.
- Robot is in Sleep Mode.
- After fully charged. Power on robot to recheck.