bit.ly/inseyoutube-e6
inselife.com/pages/faq

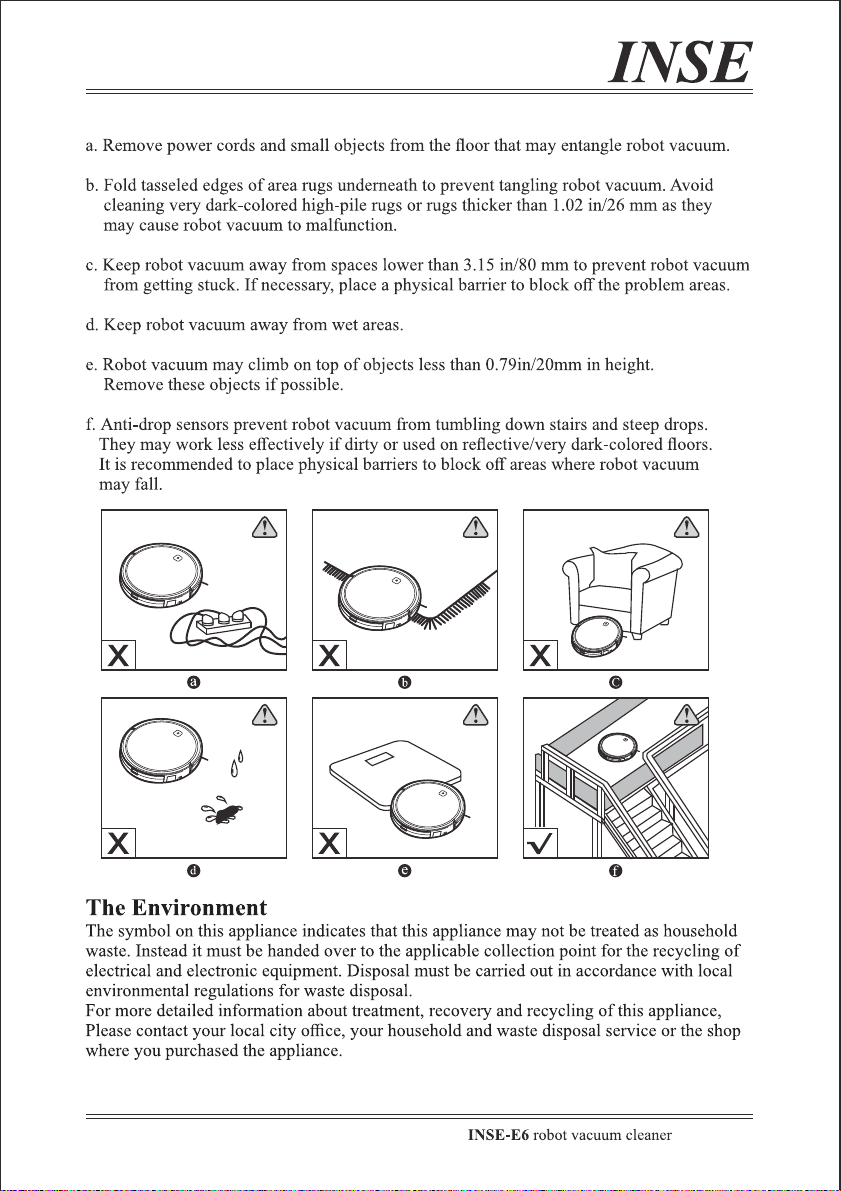
—— EN 01
—— EN 01
—— EN 03—— EN 02
—— EN 03—— EN 02
—— EN 05—— EN 04
HEPA Filter
—— EN 05—— EN 04
HEPA Filter
—— EN 07—— EN 06
—— EN 07—— EN 06

—— EN 09—— EN 08
—— EN 09—— EN 08
—— EN 11—— EN 10
—— EN 11—— EN 10
—— EN 13—— EN 12
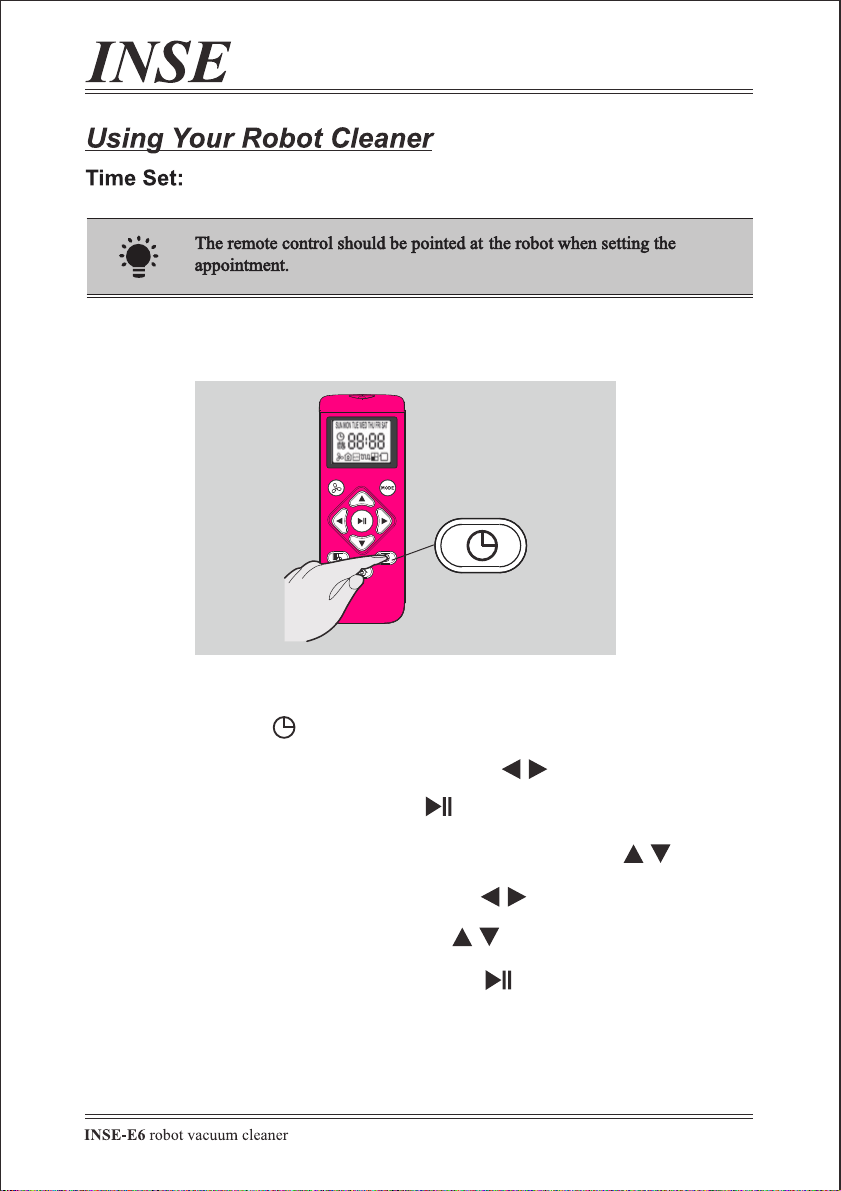
1. Press the time button;
2. Press the Left/Right buttons to select the current day;
3. Press the Play/Pause button to set the day;
4.The hours will start flashing. Press the Up/Down button to set the hour;
5. Press the Left/Right buttons to select the minutes;
6. Press the Up/Down buttons to set the minutes;
7. Press the Play/Pause button to confirm the setting.
—— EN 13—— EN 12
1. Press the time button;
2. Press the Left/Right buttons to select the current day;
3. Press the Play/Pause button to set the day;
4.The hours will start flashing. Press the Up/Down button to set the hour;
5. Press the Left/Right buttons to select the minutes;
6. Press the Up/Down buttons to set the minutes;
7. Press the Play/Pause button to confirm the setting.
—— EN 15—— EN 14
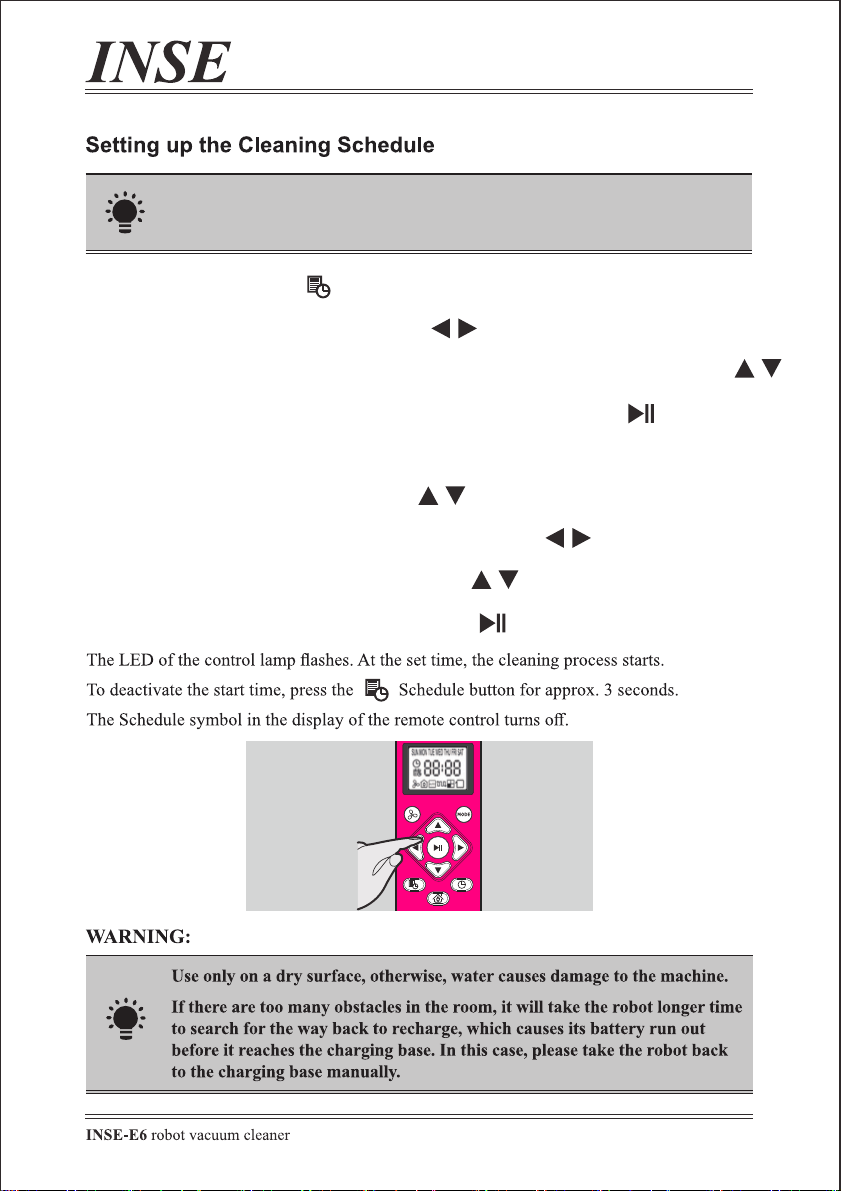
1. Press the schedule button;
2. Press the Left/Right buttons to select a day;
Press the Up/Down buttons to select or deselect that day, several days can be selected.
3. When all required days are selected, press the Play/Pause button to set;
4.The hours will start flashing. Set the time you want to start the scheduled cleaning.
Press the Up/Down button to set the hour;
5. Press the Left/Right buttons the minutes will start flashing;
6. Press the Up/Down buttons to select the minutes;
7. Press the Play/Pause button to confirm the setting.
The remote control should be pointed at the robot when setting
the schedule.
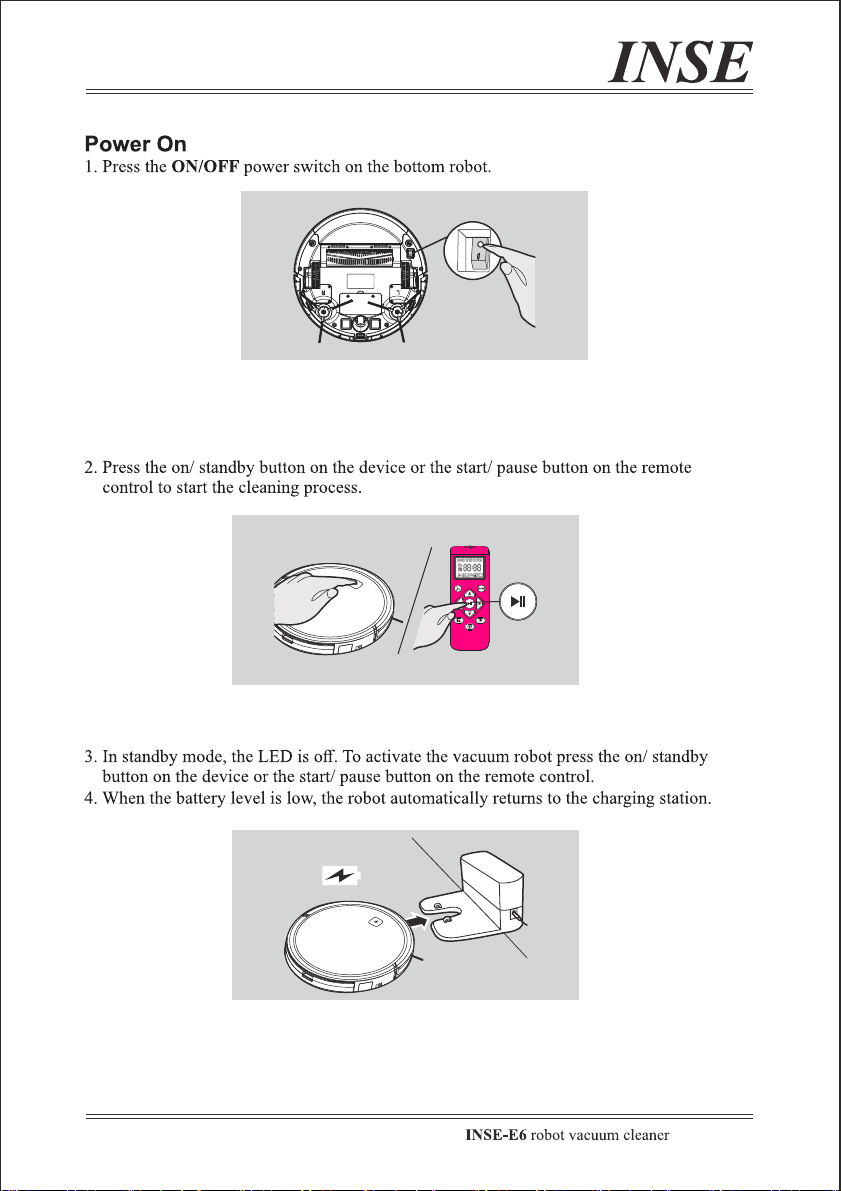
Make sure the 'main switch' beneath the robot and the 'start Button' on the
faceplate is turned on before use.
‘AUTO’
Make sure the remote control is pointed at the robot within range (16ft/5m).
E6 will return to the Charging Base automatically when the battery level becomes low.
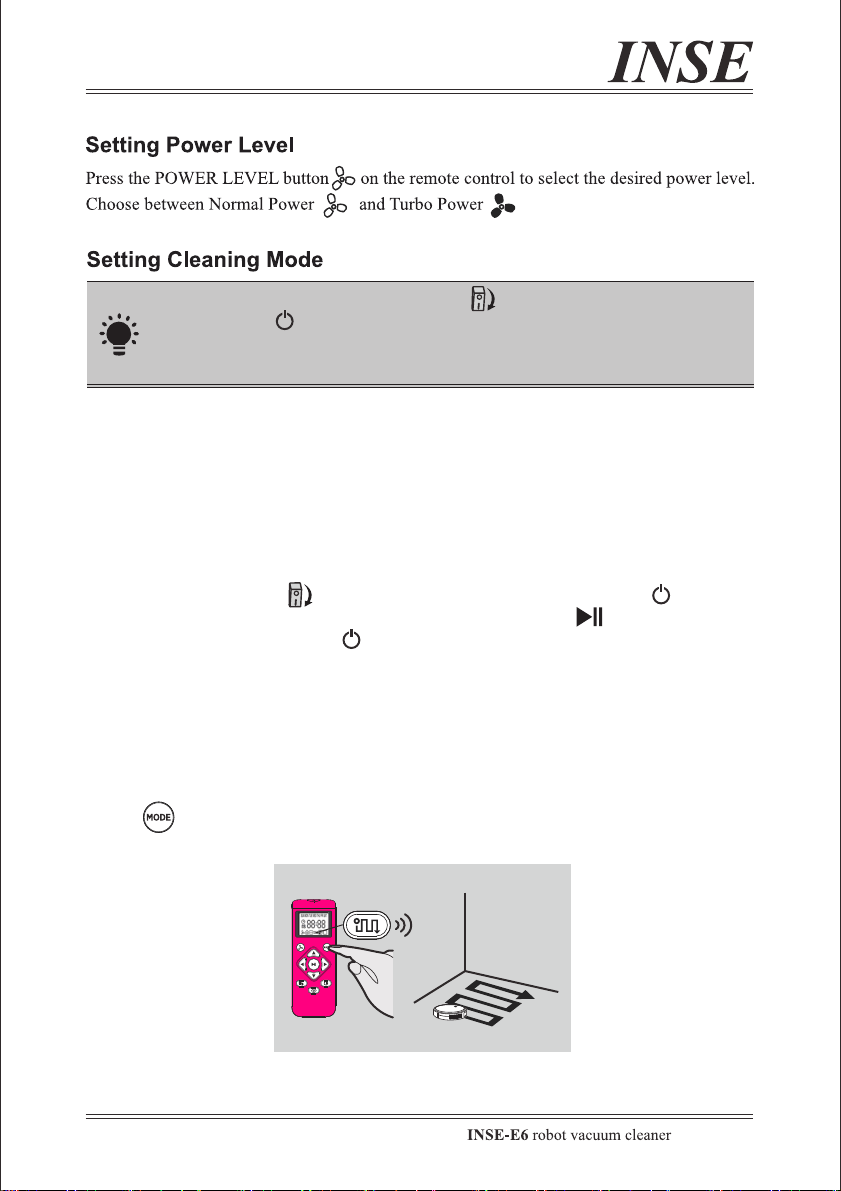
AUTO:
When E6 is set to auto mode, the robot will clean automatically in row-by-row, edge
cleaning, and random routes. During working, it does not seem to follow a specific route
and also repeat cleaning in some areas, don't worry, it will cover about 80% of the
accessible areas* before auto-recharging.
* For the robot vacuum cleaners with mapping or lidar, the maximum coverage is also
80%.
Turn on the ‘main switch’ at the bottom, press the ‘start button’ on the
faceplate one time, press it again or press the ‘Play/Pause’ button of the remote
control, the robot starts at .
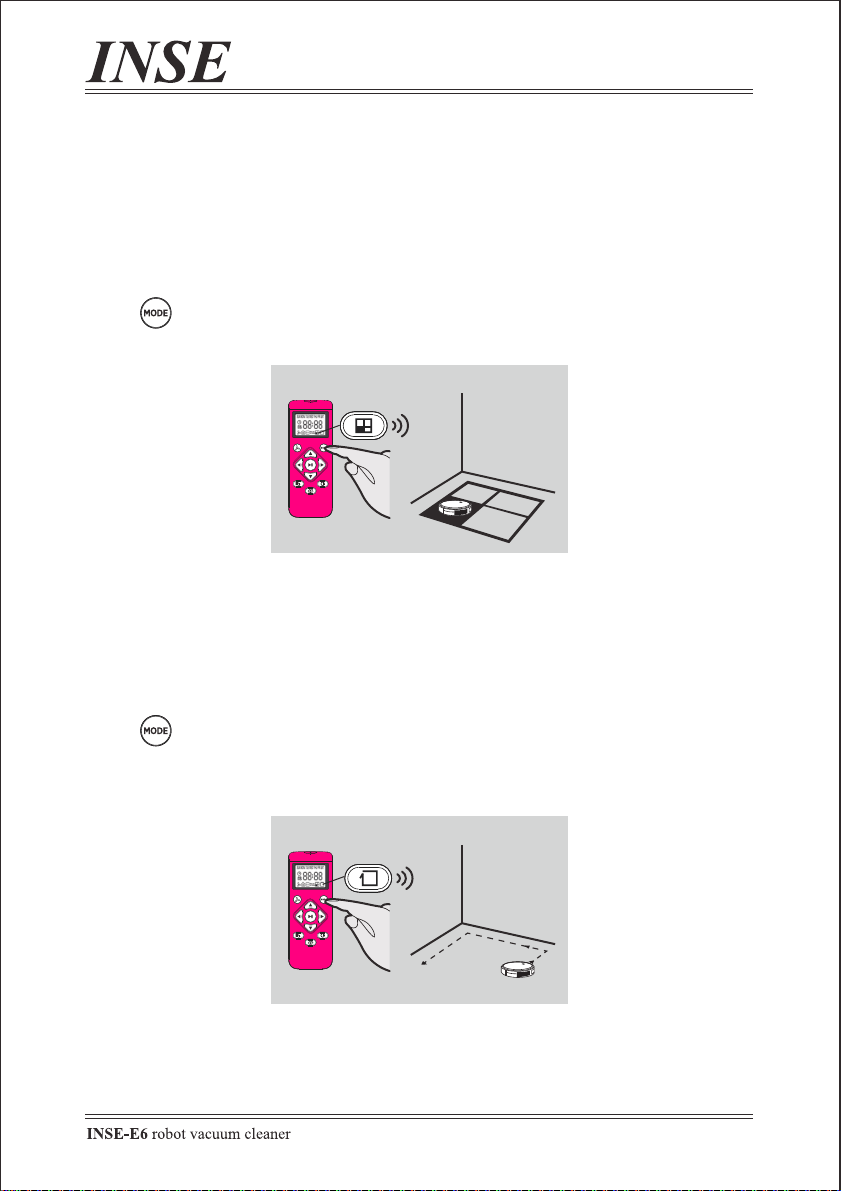
PARALLEL:
When E6 is set to parallel mode, it will clean in a bow-shaped route, which is the most
efficient cleaning mode for one wide area. If you want to save time and double the cleaning
effect, use PARALLEL mode.
Press on the remote control to start cleaning in PARALLEL mode.
‘AUTO’
‘AUTO’
—— EN 15—— EN 14
1. Press the schedule button;
2. Press the Left/Right buttons to select a day;
Press the Up/Down buttons to select or deselect that day, several days can be selected.
3. When all required days are selected, press the Play/Pause button to set;
4.The hours will start flashing. Set the time you want to start the scheduled cleaning.
Press the Up/Down button to set the hour;
5. Press the Left/Right buttons the minutes will start flashing;
6. Press the Up/Down buttons to select the minutes;
7. Press the Play/Pause button to confirm the setting.
The remote control should be pointed at the robot when setting
the schedule.
Make sure the 'main switch' beneath the robot and the 'start Button' on the
faceplate is turned on before use.
‘AUTO’
Make sure the remote control is pointed at the robot within range (16ft/5m).
E6 will return to the Charging Base automatically when the battery level becomes low.
AUTO:
When E6 is set to auto mode, the robot will clean automatically in row-by-row, edge
cleaning, and random routes. During working, it does not seem to follow a specific route
and also repeat cleaning in some areas, don't worry, it will cover about 80% of the
accessible areas* before auto-recharging.
* For the robot vacuum cleaners with mapping or lidar, the maximum coverage is also
80%.
Turn on the ‘main switch’ at the bottom, press the ‘start button’ on the
faceplate one time, press it again or press the ‘Play/Pause’ button of the remote
control, the robot starts at .
PARALLEL:
When E6 is set to parallel mode, it will clean in a bow-shaped route, which is the most
efficient cleaning mode for one wide area. If you want to save time and double the cleaning
effect, use PARALLEL mode.
Press on the remote control to start cleaning in PARALLEL mode.
‘AUTO’
‘AUTO’
—— EN 17—— EN 16
SPOT:
When E6 is set to spot mode, the robot will automatically increase suction power and swirl*
clockwise from the inside to the outside. If you need a concentrated cleaning on a specific
area where there is a lot of debris like spilled dog food, use SPOT mode.
* In a circle with 1.5m-2m (4.92ft-6.56ft) max diameter or works up to 100 seconds.
* Robot swirls counterclockwise when meeting an obstacle(s) in the route and works less
than 100 seconds.
Press on the remote control to start cleaning in SPOT mode.
EDGE:
When E6 is set to edge mode, it will start finding a solid object and then sweep along the
periphery of the object such as a wall. If there is a lot of dust in the corners of your house or
edges of furniture, use EDGE mode.
Press on the remote control to start cleaning in EDGE mode.
—— EN 19—— EN 18
insert
—— EN 19—— EN 18
insert
—— EN 21—— EN 20
If the solutions below cannot solve the problem, or the issue you met is not
website www.inselife.com for further support. We will offer you a satisfied
answer/solution quickly.
Q1: Does not work after receiving
A1. The battery is dead;
A2. The main switch beneath of the robot is not turned on;
A3. The start button on the faceplate gets stuck.
1. Make sure the robot is fully charged for 8 hours before using it for the first time;
2.1. Make sure that the main switch of the robot is turned on, then press the start button, then press it
again, or press the Play/Pause button of the remote control;
2.2. If step 2 doesn't work, press the main switch several times at intervals of a few seconds to
activate it;
3. Short press the start button for 3 seconds and then repeat this action several times to check whether
the button is stuck;
Q2: Suction power is weak
A1. The filters and dust container are blocked by excessive dust;
A2. The main brush is clogged with too much hair, dirt, and debris.
1. Clean the filters and the dust container (The HEPA filter is not washable);
2. Use the cleaning brush to remove the entangled waste.
The 'main switch' beneath the robot
The 'start Button' on the faceplate
‘AUTO’
The 'Play/Pause Button' on the remote control
Cheak out more instruction videos or FAQ by visiting
the websites or scanning the QR codes above.
—— EN 21—— EN 20
If the solutions below cannot solve the problem, or the issue you met is not
listed, please feel free to contact us via [email protected] or visit our
website www.inselife.com for further support. We will offer you a satisfied
answer/solution quickly.
Q1: Does not work after receiving
A1. The battery is dead;
A2. The main switch beneath of the robot is not turned on;
A3. The start button on the faceplate gets stuck.
1. Make sure the robot is fully charged for 8 hours before using it for the first time;
2.1. Make sure that the main switch of the robot is turned on, then press the start button, then press it
again, or press the Play/Pause button of the remote control;
2.2. If step 2 doesn't work, press the main switch several times at intervals of a few seconds to
activate it;
3. Short press the start button for 3 seconds and then repeat this action several times to check whether
the button is stuck;
Q2: Suction power is weak
A1. The filters and dust container are blocked by excessive dust;
A2. The main brush is clogged with too much hair, dirt, and debris.
1. Clean the filters and the dust container (The HEPA filter is not washable);
2. Use the cleaning brush to remove the entangled waste.
The 'main switch' beneath the robot
The 'start Button' on the faceplate
‘AUTO’
The 'Play/Pause Button' on the remote control
Cheak out more instruction videos or FAQ by visiting
the websites or scanning the QR codes above.
—— EN 23—— EN 22
Q3: The remote control does not work
A1. The remote control is not pointed at the robot at close range;
A2. The remote control' batteries are dead;
A3. The robot's main switch is not turned on;
A4. The robot is on a low battery.
1. Make sure the remote control is pointed at the robot within range (16ft/5m);
2. Replace the batteries in the remote control;
3. Make sure that both the main switch and the start button are turned ON;
4. Make sure the robot is fully charged (refer to Page EN 08).
Q4: Suddenly stops working
A1. The battery of the robot is too low;
A2. The filters and the dust container is blocked by excessive dust, which lead to overheating
protection of the robot.
1. Make sure the robot is fully charged (refer to Page EN 08).
2.1. Clean the filters and the dust container (HEPA filter is not washable);
2.2. If you still have trouble, turn OFF the main switch, wait for 2 seconds, and then turn it ON.
Q5: Fail to set schedual
A1. The robot switch is not turned on;
A2. The power of the robot is too low;
A3. The remote control is not used at the robot within the range;
A4. The time setting is not accurate (date, am/pm).
1. Make sure that both the main switch and the start button are turned ON;
2. Make sure the robot is fully charged (refer to Page EN 08).
3. Make sure the remote control is pointed at the robot within range (16ft/5m);
4. Make sure the time, time of day (AM/PM), and the scheduled time has been set accurately.
Q6: Does not get charged
A1. The power supply is not powered on;
A2. The main switch is not turned on;
A3. The power adapter is not original;
A4. The contact pins of the robot and the charging base are not completely contacted;
A5. The charging contact pin is stained.
1. Make sure the power supply has electricity;
2. Make sure the main switch is ON, then check if you can hear a beep when the robot is docked
onto the Charging Base and the blue light flashed slowly;
3. Use the original power adapter;
4. If you manually put the robot onto the charging base, ensure that the contact pins between the
robot and base are in full contact;
5. Dust off the charging contact pins with a dry cloth.
Q7: Does not return to the charging base
A1. The charging base is not powered;
A2.When the robot charging stand is placed 1 meter on the left and right, and 2 meters in front of it,
there are obstacles or reflective objects;
A3. Influenced by signal interference;
A4. The charger contact pins are stained.
Q8: Keeps going backward and turning in circles
A1. The sensor is blocked by dust or debris;
A2. There are too many obstacles around the robot that lead to wrong judgment.
1. Clean the sensors carefully with a dry cloth;
2. Remove obstacles around the robot;
3. Avoid using it on carpets or areas with slippery floors;
4. Restart the robot by turning the main switch off and on.
Q9: Unusually noisy when working
A1. The main brush or side brush is blocked by dirt and hair;
A2. The universal wheel is stuck.
1. Clean the entangled debris around the brushes;
2. Check whether the universal wheel is jammed by hair or other debris.
Q10: Trapped in a specific area
A1. Entangled by the power cords on the ground;
A2. Entangled by the fringes of hanging curtain or carpet;
A3. There are too many obstacles around the robot.
1. Remove any power cords and small items on the ground that might entangle the robot;
2. Hide the fringes of the curtain and carpet that might entangle the robot;
3. Clear obstacles from the route if necessary.
1. Make sure that the charging base is powered on;
2. Remove objects within 3 ft/1 m to the left and right side, and within 6 ft/2 m of the front of the
Charging Base. And there are no reflective objects around the charging base;
3. Keep the charging base away from objects with signals such as TVs and refrigerators;
4. Clean the charging contact pins with a dry cloth.
—— EN 24

bit.ly/inseyoutube-e6
inselife.com/pages/faq