Loading ...
Loading ...
Loading ...
en Environmental protection
8
7Environmental protection
Envi r onment al pr ot ec t i on
Your new appliance is particularly energy-efficient.
Here you can find tips on how to save even more
energy when using the appliance, and how to dispose
of your appliance properly.
Saving energy
■ Only preheat the appliance if this is specified in the
recipe or in the tables in the operating instructions.
■ Leave frozen food to defrost before placing it in the
cooking compartment.
■ Use baking tins that are dark-coloured, painted black
or have an enamel coating. These absorb the heat
particularly well.
■ Remove any unnecessary accessories from the
cooking compartment.
■ Open the appliance door as infrequently as possible
when the appliance is in use.
■ It is best to bake several cakes one after the other.
The cooking compartment stays warm. This reduces
the baking time for the second cake. You can place
two cake tins next to each other in the cooking
compartment.
■ For longer cooking times, you can switch the
appliance off 10 minutes before the end of the
cooking time and use the residual heat to finish
cooking.
Environmentally-friendly disposal
Dispose of packaging in an environmentally-friendly
manner.
This appliance is labelled in accordance with
European Directive 2012/19/EU concerning
used electrical and electronic appliances
(waste electrical and electronic equipment -
WEEE). The guideline determines the
framework for the return and recycling of used
appliances as applicable throughout the EU.
Getting to know your appliance en
9
*Getting to know your
appliance
Get t i ng to know your appl i anc e
In this section, we will explain the indicators and
controls. You will also find out about the various
functions of your appliance.
Note: Depending on the appliance model, individual
details and colours may differ.
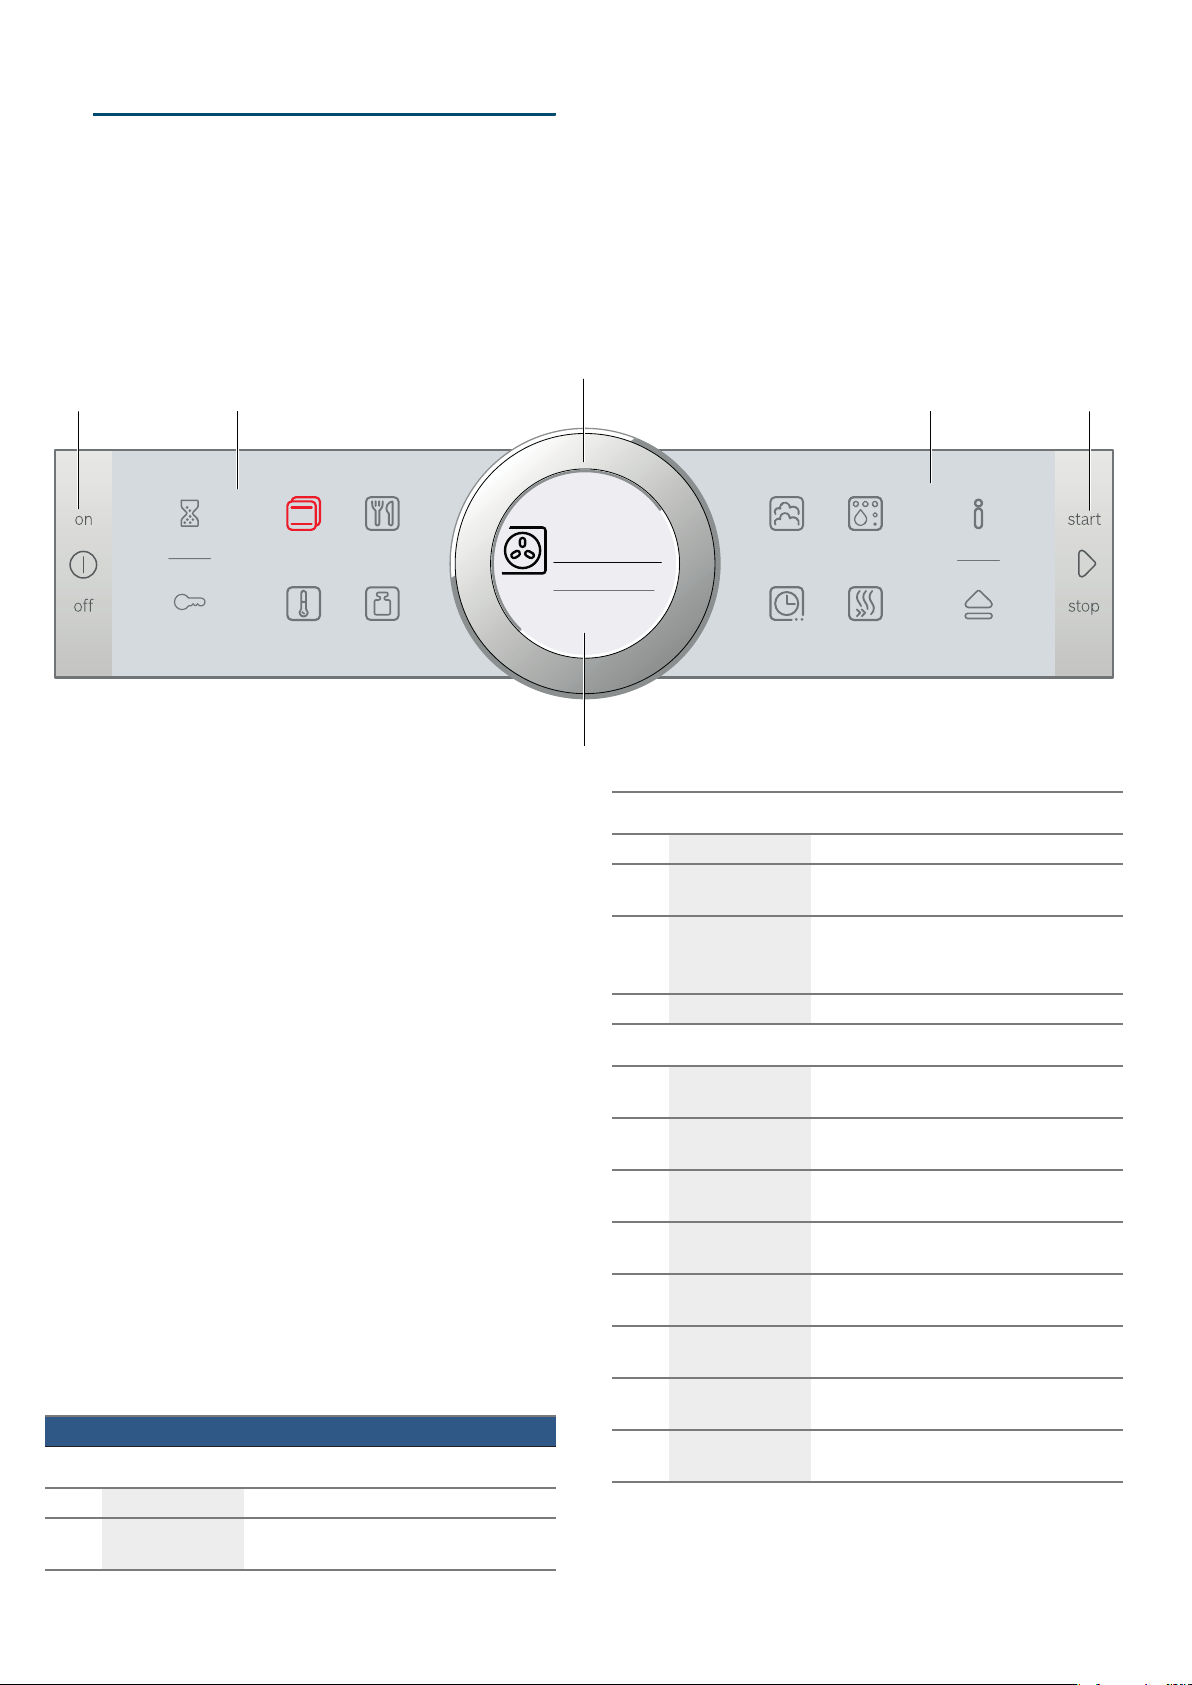
Control panel
In the control panel, you can use the various buttons,
touch fields and the rotary selector to set the different
appliance functions. The current settings are shown on
the display.
The overview shows the control panel when the
appliance is switched on with a selected heating type.
Controls
The individual controls are adapted for the various
functions of your appliance. You can set your appliance
simply and directly.
Buttons and touch fields
Here you can find a short explanation of the various
buttons and touch fields.
--------
The touch field, which has a value on the display that
can be changed or displayed in the foreground, lights
up red.
#
a &
'
KRWDLU
( Buttons
The buttons on the left- and right-hand side of the
control panel have a pressure point. Press these
buttons to activate them.
For appliances that do not have a stainless steel
front, these two button touch fields do not have a
pressure point.
0 Touch fields
There are sensors under the touch fields. Simply
touch the respective symbol to select the function.
8 Rotary selector
The rotary selector is fitted so that you can turn it
indefinitely to the left or right. Press it lightly and
move it in the direction required using your finger.
@ Display
You can see the current adjustment values,
options or notes in the display.
Symbol Meaning
Buttons
ÿ on/off Switching the appliance on and off
l Start/Stop Starting, pausing or cancelling (hold down
for approx. 3 secs) an operation
External touch fields
t Timer Selects the timer
D Childproof lock Activating and deactivating (hold down for
approx. 4 secs) the childproof lock
° Information Display notes
Hold down (approx. 3 secs) to call up the
basic settings
v Open cover Filling or emptying the water tank
Internal touch fields
! Heating types Selects the "heating types" operating
mode
} Temperature Selects the temperature in the cooking
compartment
% AutoCook Selects the operating mode for dishes
with cooking programmes
a Weight Selects the weight for the operating mode
for dishes
S Steam Selects "Steam" mode with steam assis-
tance
s Time-setting
options
Select time-setting options
O Cleaning Selects the "Cleaning function" operating
mode
F Rapid heating Starts or cancels Rapid heating for the
cooking compartment
Loading ...
Loading ...
Loading ...